이 문서에서는 Microsoft Intune과의 Chrome Enterprise Premium 통합을 설정하는 방법을 보여줍니다. 이러한 통합을 설정에는 Intune 설정, 엔드포인트 확인 설정, Azure 워크로드 아이덴티티 설정, 조직 단위에서 Microsoft Intune 사용 설정이 포함됩니다.
시작하기 전에
-
Chrome Enterprise Premium용 Intune을 설정하려면 다음 단계를 따르세요.
- 지원되는 구성을 이해하고 해당 환경이 네트워킹 요구사항을 충족하는지 확인합니다.
- 체험판 구독에 로그인하거나 새 Intune 구독을 만듭니다.
- 회사 도메인 이름을 Intune에 연결하도록 DNS 등록을 설정합니다.
- 사용자 및 그룹을 추가하거나 Active Directory에 연결하여 Intune과 동기화합니다.
- 라이선스를 할당하여 Intune 사용 권한을 사용자에게 부여합니다.
자세한 내용은 Intune 설정을 참조하세요.
조직의 기기가 다음 운영체제 중 하나를 실행하는지 확인합니다.
- macOS 버전 10.11 이상
- Microsoft® Windows 10 이상
- 조직의 엔드포인트 인증이 설정됨
Intune에 연결
- Microsoft 365 테넌트 ID를 찾습니다.
- 애플리케이션을 등록하여 애플리케이션 ID를 가져옵니다.
관리 콘솔 홈페이지에서 기기로 이동합니다.
기기로 이동- 탐색 메뉴에서 모바일 및 엔드포인트 > 설정 > 타사 통합 > 보안 및 MDM 파트너 > 관리를 클릭합니다.
- Microsoft Intune을 찾아 연결 열기를 클릭합니다.
Intune에 연결 대화상자에서 Azure 디렉터리 테넌트 ID 필드에 테넌트 ID를 입력하고 Azure 애플리케이션 ID 필드에 애플리케이션 ID를 입력합니다.

- 회사 소유 기기만 가져올지 아니면 모든 기기를 가져올지 여부에 따라 적절한 작업을 수행합니다.
- 회사 소유 기기만 가져오려면 회사 소유 기기만 가져오기 토글을 클릭합니다. 가져올 기기 속성 섹션에서 Chrome Enterprise Premium에 저장해야 하는 속성을 선택합니다.
모든 기기를 가져오려면 가져올 기기 속성 섹션에서 Chrome Enterprise Premium에 저장해야 하는 속성을 선택합니다.

device identifier,last sync time,serial number,wifi MAC address와 같은 필수 기기 속성은 기본적으로 수집됩니다.Intune이 수집하는 기기 속성에 대한 자세한 내용은 Intune 기기 속성을 참조하세요.
- 계속을 클릭합니다.
- 서비스 계정 ID를 복사합니다.

- 서비스 계정 ID를 사용하여 Azure 워크로드 아이덴티티가 Intune 기기에서 데이터를 수집하도록 승인합니다.
- 외부 ID 공급업체를 신뢰하도록 앱을 구성합니다.
해당 필드에 다음 값을 지정합니다.
- 이름: 제휴 사용자 인증 정보에 대한 이름입니다.
- 제목 식별자: 복사한 서비스 계정 ID입니다.
- 발급자:
https://accounts.google.com.
- 앱 권한 부여:
DeviceManagementManagedDevices.Read.All및DeviceManagementApps.Read.All권한을 검색하고 이러한 권한을 Microsoft Graph에 추가합니다. API 권한을 요청할 때 애플리케이션 권한을 선택합니다.DeviceManagementManagedDevices.Read.All은 모든 기기 및 Intune에서 관리되는 해당 속성에 대해 읽기 액세스 권한을 제공하고DeviceManagementApps.Read.All은 기기 삭제 이벤트에 대해 Intune 감사 로그에 대한 읽기 액세스 권한을 제공합니다.- 애플리케이션에 구성된 권한에 대해 관리자 동의를 부여합니다.
- 외부 ID 공급업체를 신뢰하도록 앱을 구성합니다.
- Intune에 연결 대화상자에서 연결을 클릭합니다.
Intune 연결이 열기로 설정됩니다.
조직 단위에 Intune 사용 설정
Intune을 사용하여 기기 정보를 수집하려면 다음을 수행하여 조직 단위에 Intune을 사용 설정합니다.
관리 콘솔 홈페이지에서 기기로 이동합니다.
기기로 이동- 탐색 메뉴에서 모바일 및 엔드포인트 > 설정 > 타사 통합 > 보안 및 MDM 파트너를 클릭합니다.
- 조직 단위 창에서 조직 단위를 선택합니다.
Microsoft Intune에 대한 체크박스를 선택하고 저장을 클릭합니다.
Microsoft Intune이 이제 보안 및 MDM 파트너 섹션에 나열됩니다. 조직의 크기에 따라 엔드포인트 확인과 Intune을 연결을 설정하는 데 몇 초 정도 걸릴 수 있습니다. 연결이 설정된 후 기기에서 Intune 데이터를 보고하는 데 몇 분에서 1시간 정도 걸릴 수 있습니다.

기기에서 Intune 데이터 확인
관리 콘솔 홈페이지에서 기기로 이동합니다.
기기로 이동- '엔드포인트'를 클릭합니다.
조직 단위에서 Intune이 사용 설정된 기기를 선택합니다.

Microsoft Intune 데이터가 타사 서비스 섹션에 나열되어 있는지 확인합니다.

전체 세부정보를 확인하려면 타사 서비스 섹션을 펼칩니다.
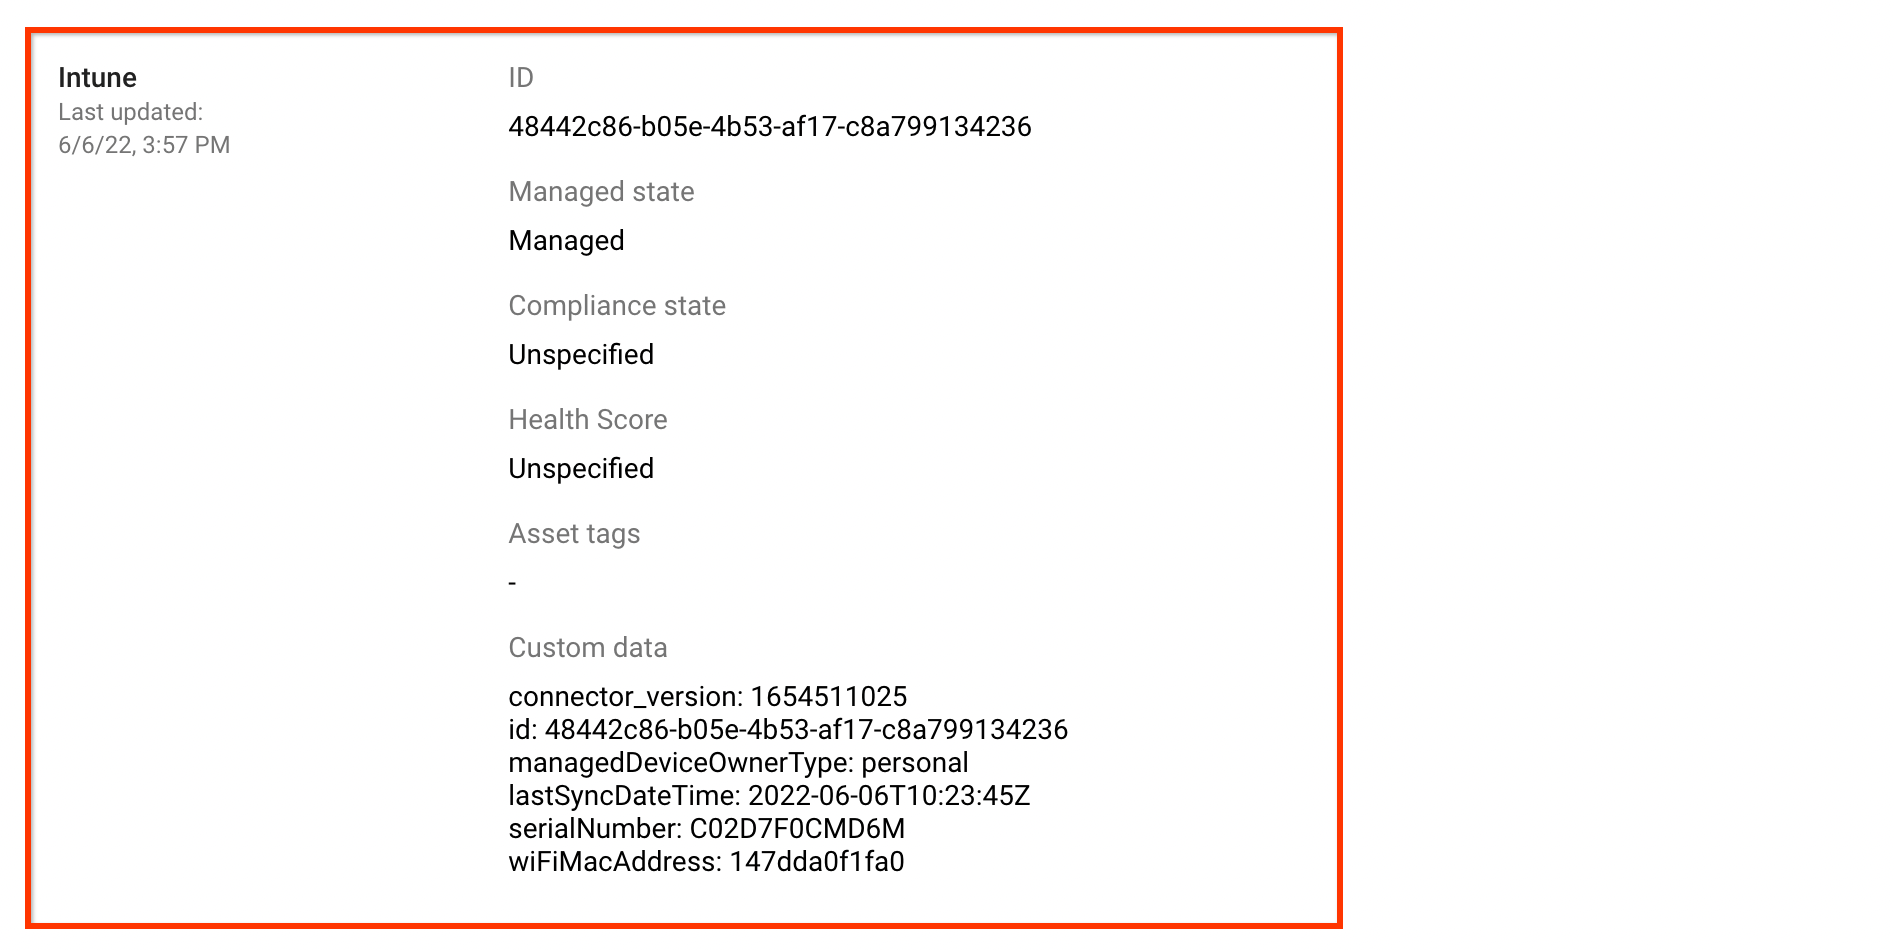
다음 이미지는 Intune에서 수집한 데이터의 세부정보를 보여줍니다.
Intune에서 보고된 규정 준수 상태는 크게 다음 규정 준수 상태로 분류됩니다.
| Google 관리 콘솔의 규정 준수 상태 | Intune에서 보고된 규정 준수 상태 |
|---|---|
COMPLIANCE_STATE_UNSPECIFIED |
unknown, configManager |
COMPLIANT |
compliant |
NON_COMPLIANT |
noncompliant, conflict, error, inGracePeriod |