Lihat konektor yang didukung untuk Application Integration.
Mengonversi string menjadi huruf besar
Dengan menggunakan tugas Pemetaan Data, lakukan iterasi pada elemen array string dan terapkan fungsi transformasi untuk mengonversi setiap nilai string menjadi huruf besar.
Contoh kode
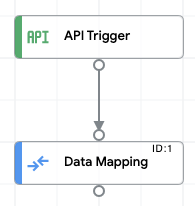
Contoh alur integrasi
Gambar berikut menunjukkan contoh tata letak editor integrasi untuk contoh kode integrasi ini.
Mengupload dan menjalankan integrasi contoh
Untuk mengupload dan menjalankan integrasi contoh, lakukan langkah-langkah berikut:
- Simpan contoh integrasi sebagai file .json di sistem Anda.
- Di konsol Google Cloud, buka halaman Application Integration.
- Klik Integrations dari menu navigasi sebelah kiri untuk membuka halaman Integrations.
- Pilih integrasi yang ada atau buat integrasi baru dengan mengklik Buat integrasi.
Jika Anda membuat integrasi baru:
- Masukkan nama dan deskripsi dalam dialog Buat Integrasi.
- Pilih region untuk integrasi.
- Pilih akun layanan untuk integrasi. Anda dapat mengubah atau memperbarui detail akun layanan integrasi kapan saja dari panel Ringkasan integrasi di toolbar integrasi.
- Klik Buat.
Tindakan ini akan membuka integrasi di editor integrasi.
- Di editor integrasi, klik menu Upload/download, lalu pilih Upload integrasi.
- Dalam dialog file browser, pilih file yang Anda simpan di langkah 1, lalu klik Open.
Versi baru integrasi dibuat menggunakan file yang diupload.
- Di editor integrasi, klik Uji.
- Klik Uji integrasi. Tindakan ini akan menjalankan integrasi dan menampilkan hasil eksekusi di panel Test Integration.