How to deploy a TeamCity Continuous Integration solution to Google Cloud
Anton Arhipov
Developer Advocate, JetBrains
[Editor’s note: Doing continuous integration with JetBrains’ TeamCity CI? Good news, you can easily host it in Google Cloud. Read on to learn how.]
Many organizations have embraced the power and efficiency of continuous integration (CI), but the engineering cost and complexity of operating scalable CI infrastructure remains high. In particular, unpredictable spikes in demand make it difficult to provision the right amount of resources at the right times.
Google Compute Engine tackles these challenges head on. With lightning fast virtual machine startup times and support for cost-efficient preemptible virtual machines, more resources can be allocated on-the-fly to execute tasks during peak hours. And, once the workload decreases, those same VMs be shut down in seconds. On top of that, Compute Engine’s per-second billing means you’re only billed for exactly what you use.


Here at JetBrains, we think this makes Compute Engine a great match for continuous integration workloads using TeamCity Server. If you need more agents to process the build queue, TeamCity will request a new Compute Engine VM. And when an agent becomes idle for some specified period of time the virtual machine is shut down.
In this article, we describe how you can easily deploy TeamCity server on Google Compute Engine in order to achieve these advantages for your organization.
Deploying TeamCity server to Google Cloud
The TeamCity CI solution consists of the central server and one or more build agents. The server is a Java application responsible for maintaining the build queue and displaying the results of the executions. Build agents are the individual Java processes that execute the build tasks. The TeamCity Google Cloud Deployment Manager template provides an easy way to deploy the TeamCity server to Google Cloud. The template deploys the TeamCity server with prepackaged Google Cloud Agents and Google Artifact Storage plugins.
Use the gcloud tool to set the project to the one you want for the TeamCity instance:
Selecting a project is optional. The default project will be chosen if no alternative is provided.
Next, follow the instructions provided with the template:
1. Ensure that the Deployment Manager service account has the Project Owner role:
2. Ensure that the required Google Cloud APIs are enabled:
3. Finally, deploy TeamCity as a template:
Voila! TeamCity CI is now up and running in Compute Engine!
Preparing Compute Engine for TeamCity Agents
To run TeamCity agents in Google Compute Engine, follow these steps:
Have a running TeamCity server instance.
Install Google Cloud Agents and Google Cloud Storage plugins for TeamCity server. In the event that you deployed TeamCity server using the template, both the plugins are pre-installed.
Prepare a Compute Engine VM image for TeamCity agents.
Create a cloud agent profile for the project in TeamCity.
Configure artifact storage for the project in TeamCity.
Prepare your VM image for TeamCity Agents
To start the new cloud-based build agents you first need to create a VM image. To do that, create a new VM instance from the available public boot disks and uncheck “Delete boot disk when instance is deleted” in the “Management, disk, networking, SSH keys” section.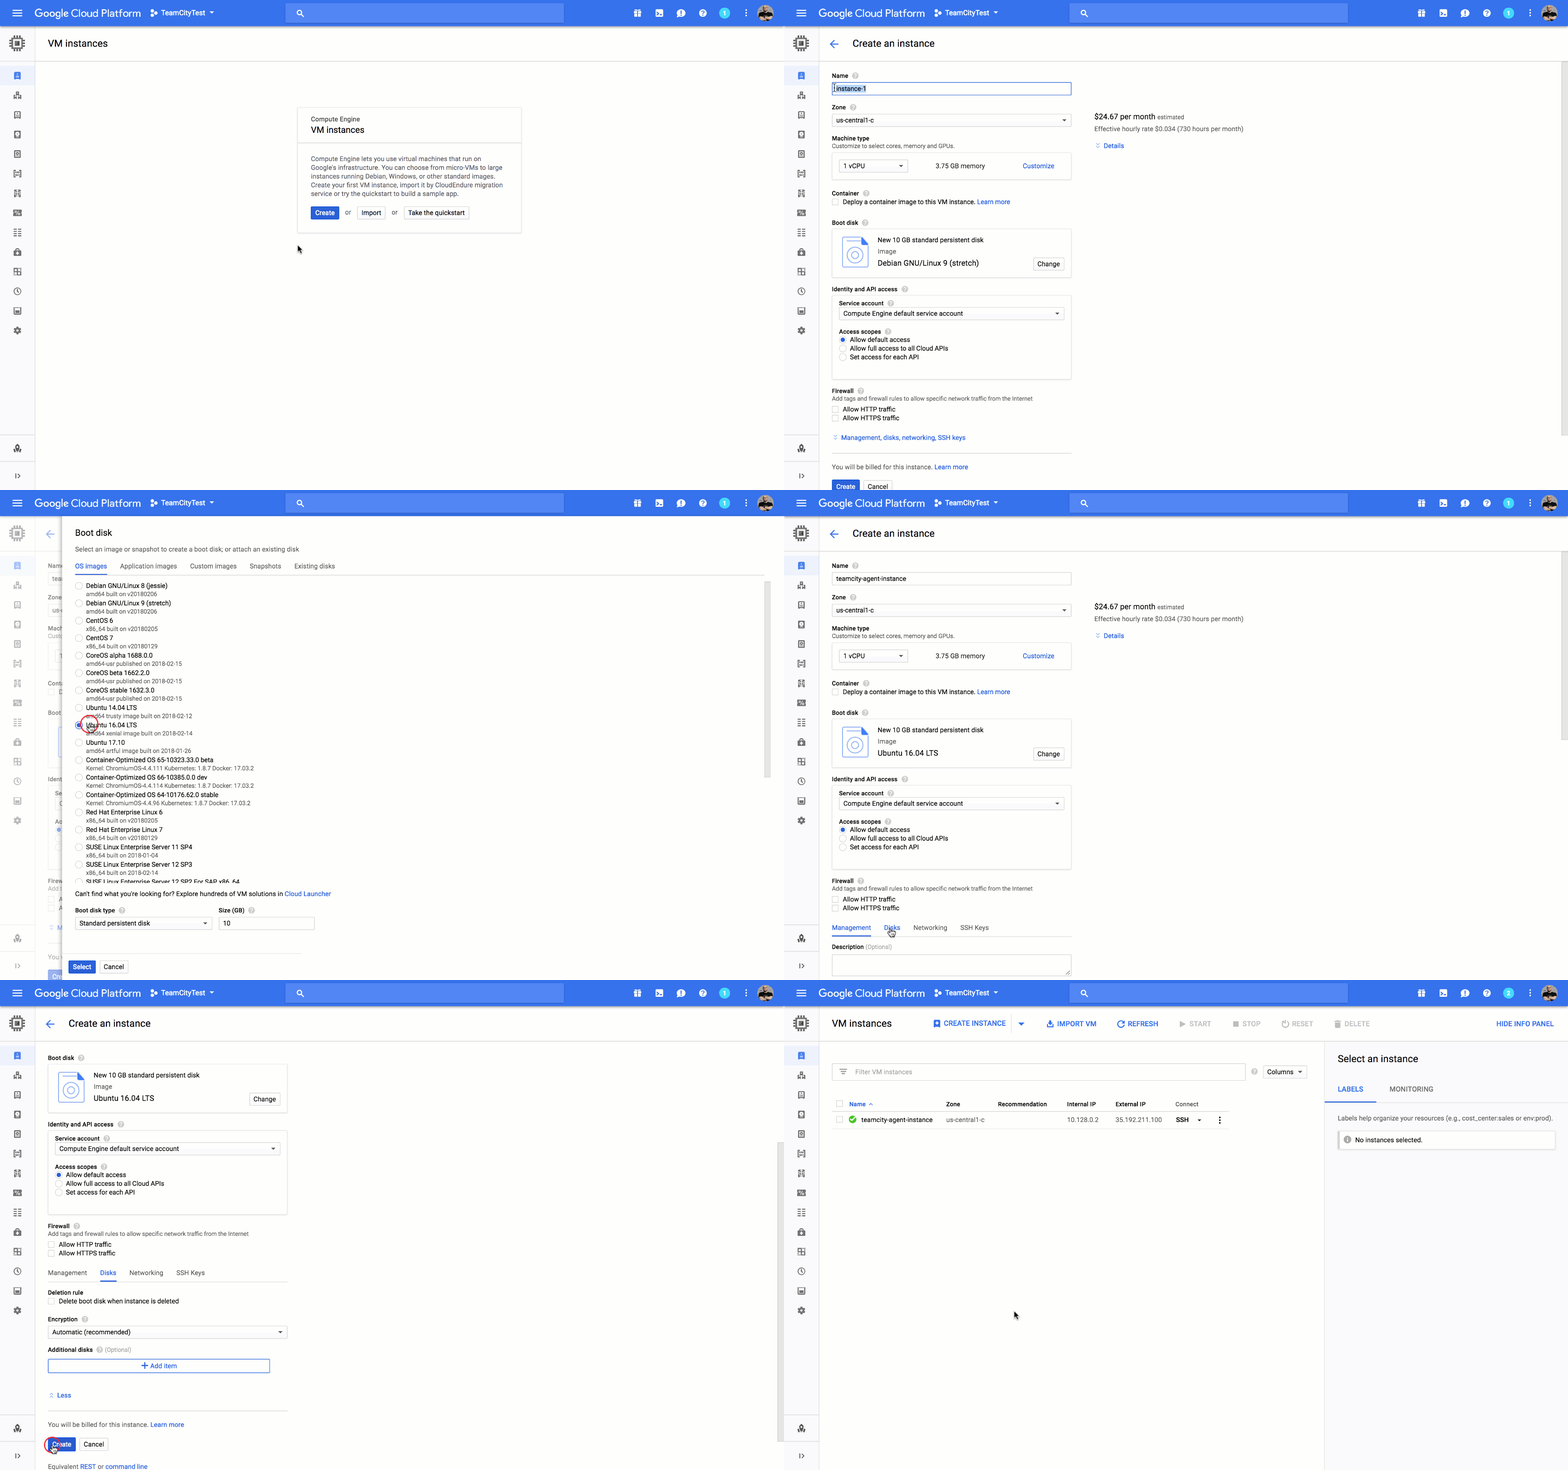

Once the VM instance is running, connect to it via SSH or RDP depending on the selected image and install a TeamCity build agent.
In our example, to connect to an Ubuntu Linux instance, you can use gcloud compute utility to copy the build agent ZIP archive and connect to the machine:
It is the administrator’s responsibility to install the packages required to execute build tasks. The build agent requires Java 1.8 to run. Also you might need to install some other build tools:
Also, you need to make sure that the agent starts automatically, i.e. by configuring the agent to run as a service depending on the host OS.
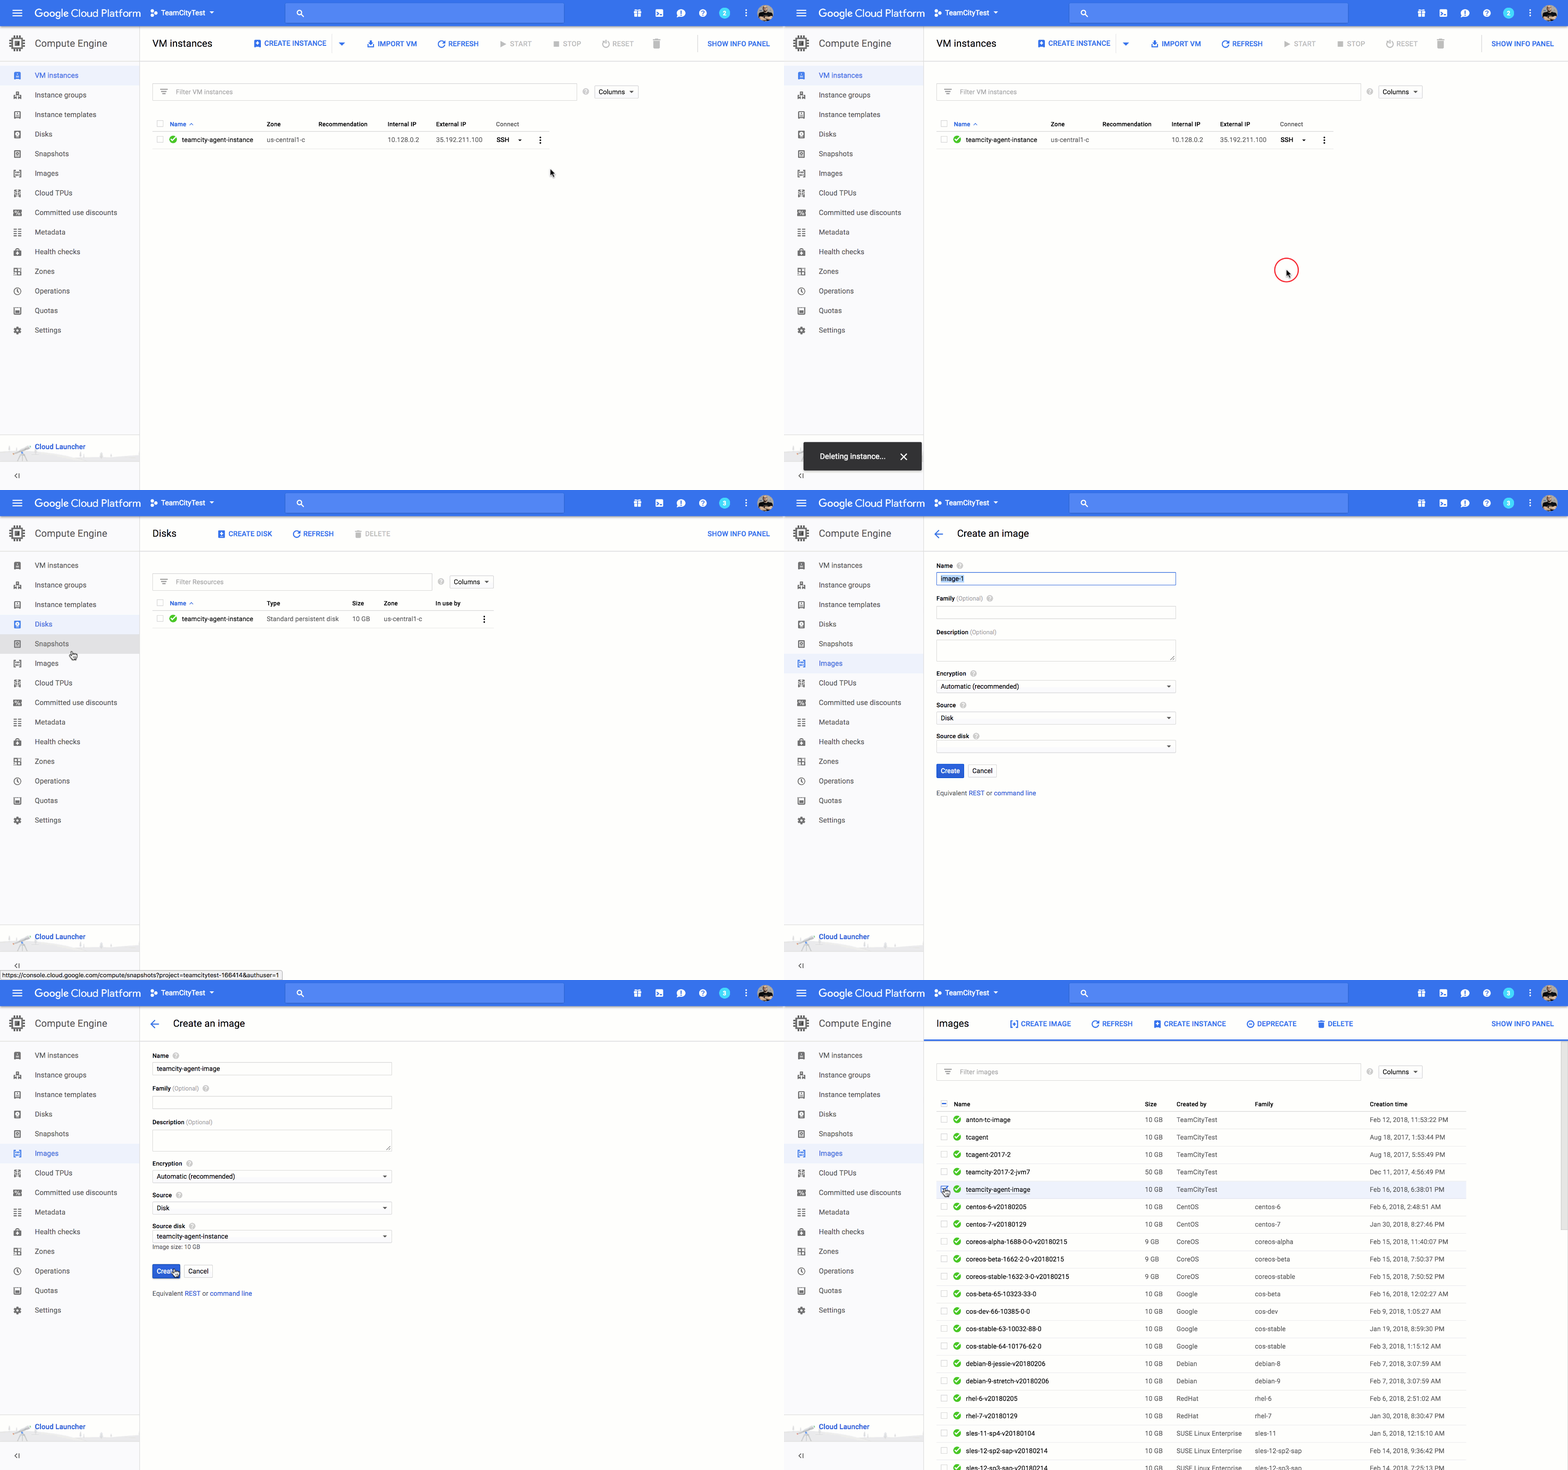
After all the required software packages are installed, remove the currently running VM instance and create a new custom image from the boot disk.

Google Cloud agents configuration
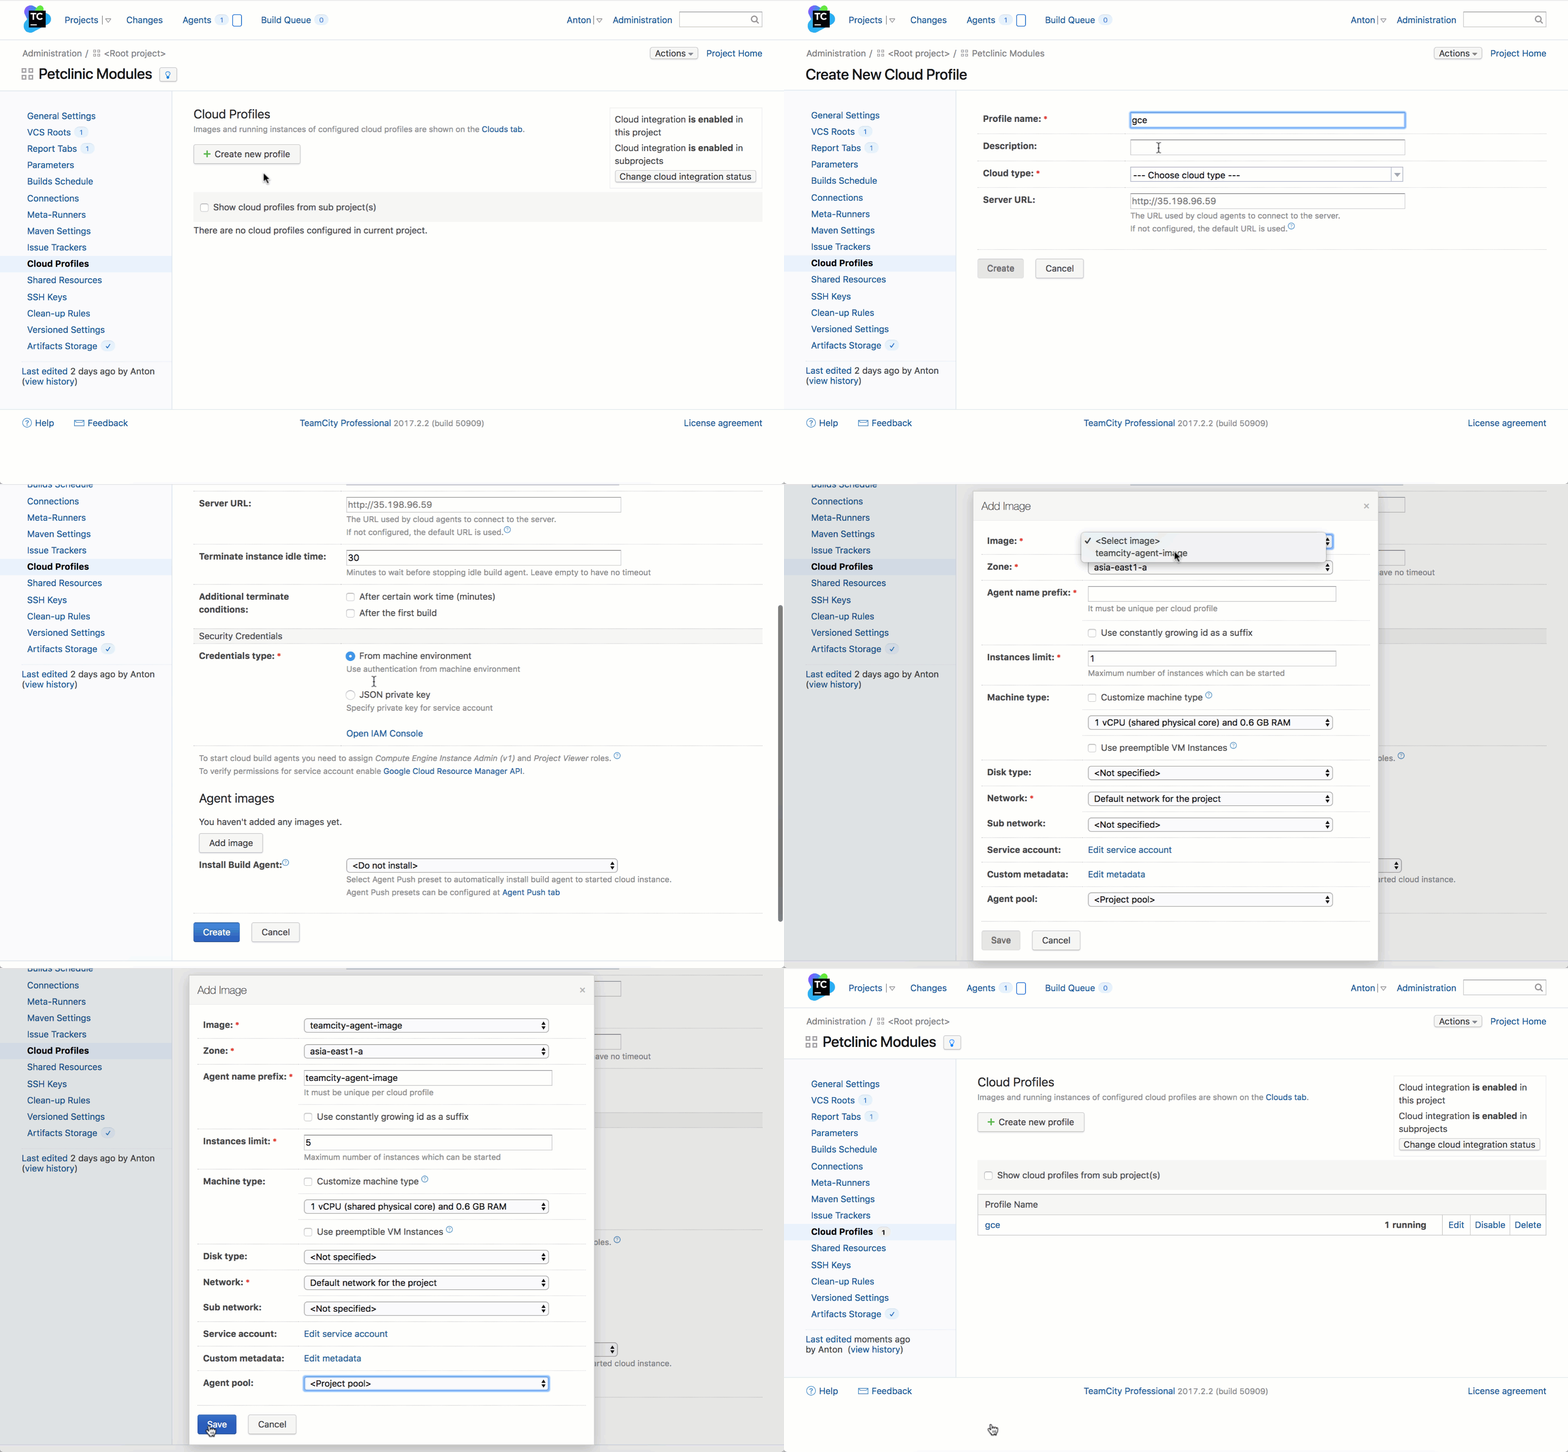
Once you’ve created your VM image, you can configure a cloud profile for a project in TeamCity.
To create a Google agent cloud profile, navigate to the project where you want to set up the profile and select the “Cloud Profiles” link. Then click the “Create new profile” button and select “Google Compute” as the cloud type. Optionally, specify the profile name.
To add a new image to the profile, press the “Add image” button, select the recently created cloud image, and fill in the other properties. Next, you need to save the image and then the profile settings.

Google Cloud Storage configuration
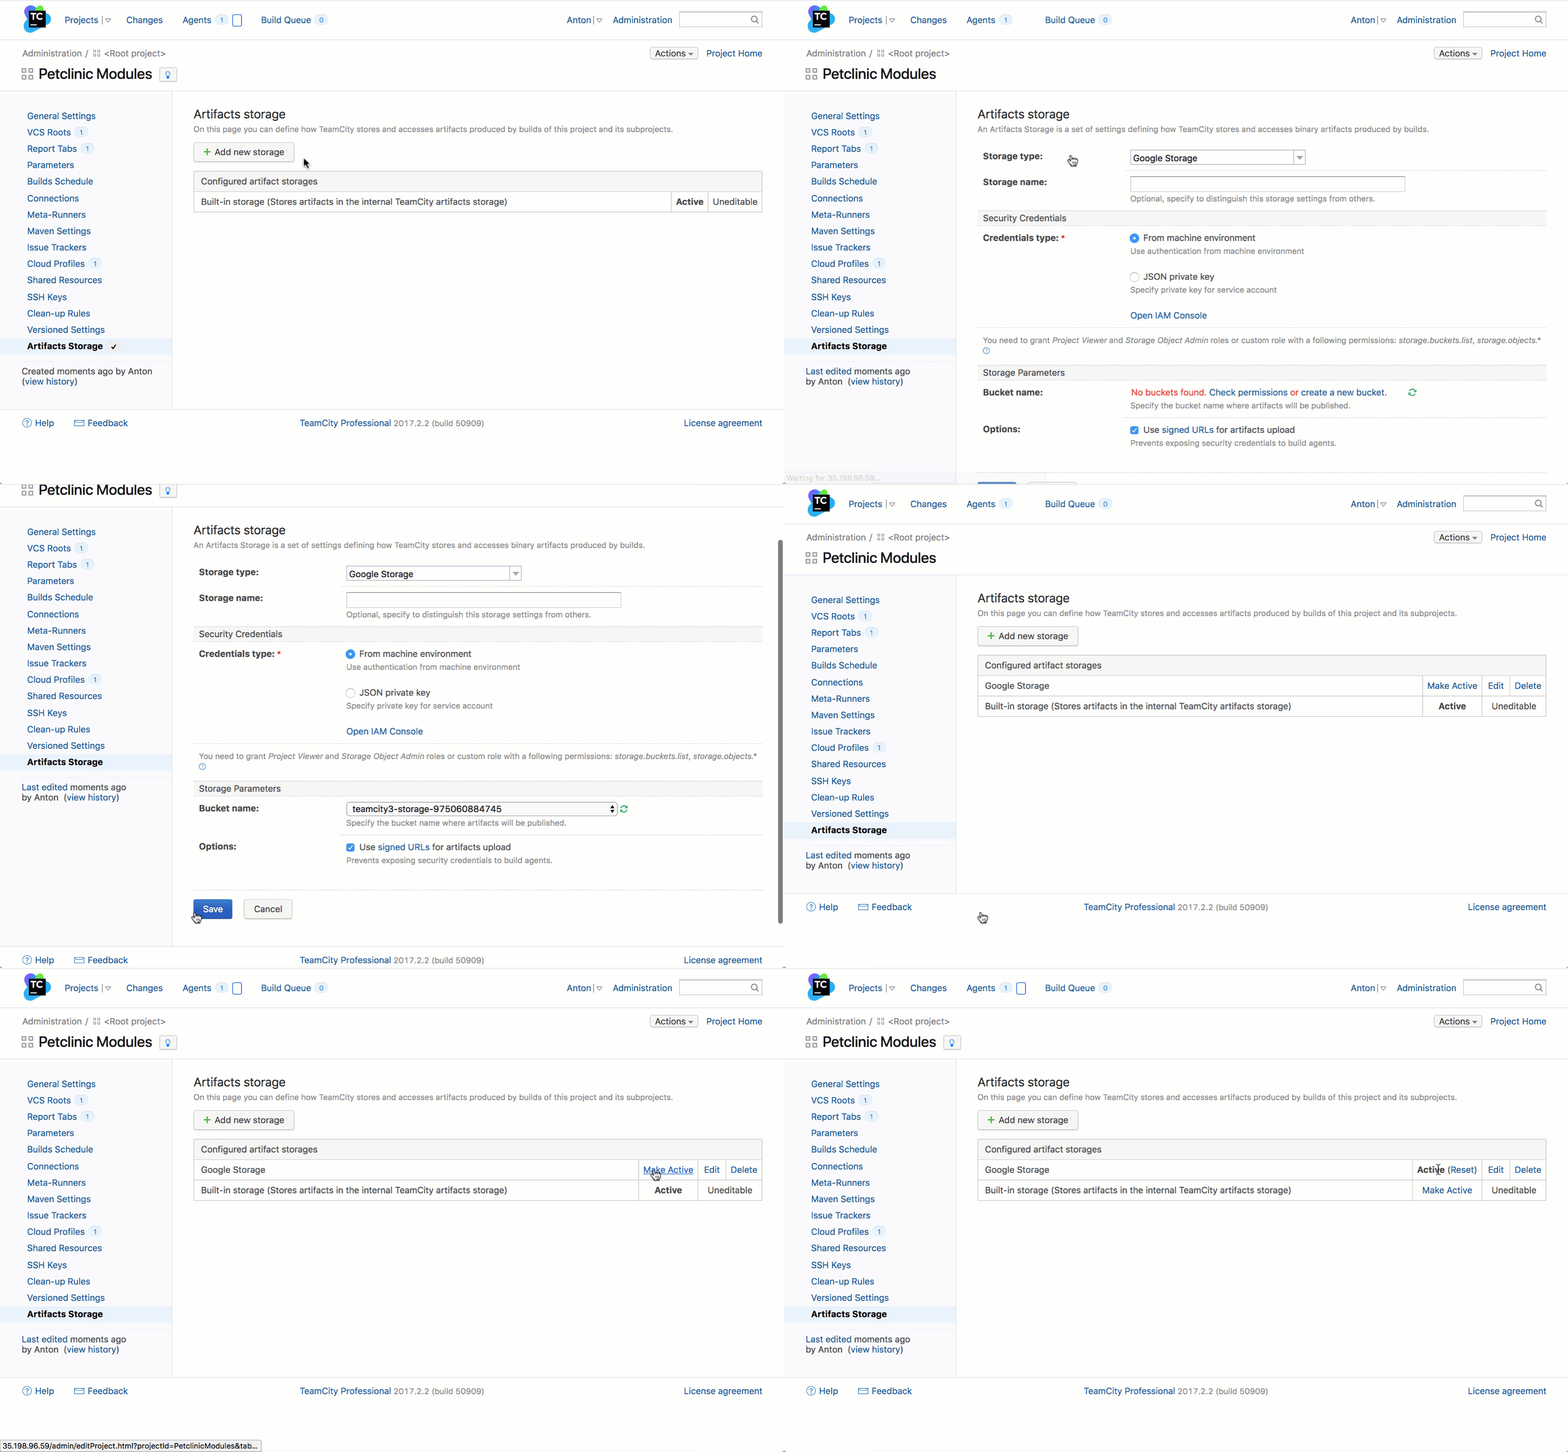
In TeamCity, a build configuration can expose artifacts that may be used later. It is wise to store the artifacts in external storage. If Compute Engine shuts down a VM instance, then the artifacts are preserved and can be recovered at any time. You can use Google Cloud Storage to store the artifacts. Let's see how to configure the service for TeamCity.
First, navigate to the Artifacts Storage Project tab and click the “Add new storage” button. Select “Google Storage” type and fill in the name, bucket name, and press Save. After that, activate this artifact storage in the TeamCity project by clicking the “Make Active” link. The new builds in this project will store artifacts in Cloud Storage automatically.

Summary
Compute Engine allows developers to harness the power of the cloud effortlessly and economically, through extremely fast VM startup times, per-second billing, cost-effective machine type offerings, such as preemptible VM instances, the ability to scale up or down based on your needs, as well as paying only for what you use. .
TeamCity integrates with Google Cloud flawlessly by using the Google Cloud Agents and Cloud Storage plugins. The source code for the integrations is available on GitHub for both plugins. Try out the instructions above to start realize the power of TeamCity and Google Cloud in minutes!


