Cloud Storage as a File System in Vertex AI Workbench Notebooks
Juan Acevedo
Enterprise AI/ML Customer Engineer
Cloud Storage as a File System in Vertex AI User Managed Notebooks
What if I told you there is no need to `gsutil cp -r `?
If you’ve developed machine learning models before, you know that data quality and governance issues are predominant. When developing models, you’ll spin up a Vertex AI Workbench Jupyter Notebook and copy some data from Cloud Storage. If the dataset is large, then you’ll wait some time while all data is copied to the notebook. Now you have two copies of the data. Multiply this X times the number of data scientists in your organization and now you have a data reconciliation problem.
Now, with Cloud Storage FUSE, you can mount Cloud Storage buckets as file systems on Vertex AI Workbench Notebooks and Vertex AI training jobs. This way you can keep all your data in a single repository (Cloud Storage) and make it available across multiple teams as a single source of truth.
Cloud Storage FUSE
Cloud Storage FUSE is a File System in User Space mounted on Vertex AI systems. It provides 3 benefits over the traditional ways of accessing Cloud Storage:
Jobs can start quickly without downloading any data
Jobs can perform I/O easily at scale, without the friction of calling the Cloud Storage APIs, handling the responses, or integrating with client-side libraries.
Jobs can leverage the optimized performance of Cloud Storage FUSE.
You can learn more about Cloud Storage FUSE and best practices here.
In all custom training jobs, Vertex AI mounts Cloud Storage buckets that you have access to in the /gcs/ directory of each training node’s filesystem. You can read and write directly to the local filesystem in order to read data from Cloud Storage or write data to Cloud Storage.
For Vertex AI Workbench Notebooks, Cloud Storage FUSE is supported with just a few steps and next we’ll go through how to do this. Let’s get started!
Getting Started with Vertex AI Workbench Notebooks
Vertex AI Workbench is a fully managed, scalable, enterprise-ready compute infrastructure for running Jupyter Notebooks. Workbench Notebooks have a preinstalled suite of deep learning packages, and support multiple frameworks such as TensorFlow, PyTorch, and scikit-learn. If you need more customization, no problem. You can build custom containers with your favorite frameworks and dependencies.
Mounting Cloud Storage buckets
First we need to create a Vertex AI Workbench Notebook. In this example, we’ll create a user managed notebook. Creating it is simple.
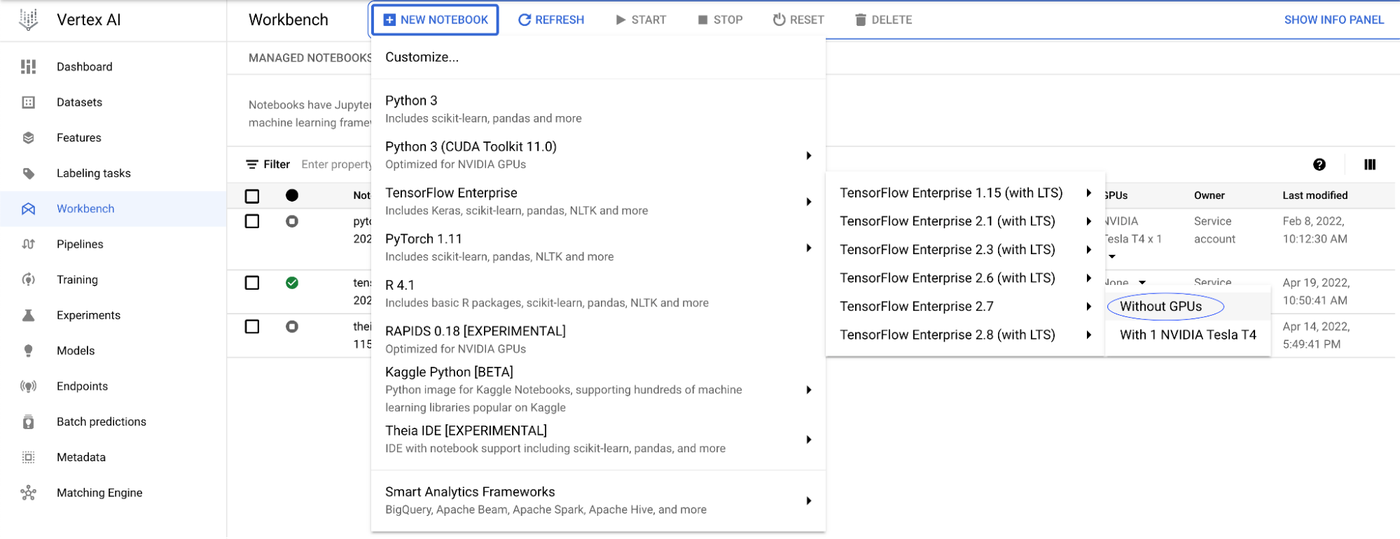
In the Workbench section of the Vertex AI console, select the “User Managed Notebooks” tab and then select “New Notebook” to create a notebook.
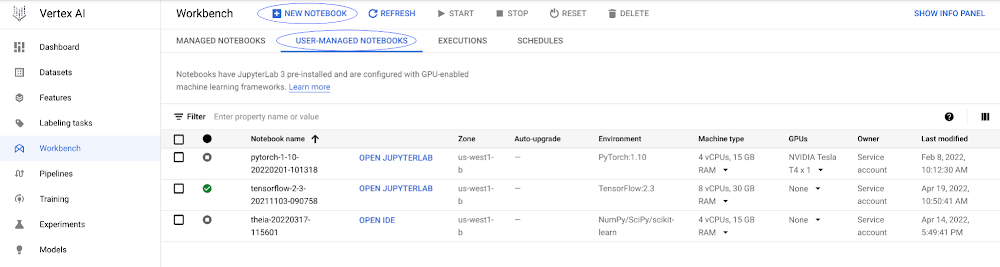
You can select many of the preinstalled suite of deep learning packages or choose a custom container. For this example, you can select the TensorFlow Enterprise 2.7 image without GPUs and press “Create”.
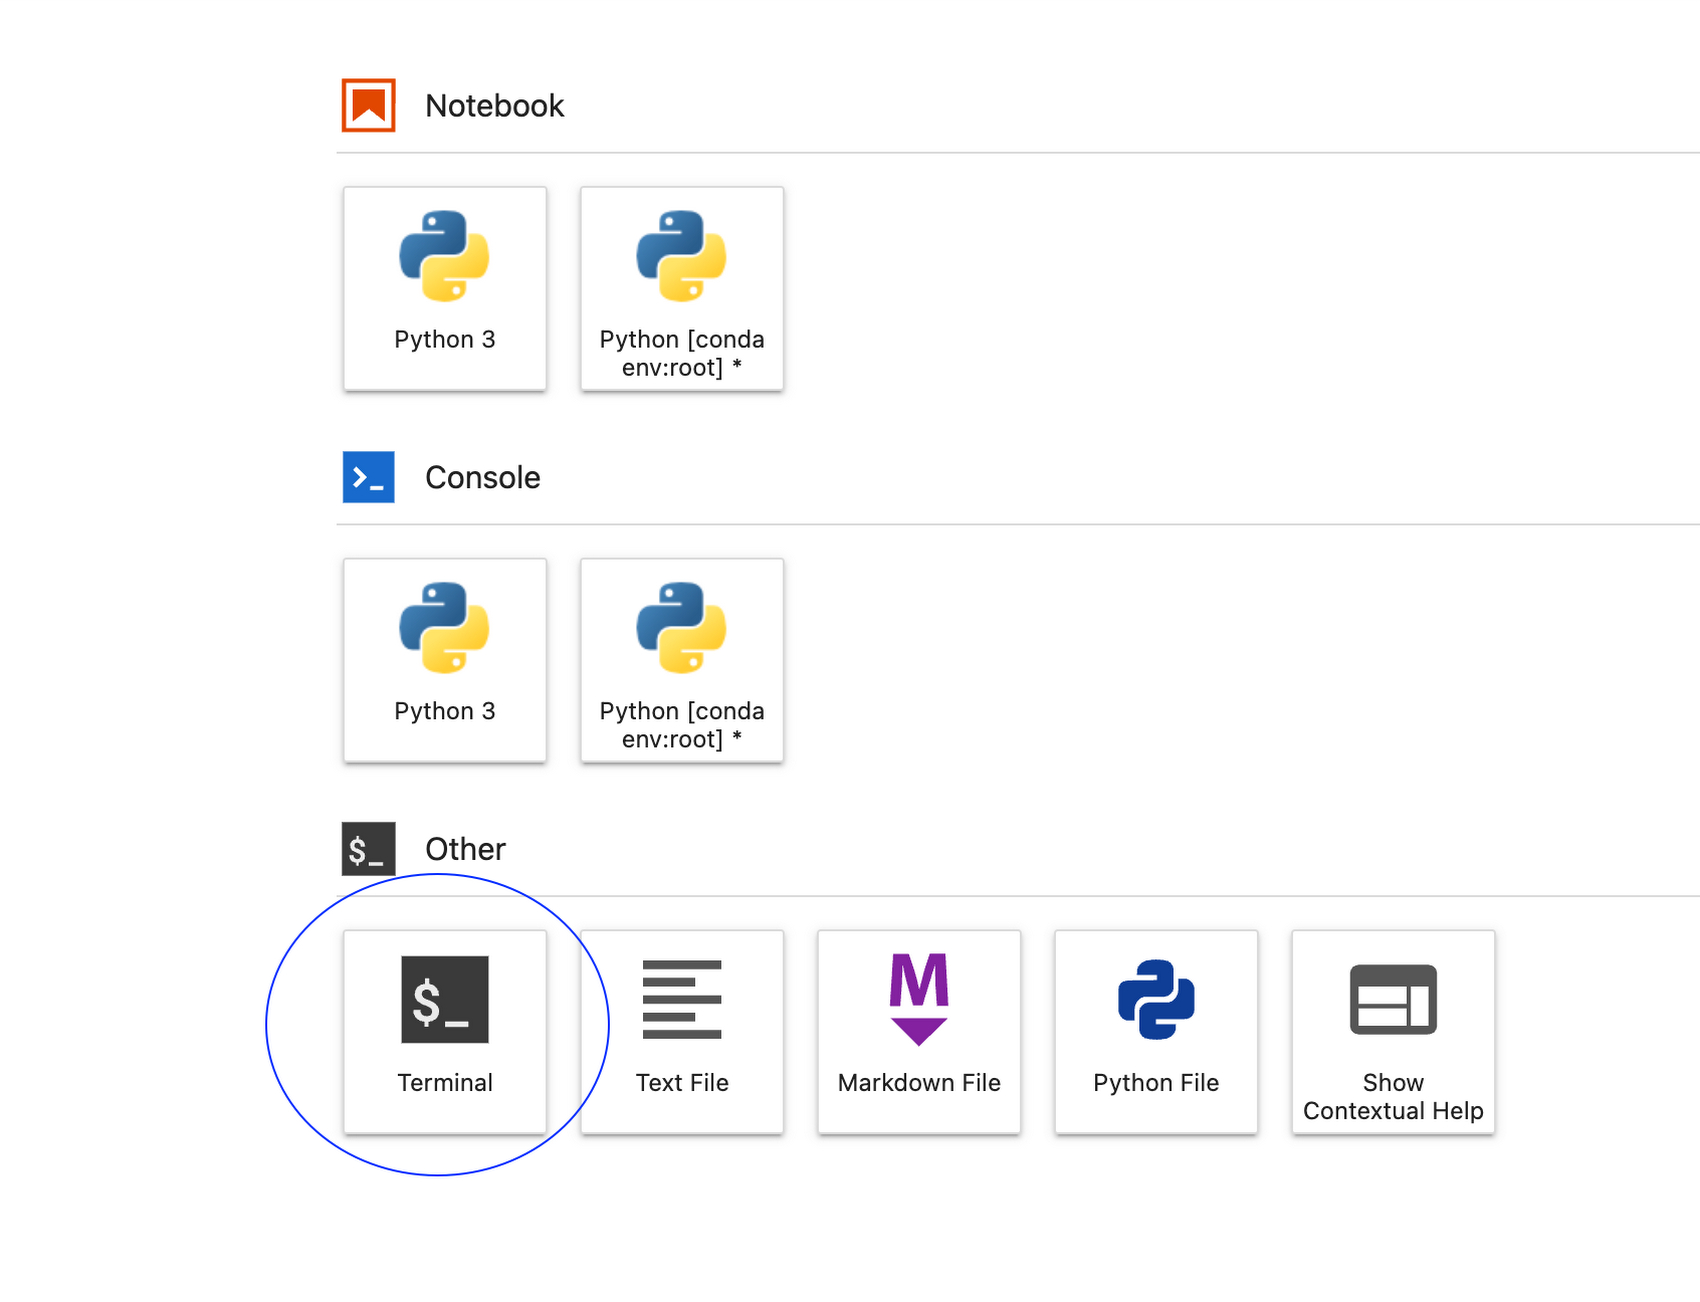
Once the notebook is ready, you will see a blue button, “Open Jupyterlab”. Clicking it will open a new browser window with the Jupyter Notebook environment.

From the Launcher, open a new terminal session. We’ll be running a few commands to mount Cloud Storage buckets as a filesystem in the Notebook.
On the terminal window, verify that gcsfuse is installed by running the command gcsfuse

Copy the name of the bucket you’ll like to mount, omitting protocol identifier (in this case gs://). For example, if my bucket is gs://my-cloud-bucket, then you’ll just copy my-cloud-bucket.
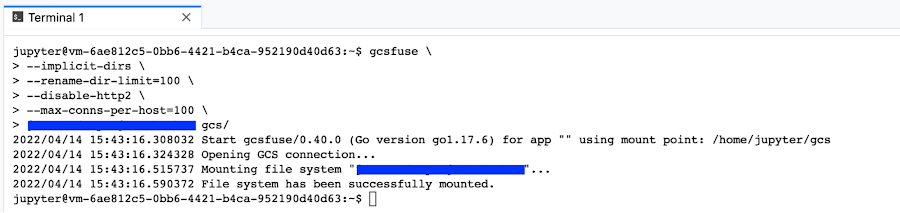
Once you have the bucket name copied, you can run the following commands in the terminal window. In this example we take the copied bucket name, my-cloud-bucket, and paste it as a parameter to the gcsfuse command to map to the gcs directory in the last line using a variable.
MY_BUCKET=my-cloud-bucket
cd ~/ # This should take you to /home/jupyter/
mkdir -p gcs # Create a folder that will be used as a mount point
gcsfuse --implicit-dirs \
--rename-dir-limit=100 \
--disable-http2 \
--max-conns-per-host=100 \
$MY_BUCKET "/home/jupyter/gcs"
You can now access the Cloud Storage bucket files from your Workbench Notebook instance as if they were locally. You can even create and run Jupyter Notebooks from the Cloud Storage bucket.
If you would like to mount all buckets in your Cloud Storage project, you can omit the bucket name when using gcsfuse.
cd ~/ # This should take you to /home/jupyter/
mkdir -p gcs # Create a folder that will be used as a mount point
gcsfuse --implicit-dirs \
--rename-dir-limit=100 \
--disable-http2 \
--max-conns-per-host=100 \
"/home/jupyter/gcs/"
In this case, buckets need to be accessed with the full path. For example,
with open("gcs/my-cloud-bucket/area_cover_dataset.csv",'r') as f:
print(f.read())
If you rather use a startup script, you can find a sample script in this post.
Now that we’ve mounted our Cloud Storage buckets, we can load our data directly without making a copy and having to worry about data reconciliation.