Calling Google APIs from serverless (Part I: Cloud APIs)
Wesley Chun
Developer Advocate
Introduction
As Google Cloud users, you may already be familiar with Google App Engine, Cloud Functions, or Cloud Run, our serverless platforms allowing technical practitioners to focus on building solutions, not what they run on. Google as a whole, has many divisions which provide developer tools beyond these platforms, so a common question which arises is: How do you call Google APIs from serverless?
We'll tackle this query in two phases, starting with how to access Cloud APIs from serverless. Most Cloud APIs have their own product client libraries you'll use from serverless (and even non-serverless) platforms. Below, we'll demonstrate a sample app calling Cloud APIs from serverless to kick off this conversation. Non-Cloud Google APIs operate differently. You'll likely have to use a platform client library as individual products may not have their own client libraries. One key difference that sets Cloud and non-Cloud APIs apart is that their security models differ depending on who owns the data your apps try to access, and this is where we'll dive in.
API security
Most Cloud APIs have their own product client libraries and use a combination of service accounts (for authentication) and Cloud IAM permissions (for authorization). To ease the onboarding process, all Cloud compute platforms (including serverless) provide default service accounts which are granted a wide variety of permissions. Once you've finished prototyping and moving to production, follow the best practice of "least privilege" with user-managed service accounts providing only the permissions needed for your app to function properly. The sample app doesn't show these steps for simplicity, but they should be employed for your apps.
To simplify the onboarding process, we'll use the default service accounts for the sample app. When you eventually switch to user-managed service accounts, your code doesn't need to change as the Application Default Credentials (ADC) library looks for the most appropriate service account to use. With that in mind, let's take a look at the sample app.
The application
The app demonstrates use of the Cloud Translation API, one of our AI/ML "building block" APIs (now part of our Vertex AI offering). If Google Translate had an API, Cloud Translation would be it. This API is used to implement a minimal "Google Translate" from English to Spanish. The app prompts for the text to translate, calls Cloud Translation to do the heavy lifting, then displays the results in the browser. Python and Node.js versions of the app are available in its open source repo. At the heart of the application is its translate() function, shown in pseudocode below: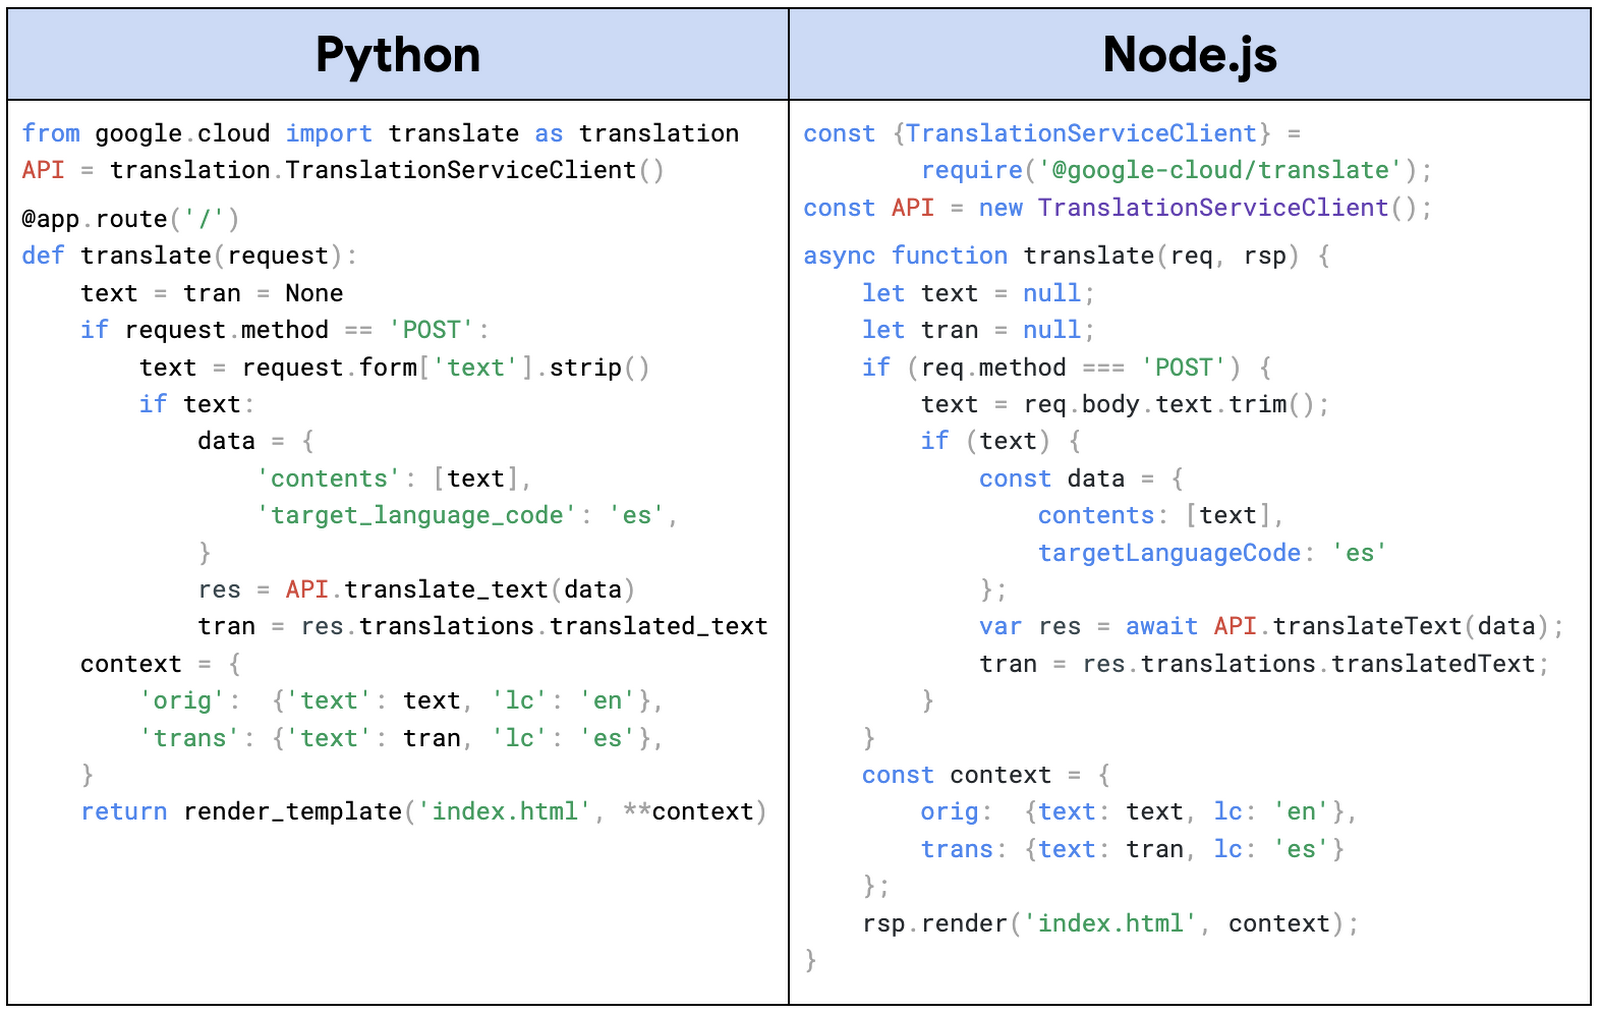

Use of Cloud APIs requires several lines of code:
At the top is the
import/requirethat connects your app to the Cloud Translation client library.The very next line instantiates an API client with which to connect to the API. Here the service account credentials (ADC) are checked, whether the default service account demonstrated here, or the user-managed service account you'll use for your app.
Once an API client has been created, you can access any API functionality the service account has permissions for, in this case, we have one call to the API near the middle to perform the actual translation.
That's it. Both apps feature less than 50 lines of actual code. All other lines are used only for application purposes. When we cover non-Cloud Google APIs in the next post, you'll observe code that looks similar. The client libraries and auth types will change, but the "flow" will roughly be the same: 1) import the library, 2) create an API client, 3) use the client object to access API functionality.
Choose a serverless platform to deploy the sample app to. Once deployed to the cloud, accessing it to make one translation of "hello world" results in program output like what you see below. The output will look identical for all three platforms, but the screenshot featured is the Cloud Run version:
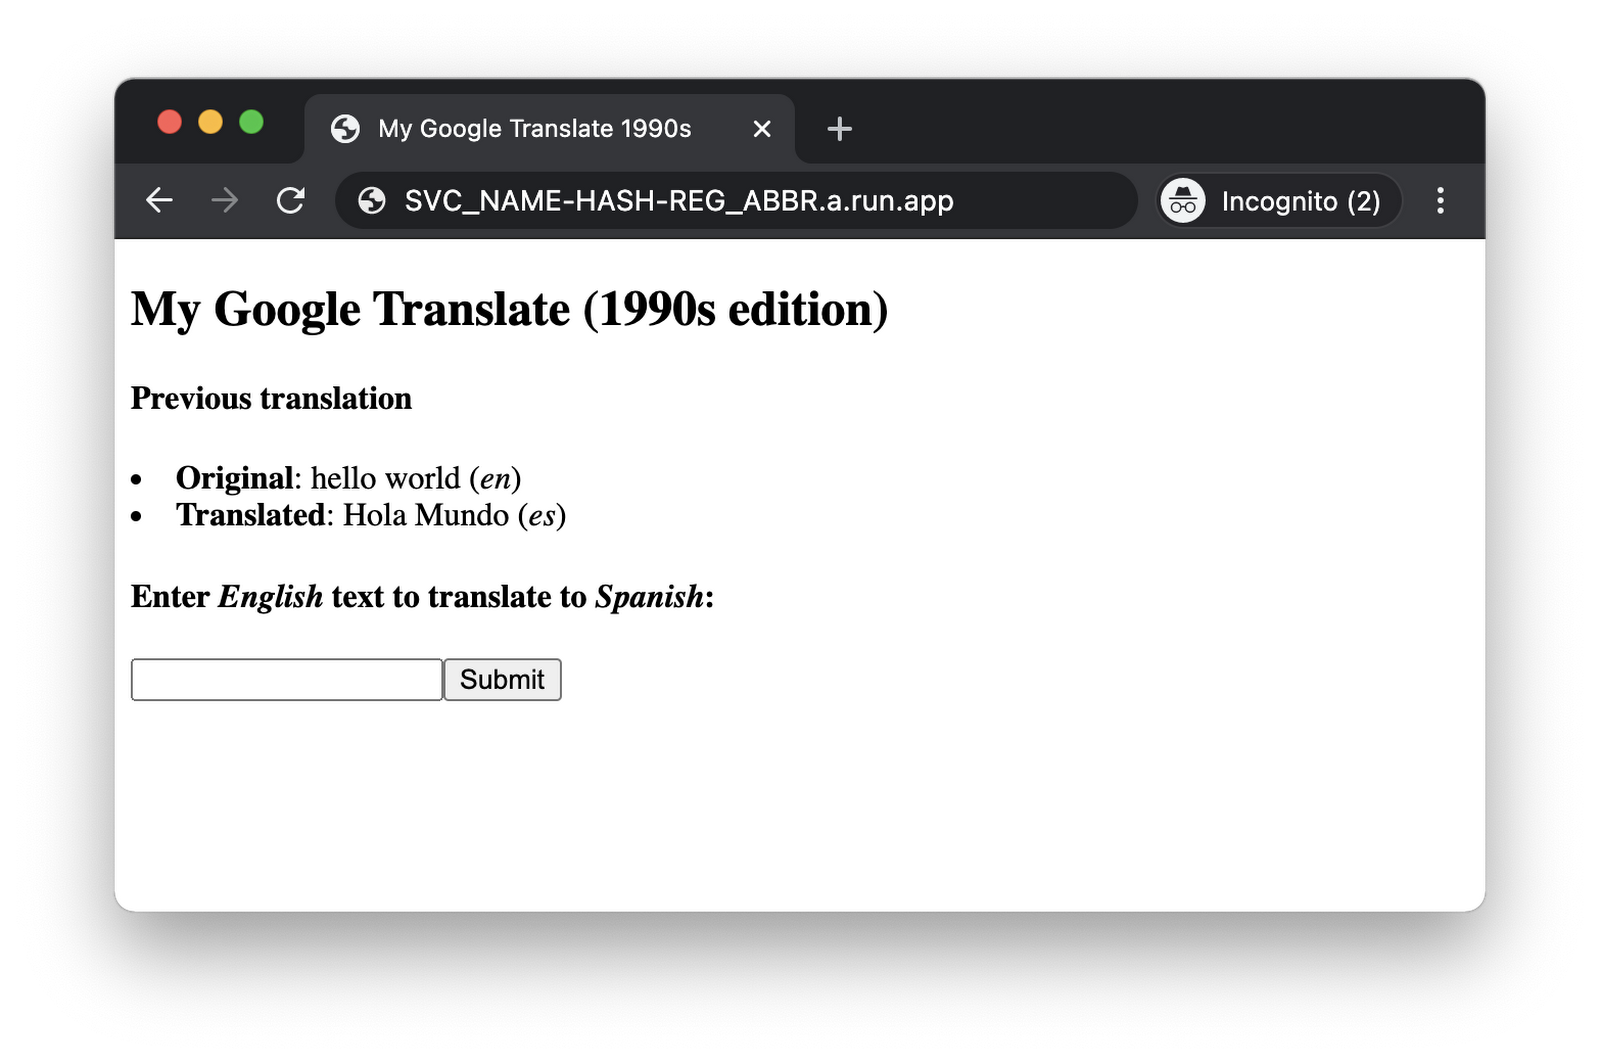

While this app demonstrates accessing Cloud APIs from serverless, it has been written with another purpose: it can be deployed to App Engine, Cloud Functions, or Cloud Run, with no code changes. (The differences are managed in the configuration.) For users new to our serverless platforms, this will help you learn them better, gain a greater understanding of how they're similar and different from each other, and lastly how to write code that can run on any of them in case you pick one but then decide later another one is a better fit. This means you, "can't make a mistake and pick the wrong platform," when you can "shift" between them. Also see this companion post covering the same sample app but from the perspective of the configuration changes necessary to get it to run on another Cloud serverless platform.
Next steps
In addition to the code, the repo also links you to various codelabs (self-paced, hands-on tutorials) that guide you in building and deploying this app to any of the serverless platforms (or running locally) in either Python or Node.js. An active Google Cloud billing account is required to deploy to the cloud, but you shouldn't incur charges if you run it briefly and stay within each product's "Always Free" tier. More information can be found in the "Cost" section in theREADME. Once you know how to call one Cloud API, accessing others will be quite similar. See you next time when we'll cover how to access non-Cloud Google APIs from serverless!