이 페이지에서는 검색 위젯을 사용하여 웹사이트에 검색 기능을 추가하는 방법을 설명합니다.
시작하기 전에
웹페이지에 검색 위젯을 추가하기 전에 검색 위젯의 결과 구성부터 시작하여 검색 위젯을 구성해야 합니다. 웹페이지에서 검색 위젯의 스타일을 조정할 수는 없습니다.
절차
웹페이지에 검색 위젯을 추가하는 절차는 선택한 승인 유형에 따라 다릅니다.
승인 토큰: 위젯은 코드베이스에서 제공하는 JWT 또는 OAuth 토큰을 사용합니다. 토큰을 생성하는 데 사용할 수 있는 자체 서버가 있어야 합니다. 인증 토큰은 사용자 또는 서비스 계정을 대신하여 API를 호출하는 데 사용됩니다. 인증 토큰을 생성할 때는 OAuth 범위
https://www.googleapis.com/auth/cloud-platform을 사용합니다.서비스 계정과의 서버 간 상호작용: 승인 문서의 서버 간 애플리케이션에 OAuth 2.0 사용을 참고하세요.
JavaScript 웹 애플리케이션: 승인 문서의 클라이언트 측 웹 애플리케이션용 OAuth 2.0을 참고하세요.
공개 액세스: 위젯이 검색어의 결과를 가져올 수 있는 사용자를 제한하지 않습니다.
승인 토큰을 사용하는 위젯 추가
Google Cloud 콘솔에서 AI 애플리케이션 페이지로 이동합니다.
수정하려는 앱의 이름을 클릭합니다.
통합을 클릭합니다.
위젯 탭을 클릭합니다.
위젯 승인 유형으로 JWT 또는 OAuth 기반을 선택합니다.
위젯 페이지의 도메인 이름을 지정합니다.
위젯이 표시될 페이지의 도메인 이름을 입력합니다.
예를 들어 위젯을 페이지
example.com/ai.html및cymbal.example.com/search.html에 복사하려면example.com을 도메인으로 입력합니다. 하위 도메인의 페이지에서만 위젯이 작동하도록 하려면cymbal.example.com을 입력합니다.localhost에서 위젯을 테스트하려면
localhost을 입력합니다.추가를 클릭합니다.
위젯이 표시될 도메인마다 6단계를 반복합니다.
저장을 클릭합니다.
웹 애플리케이션에 다음 코드 복사 섹션에 제공된 코드 스니펫을 복사합니다.
선택사항: 검색 위젯 동작을 맞춤설정하려면 다음을 변경합니다.
웹의 결과를 새 탭에서 대신 열려면 복사한 코드 스니펫에 다음을 추가하세요. 기본적으로 구조화되지 않은 문서의 결과는 새 탭에서 열리고 웹의 결과는 위젯과 동일한 페이지에서 열립니다.
anchorsTarget="_blank"예를 들면 다음과 같습니다.
<gen-search-widget configId="..." anchorsTarget="_blank"></gen-search-widget>검색창 내의 자리표시자 텍스트를 맞춤설정하려면 복사된 코드 스니펫에 다음을 추가하세요.
placeholder="CUSTOM_PLACEHOLDER"예를 들면 다음과 같습니다.
<gen-search-widget configId="..." placeholder="Start your search here"></gen-search-widget>트리거 없이 항상 위젯을 표시하려면 복사한 코드 스니펫에 다음을 추가하세요.
alwaysOpened예를 들면 다음과 같습니다.
<gen-search-widget alwaysOpened></gen-search-widget>
코드베이스에서 승인 토큰을 생성합니다.
위젯에 승인 토큰을 전달하려면 다음 코드를 웹 애플리케이션에 복사 섹션에 제공된 두 번째 코드 스니펫인 "
// Set authorization token"을 사용하고<JWT or OAuth token provided by you backend>텍스트를 승인 토큰으로 바꿉니다.현재 토큰이 만료되기 전에 이전 단계를 반복하여 새 토큰을 주기적으로 설정합니다.
공개적으로 액세스할 수 있는 위젯 추가
Google Cloud 콘솔에서 AI 애플리케이션 페이지로 이동합니다.
수정하려는 앱의 이름을 클릭합니다.
공개 액세스의 경우 검색 앱이 액세스 제어의 데이터 스토어와 연결되어 있지 않은지 확인합니다.
통합을 클릭합니다.
위젯 탭을 클릭합니다.
위젯 승인 유형으로 공개 액세스를 선택합니다.
위젯 페이지의 도메인 이름을 지정합니다.
위젯이 표시될 페이지의 도메인 이름을 입력합니다.
예를 들어 위젯을 페이지
example.com/ai.html및cymbal.example.com/search.html에 복사하려면example.com을 도메인으로 입력합니다. 하위 도메인의 페이지에서만 위젯이 작동하도록 하려면cymbal.example.com을 입력합니다.localhost에서 위젯을 테스트하려면
localhost을 입력합니다.추가를 클릭합니다.
위젯이 표시될 도메인마다 6단계를 반복합니다.
저장을 클릭합니다.
웹 애플리케이션에 다음 코드 복사 섹션에 제공된 코드 스니펫을 복사합니다.
선택사항: 검색 위젯 동작을 맞춤설정하려면 다음을 변경합니다.
웹의 결과를 새 탭에서 대신 열려면 복사한 코드 스니펫에 다음을 추가하세요. 기본적으로 구조화되지 않은 문서의 결과는 새 탭에서 열리고 웹의 결과는 위젯과 동일한 페이지에서 열립니다.
anchorsTarget="_blank"예를 들면 다음과 같습니다.
<gen-search-widget configId="..." anchorsTarget="_blank"></gen-search-widget>검색창 내의 자리표시자 텍스트를 맞춤설정하려면 복사된 코드 스니펫에 다음을 추가하세요.
placeholder="CUSTOM_PLACEHOLDER"예를 들면 다음과 같습니다.
<gen-search-widget configId="..." placeholder="Start your search here"></gen-search-widget>트리거 없이 항상 위젯을 표시하려면 복사한 코드 스니펫에 다음을 추가하세요.
<gen-search-widget alwaysOpened></gen-search-widget>
코드 스니펫을 웹페이지에 붙여넣습니다.
삽입된 공개 액세스 위젯의 예
공개 웹페이지에 삽입된 검색 위젯을 보려면 Vertex AI Search 사용해 보기를 참고하세요.
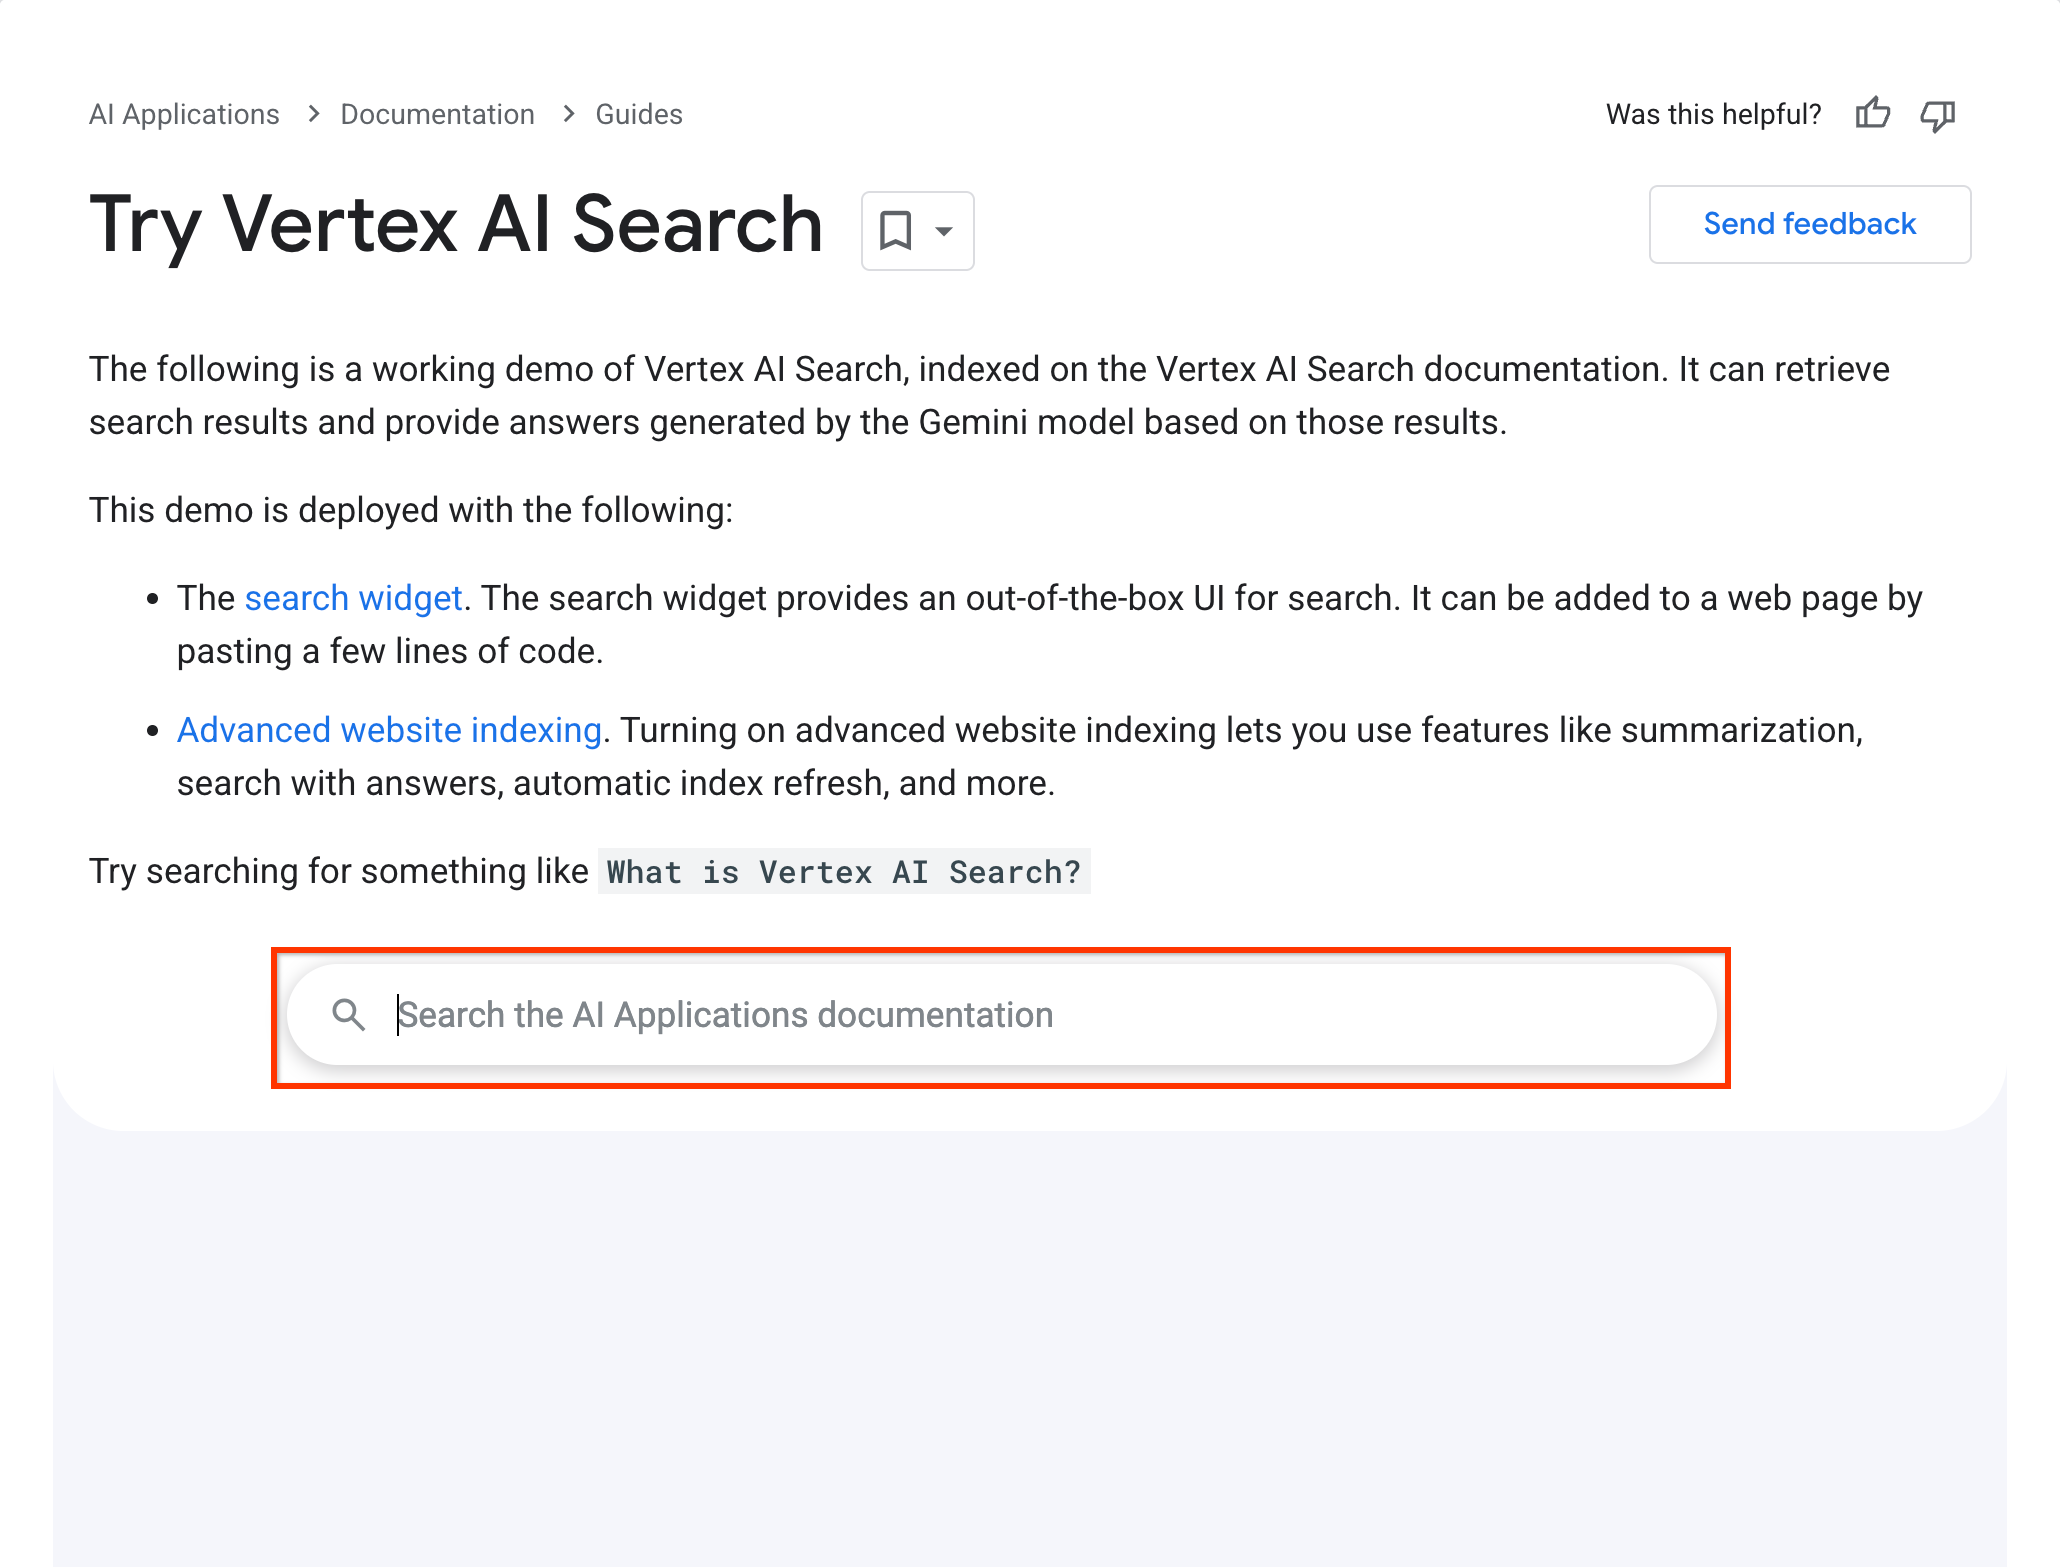
이 검색 위젯은 다음 구성과 함께 작동합니다.
  <gen-search-widget
    configId="123456"
    anchorsTarget="_blank"
    placeholder="Search the Vertex AI Search documentation"
    alwaysOpened>
  </gen-search-widget>