Dataproc JupyterLab-Cluster über Dataproc Hub erstellen
Wählen Sie in der Google Cloud Console auf der Seite Dataproc → Workbench den Tab Nutzerverwaltete Notebooks aus.
Klicken Sie in der Zeile, in der die vom Administrator erstellte Dataproc Hub-Instanz aufgeführt ist, auf JupyterLab öffnen.
Wenn Sie keinen Zugriff auf die Google Cloud Console haben, geben Sie in Ihrem Webbrowser die Dataproc Hub-Instanz-URL ein, die ein Administrator für Sie freigegeben hat.
Wählen Sie auf der Seite Jupyterhub → Dataproc-Optionen eine Clusterkonfiguration und -zone aus. Falls aktiviert, nehmen Sie die gewünschten Anpassungen vor und klicken Sie auf Erstellen.
Nachdem der Dataproc-Cluster erstellt wurde, werden Sie zur JupyterLab-Oberfläche weitergeleitet, die im Cluster ausgeführt wird.
Notebook erstellen und einen Spark-Job ausführen
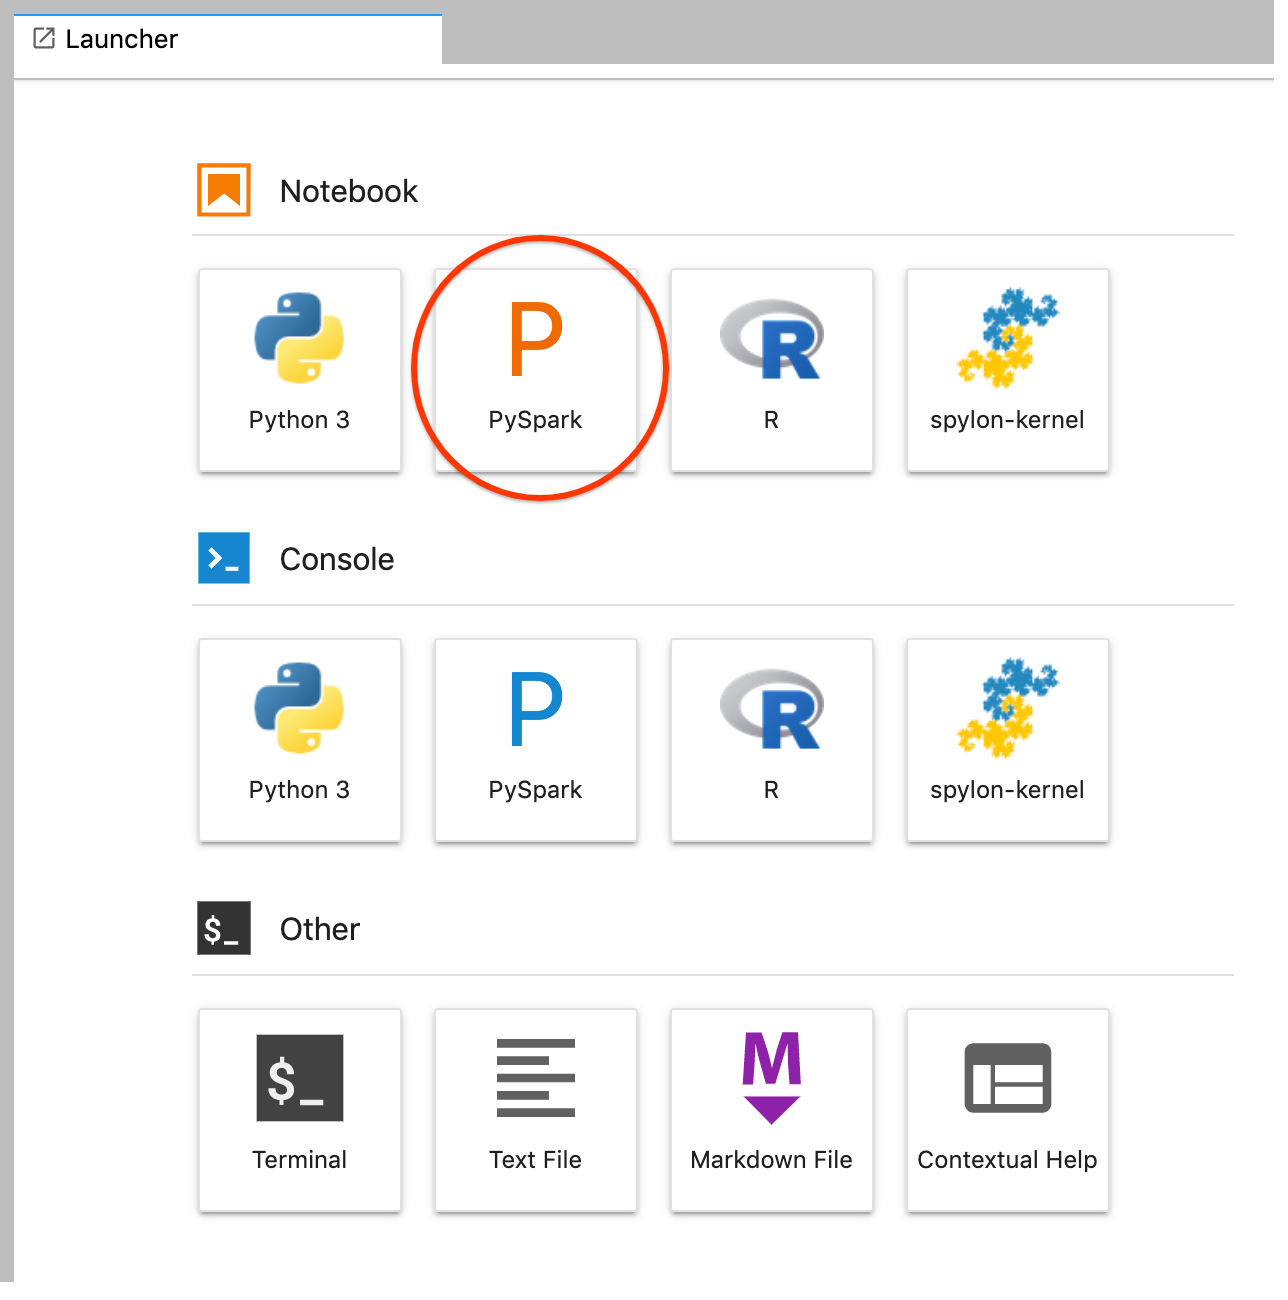
Klicken Sie im linken Bereich der JupyterLab-Benutzeroberfläche auf GCS (Cloud Storage).
Erstellen Sie ein PySpark-Notebook über den JupyterLab-Launcher.
Der PySpark-Kernel initialisiert einen SparkContext mithilfe der Variable sc.
Sie können den SparkContext untersuchen und einen Spark-Job aus dem Notebook ausführen.
rdd = (sc.parallelize(['lorem', 'ipsum', 'dolor', 'sit', 'amet', 'lorem'])
.map(lambda word: (word, 1))
.reduceByKey(lambda a, b: a + b))
print(rdd.collect())
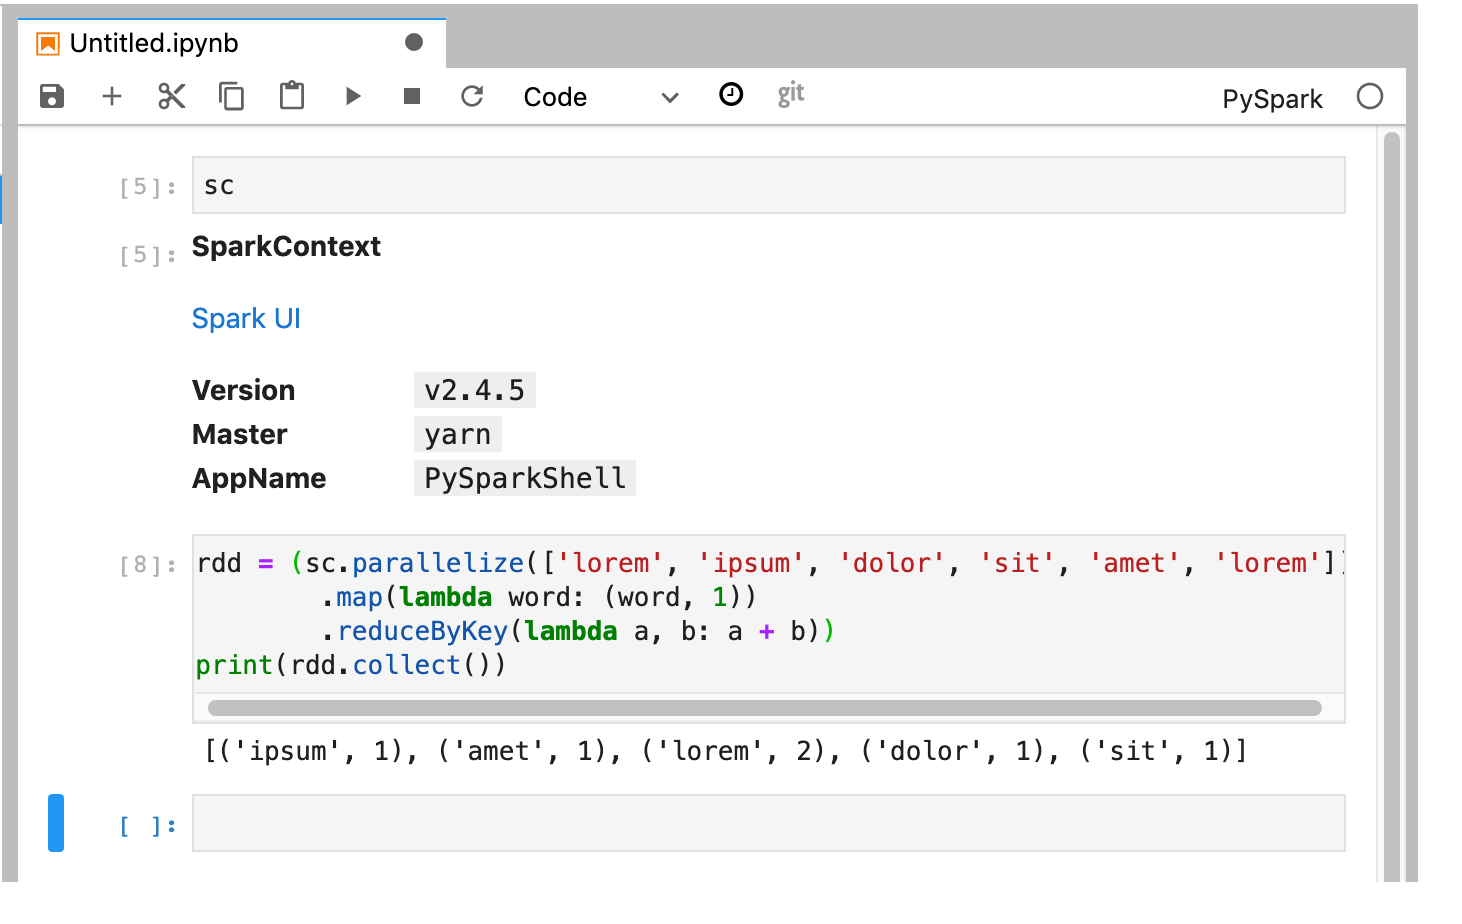
Benennen Sie das Notebook und speichern Sie es. Das Notebook wird gespeichert und verbleibt in Cloud Storage, nachdem der Dataproc-Cluster gelöscht wurde.
Dataproc-Cluster herunterfahren
Wählen Sie in der JupyterLab-Benutzeroberfläche Datei → Hub-Steuerfeld aus, um die Seite Jupyterhub zu öffnen.
Klicken Sie auf Stop My Cluster, um den JupyterLab-Server zu beenden (löschen), wodurch der Dataproc-Cluster gelöscht wird.
[[["Leicht verständlich","easyToUnderstand","thumb-up"],["Mein Problem wurde gelöst","solvedMyProblem","thumb-up"],["Sonstiges","otherUp","thumb-up"]],[["Schwer verständlich","hardToUnderstand","thumb-down"],["Informationen oder Beispielcode falsch","incorrectInformationOrSampleCode","thumb-down"],["Benötigte Informationen/Beispiele nicht gefunden","missingTheInformationSamplesINeed","thumb-down"],["Problem mit der Übersetzung","translationIssue","thumb-down"],["Sonstiges","otherDown","thumb-down"]],["Zuletzt aktualisiert: 2025-09-08 (UTC)."],[[["\u003cp\u003eDataproc Hub and Vertex AI Workbench user-managed notebooks are deprecated and will no longer be supported after January 30, 2025.\u003c/p\u003e\n"],["\u003cp\u003eYou can use Dataproc Hub to create a single-user JupyterLab notebook environment running on a Dataproc cluster, utilizing a configured cluster and zone from the Dataproc Options page.\u003c/p\u003e\n"],["\u003cp\u003eUsers can create a PySpark notebook within the JupyterLab interface, allowing them to run Spark jobs, and the notebook is saved in Cloud Storage even after the Dataproc cluster is deleted.\u003c/p\u003e\n"],["\u003cp\u003eTo shut down the Dataproc cluster, users must navigate to the Jupyterhub page and click "Stop My Cluster," which deletes the JupyterLab server and the Dataproc cluster, but not the Dataproc Hub instance itself.\u003c/p\u003e\n"],["\u003cp\u003eThe admin user must grant the \u003ccode\u003enotebooks.instances.use\u003c/code\u003e permission for a user to be able to utilize Dataproc Hub.\u003c/p\u003e\n"]]],[],null,["# Use Dataproc Hub\n\n*** ** * ** ***\n\n|\n| Dataproc Hub and\n| Vertex AI Workbench user-managed notebooks are\n| deprecated. On January 30, 2025, support for user-managed notebooks\n| will end and the ability to create user-managed notebooks instances\n| will be removed. For alternative notebook solutions\n| on Google Cloud, see:\n|\n| - [Install\n| the Jupyter component on your Dataproc cluster](/dataproc/docs/concepts/components/jupyter#install_jupyter).\n| - [Create\n| a Dataproc-enabled\n| Vertex AI Workbench instance](/vertex-ai/docs/workbench/instances/create-dataproc-enabled).\n\nObjectives\n----------\n\n1. Use Dataproc Hub to create a single-user\n JupyterLab notebook environment running on a Dataproc cluster.\n\n2. Create a notebook and run a Spark job on the Dataproc cluster.\n\n3. Delete your cluster and preserve your notebook in Cloud Storage.\n\nBefore you begin\n----------------\n\n1. The administrator must grant you `notebooks.instances.use` permission (see [Set Identity and Access Management (IAM) roles](/dataproc/docs/tutorials/dataproc-hub-admins#set_identity_and_access_management_iam_roles)). \n\nCreate a Dataproc JupyterLab cluster from Dataproc Hub\n------------------------------------------------------\n\n1. Select the **User-Managed Notebooks** tab on the\n **[Dataproc→Workbench](https://console.cloud.google.com/dataproc/workbench)**\n page in the Google Cloud console.\n\n2. Click **Open JupyterLab** in the row that\n lists the Dataproc Hub instance created by the administrator.\n\n 1. If you do not have access to the Google Cloud console, enter the Dataproc Hub instance URL that an administrator shared with you in your web browser.\n3. On the **Jupyterhub→Dataproc Options** page, select\n a cluster configuration and zone. If enabled, specify any customizations, then\n click **Create**.\n\n After the Dataproc cluster is created, you are redirected\n to the JupyterLab interface running on the cluster.\n\nCreate a notebook and run a Spark job\n-------------------------------------\n\n1. On the left panel of the JupyterLab interface, click on `GCS` (Cloud Storage).\n\n2. Create a PySpark notebook from the JupyterLab launcher.\n\n3. The PySpark kernel initializes a SparkContext (using the `sc` variable).\n You can examine the SparkContext and run a Spark job from the notebook.\n\n ```\n rdd = (sc.parallelize(['lorem', 'ipsum', 'dolor', 'sit', 'amet', 'lorem'])\n .map(lambda word: (word, 1))\n .reduceByKey(lambda a, b: a + b))\n print(rdd.collect())\n ```\n4. Name and save the notebook. The notebook is saved and remains in\n Cloud Storage after the Dataproc cluster is deleted.\n\nShut down the Dataproc cluster\n------------------------------\n\n1. From the JupyterLab interface, select **File→Hub Control Panel** to\n open the **Jupyterhub** page.\n\n | When using Dataproc image versions 1.4 or earlier, navigate to `/hub/home` to access the **Jupyterhub** page.\n2. Click **Stop My Cluster** to shut down (delete) the JupyterLab server, which\n deletes the Dataproc cluster.\n\n | Stopping the server and deleting the cluster **does not delete the Dataproc Hub instance** . You can click **Start my server** on the **Jupyterhub** (Hub Control Panel) page or select the **Open JupyterLab** link for your Dataproc Hub instance on the **Dataproc→Workbench→User-Managed Notebooks** page in the Google Cloud console to open configure and create another Dataproc JupyterLab cluster.\n\nWhat's next\n-----------\n\n- Explore [Spark and Jupyter Notebooks on Dataproc](https://github.com/GoogleCloudDataproc/cloud-dataproc/tree/master/notebooks) on GitHub."]]