啟用預設的 GPU 執行階段
如需在預先發布期間取得支援,請傳送電子郵件至 vertex-notebooks-previews-external@google.com。
本文說明如何為專案中的 Colab Enterprise 使用者啟用預設執行階段的 GPU。啟用含 GPU 的預設執行階段後,使用者只要按一下筆記本中的按鈕,即可從一般預設執行階段切換至含 GPU 的預設執行階段。
本文適用於 Colab Enterprise 管理員,他們想為機構中的其他使用者啟用搭載 GPU 的預設執行階段。並假設您瞭解下列事項:
- 如何管理 Colab Enterprise 執行階段和執行階段範本。
- 如何使用 Identity and Access Management (IAM) 控管存取權。
總覽
如要讓使用者切換至預設的 GPU 執行階段,管理員 (roles/aiplatform.colabEnterpriseAdmin) 或具備 aiplatform.notebookRuntimeTemplates.create 權限的使用者帳戶必須先建立預設的 GPU 執行階段。
首次建立預設 GPU 執行階段時,Colab Enterprise 會建立新的預設執行階段範本,並在規格中加入 GPU。原始預設執行階段不會受到影響,且會存在直到過期或刪除為止。建立新的預設 GPU 執行階段範本後,只要使用者對專案具有 aiplatform.notebookRuntimes.assign 權限,且對執行階段範本具有 aiplatform.notebookRuntimeTemplates.apply 權限,就能建立及使用預設的 GPU 執行階段。Colab Enterprise 使用者 (roles/aiplatform.colabEnterpriseUser) 角色已具備這些權限。
規格
含有 GPU 的預設執行階段規格與原始預設執行階段不同。可用的機器類型、GPU 和資料磁碟類型會因區域而異,因此部分規格可能與原始預設執行階段不同。
下表說明預設 GPU 執行階段的規格,具體取決於預設執行階段的區域。
| 地區說明 | 預設執行階段規格 |
|---|---|
| 支援 L4 GPU 的地區 |
|
| 不支援 L4 GPU 但支援 T4 GPU 的地區 |
|
| 不支援 L4 或 T4 GPU 的地區 | 系統不支援預設的 GPU 執行階段。 |
加速器適用情形
Colab Enterprise 支援下列加速器類型的預設執行階段:
- L4
- T4
如要瞭解這些加速器在各區域的供應情形,請參閱「使用加速器」。
事前準備
- Sign in to your Google Cloud account. If you're new to Google Cloud, create an account to evaluate how our products perform in real-world scenarios. New customers also get $300 in free credits to run, test, and deploy workloads.
-
In the Google Cloud console, on the project selector page, select or create a Google Cloud project.
Roles required to select or create a project
- Select a project: Selecting a project doesn't require a specific IAM role—you can select any project that you've been granted a role on.
-
Create a project: To create a project, you need the Project Creator
(
roles/resourcemanager.projectCreator), which contains theresourcemanager.projects.createpermission. Learn how to grant roles.
-
Verify that billing is enabled for your Google Cloud project.
-
Enable the Vertex AI, Dataform, and Compute Engine APIs.
Roles required to enable APIs
To enable APIs, you need the Service Usage Admin IAM role (
roles/serviceusage.serviceUsageAdmin), which contains theserviceusage.services.enablepermission. Learn how to grant roles. -
In the Google Cloud console, go to the Colab Enterprise My notebooks page.
-
In the Region menu, select the region that contains your notebook.
-
Click the notebook that you want to open. If you haven't created a notebook yet, create a notebook.
-
In your notebook, click Connect.

-
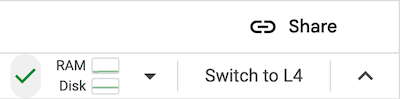
After Colab Enterprise connects to the default runtime, in the top right corner of your notebook, click the button to switch to a default runtime with GPUs. For example, if your notebook is in a region that supports L4 accelerators, click Switch to L4.
Default runtimes with GPUs are only available in regions that support specific accelerator availability. See Accelerator availability.
You must first connect a notebook to a default runtime to be able to switch to a default runtime with GPUs.
- To manage your runtime, see Manage runtimes.
- Learn more about runtimes and runtime templates.
必要的角色
為確保您的使用者帳戶具備必要權限,能在 Colab Enterprise 中啟用搭載 GPU 的預設執行階段,請要求管理員將 Colab Enterprise 管理員 (roles/aiplatform.colabEnterpriseAdmin)
IAM role on the project.
For more information about granting roles, see Manage access to projects, folders, and organizations.
Your administrator might also be able to give your user account
the required permissions through custom
roles or other predefined
roles.
Enable GPUs for default runtimes
To enable GPUs for default runtimes, do the following:
Colab Enterprise creates a new default runtime that has
GPUs, and then connects to the runtime. The ability to switch to a
default runtime with GPUs is enabled for other users in the project.
Turn off GPUs for default runtimes
To turn off the ability to switch to a default runtime with GPUs, you
must delete the runtime template named Default with GPU.
See Delete a runtime template.
Limitations
What's next