VM Manager 101: Create a disk clone before patching VMs
Christoph Petersen
Solution Lead, EMEA
Earlier this year, we introduced VM Manager, a suite of tools that can be used to manage virtual machines running on Google Cloud at scale.
One of the services available with VM Manager is OS patch management, which helps to apply patches to virtual machines on-demand and based on schedules. Both Linux and Windows operating systems are supported and the service uses the respective update infrastructure of the operating system (e.g. apt, ZYpp, yum and Windows Update Agent) to both identify and apply missing patches.
A request that comes up often when talking to customers that plan on using this service or are already using it, is how to create a backup of the state of a virtual machine before patches are applied in order to be able to roll back in case something goes wrong with patching or with the patches themselves. Unfortunately this feature is not supported by VM Manager out of the box.
One of the capabilities the service supports however is the ability to run pre-patch and post-patch scripts on each VM that is targeted for patching. Scripts running pre-patching or post-patching run on the instance and in the context of the service account that is associated with it (either the Compute Engine default service account or the one that was used during creation).
In this blog, I will explain how pre-patch scripts can be leveraged to create a crash consistent disk clone of the attached persistent disks of a VM before patches are applied.
Considerations
This blog describes a solution to a common customer problem. The ideal solution would be to have a direct integration in the service, that does not rely on executing the snapshot creation on the VM and in the context of the associated service account. Assigning the required permission to the service account ultimately gives these permissions to any user that can login onto the VMs.
By making the patching of a VM dependent on taking a disk clone (this is how the sample script in this article is put together), a failure to create the clone ultimately results in not patching the VM.
Prerequisites
Setting up VM Manager and OS patch management is out of the scope of this article. Follow the instructions on Setting up VM Manager to enable VM Manager for your project.
Permissions
Creating disk clones requires at least the following permissions to be assigned to the service account associated with the VM:compute.disks.create # on the projectcompute.disks.createSnapshot # on the source disk
Scopes
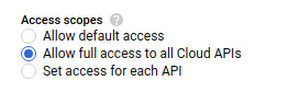
The script that creates the clone ultimately runs on the VM that is being patched. This means that it is not only required to set the correct permission to the service account associated with the VM but the API scope needs to be set as well.
Set the scope to either Allow full access to all Cloud APIs
Upload scripts
I've included sample scripts for both Linux and Windows based operating systems at the end of this section. I have tested these scripts Debian 10, Ubuntu 20.04, the latest Container-Optimize OS and Windows Server 2019. If you use different versions, I strongly recommend to test the scripts.
Both versions of the sample script follow the same logic:
Retrieve the ID of the patch job (used to tag the snapshot for better discoverability)
Retrieve disks associated with the VM
Create disk clones
You need to download the appropriate version of the update script and then upload them to a storage bucket (this guide explains how to do just that):
# Copy script to GCS bucketgsutil cp clone-linux.sh gs://<BUCKET>/clone-linux.sh
Now we need to get the version of the file we just uploaded. We need to pass along the version so the patch service can pick up the right version for execution:
# Retrieve file versiongsutil ls -a gs://<BUCKET>/clone-linux.sh | cut -d'#' -f 2
Linux
Find the latest version on GitHub.
Windows
Find the latest version on GitHub.
Create patch job with pre-patch script execution
Now that the scripts have been uploaded we can create patch jobs. These can either be on-demand or scheduled. Additionally they can be configured to target different subsets of VM instances. More information about instance filters can be found in the documentation.
The following samples create on-demand patch jobs targeting all instances. Make sure to supply the correct values for the GCS bucket and the file version for the script.
Linux
Windows
Validate snapshot creation
Patch results / Cloud Logging
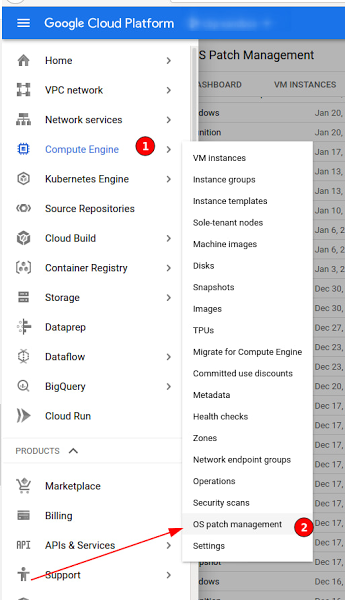
Navigate to Compute Engine then OS patch management.
Select Patch Jobs.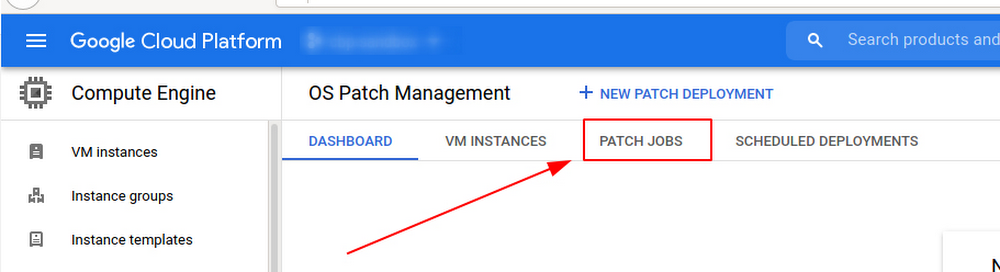
Select the job and review the status.
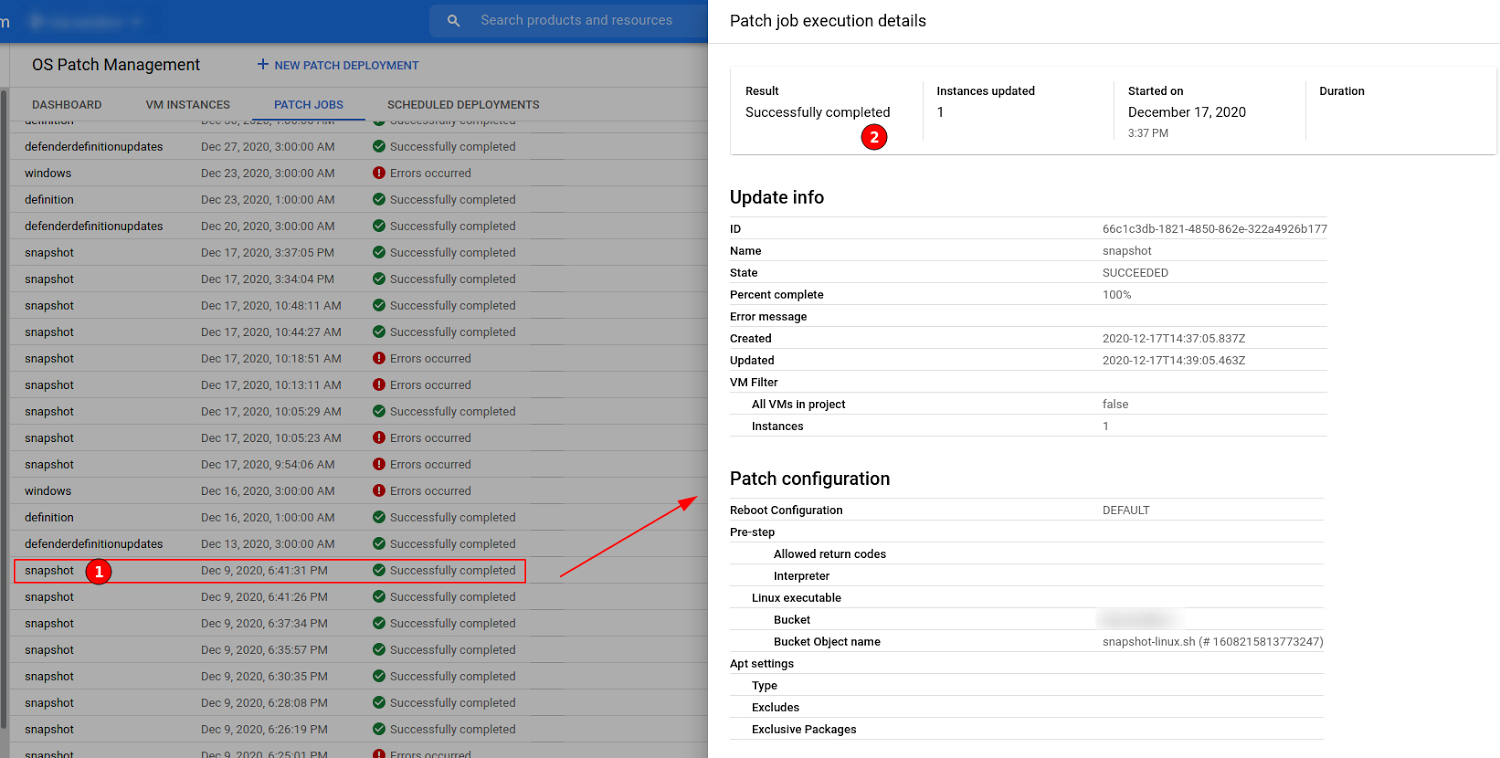
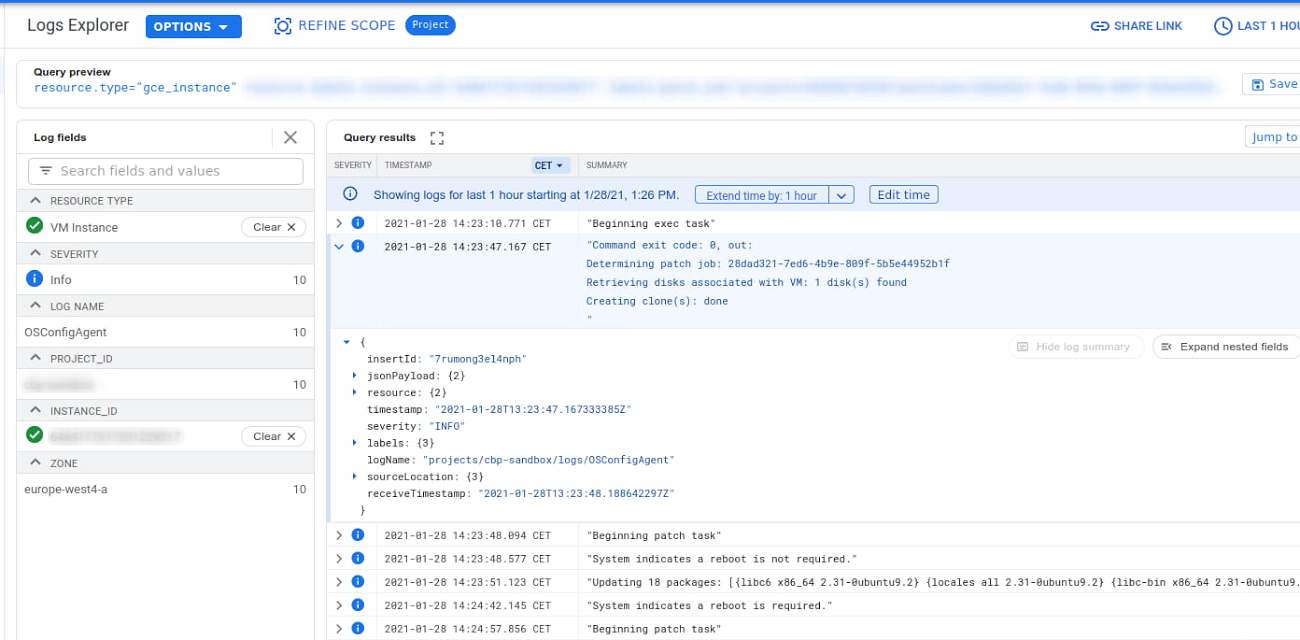
For more details, scroll down in the patch job execution details overlay and select View for a VM that was targeted by this job.
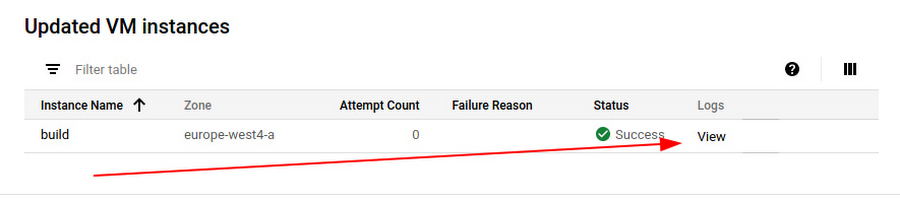
This opens Cloud Logging and contains a detailed log of the script execution.
Clones
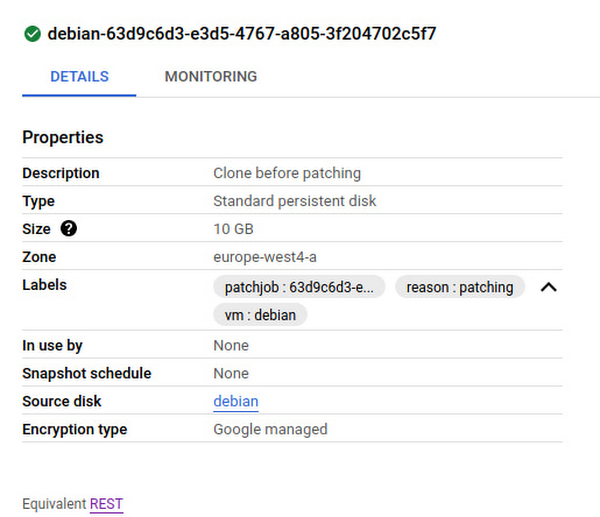
Navigate to Compute Engine then Disks.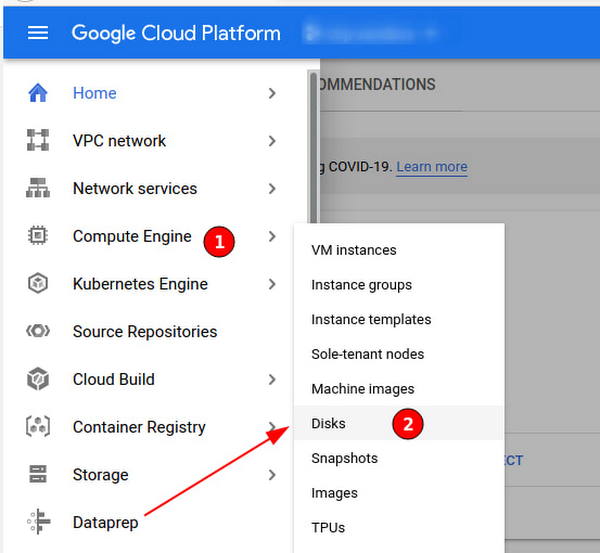
Review the available disks.
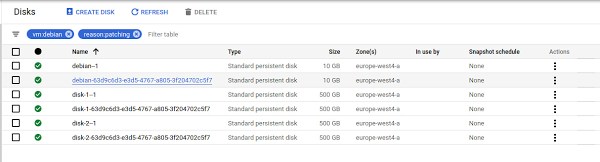
The name of the disk clone is the original disk name with the ID of the patch job appended. Additionally a few labels have been set to make discovery easier:
The name of the disk clone is the original disk name with the ID of the patch job appended. Additionally a few labels haven been set to make discovery easier:
Conclusion
Hope you enjoyed today’s blog, illustrating how the pre-patch and post-patch scripts can be used to automate common enterprise requirements. While there are limitations and considerations to be made this process can be used to secure workloads before patching at scale.
To learn more about VM Manager, visit the documentation, or watch our Google Cloud Next ‘20: OnAir session, Managing Large Compute Engine VM Fleets.