Looker stores Looks (saved snapshots of data from a query) and dashboards (collections of tiles that show visualized query results) in folders. Access to these folders is controlled by access levels and user permissions.
Folder access levels
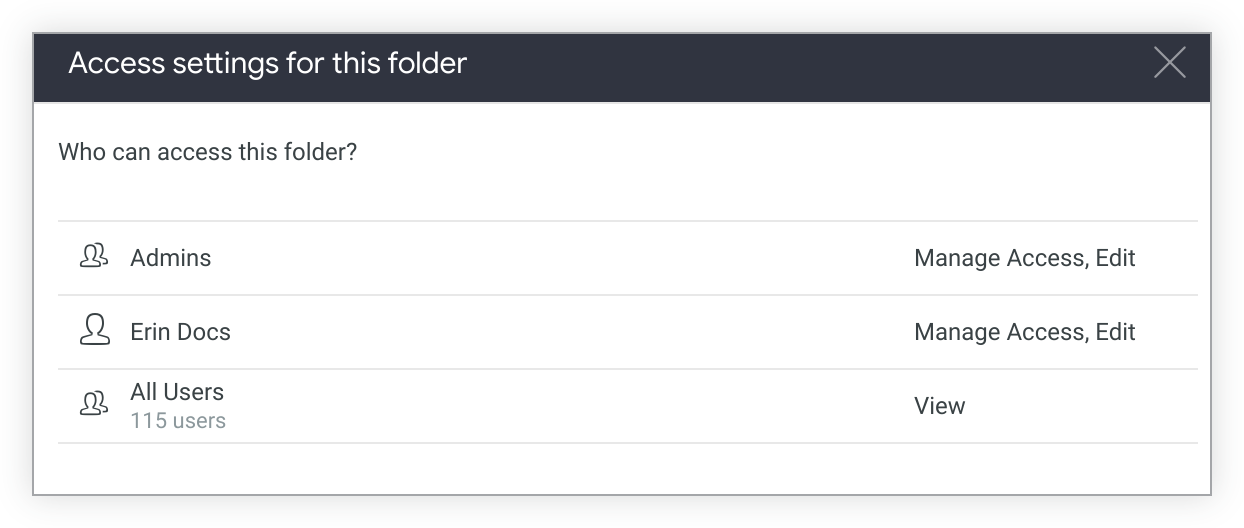
A user or a group of users can have one of two access levels for a folder:
View: The user or group can see the folder, view the Looks and dashboards inside it, and copy the Looks and dashboards in the folder.
Manage Access, Edit: The user or group has View access and can also manage access to the folder and edit the folder and its content (including renaming folders, moving content, and deleting Looks and dashboards).
For more information about content access and permissions, see Controlling user content access and How content access and permissions interact.
Viewing and managing folder access levels
To manage a folder, you need both the appropriate permissions from your Looker admin and the Manage Access, Edit access level for that folder. This lets you edit the name of a folder, create subfolders, and specify which users can view or manage the folder.
Navigate to the folder.
Click the Toggle Dropdown gear icon .
Select Manage Access.
If you are not allowed to change access levels, you cannot manage the folder. The permissions levels will not be selectable, and there will not be an option to add a new group or user.
If a text field with the placeholder text Add group or user appears below the other groups and users, then you can manage the folder.

If the folder is a subfolder, Looker shows whether this folder inherits its access-level settings from its parent.
If you want to customize access-level settings for a particular set of users and groups, you can add those users and groups to a list and manage each of them individually.
To change the access level for a user or group, select the current access level and choose the one that you want instead. You cannot change the ability of Looker admins to manage the folder.
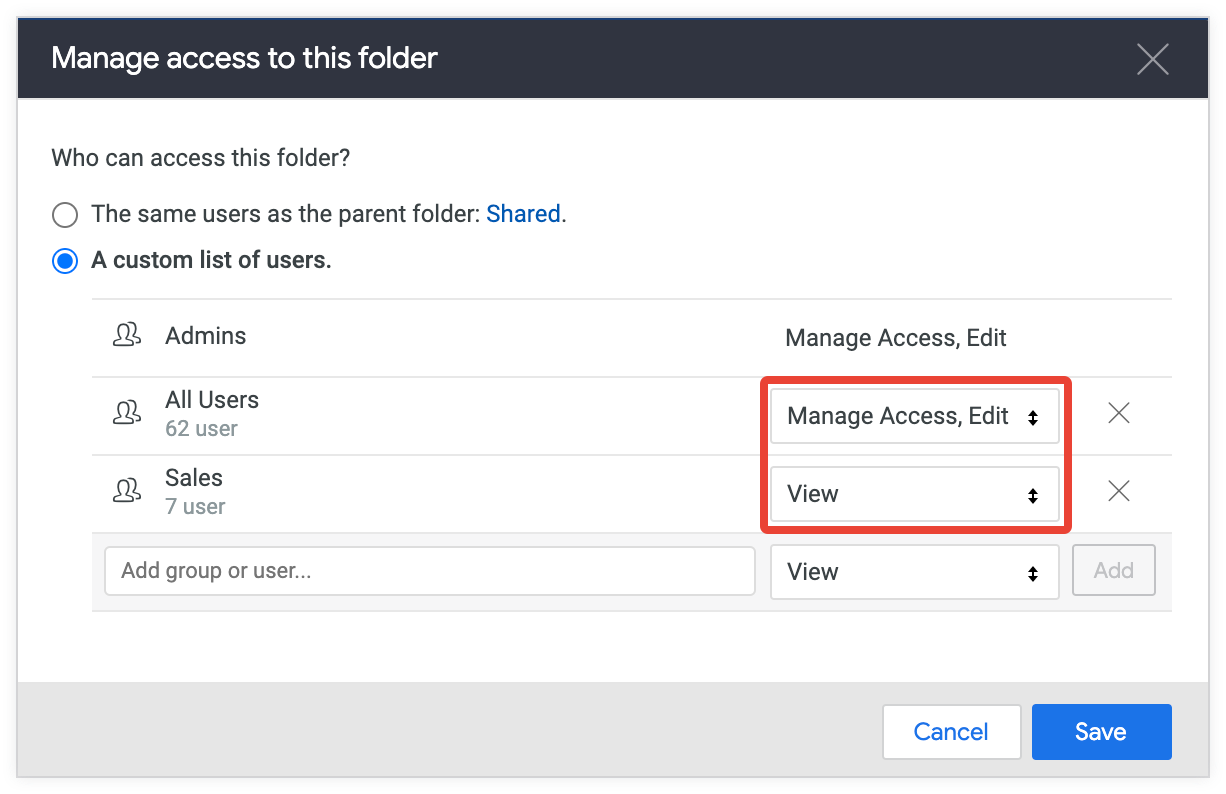
To remove the access level from a group or user, select the X beside the name.
To add one or more groups or users, select the Add group or user field, choose a group or user, and then select the desired access level. Select Add to set the access level for the group or user.
Creating a folder
You can create a new folder within the Shared folder or your personal folder. By default, a folder inherits the folder access levels of its parent.
Click the New button.
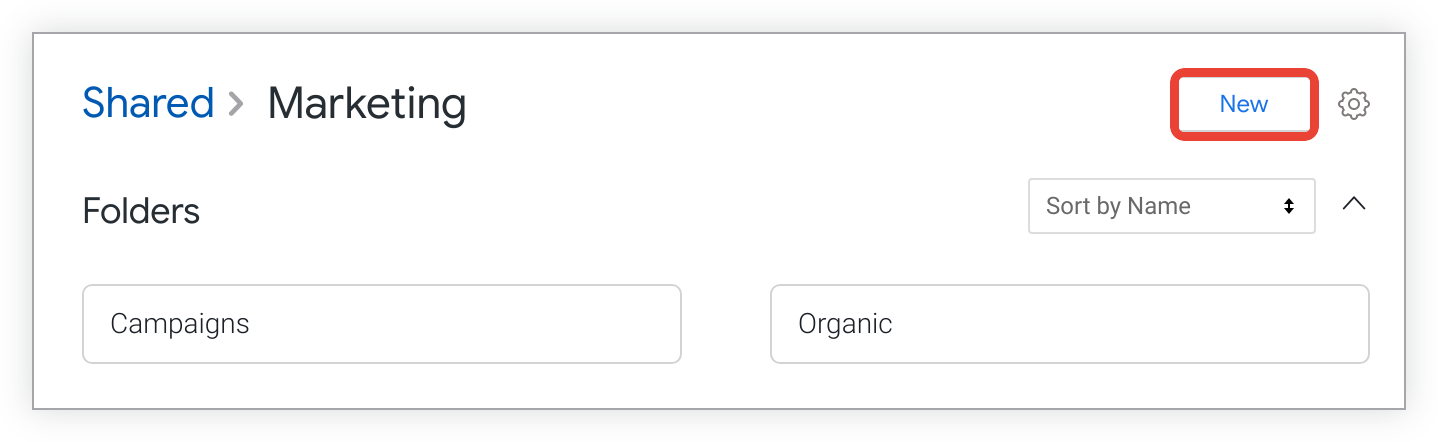
Select the Folder option.
In the Create folder window, enter a name for the folder.
Select Create folder.
Setting your default folder
By default, if your admin has enabled the pre-built Looker homepage option, Looker displays Shared folders in the left navigation. If you set a different default folder, it replaces Shared folders in the left navigation.
To set a different folder as your default folder:
Navigate to the folder that you want to set as your default folder.
Click the Toggle Dropdown gear icon .
Select Set as your default folder.
The default folder appears in the Folders section of main navigation.
Renaming, moving, or deleting a folder
You can rename, move, or delete subfolders within Shared or your personal folder. However, you cannot change top-level folders, such as Shared or your top-level personal folder, in this way.
Navigate to the folder.
Click the Toggle Dropdown gear icon .
Select Rename, Move, or Delete.
Copying or moving Looks and dashboards
If you have the Manage Access, Edit access level for a folder, you can copy or move its Looks and user-defined dashboards to another folder. You can also move a LookML dashboard to another folder if you have the develop permission on the model that includes the LookML dashboard.
If a dashboard has tiles that are based on Looks, then those Looks must be in the same folder as the dashboard. If you try to move a Look that is used in a dashboard, Looker instead makes a copy of the Look in the new location and keeps the Look in its original location. This ensures that your dashboard doesn't have any missing tiles. If you copy or move a dashboard to a new location, then Looker will copy or move its Looks to the new location as well.
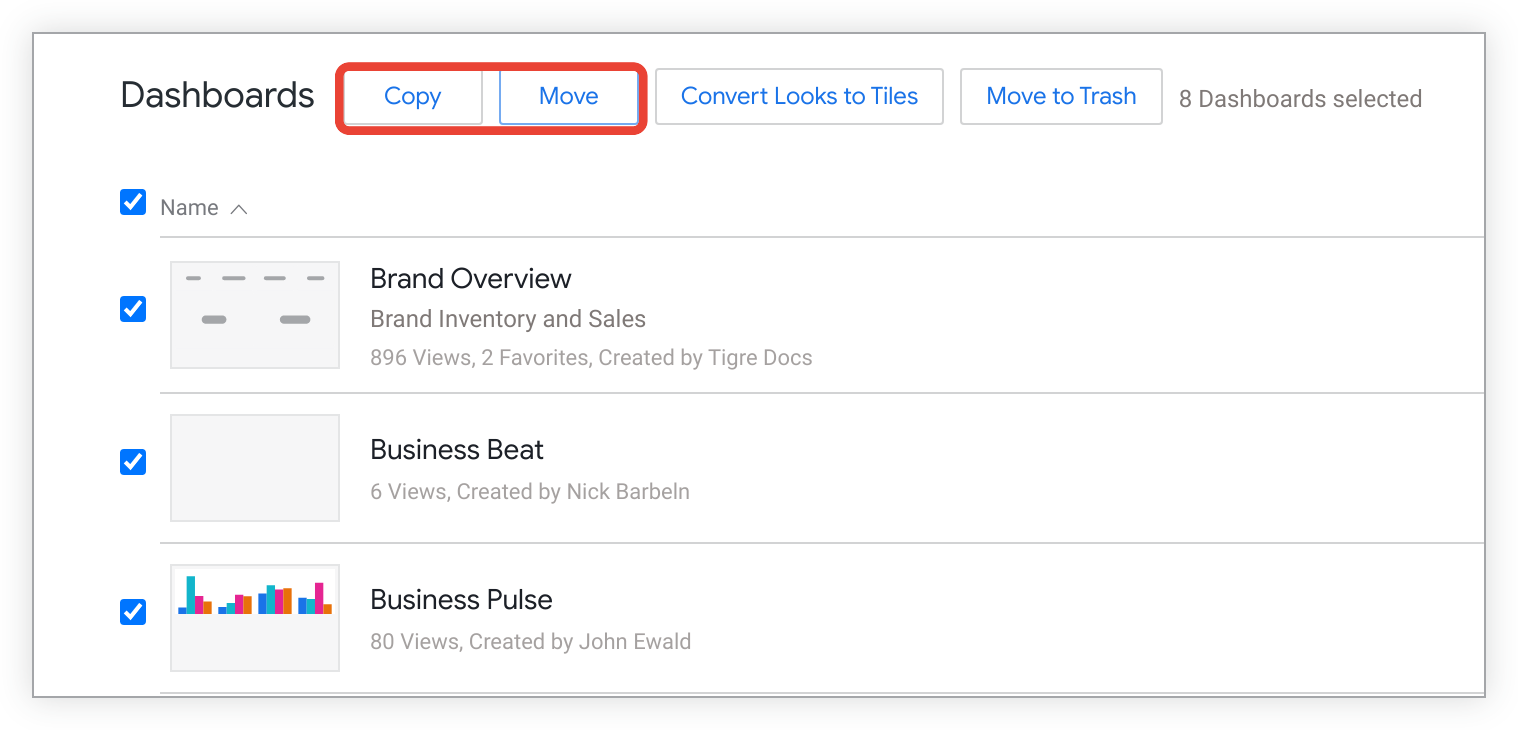
Select the checkbox for any items that you want to change. If you have the pre-built Looker homepage enabled and are in grid view, you can hover over a thumbnail to see the checkmark and then select it to include the Look or dashboard.
Once a box is checked, select Copy or Move.
In the Copy window or Move window, select the name of a top-level folder on the left to navigate to it.
Select a subfolder from the list, or navigate down to a subordinate subfolder. You can also enter the subfolder name into the Filter by title field to filter the list.
Select OK.
Converting Looks to query tiles
You can create a dashboard tile by linking to a saved Look (also known as a Look-linked tile), specifying text, or specifying a query directly. Saving many Looks that are only needed for a single dashboard can cause clutter. To avoid this, you can convert all tiles that are based on saved Looks to query tiles.
Then, you can choose to delete the source Looks, if they meet the following criteria:
- Not used in another dashboard
- Not marked as a favorite
- Not scheduled for delivery
- Not public
To convert Looks to query tiles, follow these steps:
From list view, select one or more dashboards from your folder.
Select the Convert Looks to Tiles button.
In the Convert All Looks to Tiles dialog, you can select the checkbox to move Looks to the trash and then hover over the link to see the list of Looks that are identified for deletion.
Looker shows this link only if there are Looks that can be deleted safely, such as those that are not scheduled for data delivery, not used in other dashboards, not favorited, or not public.
To prevent Looker from deleting the source Looks, make sure that the checkbox is not selected. Looker will keep all the Looks for now. You can delete the Looks manually later to clean up your folders.
Select Convert to convert all the dashboard's Look-linked tiles to query tiles.
Looker replaces each Look-linked tile with a new query tile that uses the same query and visualization settings as the original Look. If you opted to move Looks to the trash, those converted Looks no longer appear in folders.
If you later realize that you need a deleted Look, your Looker admin might be able to recover it for you, if your Looker admin team has not already emptied Looker's trash as part of their maintenance process.
Deleting Looks and dashboards
If you have the Manage Access, Edit access level for a folder, you can delete its Looks and dashboards.
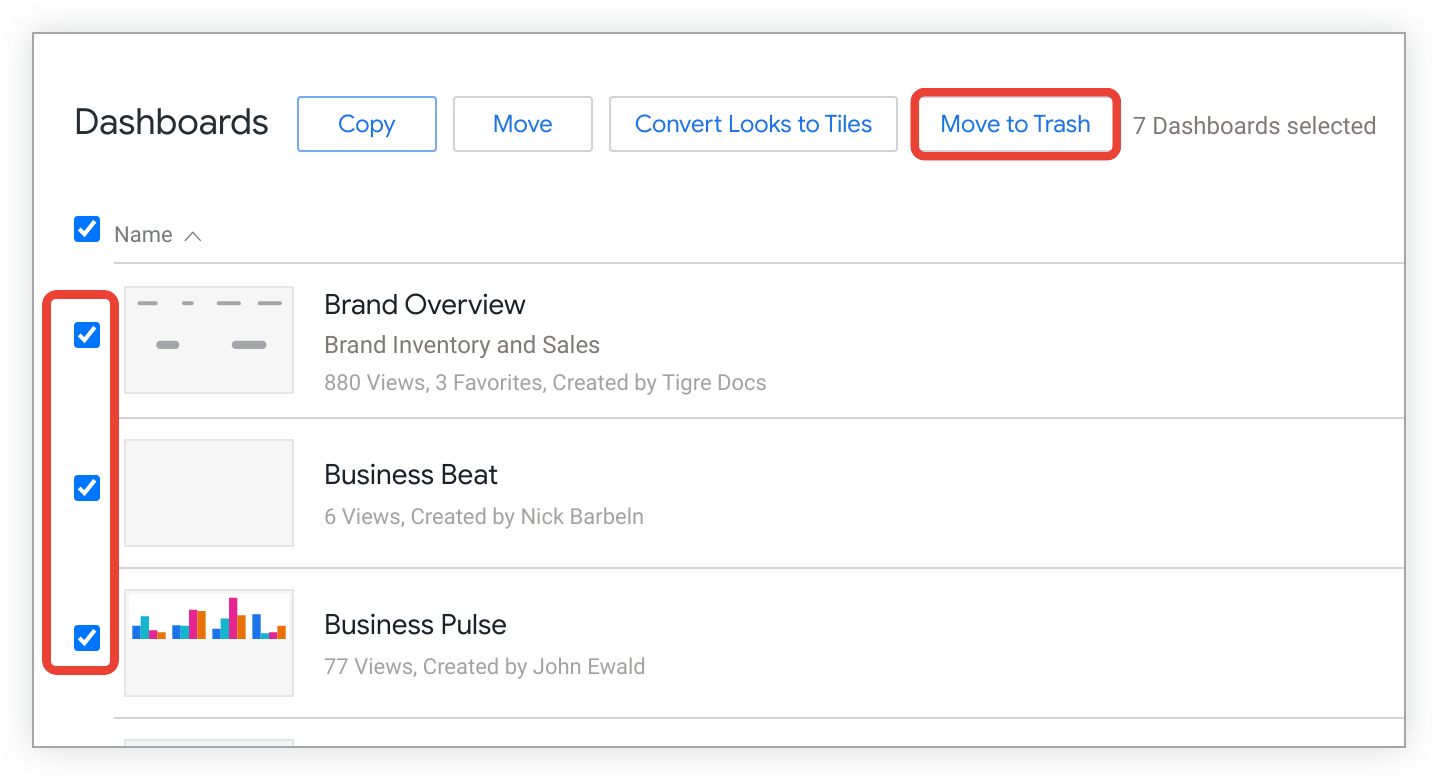
- Select the checkbox for each Look or dashboard that you want to delete.
Click Move to Trash.
In the confirmation window, click OK.
If you delete a Look that is the source for a dashboard tile, the dashboard's Look-linked tile returns an Element not found error.
For dashboards, the confirmation window may show an option to Move an additional X Looks associated with the above Dashboards to the trash.
When the option is selected, Move an additional X Looks associated with the above Dashboards to the trash deletes any Looks that are associated with the dashboard. However, Looker only deletes those Looks they aren't scheduled for data delivery, used in other dashboards, favorited, or public. Hover over the link at the bottom of the confirmation window to see the list of Looks that are identified for deletion.
If you don't see the Move an additional X Looks associated with the above Dashboards to the trash option, Looker hasn't identified any Looks that can be deleted safely.