How To Create a Windows Server VM instance in Compute Engine
Bukola Ayodele
Developer Advocate
If you want to create a Windows Server Virtual Machine (VM) in Compute Engine, it's as quick and easy as clicking a few buttons!
In this blog post, we’ll learn how to create a Windows Server VM in Compute Engine. If you want to follow along with this blog post, check out the documentation and in-console tutorial.
Step 1
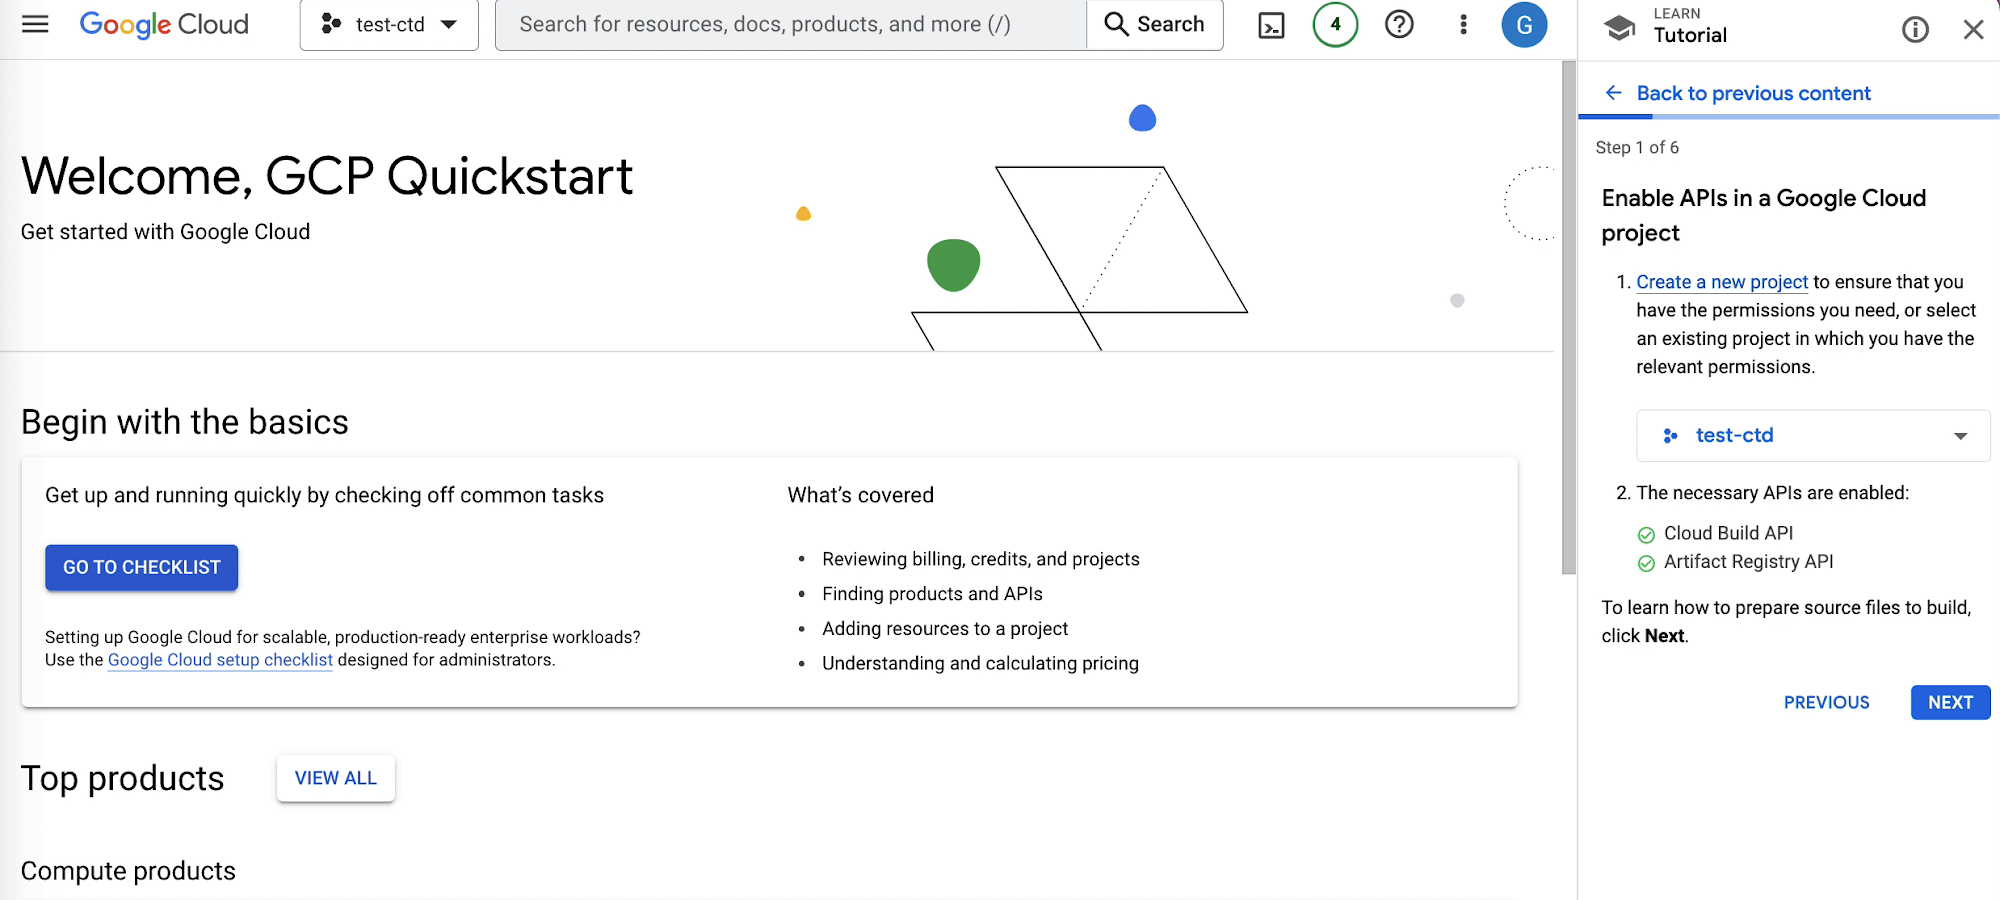
The first step is to create a new project; we will use an existing project called “test-ctd”. If you are unable to use an existing project, you will need to create a new project. Next we’ll enable the Compute Engine API which is necessary for creating a Windows Server VM instance. If you have billing enabled and or are in your free trial mode you’ll be able to enable the necessary APIs with a button labeled "Enable Apis".

Step 2
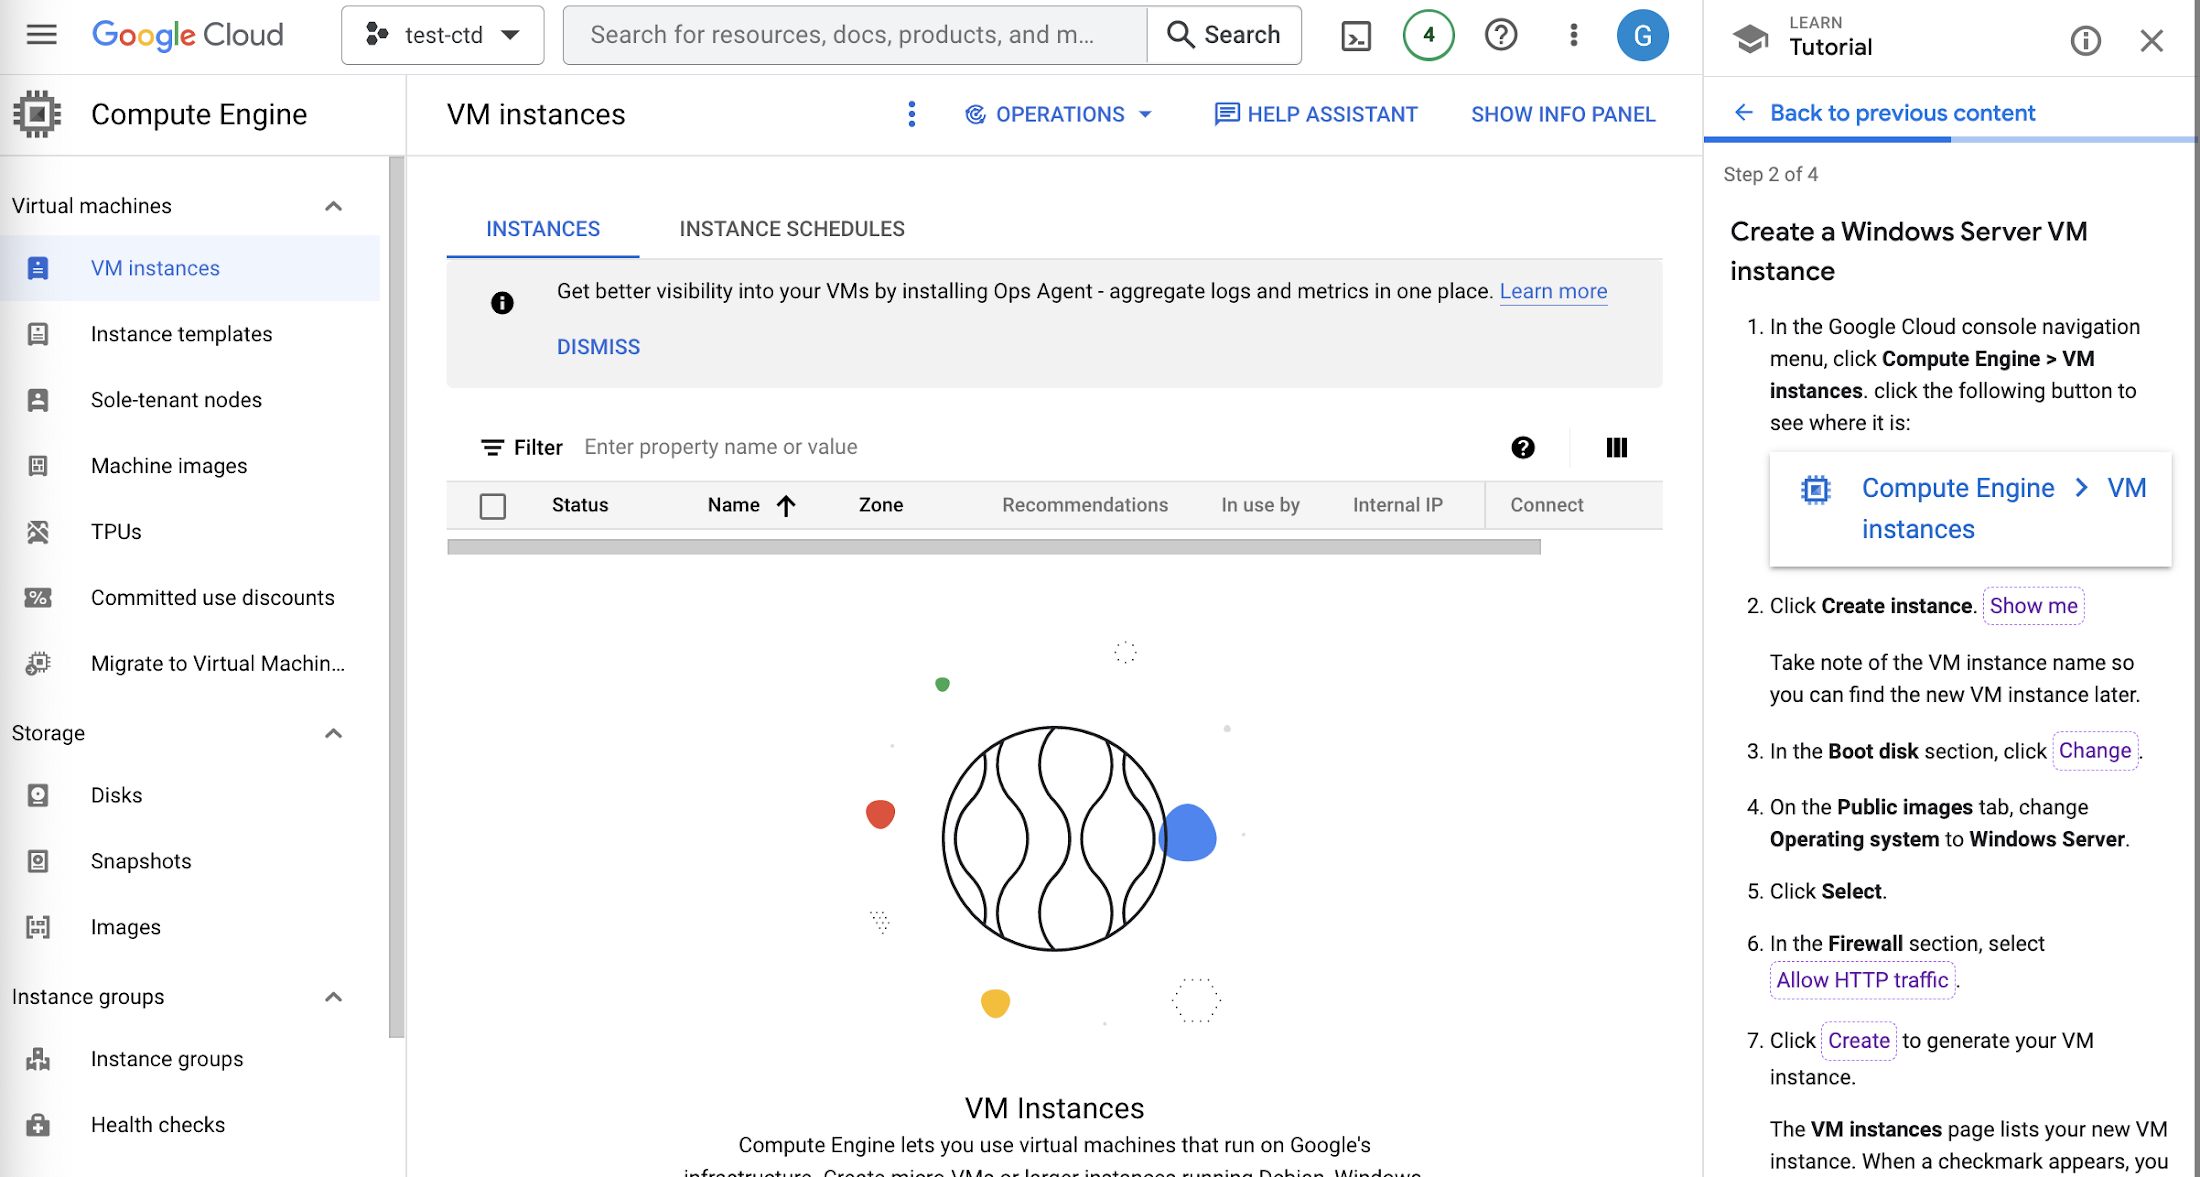
The second step is to create the Windows Server VM instance. In the Google Cloud console navigate to Compute Engine > VM instances, this where you’ll be able to create VM instances from micro-VMs to larger instances like Debian, Windows or Linux.

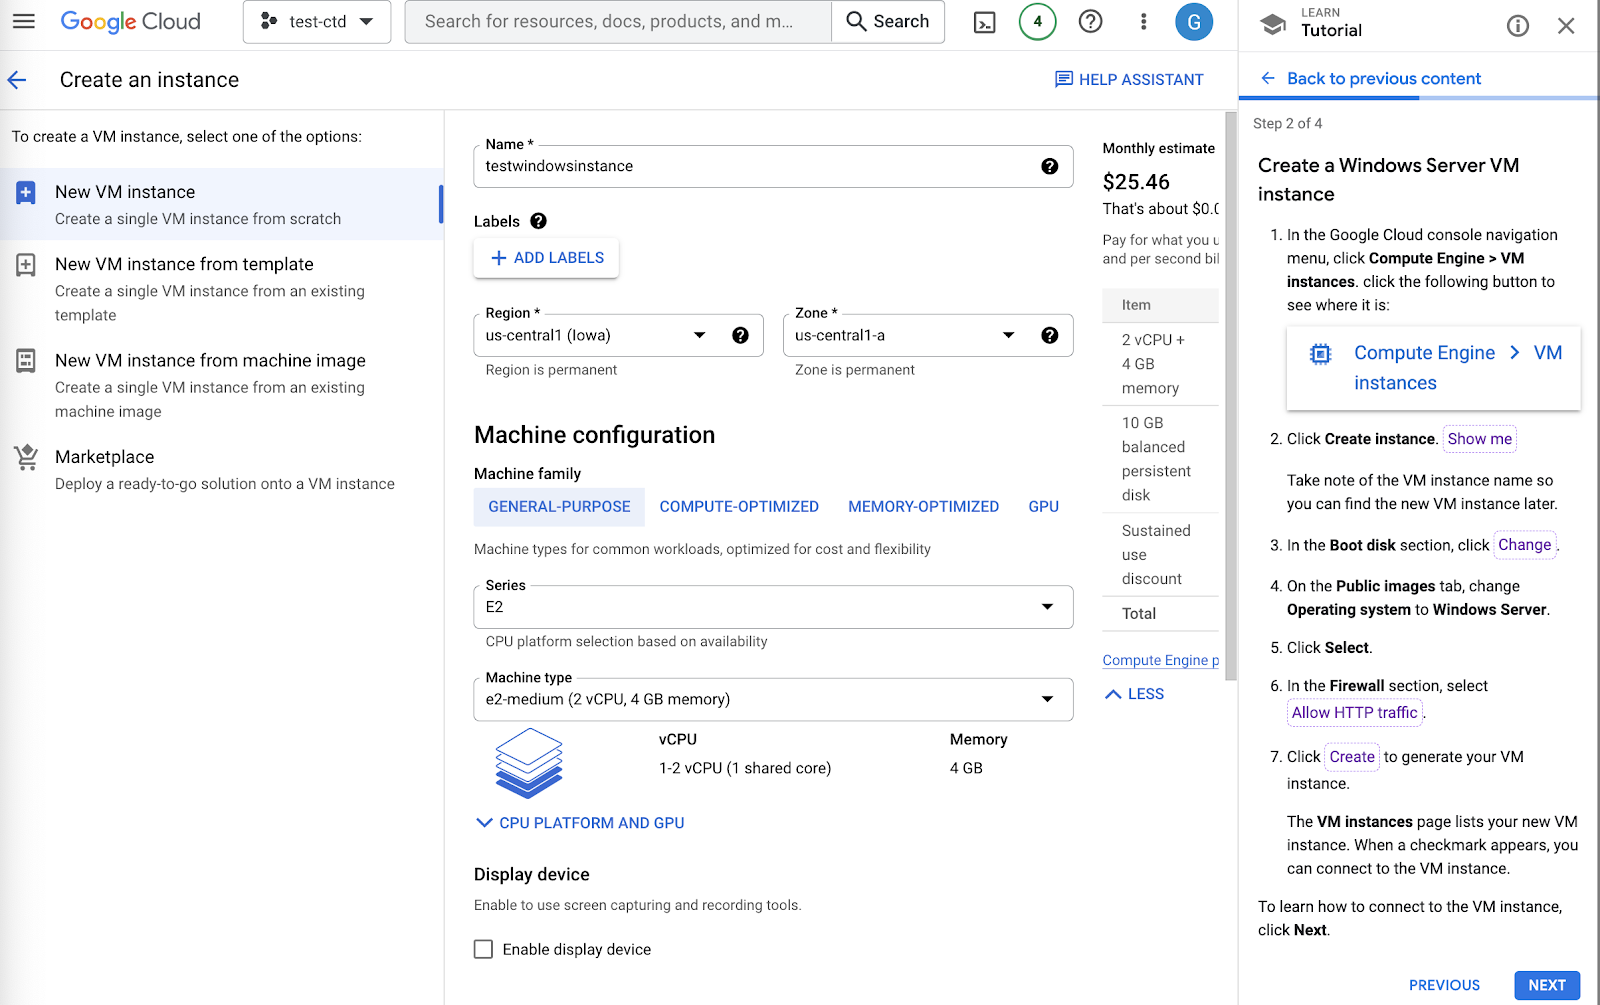
We’ll click the Create Instance button, and then fill in the requirements to create a VM instance. Starting first with the name, we’ll use the name testwindowsinstance. Make sure to remember the name because we’ll need it to find the new instance later.

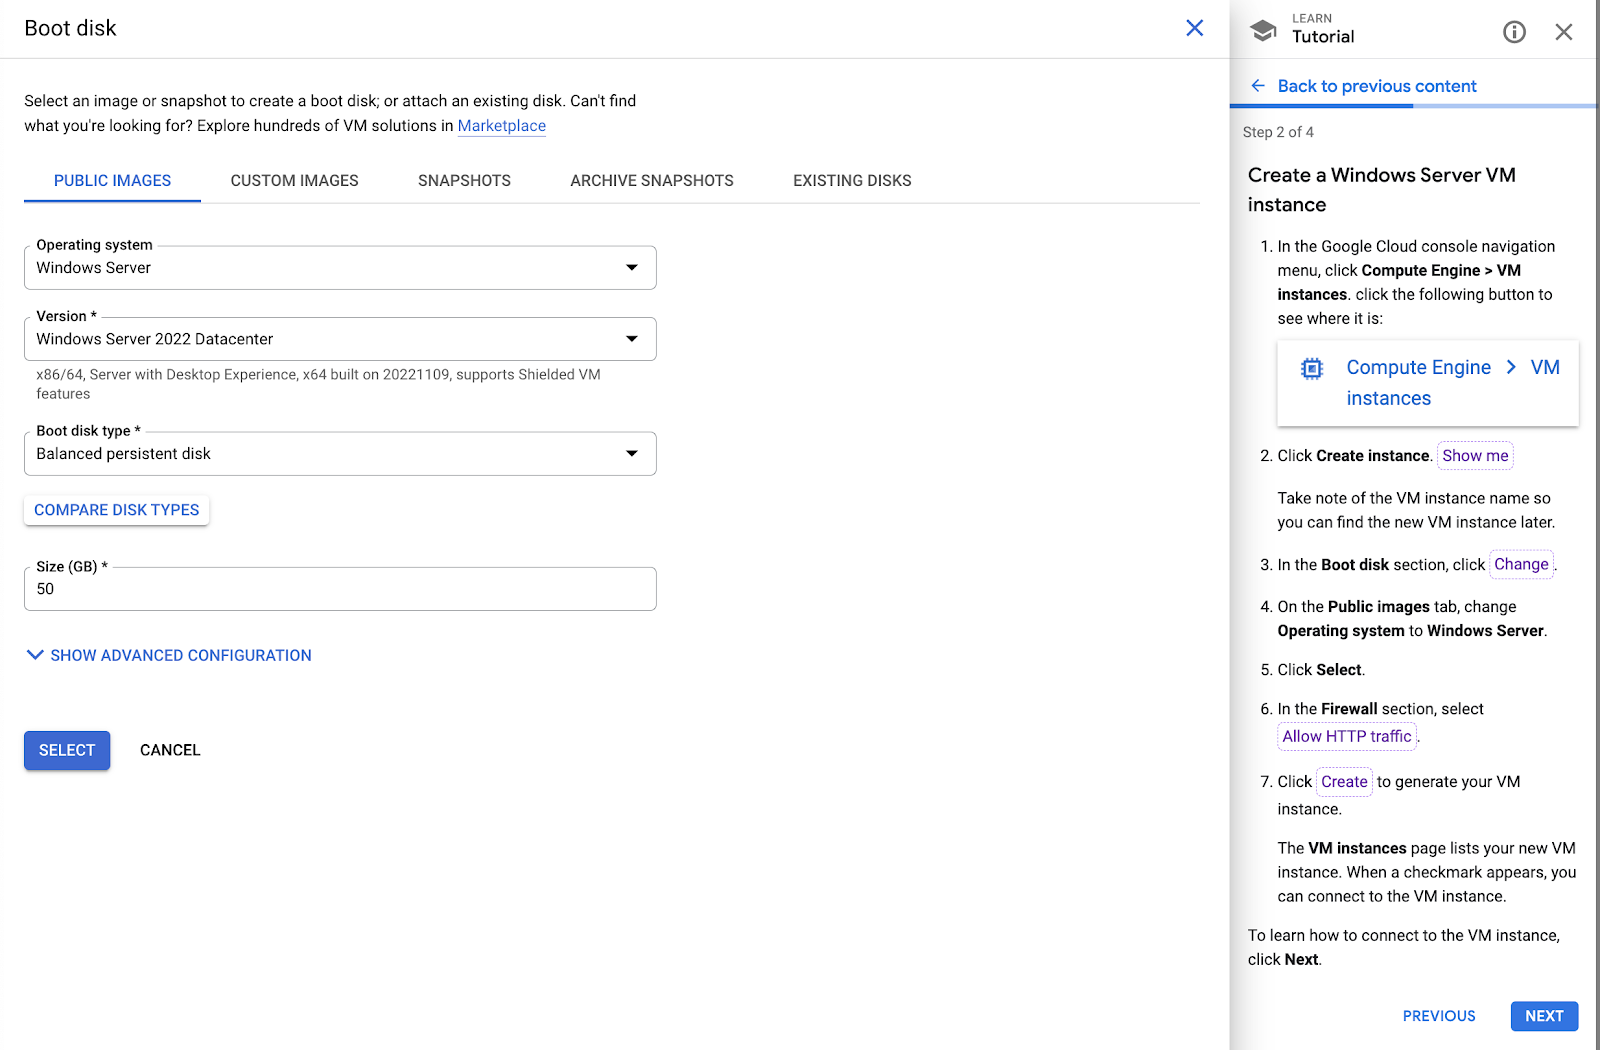
Next step is to change the Boot Disk; we’ll scroll down to the section that has Boot Disk and click the button labeled CHANGE. On the Public images tab, we’ll change the operating system to Windows Server and choose Select.

Next we’ll scroll down to the Firewall Section and select Allow HTTP Traffic, this will allow specific network traffic from the Internet.
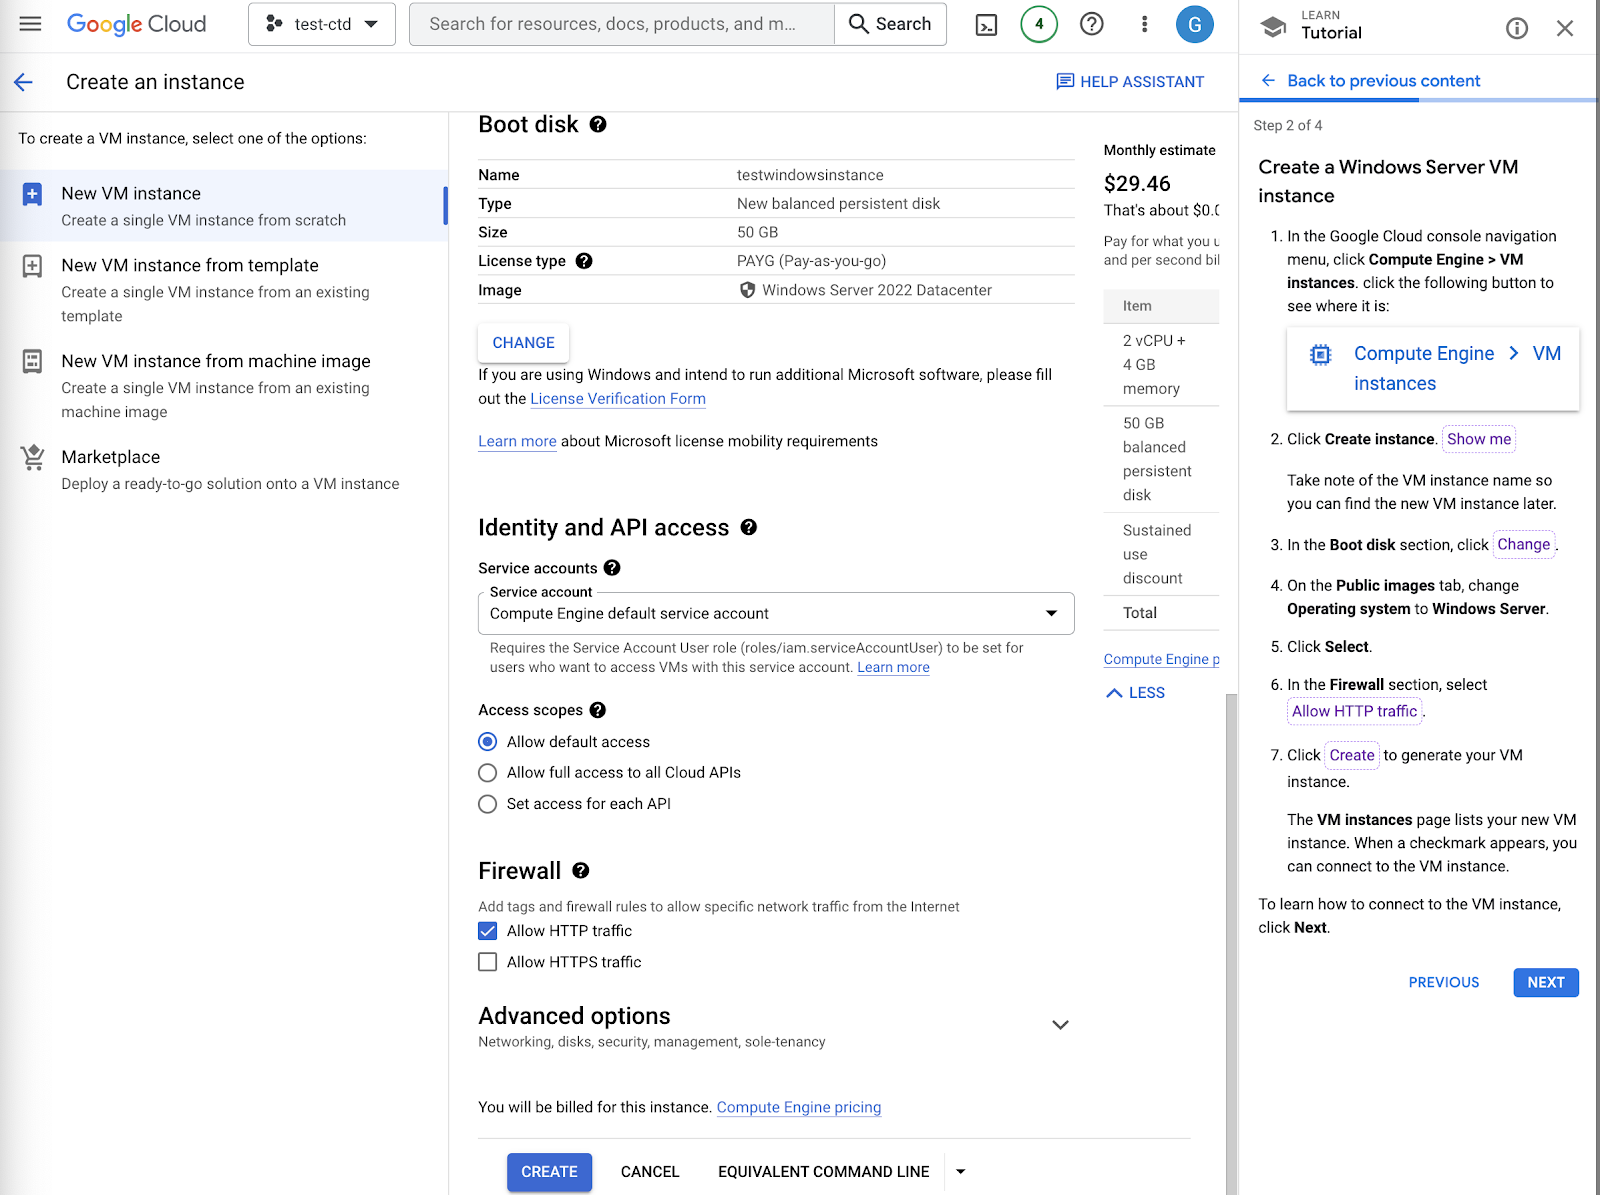

Finally, we’ll click the button labeled Create to generate a Windows VM instance.
Step 3
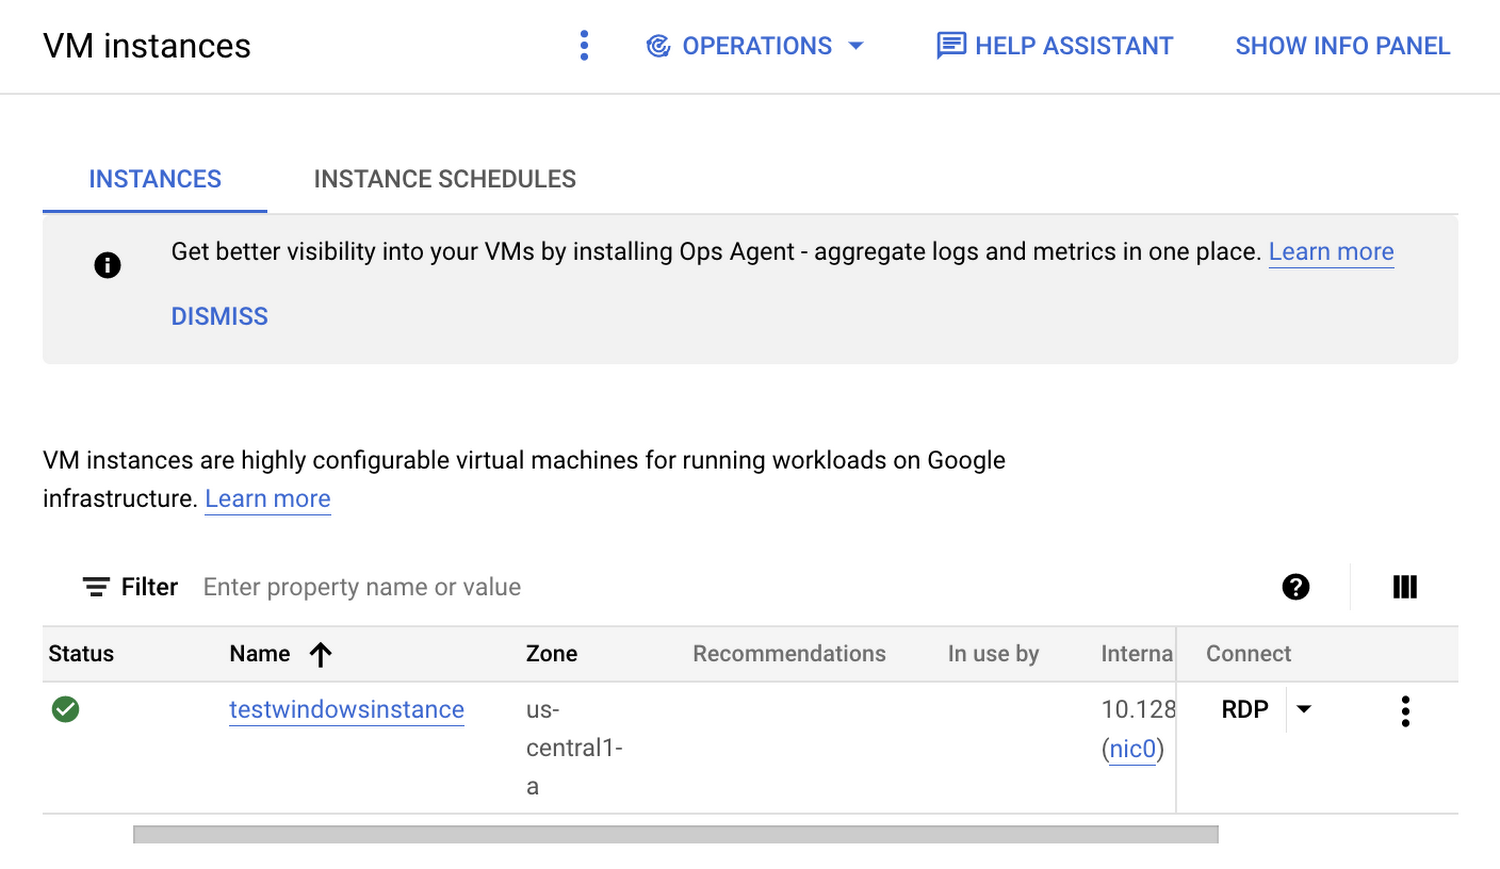
With the Windows Server VM instance created, it's time to connect to the VM instance. If there is a green check mark next to the Status, this indicates that the VM is running.

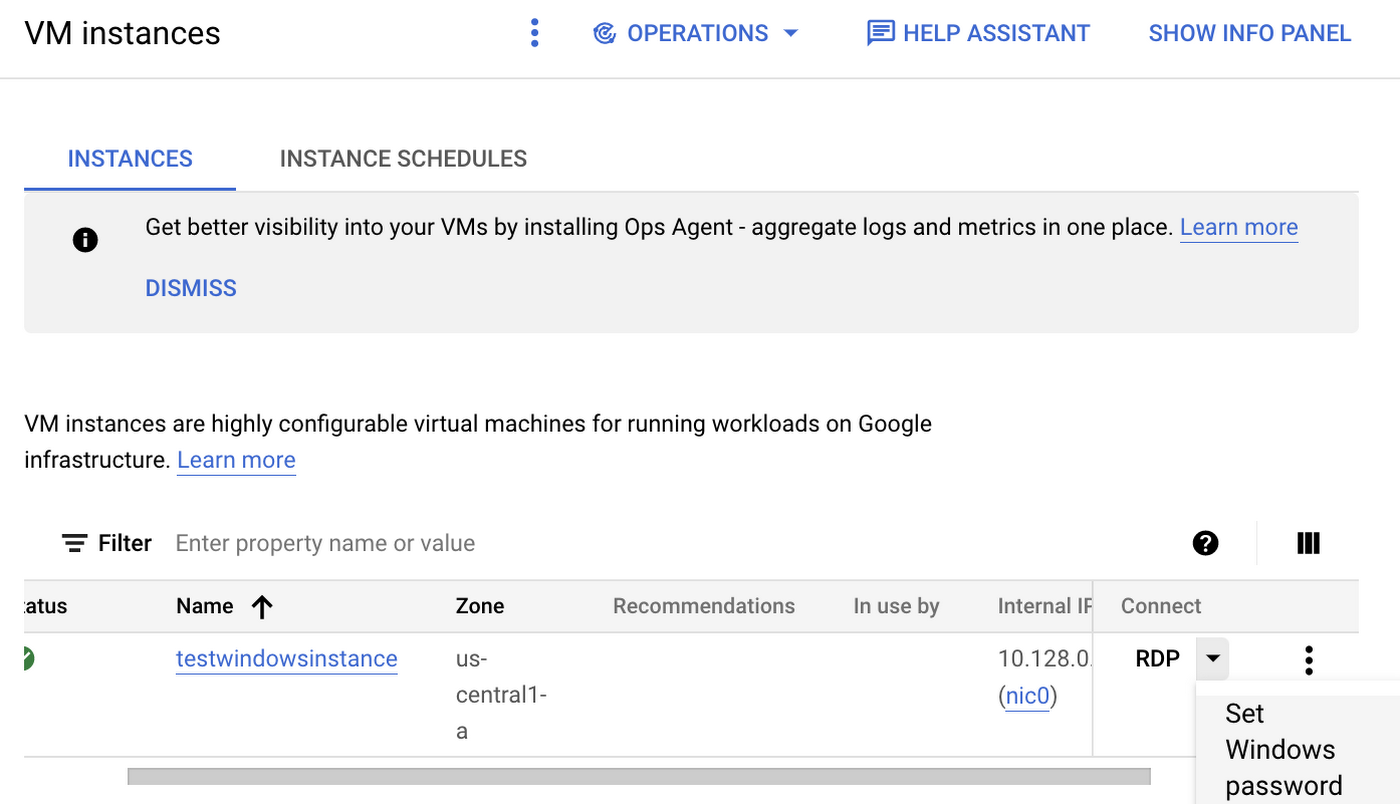
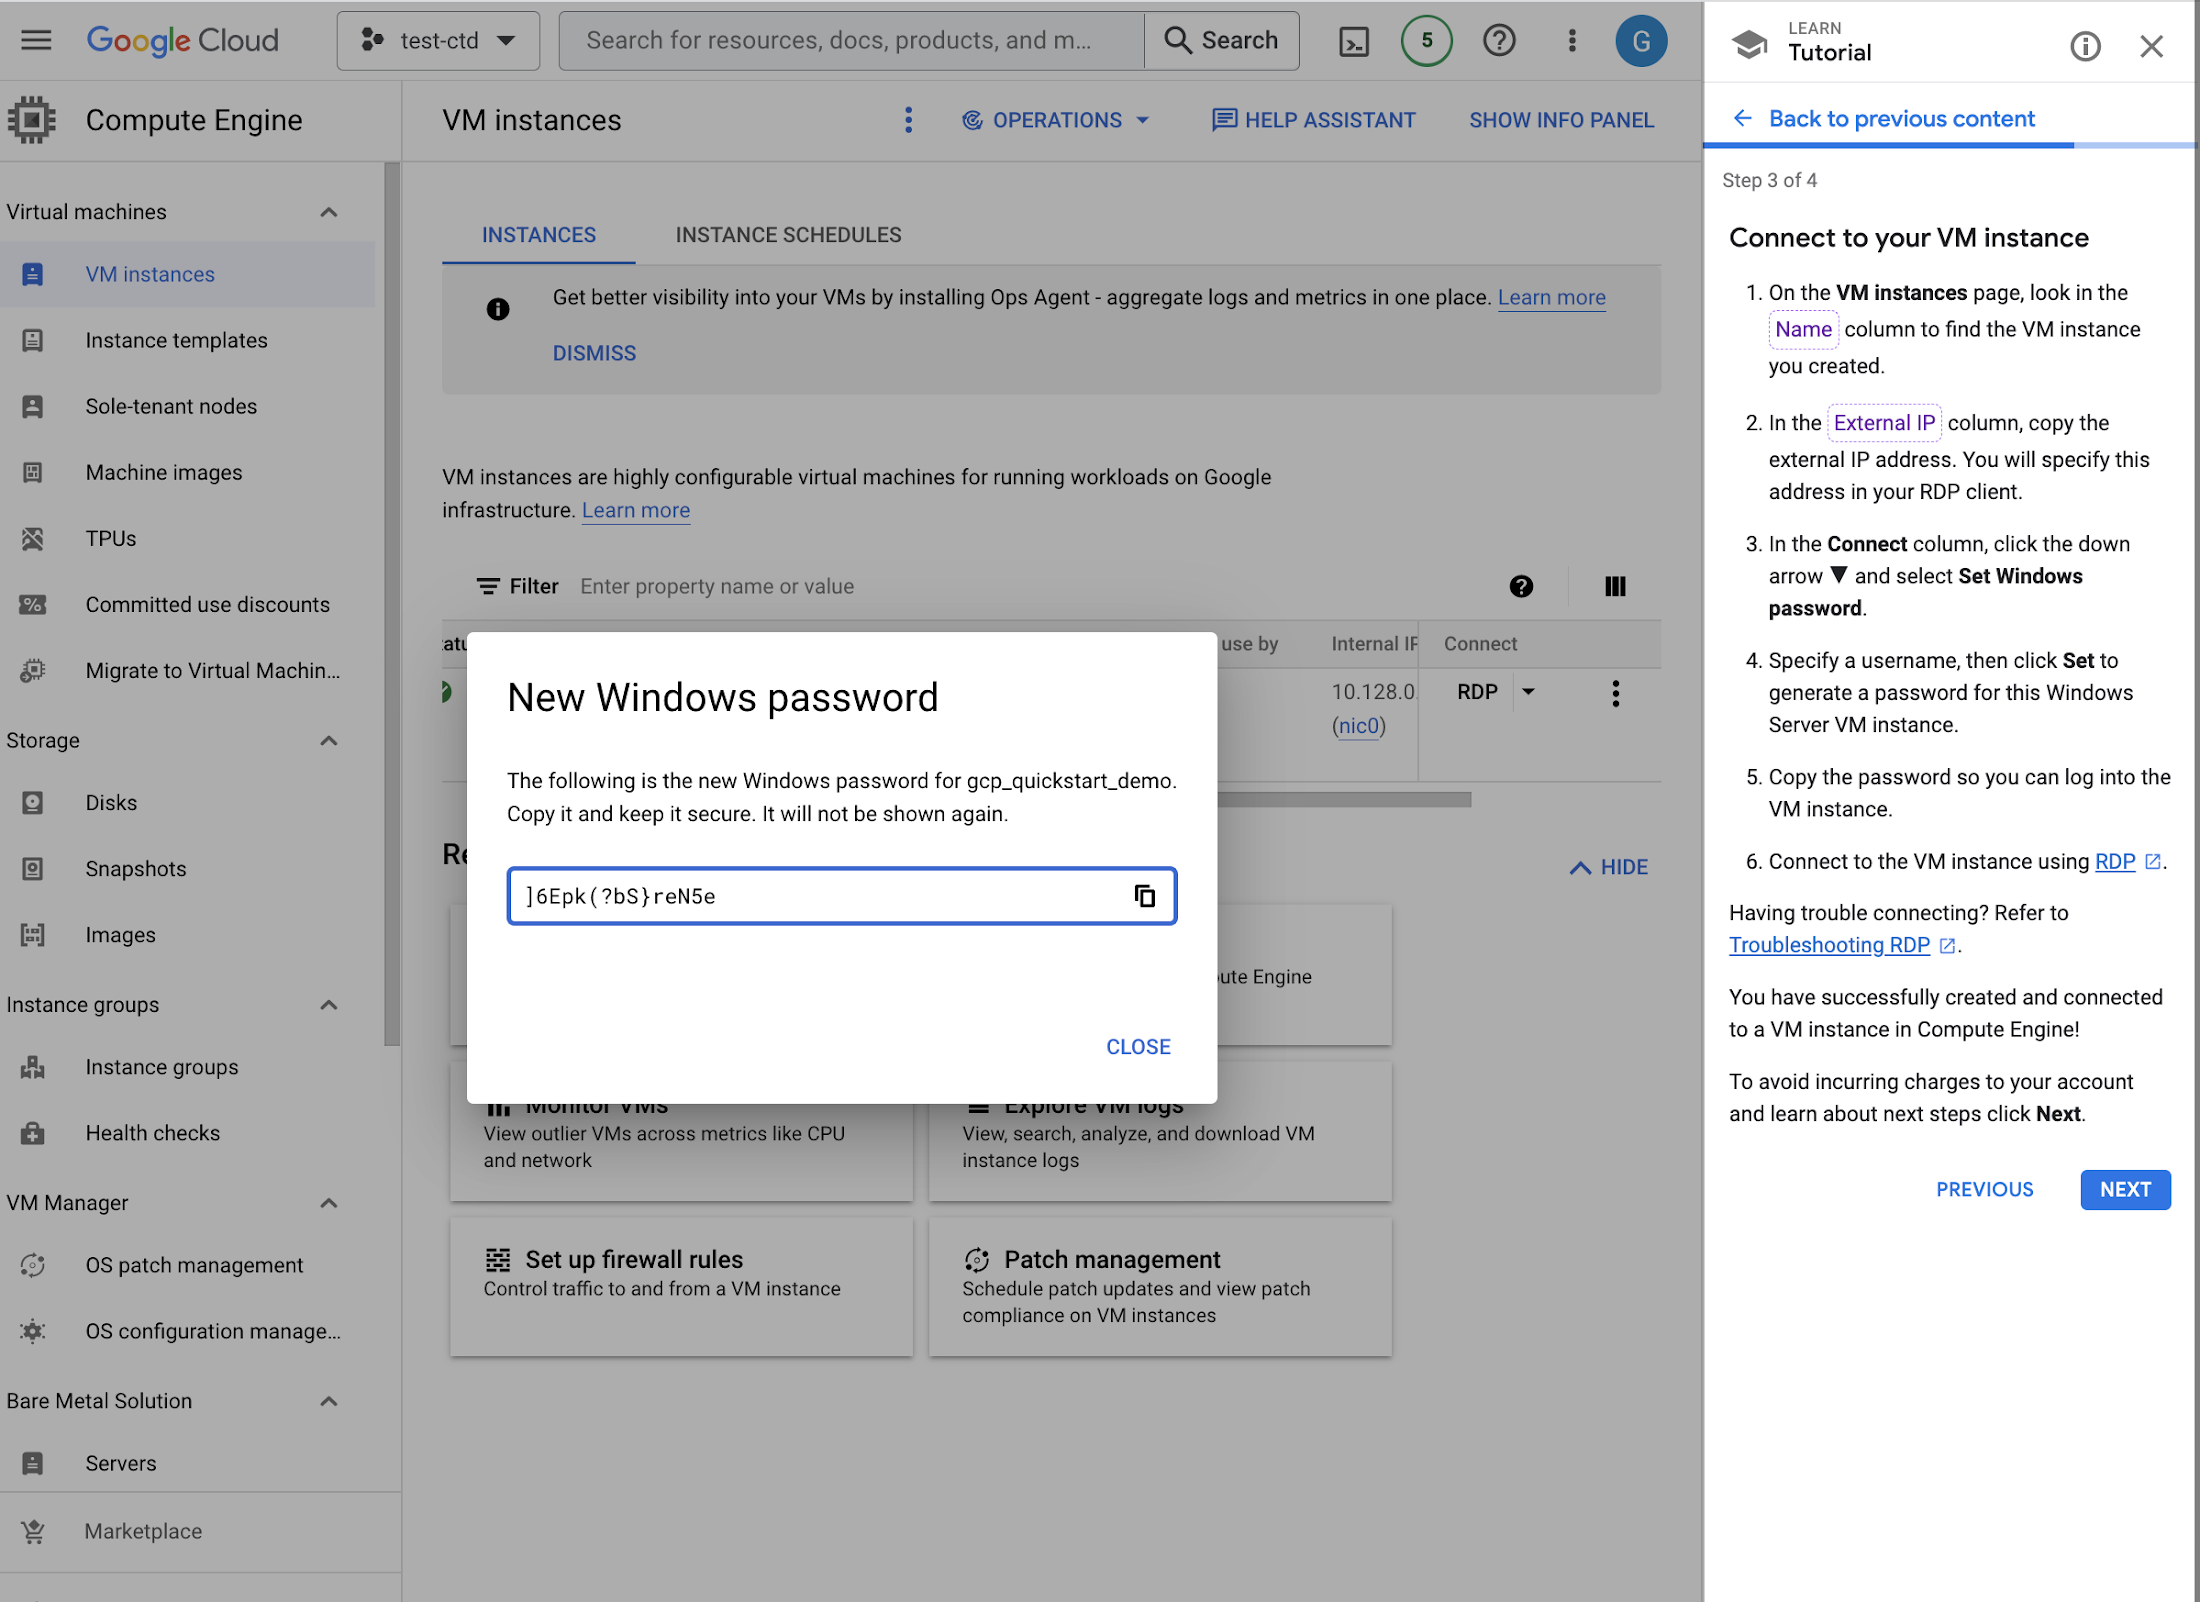
To set a password for the VM, use Remote Desktop Protocol. Navigate to Connect > RDP and choose Set Windows Password. This brings us to a screen where we will choose a username, then a password is automatically generated for this Windows Server VM instance. Make sure to copy the password so you can log into the VM instance. Then you’ll be able to connect to the VM instance using RDP.


Step 4
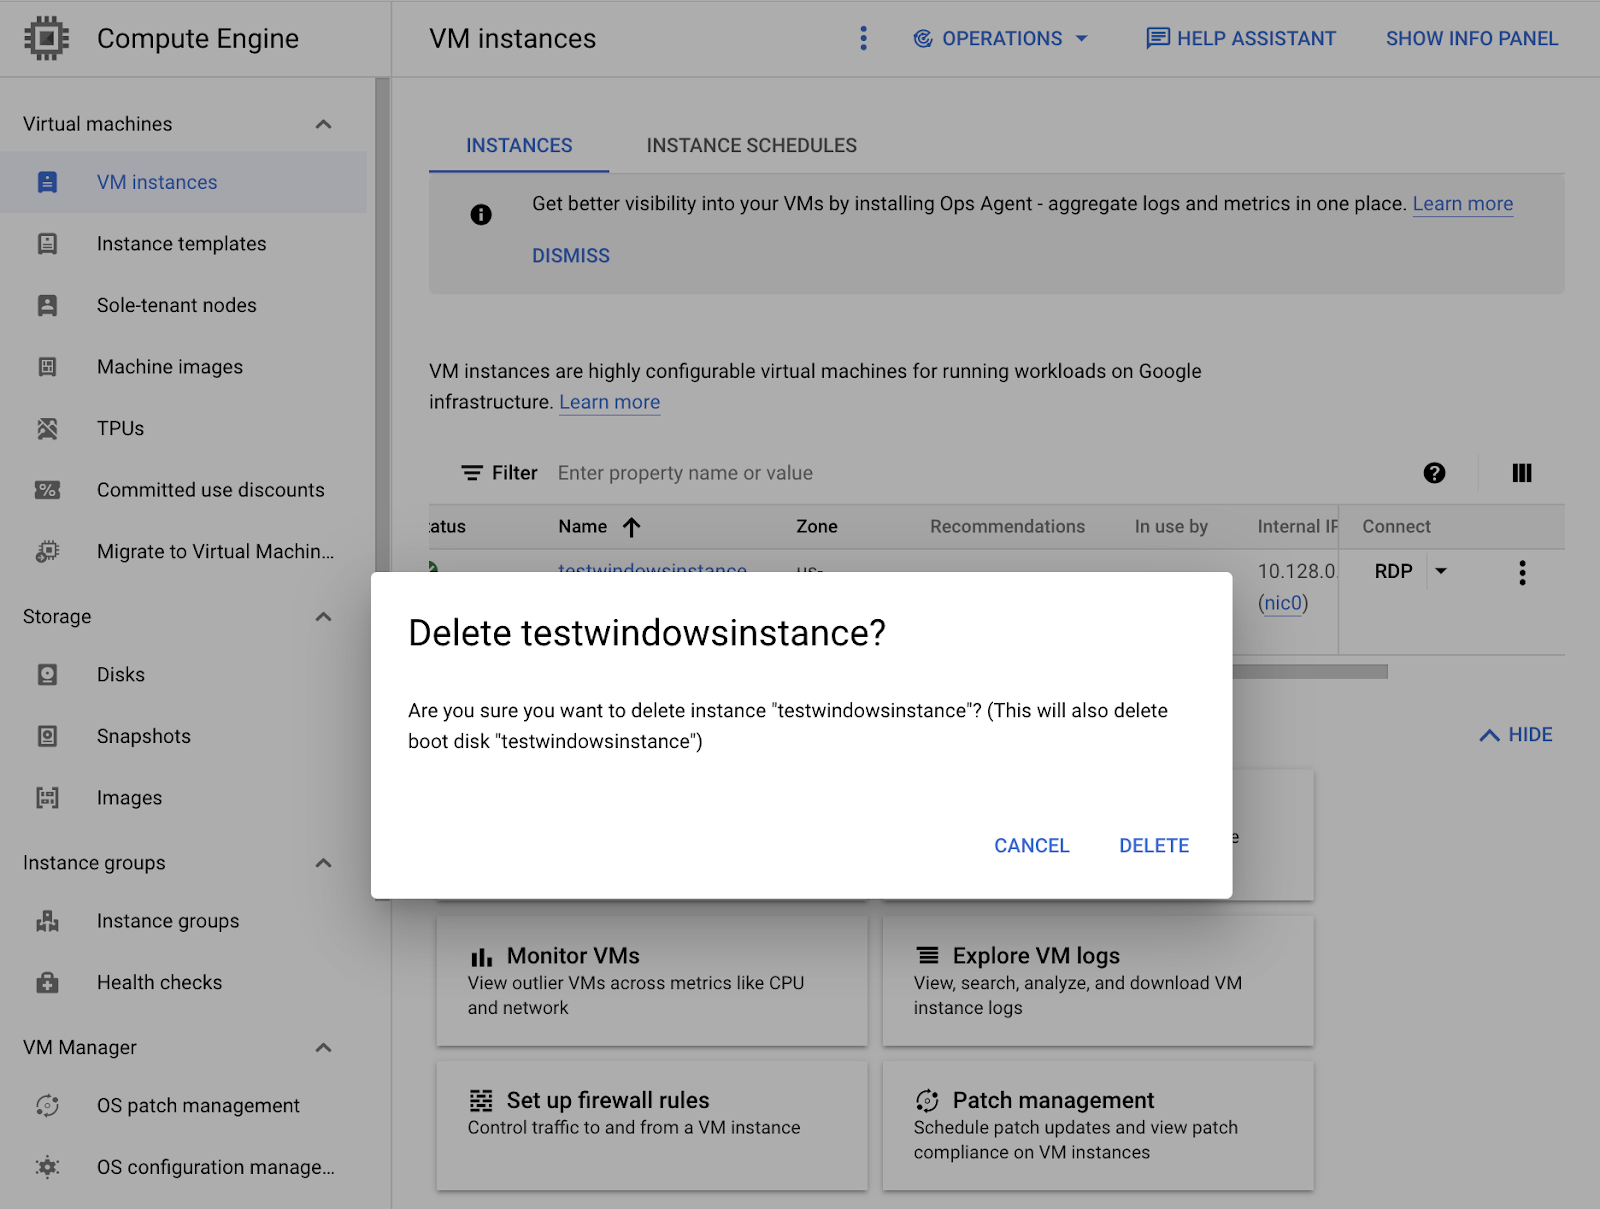
For the final step, we will delete the VM instance created to prevent incurring charges. Return to Compute Engine > VM Instance to the side of the instance there is a menu icon that will open a menu bar that allows you to delete the instance. Click DELETE to remove the instance.

In Conclusion
There you have it! You’ve created a Windows VM Instance in Compute Engine. If you’d like to follow an interactive tutorial, check out this Create a Linux VM instance in Compute Engine tutorial.


