Enhance the security of your DialogFlow CX chatbots with Apigee
Pallavi Vageria
Senior Strategic Cloud Engineer, Google Cloud
Organizations that want to create a chatbot often turn to Dialogflow, Google Cloud’s service for creating conversational agents that can understand and respond to natural language. Available in two editions, many organizations choose Dialogflow CX for its advanced chatbot capabilities. However, integrating a chatbot with your website in the absence of a middleware solution may risk directly injecting sensitive credentials like service account keys into the frontend, or opting for unauthenticated URLs. This is not a best practice for production-grade systems and can result in exposing your agent and Google project ID, leaving them vulnerable.
You can mitigate this by introducing an Apigee layer between your frontend and DialogFlow CX APIs. Apigee is a full lifecycle API management platform offered by Google Cloud that enables businesses to design, secure, publish, analyze, monitor, and monetize their APIs. Apigee acts as a robust layer between backend services and clients that access them, providing a multitude of features and benefits. In this context, Apigee provides:
-
Centralized authentication and authorization: Apigee acts as a secure gateway, handling all authentication and authorization processes. This eliminates the need to expose credentials on the frontend.
-
Controlled access: Apigee allows you to define fine-grained access policies, determining which frontend components can interact with specific DialogFlow CX APIs.
-
API key management: Apigee helps manage API keys, simplifying the process of rotation and revocation if a compromise occurs.
-
Threat protection: Apigee offers built-in features like rate limiting, quota management, and spike arrest, safeguarding your APIs from abuse and potential attacks.
By using Apigee as an intermediary, you not only enhance the security of your chatbot integration but also gain a powerful tool for managing and monitoring your APIs. In this post we’ll walk you through how to configure Apigee to improve security for conversational agents.
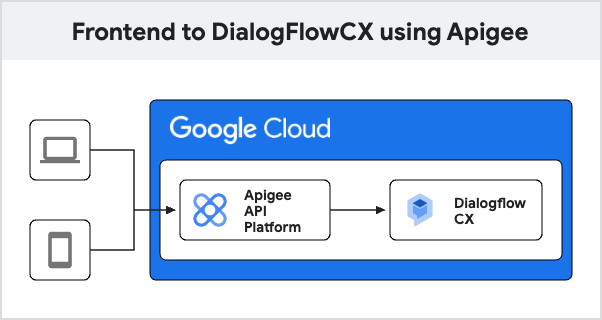
Creating and configuring the Apigee Proxy for conversational agents
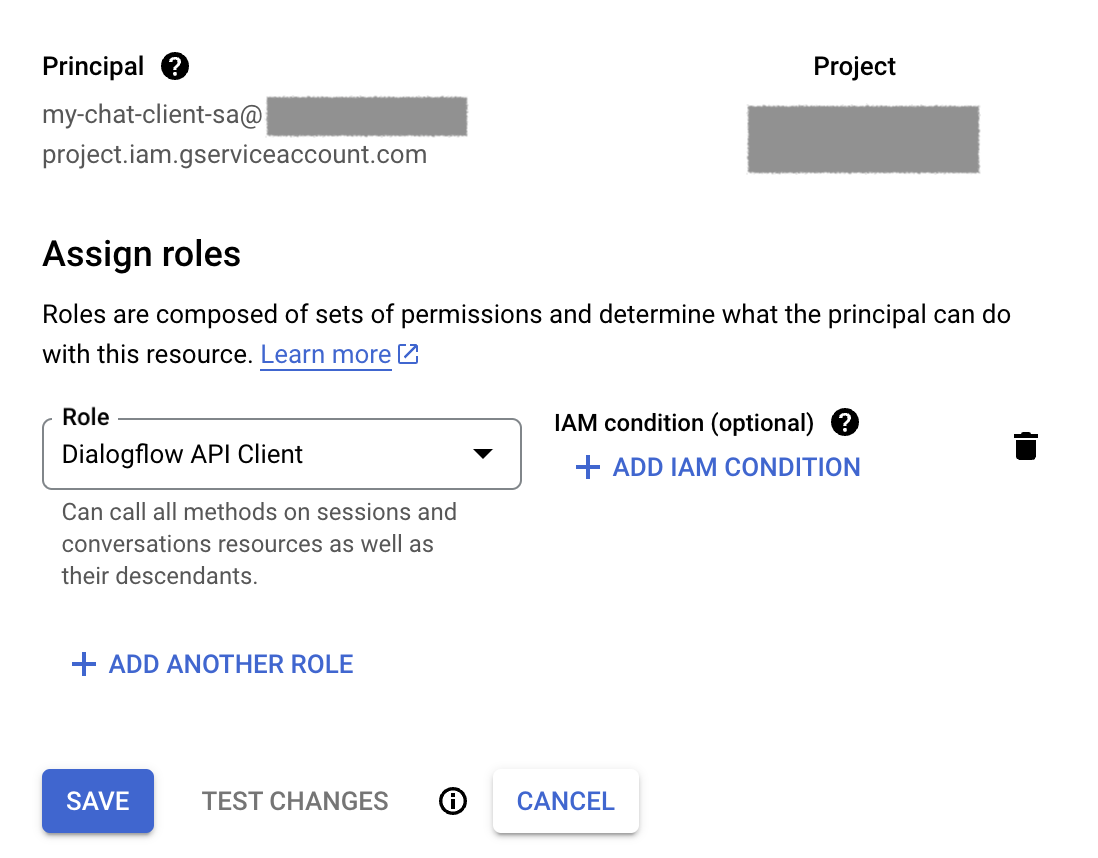
4. Create a service account and grant “DialogFlow API Client” role.
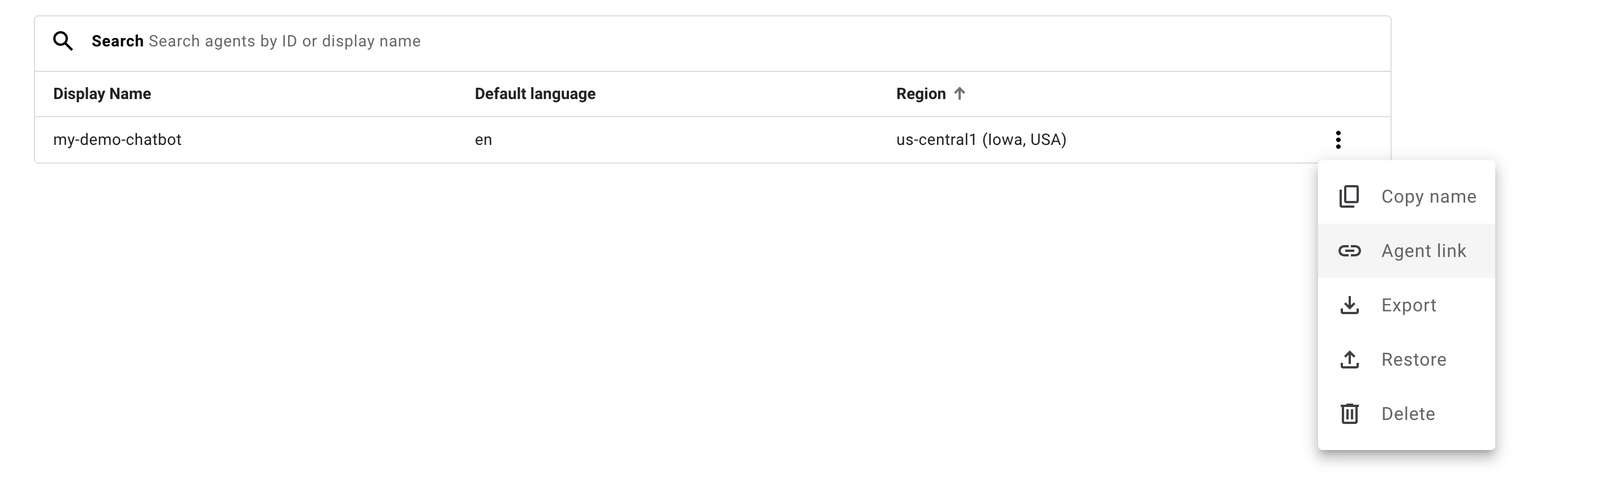
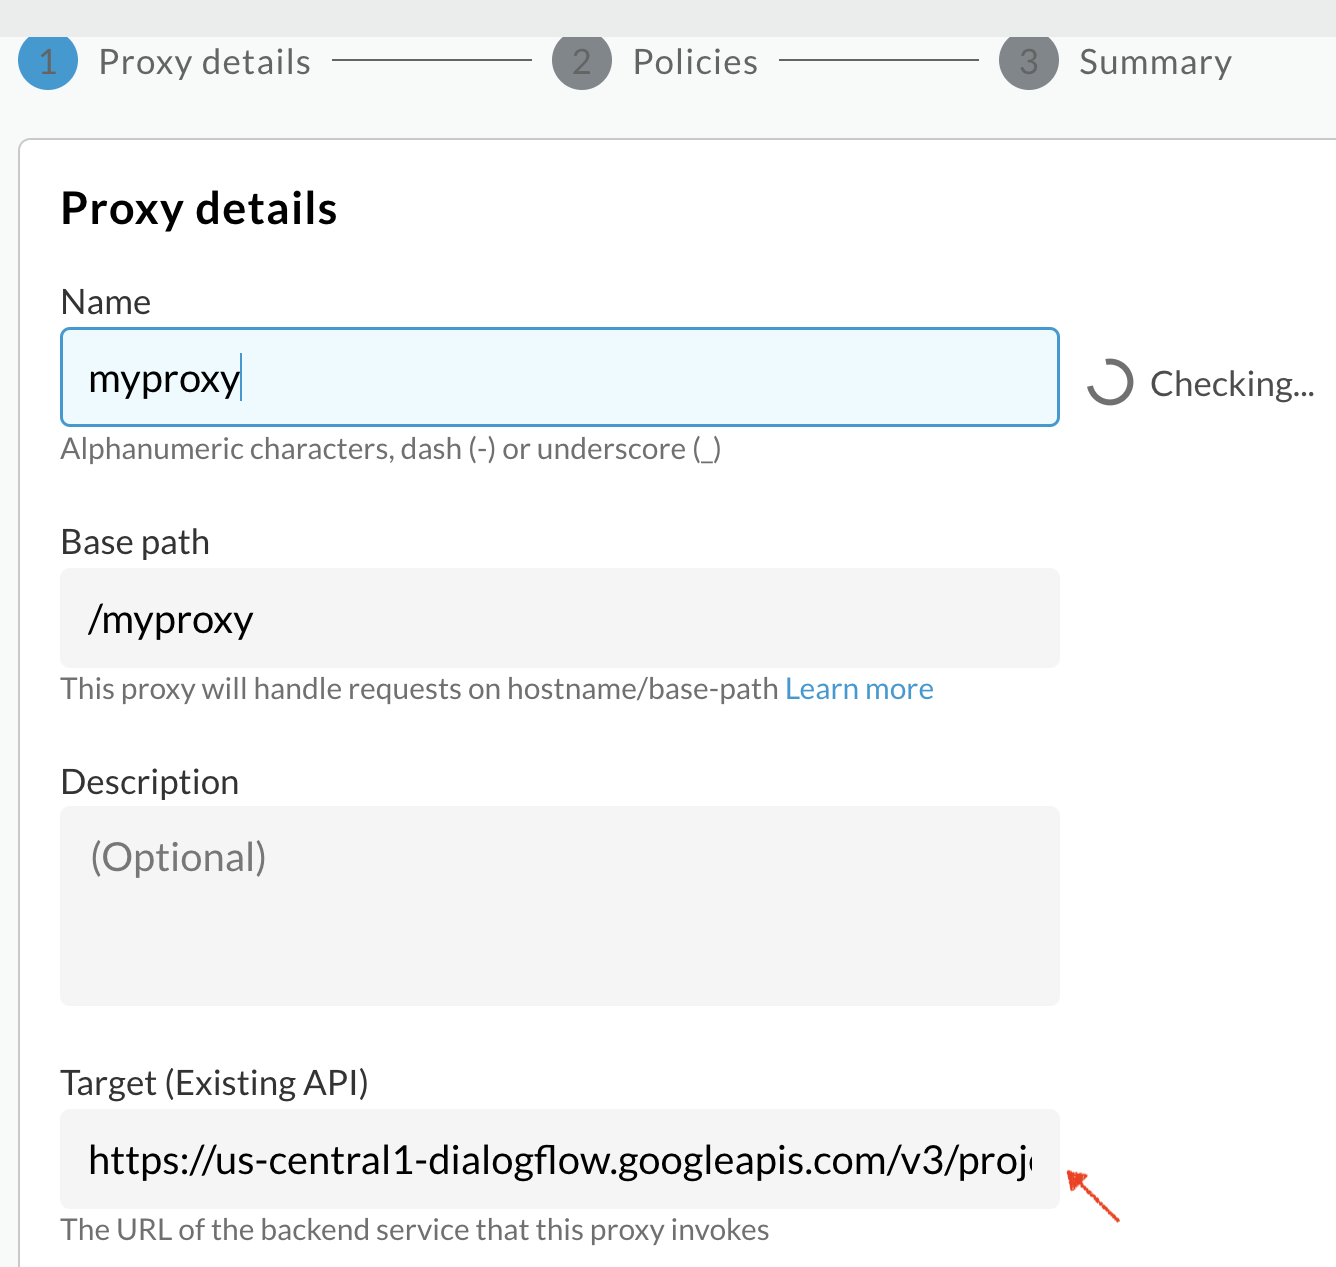
5. Go to apigee.google.cloud and click on ‘Create a Proxy’ of type ‘Reverse Proxy’, give it a name, e.g., ’myproxy’.

6. Configure the target endpoint as the DialogFlow CX Detect Intent API, replace the project id, agent id and location appropriately.
7. In the Proxy Develop tab, add <GoogleAccessToken> and <Scopes> in the HTTP target connection as shown below.

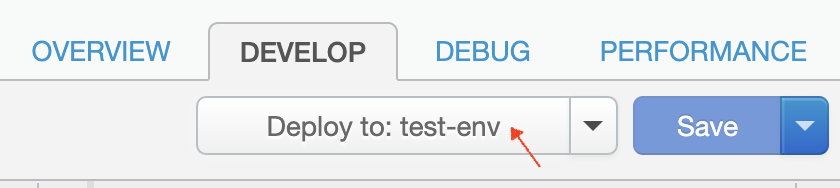
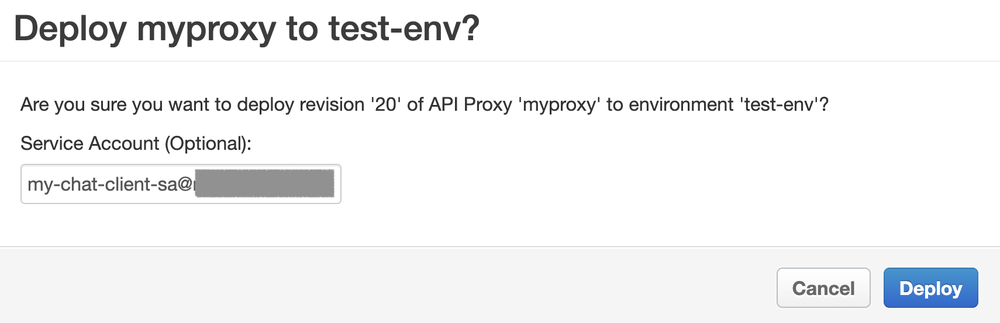
8. Deploy the proxy on the available environment. In this step, it's important to use the Service Account which you created earlier. This Service Account will be used to authenticate requests to the DialogFlow CX API.
9. Test your proxy through any API Client. You should see a response from the DialogFlow CX Intent API.
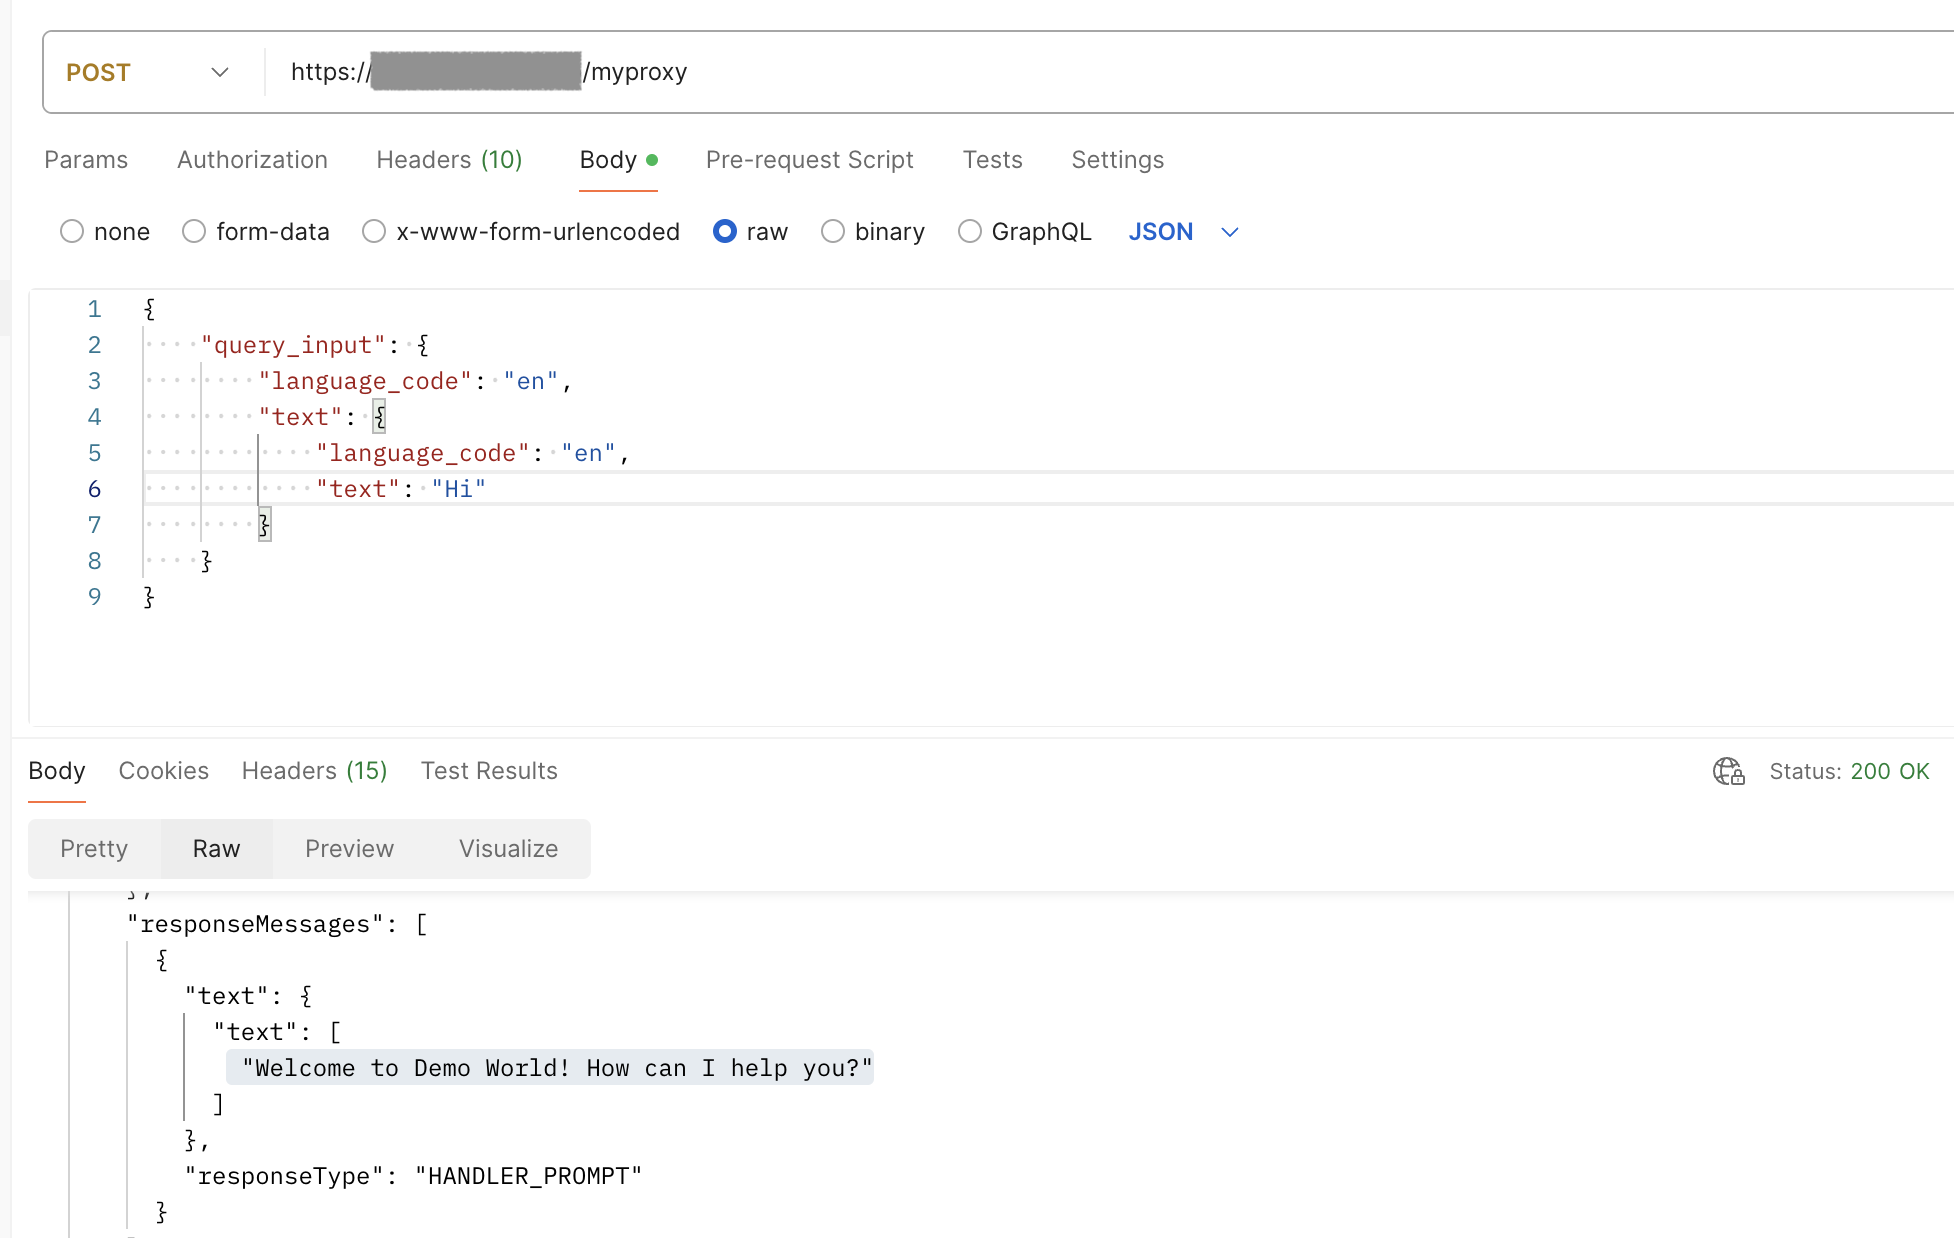
Whoa! Your proxy should be working and interacting with the DialogFlow CX.
You can verify on the Apigee debug console to trace the full path of the request.
Next steps
Now that you have your first proxy working, you are ready to take the next steps. You can:
-
Configure the Apigee Oauth policy to add authentication of the users invoking the proxy from the frontend
-
Add the Spike Arrest and Quota policy as per requirements
You can use this Apigee Proxy URL to embed in your website or chatbot frontend. With Apigee proxies, you now explore the power of effective API management, user access control, quota management, as well as monitoring and monetizing your APIs.