Who is this street artist? Building a graffiti artist classifier using AutoML
Alex Osterloh
Big Data Product Specialist
What do I know about graffiti or street art? Honestly, only a little. But I did watch all the Banksy documentaries, and I had a lot of fun hunting down his walls in New York a few years ago.
As a Data Specialist at Google Cloud, I am mostly involved with customer use cases around data engineering and machine learning. But I ran into my own machine learning use case when a few weeks ago a fellow Googler approached me with an interesting machine learning question.
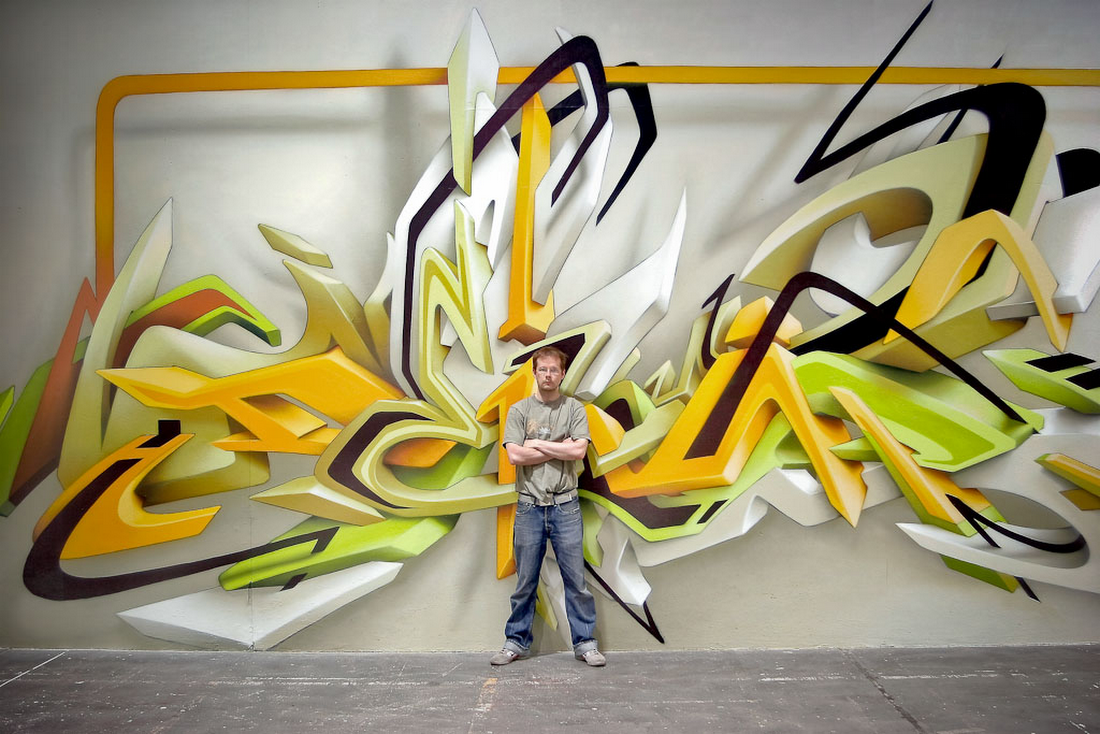
His friend Mirko Reisser is the well known graffiti artist, DAIM. Both wondered if machine learning could help educate people more about the works of art that people walk by every day.
We came across this idea just as AutoML Vision was released in alpha on Google Cloud Platform—at time of writing, AutoML Vision is now in public beta. Both artists shared some images from their private archives across a number of known urban artists. A few hours later I came back to them with a working model.
While this fun use case is about identifying urban artists, AutoML Vision is already used by customers like Disney to solve real world problems, as we discussed here.
Let’s see where AutoML fits in the overall machine learning offering from Google Cloud.
What is AutoML Vision?
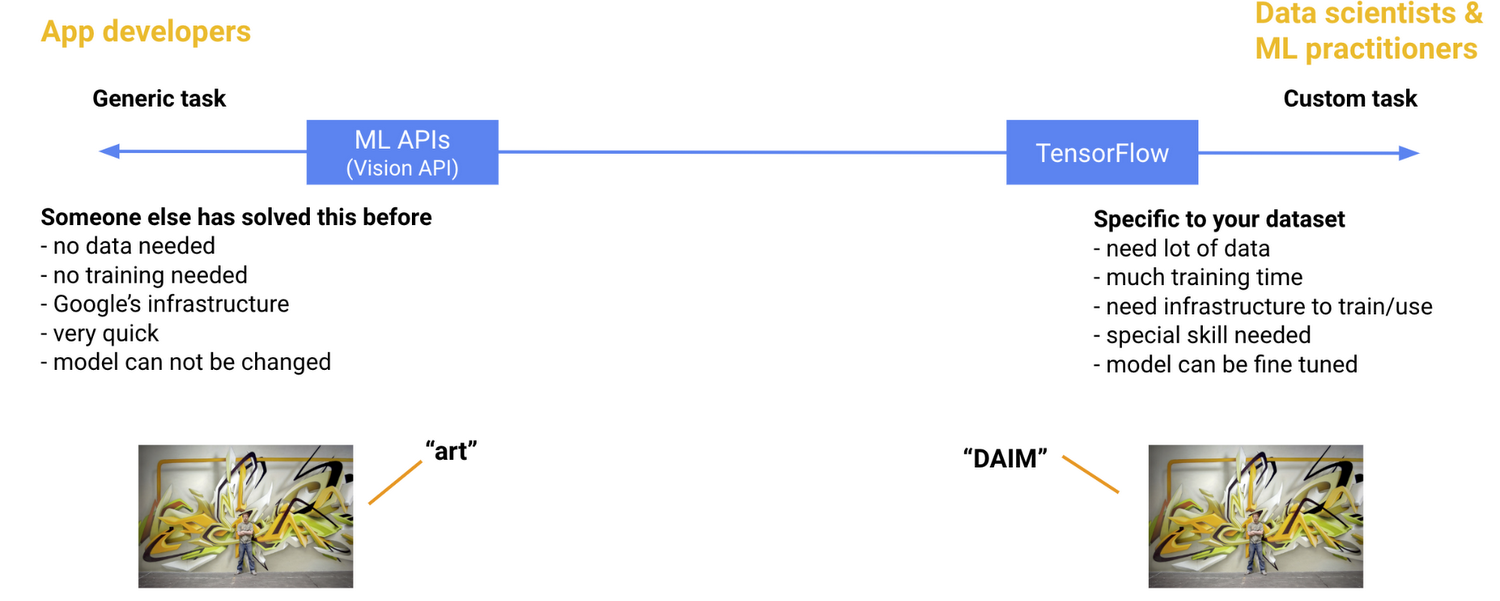
Let's say you want to use a machine learning model (e.g. to build a mobile app that can recognize if there was a hot dog or pizza in an image, or—in our case—detect if artwork is created by DAIM, Banksy, or somebody else). In the past, you traditionally had two choices, these were:
Train your model from scratch
Using your favorite machine learning framework like TensorFlow, you could build your own model. This process usually involves first gathering a lot of data, then spending weeks or months of training and tuning. Also, training a model from scratch requires data science skills. You also need to think about managing the infrastructure for training and doing the predictions. On the plus side, this is the most flexible option an TensorFlow keeps getting easier to use for new teams with the use of higher-level APIs like Keras.- Use a pre-trained machine learning API from Google Cloud
At the other end of the spectrum, you could use a Cloud API that will tell you if an image contains pizza or a hot dog—or in our case street art. You can quickly test the Cloud Vision API yourself.

Coming back to our street art challenge, the Vision API can certainly tell you if an image is a piece of art or not. No data needed. Any application developer can integrate this API into their app without requiring data science or machine learning skills. If this is your problem, use the Vision API. But if your challenge is to do something more specific to your dataset, like determine the artist given an image of some artwork or the graffiti style, you’ll need to train your own model.
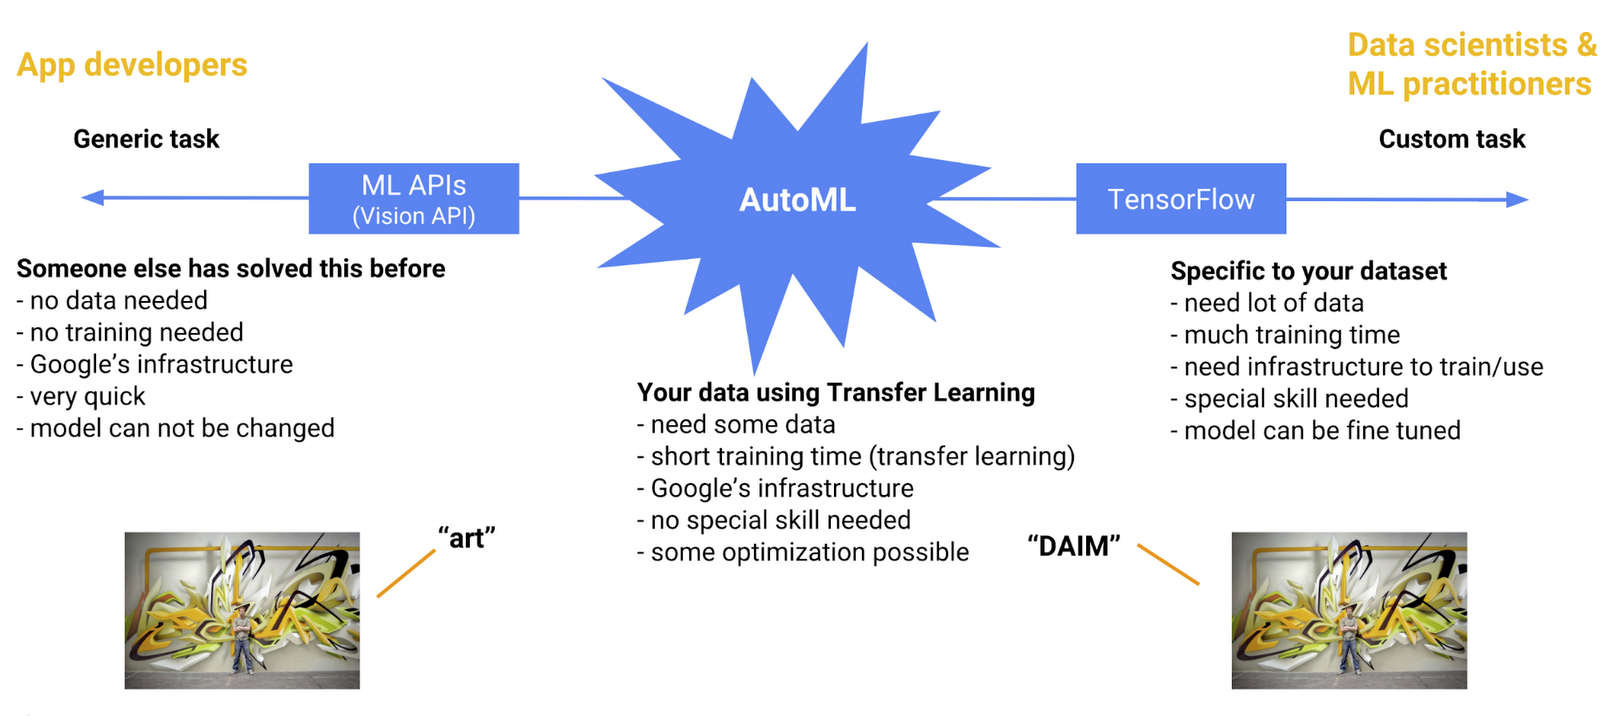
Now AutoML Vision gives you a third option. AutoML lets any developer train their own model on their own data. Using Neural Architecture Search technology and Google’s state of the art transfer learning, you don’t even need that much data. In our urban artist detection app we trained the model with often not more than 100 images per artist (label). Also there is no coding involved training the model. All you need is to write some code to call the AutoML API from within your application.
How to create a model using AutoML Vision
It’s actually quite simple. With AutoML Vision you can train your model in less than 2 hours. There are only a few guided steps that the AutoML user interface guides you through. At the end of this post, I will share some resources to more easily help get you started.
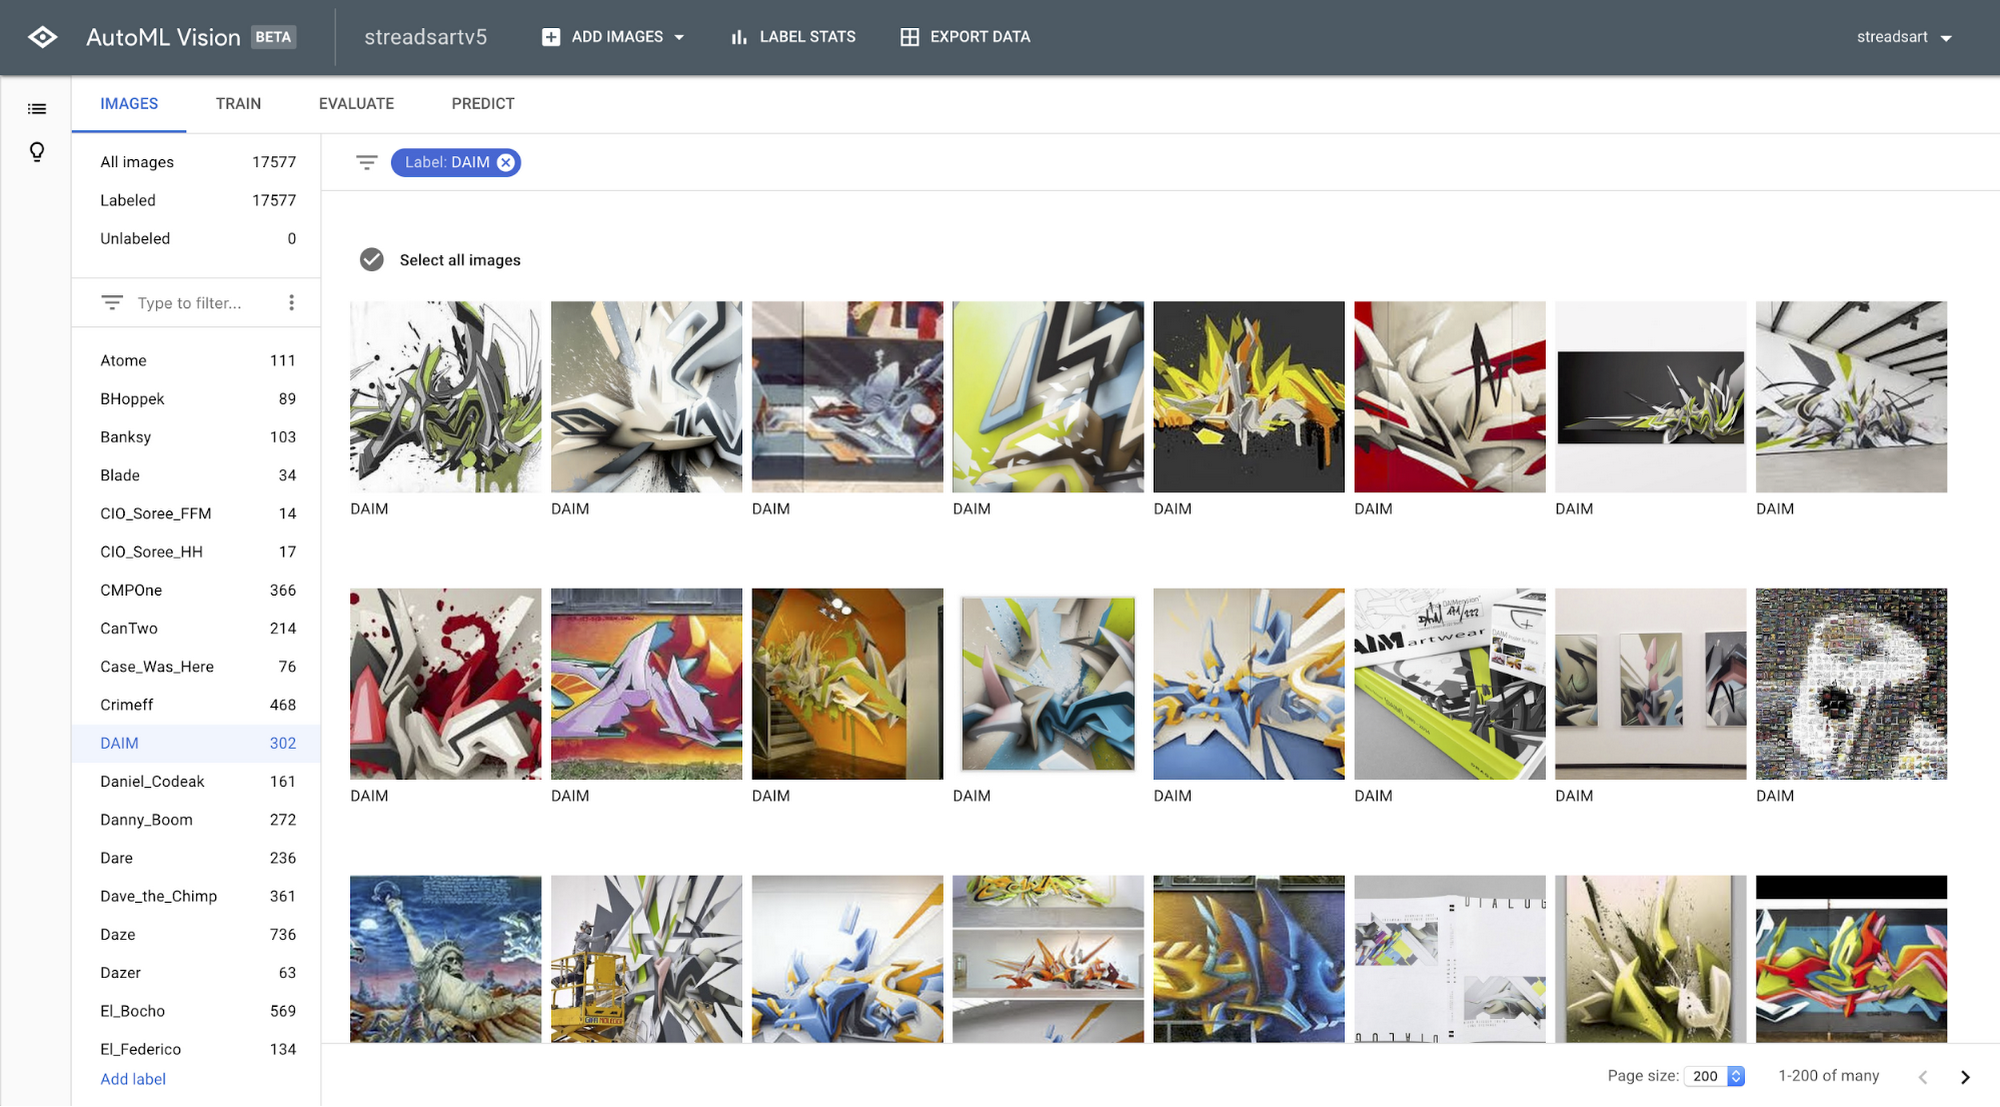
1. Prepare the data
In the whole process, this is likely where you spend the most time. Gather some images and put them in some logical folder structure (using folders is not required but makes life easier with bigger datasets). Try to use at least 10 images per label. The more, the better, but with about 100 images per label you can already see great accuracy (I’ll talk more about model quality in a later section).
If you have less than 500 images, you can upload the folder hierarchy as a zip file directly from within the AutoML interface. For more images use either the Cloud Storage console or the gsutil copy command. If you copied the images to Cloud Storage, you’ll have to create a CSV file that lists each image URL along with the label. By default, AutoML uses 80% of the data for training, 10% for validation, and 10% for testing. You have the option of changing these ratios in the CSV file.
AutoML supports both single label and multi labeled data sets. Here we used a single labeled dataset where the label represented the artist name. An entry in the CSV file would look like this:
gs://streadsart-vcm/DAIM1.jpeg, DAIM
But we could easily train a dataset with multiple labels. In our case we could also use the graffiti style. Simply add the additional labels in the CSV file, like this:
gs://streadsart-vcm/DAIM1.jpeg, DAIM, Wildstyle
2. Train the model
You might want to make some coffee during this step. While training the model only takes one click, you’ll need to decide how intensively you want to train your model and how much time you have. There is a rule of thumb, that around 100,000 pictures will approximately take around 20 minutes to train in the basic model. For the advanced model, assume around 4 hours. Generally we predict that the basic model will run for a maximum of one hour and is available as free training. The advanced training can build complex models that take as long as 24 hours to complete and use methods like auto-optimization (e.g. hyperparameter tuning) and advanced modeling techniques.
3. Evaluate the model
After the training is done you will receive an e-mail notification. First you should verify the quality of your model. You can see the precision and recall scores in the Evaluation tab. You might get suggestions to add more images for a certain label. If the model does not perform to your expectations, check the next section further down on model improvement options. For single-label models, AutoML generates a confusion matrix. This confusion matrix gives a quick overview of the error rate for a classification problem like ours. In my street art model, it revealed some interesting details.
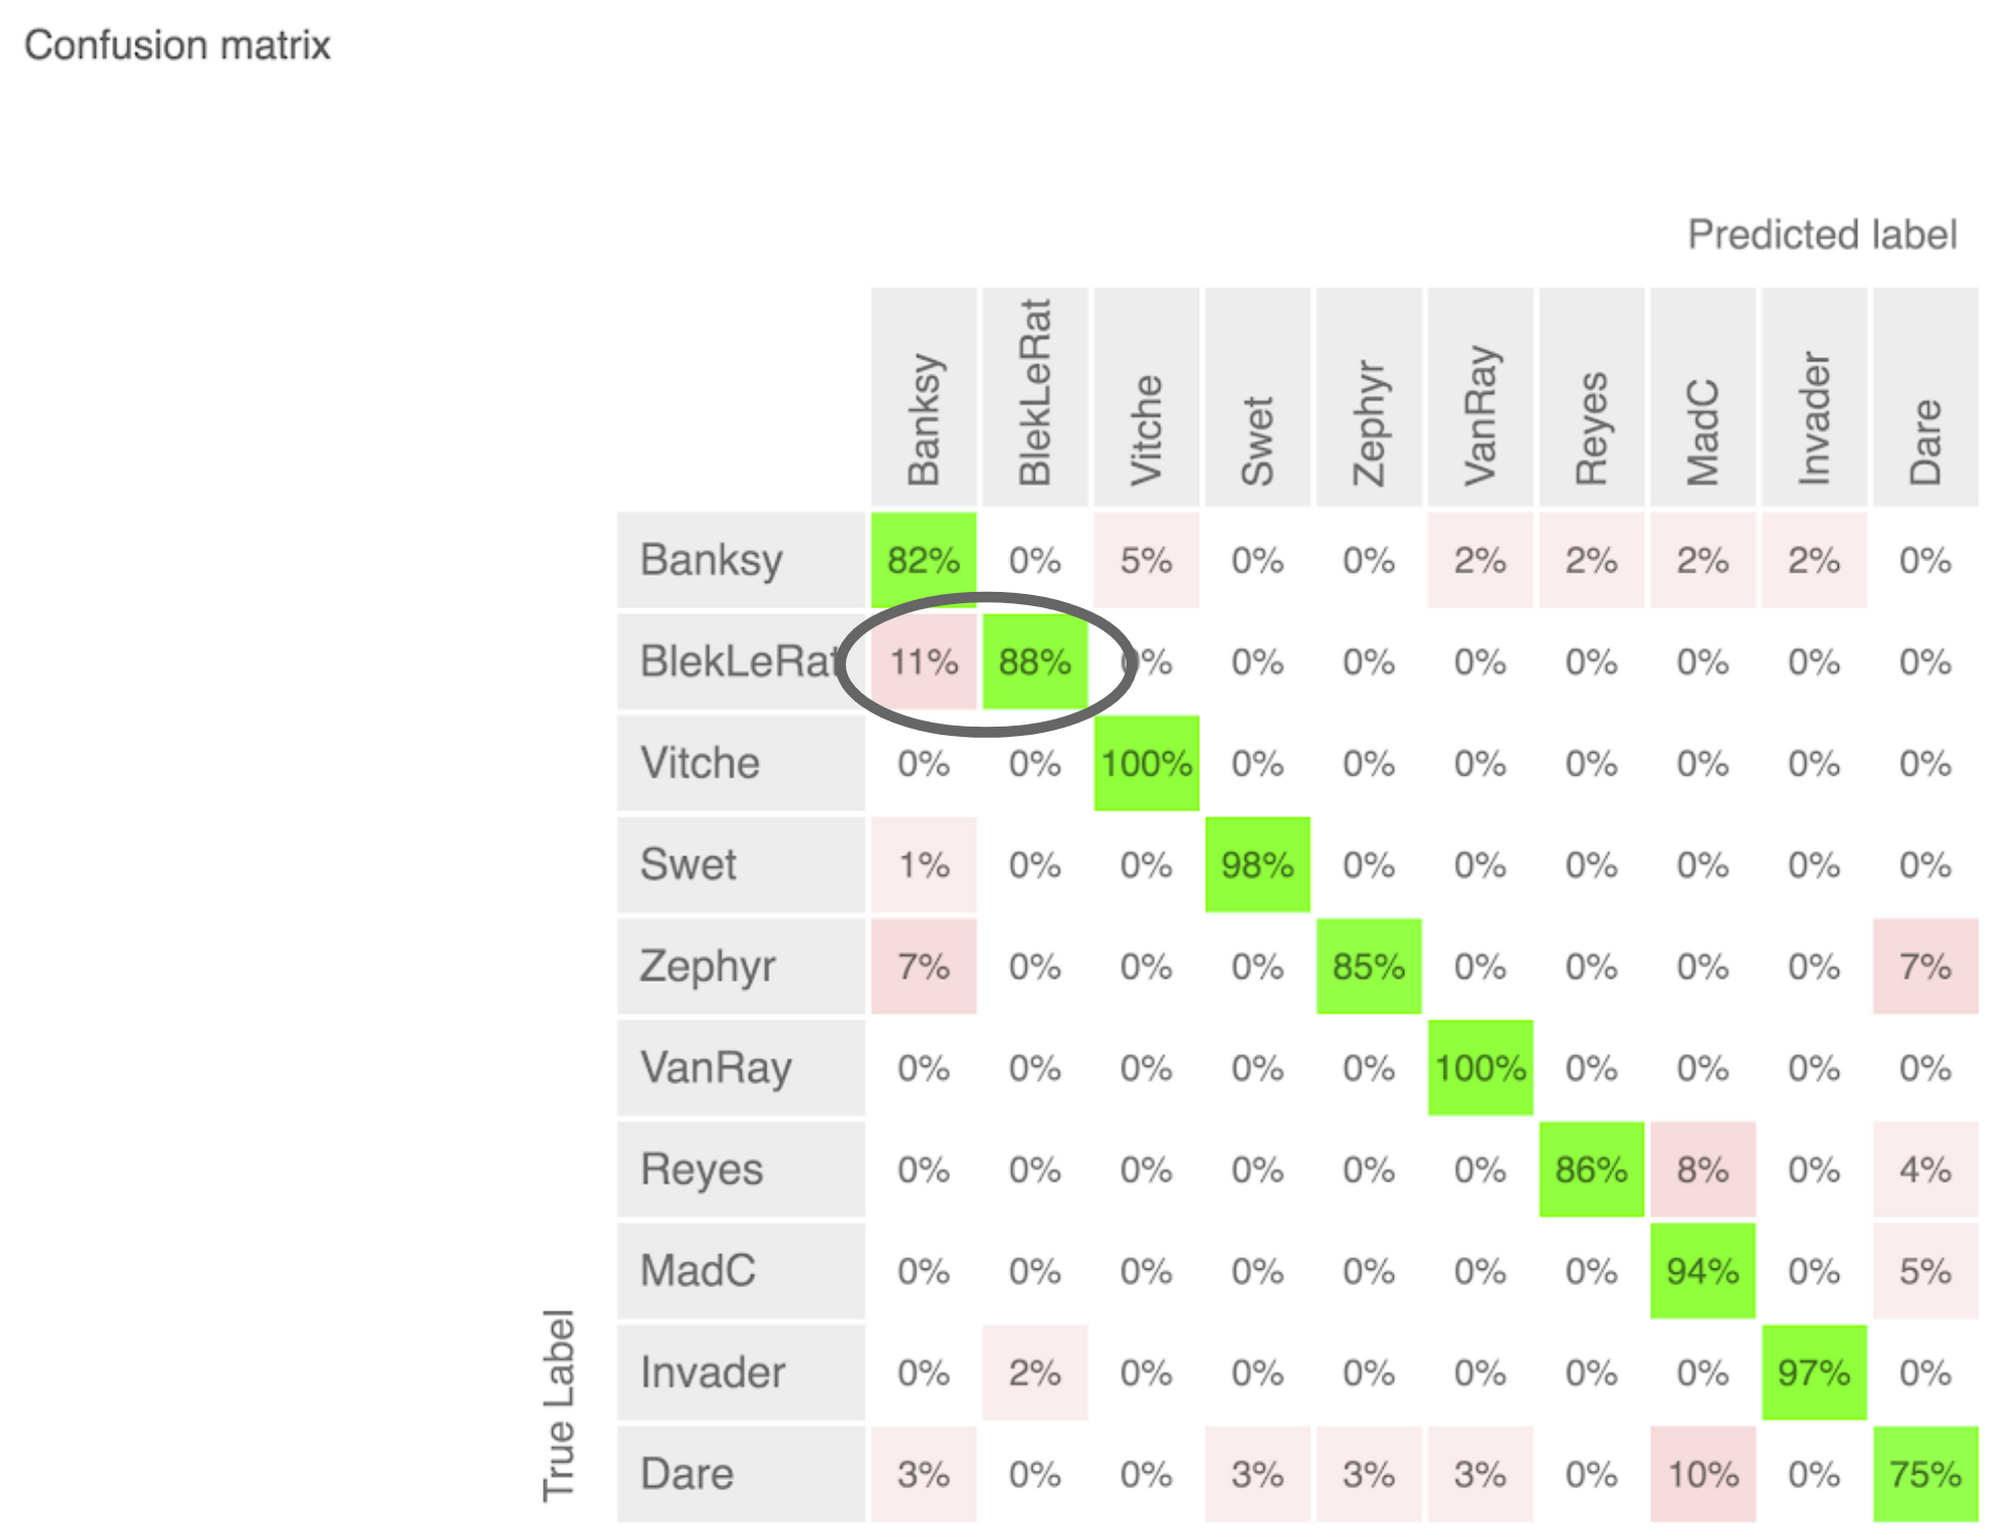
The confusion matrix shows which artist pairs influence one another the most.
You can see the precision for each artist on the diagonal. It seems the model is sometimes (11%) confused for artist Blek le Rat with art works by Banksy. This makes sense given that Banksy mentioned that some similar works to his own were painted by Blek le Rat 20 years earlier. If you do a quick Google image search on both artists, you can explore some of these similarities.
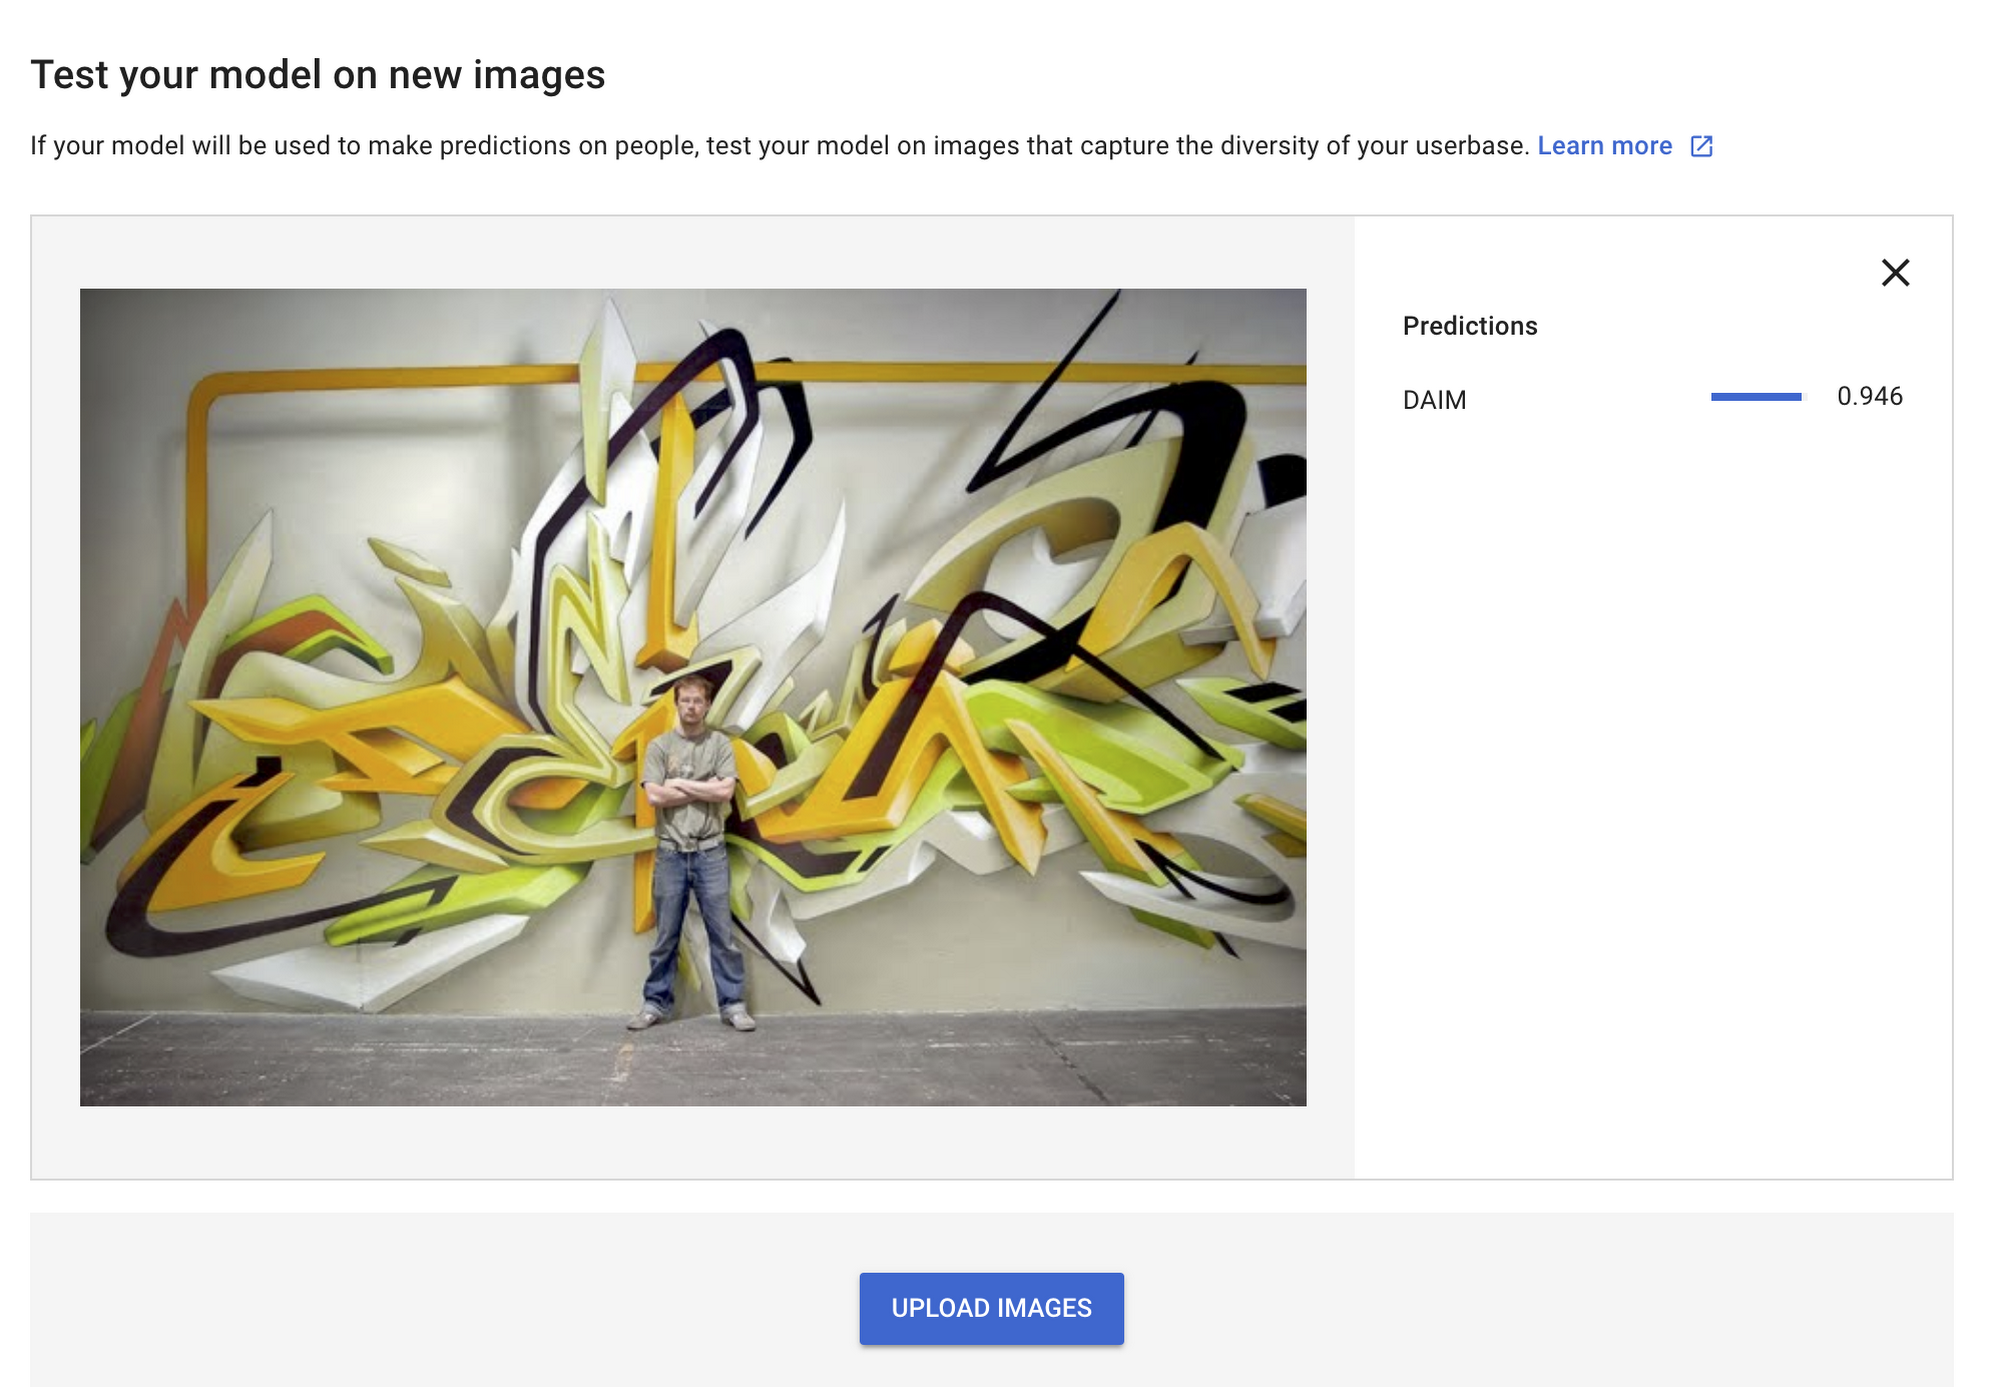
4. Test the model
Once you decide that your evaluation metrics are satisfactory, you should test your model in the wild. Take some new images (they should not be part of the training dataset) and upload them to the prediction page, to see how well the model performs. This step also gives you some sample Python code to help you quickly and easily embed the model in your application. As a result, once the model is trained, it is instantly ready to use in production.
Improving the model
It is very likely that your first version of the model can be improved upon quite a bit. Your precision metrics overall and per label will be a good indicator where to adjust the model. Also AutoML will give you notifications on e.g. needing to add more images for some labels.
The easiest way to improve your model is to add more images for a predefined label. After you upload or import the images with labels, you can sort your data into cardinal order. This lets you see all the labels where you could add more images.
It’s good practice when you’re defining your labels to always create a label like “other” or “none”. Images that do not match any of the other labels can be tagged here. This little trick will significantly improve the quality of the model. If, for example, you want to train a model to distinguish different chair models, you should also add a label to gather related objects that are not chairs, e.g. tables.
Do you have a model where you want to identify small objects in high resolution images? A good way to train the model for something like this is to use cropped images of the section that is significant in addition to the original high resolution image for the same label.
For photographs you’re taking yourself (e.g. a graffiti on a house wall), change the camera position, the angle or even take some shots with and without flash.
If you can’t find more images for a given label that has low cardinality, consider removing the label altogether.
Check that the images are labeled correctly and re-assign labels or delete images.
Don’t have labeled images? You can also use AutoML’s human labeling service that can help you. You just need to provide 100 images per label.
Note: labels with a hyphen will be converted to an underscore. This is particularly important, if your application should do something based on the label response.
Tell me more
If you want to try AutoML yourself just create a project on Google Cloud Platform. There are some valuable resources to get you started. Check out:
There are great places on the web to grab some images like the Dogs vs. Cats dataset on Kaggle.
Note that AutoML Natural Language and AutoML Translate were also recently announced. Stay tuned for more AutoML solutions in the future. Have fun training your first model using AutoML Vision!