PostgreSQL extension turned Cloud microservice
Gabe Weiss
Developer Advocate
Try Google Cloud
Start building on Google Cloud with $300 in free credits and 20+ always free products.
Free trialOne challenge to migrating databases is lining up your environment so that you don’t end up with compatibility issues. So what happens, when you want to move to a managed service in the Cloud, like Cloud SQL, and you discover that your favorite extension isn’t supported? Of course we want to support all the things, but supporting each individual plugin takes time to be sure it gets integrated into Cloud SQL without destabilizing anything.
For this post, let’s chat about pg_cron. The PostgreSQL plugin which gives you a crontab inside your database. Handy for all kinds of things from pruning old unused data with vacuum, truncating data from tables that’s no longer needed, and a slew of other periodic tasks. Super handy plugin. And while we did just recently add support for it in Cloud SQL, the process of splitting out an extension into a service that doesn’t run within your database can be a good exercise. There’s a few good reasons to avoid using extensions. They’re often engine-specific, so you’re further locking your database engine. If you’re using something open like PostgreSQL? Maybe not a huge deal, but it can be a consideration. Also running a lot of business logic inside your database can and will eventually start to affect performance. Being flexible with microservices can be a good way to balance performance and convenience.
Let’s walk through one way to break out pg_cron tasks into a Cloud microservice.
The tools
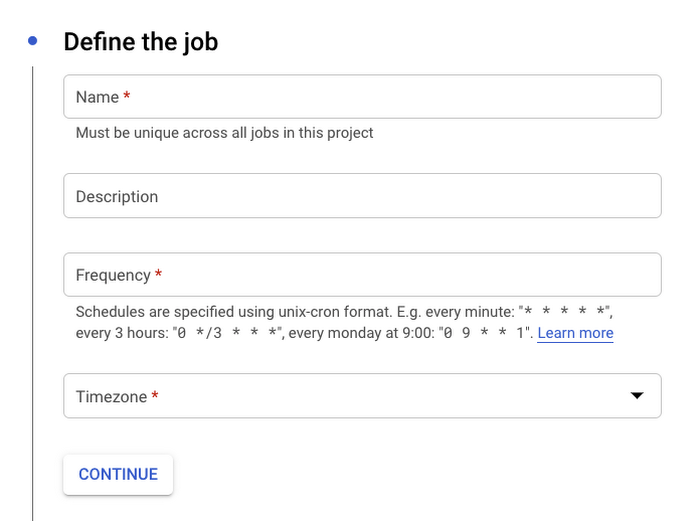
The primary product we’ll be using to produce cron tasks is Cloud Scheduler. Long story short, it’s a crontab (mostly) for GCP products. Going to create a new job in the console starts you off with the familiar cron interface for defining when you’d like your job to trigger, and you can define what timezone you want it to be in.
Next comes the different piece. Unlike normal cron, where you define the path to what you’d like to execute, in the case of Scheduler you need to define a trigger target. You can hit an arbitrary HTTP URL, send a message to a predefined Pub/Sub Topic, or send an HTTP message to an App Engine instance you’ve created. Naturally which method you want to use depends entirely on what the existing tasks you’re wanting to port over.
For example, if you have one job that needs to trigger multiple actions that aren’t necessarily related? Probably makes the most sense to send a message to Pub/Sub and have other services subscribed to the topic where the message will go. This would mirror a delegator pattern. Alternatively, if the job needs to trigger a set of related tasks, building an App Engine application as an endpoint which can then handle the related tasks in a bundle may make the most sense. Lastly, and what I’m going to show here, is if the job is a one-off and just needs to accomplish a small task, it may make sense to build a Cloud Function, or set up a container to run in Cloud Run to handle these one-off tasks as these serverless offerings scale to zero, so won’t cost you anything while they aren’t being run.
Let’s take a look at a simple example just to walk through one way to do this.
The walkthrough
Say for the sake of argument, you’ve got a pg_cron job that runs every night at 1 o’clock in the morning after your backup has finished which prunes older data from one of your tables to keep operational data at a 30-day window.
Step one is getting that functionality of our SQL query to remove our old data somewhere else. There’s a multitude of ways to do this in GCP as I mentioned. For this, I’m going to stick to Google Cloud Functions. They’re incredibly simple to stand up and this sort of one-off function is a perfect use-case.
There’s a very well written Codelab that walks through creating a Cloud Function which talks to a Cloud SQL instance. Couple things need changing from the Codelab. First is the stmt variable from the insert call that’s in the code sample to the delete call from our pg_cron function. Second we want to not listen when the Codelab tells us to allow unauthenticated invocations of our Cloud Function. Nothing catastrophic would happen if you do allow unauthenticated requests, because we’re only deleting older data that we want gone anyway, but if someone happens to get ahold of the URL, then they can spam it, which could impact performance on the database, as well as costing you some extra money on the Cloud Function invocations.
One other thing to note about this setup is that the Cloud SQL instance gets created with a public IP address. For the sake of this post staying focused on converting an extension into a microservice I’m not going to go into too much detail, but know that connectivity can become a bit sticky depending on your requirements for the Cloud SQL instance. In an upcoming post I’m going to cover connectivity around our serverless offerings to Cloud SQL in a bit more depth.
Okay, if you’re doing this inline while reading the post, go and do the Codelab with the changes I mentioned, then come back. I’ll wait.
All set? Awesome, back to our story.
So now we have a function set up, and when I tested/ran it, it correctly deleted entries older than a month from our database. Next up we’ve got to set up our Cloud Scheduler task to call our function.
Revisiting the creation page from earlier, now let’s dig in and get things rolling.
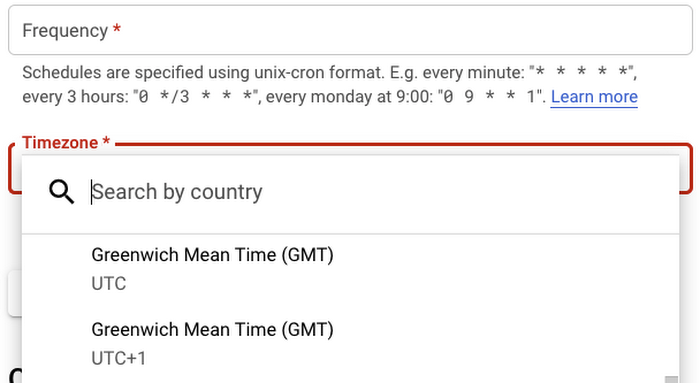
As it says in the UI, Frequency is standard cron formatting, so we want our cleanup script to fire every day at 1:00 AM so set our frequency field to: 0 1 * * *
I created my Cloud SQL instance in us-west2, so I’ll set my timezone to Pacific Daylight Time (PDT).
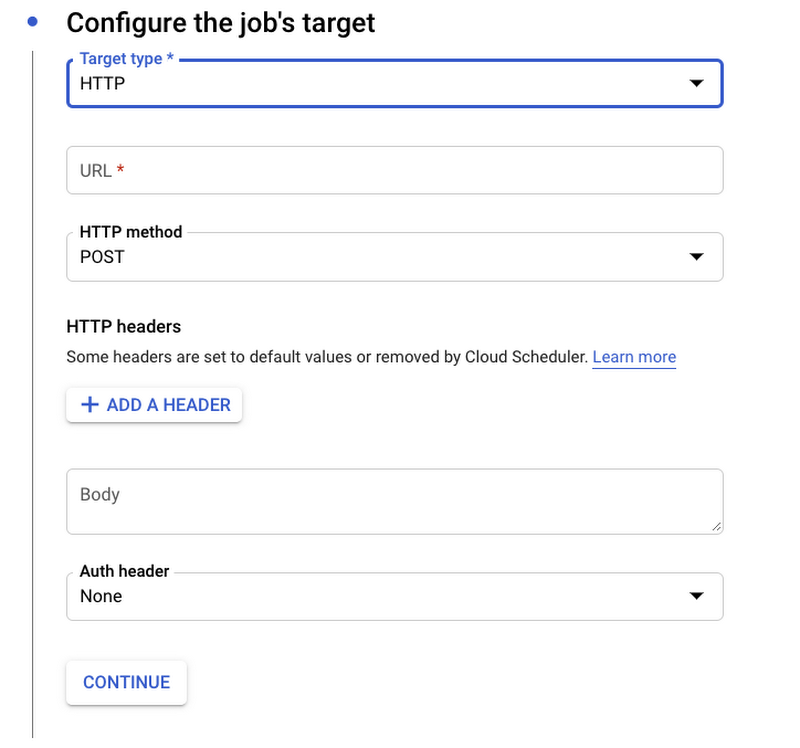
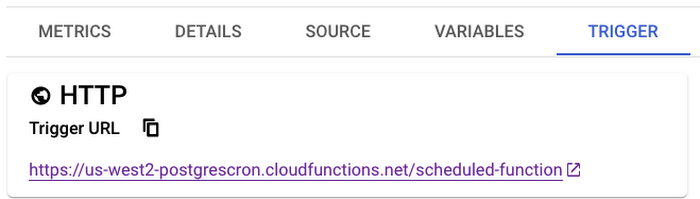
Since we set up our Cloud Function to be triggered by HTTP, we set our Scheduler task to hit an HTTP endpoint. You can get the URL from the details of your Cloud Function you created.
Now, if you’ve set your Cloud Function to accept unauthorized connections just to play around with it (please don’t do that in production) then you’re pretty much all set. You can hit Create at the bottom and poof done, it’ll just start working. If however, you disabled that, then you’ll need to send along an Auth header with your request. Your two options are an OAuth token, or an OIDC token. Broadly speaking, at least as far as GCP targets are concerned, if you’re hitting an API that lives on *.googleapis.com then you’ll want an OAuth token, otherwise an OIDC token is preferred. So in our case, Cloud Functions can use an OIDC token. The service account you want to specify can be the same one you used from the Cloud Function service account if you want. Either way, the role you’ll need to add to the service account to successfully call the Cloud Function is the Cloud Functions Invoker role. Either create a new one with that role, or add that role to your existing service account, and then specify the service account’s full email in the Scheduler field. The audience field is optional and you can ignore it for this service.
That should be it! Hit the create button and your Scheduler task will be created and will run at the specified schedule! When I test this, I set my frequency to 5 * * * * and have my Cloud Function just output something to console. That way I can just check Logging to see if it’s firing. Once you click into the Cloud Function you created’s details, there’s a navigation tab in there for LOGS. Clicking that will show you a filtered view of your project’s logs for that function.
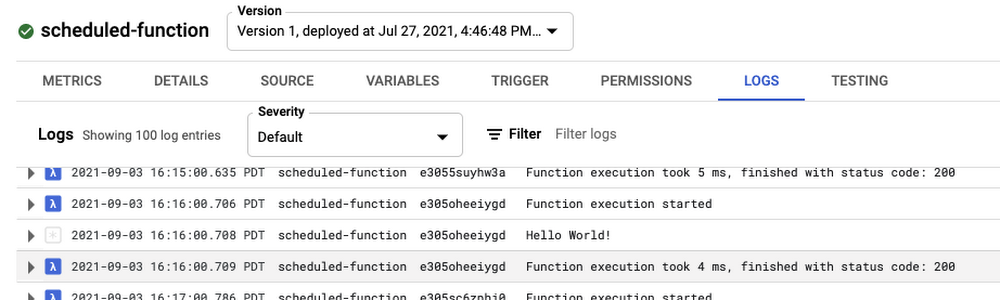
I would suggest testing, to be sure you’re not going to spam your database, by creating a simple Hello World! Cloud Function first and trigger that with your scheduler.
That’s it then! Replacing a PostgreSQL extension with a microservice. While I showed you here how to do it for pg_cron and Cloud Scheduler, hopefully this sparks some thought around splitting some of that business logic away from the database and into services. This is a simple case of course, but this can help alleviate some load on your primary database.
Thanks for reading! If you have any questions or comments, please reach out to me on Twitter, my DMs are open.