Fuel your custom models with Vertex AI

Sara Robinson
Staff Developer Relations Engineer
Anu Srivastava
Senior Developer Programs Engineer
In May we announced Vertex AI, our new unified AI platform which provides options for everything from using pre-trained models to building your models with a variety of frameworks. In this post we'll do a deep dive on training and deploying a custom model on Vertex AI. There are many different tools provided in Vertex AI, as you can see in the diagram below. In this scenario we’ll be using the products highlighted in green:
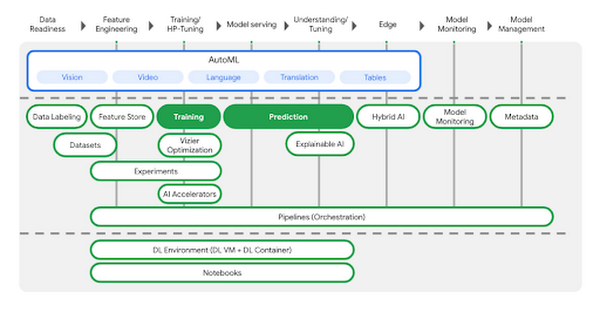
AutoML is a great choice if you don’t want to write your model code yourself, but many organizations have scenarios that require building custom models with open-source ML frameworks like TensorFlow, XGBoost, or PyTorch. In this example, we’ll build a custom TensorFlow model (built upon this tutorial) that predicts the fuel efficiency of a vehicle, using the Auto MPG dataset from Kaggle.
If you’d prefer to dive right in, check out the codelab or watch the two minute video below for a quick overview of our demo scenario:
Environment setup
There are many options for setting up an environment to run these training and prediction steps. In the lab linked above, we use the IDE in Cloud Shell to build our model training application, and we pass our training code to Vertex AI as a Docker container. You can use whichever IDE you’re most comfortable working with, and if you’d prefer not to containerize your training code, you can create a Python package that runs on one of Vertex AI’s supported pre-built containers.
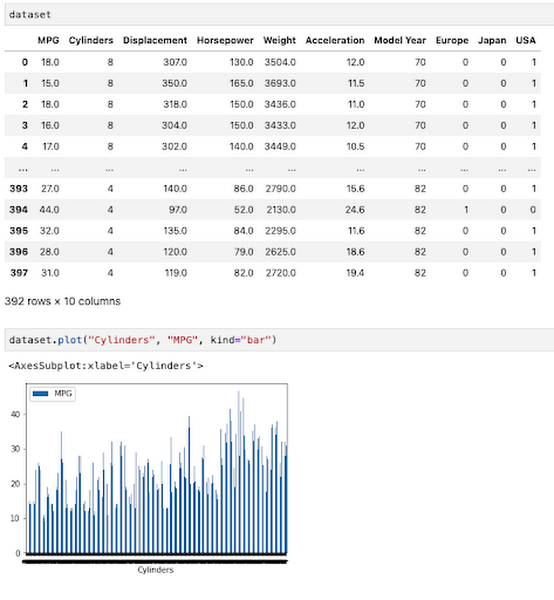
If you would like to use Pandas or another data science library to do exploratory data analysis, you can use the hosted Jupyter notebooks in Vertex AI as your IDE. For example, here we wanted to inspect the correlation between fuel efficiency and one of our data attributes, cylinders. We used Pandas to plot this relationship directly in our notebook.
To get started, you’ll want to make sure you have a Google Cloud project with the relevant services enabled. You can enable all the products we’ll be using in one command using the gcloud SDK:
Then create a Cloud Storage bucket to store our saved model assets. With that, you’re ready to start developing your model training code.
Containerizing training code
Here we’ll develop our training code as a Docker container, and deploy that container to Google Container Registry (GCR). To do that, create a directory with a Dockerfile at the root, along with a trainer subdirectory containing a train.py file. This is where you’ll write the bulk of your training code: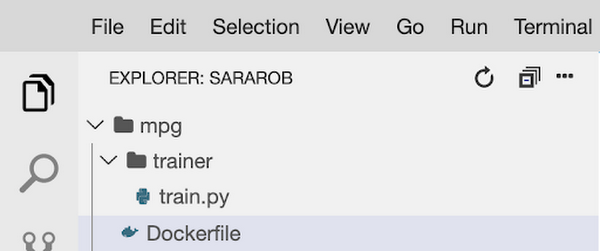
To train this model, we’ll build a deep neural network using the Keras Sequential Model API:
We won’t include the full model training code here, but you can find it in this step of the codelab. Once your training code is complete, you can build and test your container locally. The IMAGE_URI in the snippet below corresponds to the location where you’ll deploy your container image in GCR. Replace $GOOGLE_CLOUD_PROJECT below with the name of your Cloud project:
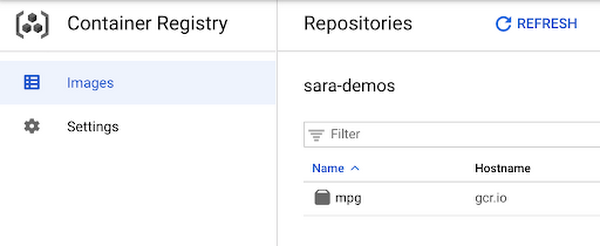
All that’s left to do is push your container to GCR by running docker push $IMAGE_URI. In the GCR section of your console, you should see your newly deployed container:
Running the training job
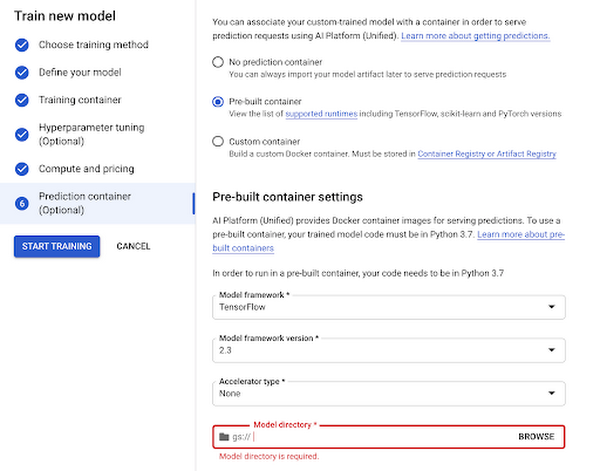
Now you're ready to train your model. You can select the container you created above in the models section of the platform. You can also specify key details like the training method, compute preferences (GPUs, RAM, etc.) and hyperparameter tuning if required.
Now you can hand over training your model and let Vertex do the heavy lifting for you.
Deploy to endpoint
Next, let's get your new model incorporated into your app or service. Once your model is done training you will see an option to create a new endpoint. You can test out your endpoint in the console during your development process. Using the client libraries, you can easily create a reference to your endpoint and get a prediction with a single line of code:
Start building today
Ready to start using Vertex AI? We have you covered for all your use cases spanning from simply using pre-trained models to every step of the lifecycle of a custom model.
- Use Jupyter notebooks for a development experience that combines text, code and data
- Fewer lines of code required for custom modeling
- Use MLOps to manage your data with confidence and scale
Get started today by trying out this codelab yourself or watching this one hour workshop.