Deploy a coloring page generator in minutes with Cloud Run
Laurent Picard
Developer Advocate
Have you ever written a script to transform an image? Did you share the script with others or did you run it on multiple computers? How many times did you need to update the script or the setup instructions? Did you end up making it a service or an online app? If your script is useful, you’ll likely want to make it available to others. Deploying processing services is a recurring need – one that comes with its own set of challenges. Serverless technologies let you solve these challenges easily and efficiently.
In this post, you’ll see how to…
Create an image processing service that generates coloring pages
Make it available online using minimal resources
…and do it all in less than 200 lines of Python and JavaScript!
Tools
To build and deploy a coloring page generator, you’ll need a few tools:
A library to process images
A web application framework
A web server
A serverless solution to make the demo available 24/7
Architecture
Here is one possible architecture for a coloring page generator using Cloud Run:

And here is the workflow:
The user opens the web app: the browser requests the main page.
Cloud Run serves the app HTML code.
The browser requests the additional needed resources.
Cloud Run serves the CSS, JavaScript, and other resources.
The user selects an image and the frontend sends the image to the /api/coloring-page endpoint.
The backend processes the input image and returns an output image, which the user can then visualize, download, or print via the browser.
Software stack
Of course, there are many different software stacks that you could use to implement such an architecture.
Here is a good one based on Python:
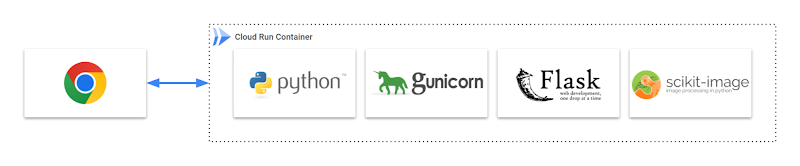
It includes:
Gunicorn: A production-grade WSGI HTTP server
Flask: A popular web app framework
scikit-image: An extensive image processing library
requirements.txt: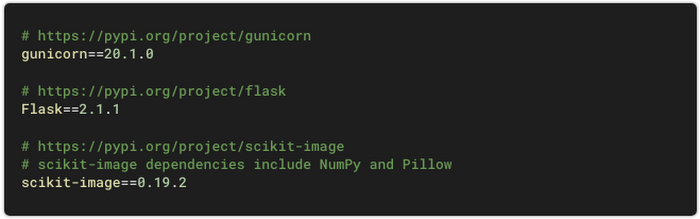
Image processing
How do you remove colors from an image? One way is by detecting the object edges and removing everything but the edges in the result image. This can be done with a Sobel filter, a convolution filter that detects the regions in which the image intensity changes the most.
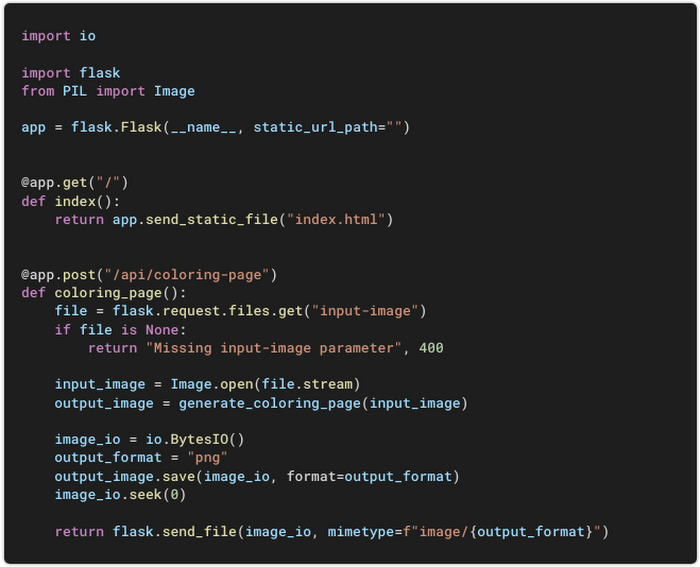
Create a Python file named main.py, define an image processing function, and within it use the Sobel filter and other functions from scikit-image:
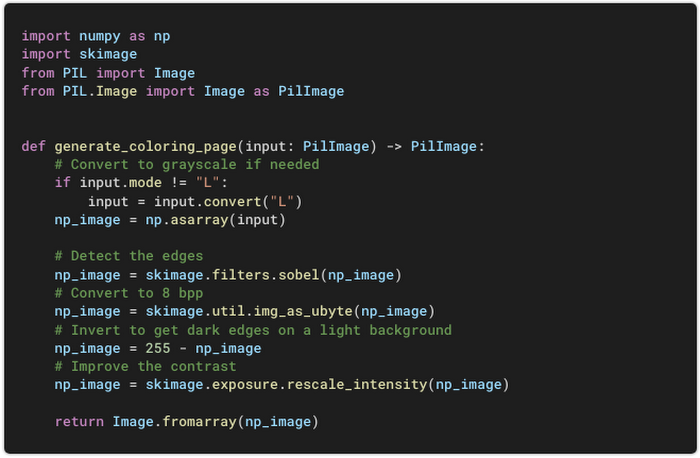
Note: The NumPy and Pillow libraries are automatically installed as dependencies of scikit-image.
As an example, here is how the Cloud Run logo is processed at each step:

Web app
Backend
To expose both endpoints (GET / and POST /api/coloring-page), add Flask routes in main.py:
Frontend
On the browser side, write a JavaScript function that calls the/api/coloring-page endpoint and receives the processed image: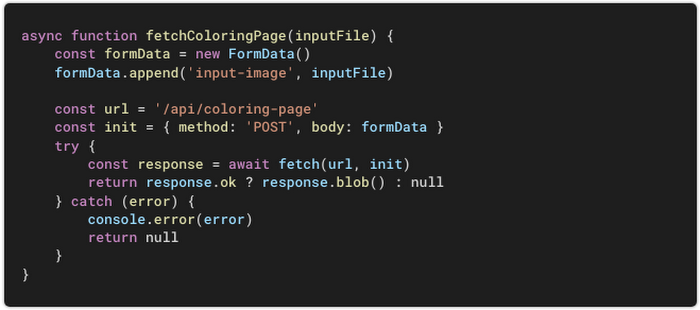
The base of your app is there. Now you just need to add a mix of HTML + CSS + JS to complete the desired user experience.
Local development
To develop and test the app on your computer, once your environment is set up, make sure you have the needed dependencies:

Add the following block to main.py. It will only execute when you run your app manually:
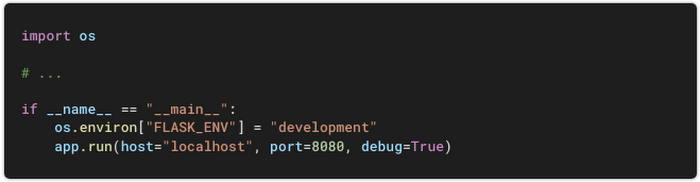
Run your app:

Flask starts a local web server:
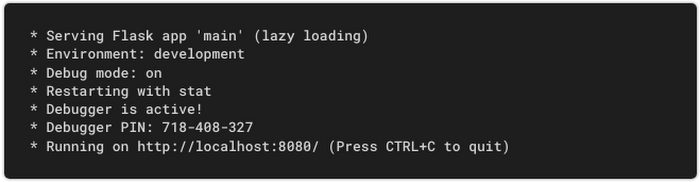
Note: In this mode, you’re using a development web server (one that is not suited for production). You’ll next set up the deployment to serve your app with Gunicorn, a production-grade server.
You’re all set. Open localhost:8080 in your browser, test, refine, and iterate.
Deployment
Once your app is ready for prime time, you can define how it will be served with this single line in a file named Procfile:

That’s it, you can now deploy your app from the source folder:

Under the hood
The command line output details all the different steps:
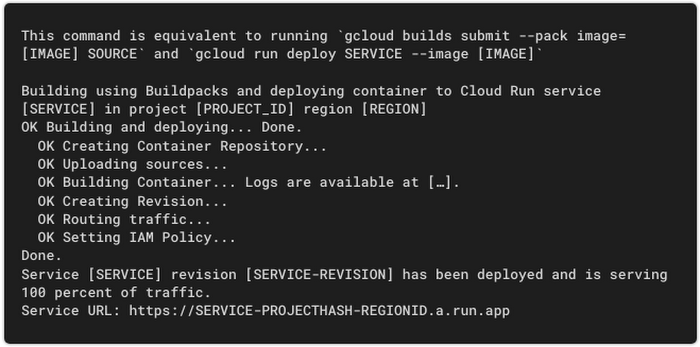
Cloud Build is indirectly called to containerize your app. One of its core components is Google Cloud Buildpacks, which automatically builds a production-ready container image from your source code. Here are the main steps:
Cloud Build fetches the source code.
Buildpacks autodetects the app language (Python, in this case) and uses the corresponding secure base image.
Buildpacks installs the app dependencies (defined in
requirements.txtfor Python).Buildpacks configures the service entrypoint (defined in
Procfilefor Python).Cloud Build pushes the container image to Artifact Registry.
Cloud Run creates a new revision of the service based on this container image.
Cloud Run routes production traffic to it.
Notes:
Buildpacks currently supports the following runtimes: Go, Java, .NET, Node.js, and Python.
The base image is actively maintained by Google, scanned for security vulnerabilities, and patched against known issues. This means that, when you deploy an update, your service is based on an image that is as secure as possible.
Dockerfile and Buildpacks will use it instead.Updates
More testing from real-life users shows some issues.
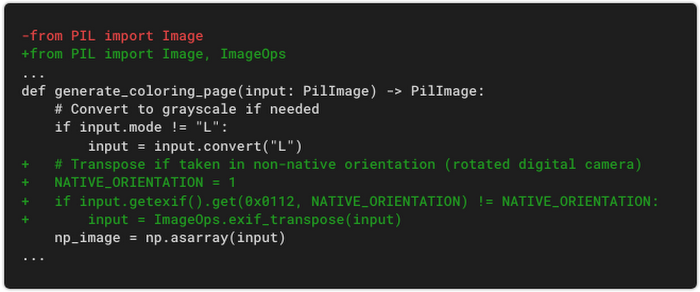
First, the app does not handle pictures taken with digital cameras in non-native orientations. You can fix this using the EXIF orientation data:
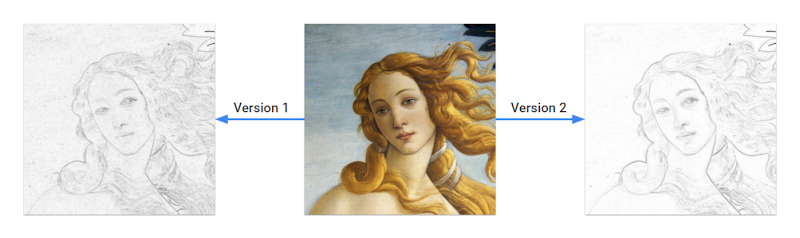
In addition, the app is too sensitive to details in the input image. Textures in paintings, or noise in pictures, can generate many edges in the processed image. You can improve the processing algorithm by adding a denoising step upfront:
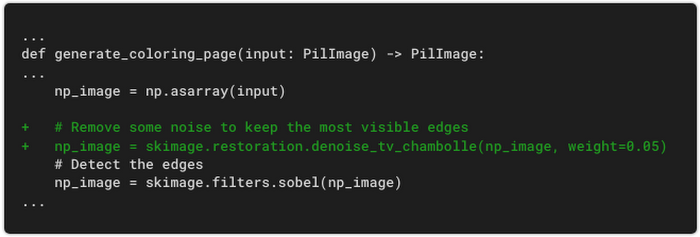
This additional step makes the coloring page cleaner and reduces the quantity of ink used if you print it:
Redeploy, and the app is automatically updated:

It’s alive
The app is visible as a service in Cloud Run:

The service dashboard gives you an overview of app usage:
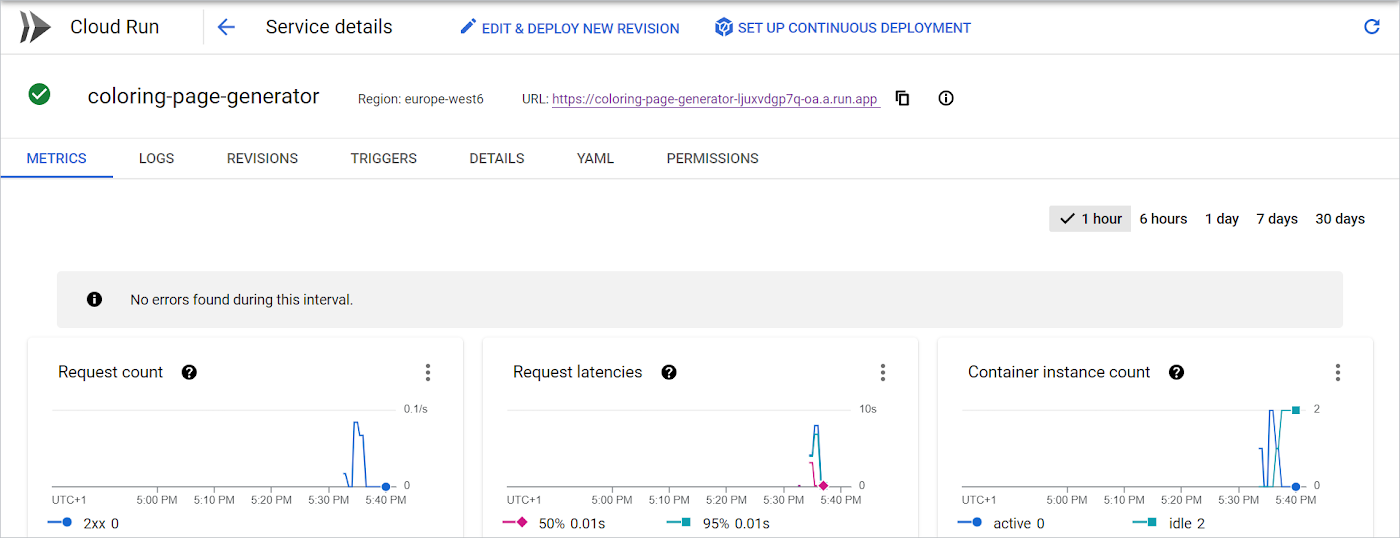
That’s it; your image processing app is in production!

It’s serverless
There are many benefits to using Cloud Run in this architecture:
Your app is available 24/7.
The environment is fully managed: you can focus on your code and not worry about the infrastructure.
Your app is automatically available through HTTPS.
You can map your app to a custom domain.
Cloud Run scales the number of instances automatically and the billing includes only the resources used when your code runs.
If your app is not used, Cloud Run scales down to zero.
If your app gets more traffic (imagine it makes the news), Cloud Run scales up to the number of instances needed.
You can control performance and cost by fine-tuning many settings: CPU, memory, concurrency, minimum instances, maximum instances, and more.
Every month, the free tier offers the first 50 vCPU-hours, 100 GiB-hours, and 2 million requests for no cost.
Source code
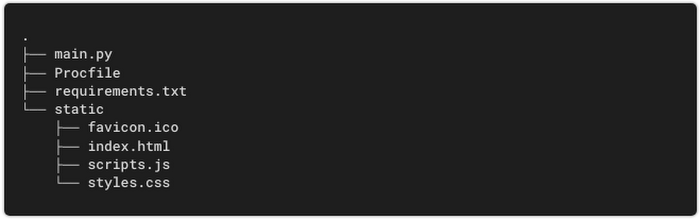
The project includes just seven files and less than 200 lines of Python + JavaScript code.
You can reuse this demo as a base to build your own image processing app:
Check out the source code on GitHub.
For step-by-step instructions on deploying the app yourself in a few minutes, see “Deploying from scratch”.
More
Try the demo and generate your own coloring pages.
Learn more about Cloud Run.
For more cloud content, follow me on Twitter (@PicardParis) or LinkedIn (in/PicardParis), and feel free to get in touch with any feedback or questions.