Compute Engine explained: Best practices for OS updates at scale

Sergey Maximov
Product Manager
Keeping all your VMs up-to-date with the latest patches is job #1 for any system administrator, but if you have a large deployment, you need to balance the speed of updates with potential reliability risks. Google Cloud’s OS patch management service is a powerful tool to help you install updates at scale across the whole fleet safely and effectively.
While every organization has its own patch management processes, and there is no one-size-fits-all approach to patching, there are a number of best practices you can follow. In this post, we’ve summarized some of those best practices used by Google Cloud customers with large Compute Engine environments. We hope you’ll find some of the recommendations below useful.
1. Use labels to create flexible deployment groups
Labels are a flexible way to segment your fleet and create deployment groups for your updates. You can use labels to specify instance role (web or database), environment (dev, test, or production), belonging to the particular business application or instance OS family (Windows or Linux), or group all the VMs that belong to the single application. Investing in consistent label policies allows you to be more agile in managing your fleet and targeting your patch deployments. Learn more about labels on Google Cloud.
2. Deploy updates zone by zone and region by region.
In general, we recommend you deploy fault-tolerant applications that have high availability across multiple zones and multiple regions. This helps protect against unexpected component failures, up to and including a single zone or region.
In our experience working with global and regional deployments, we recommend you apply updates to one zone at a time. After testing updates in dev/staging environments, there is still a risk of unforeseen conflict in the production environment. If there’s a problem, it’s much easier to isolate problems in a single zone and roll back the updates. If you update all your zones at the same time, it will take more time to fix and can potentially impact your application availability.
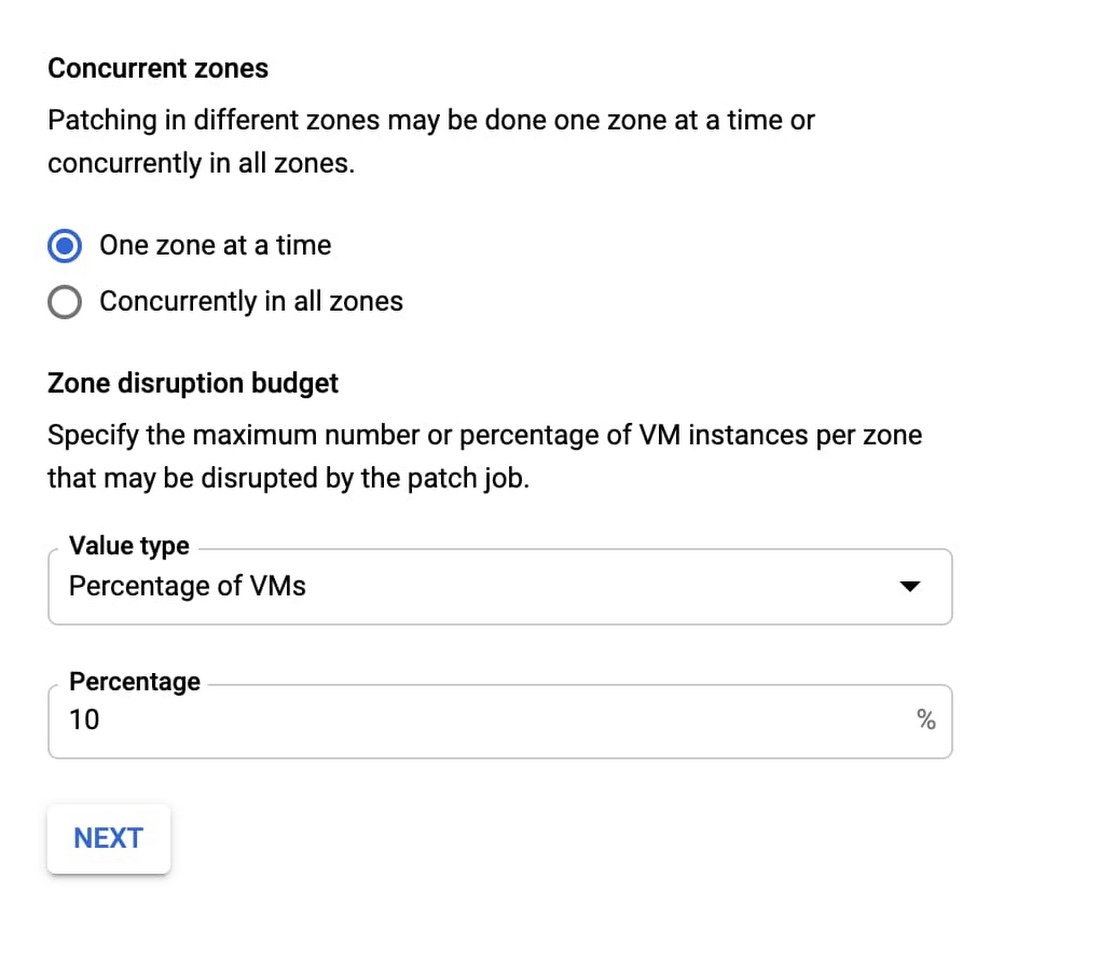
By default, OS patch management provides a rollout plan installing updates zone by zone:

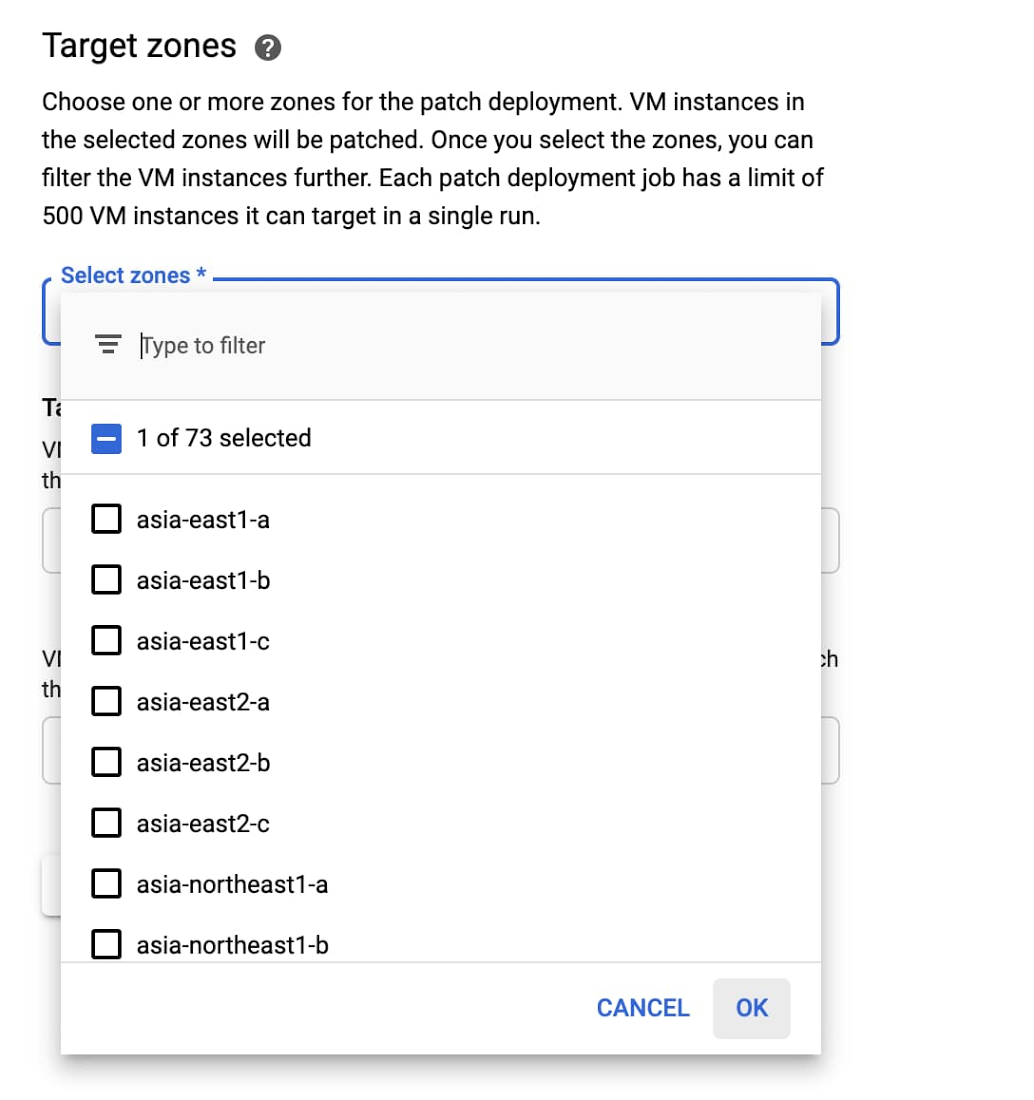
A stricter recommendation is to limit each patch deployment to a single zone for a single patch job:

3. Use pre-patch and post-patch script to patch safely.
As discussed in a previous blog post, you can use pre- and post-patch scripts to help your OS updates go more smoothly.
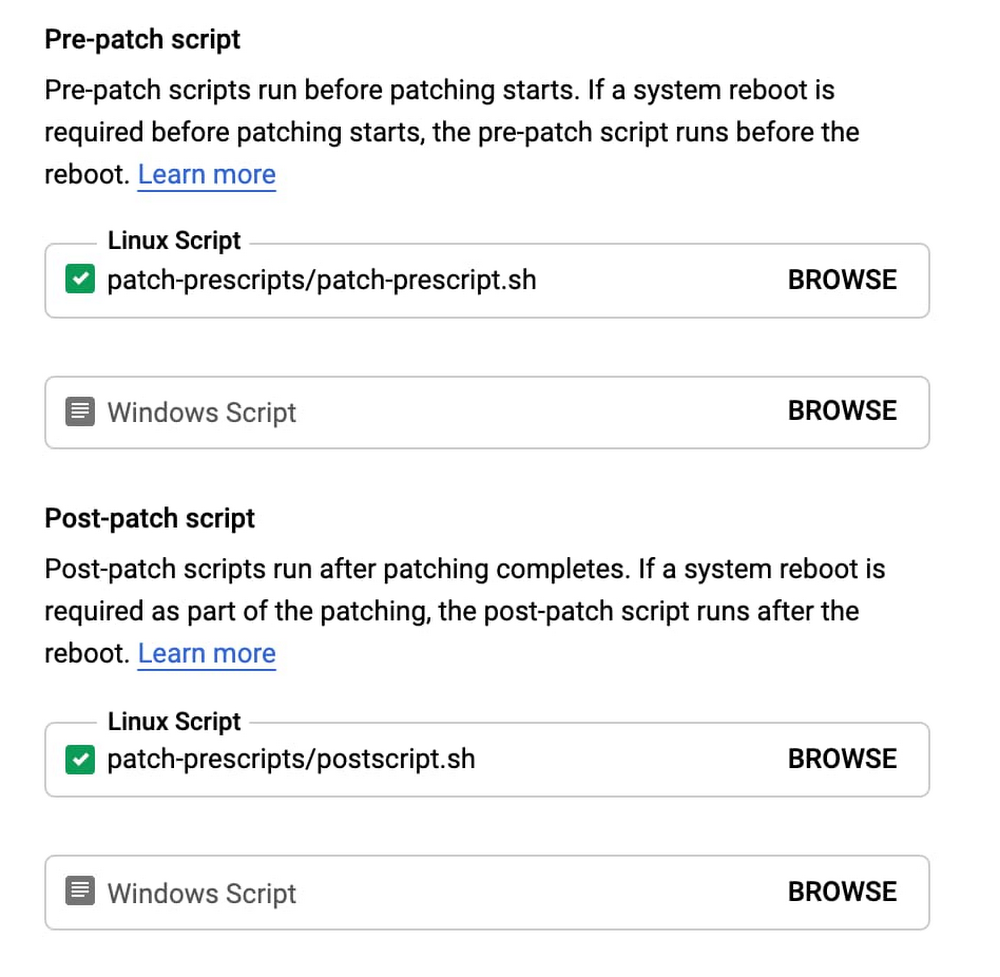

As the name implies, pre-patch scripts are executed before installing patches and can determine whether or not it’s safe to install updates. For example, as part of the script, you might want to stop a specific application, make sure the instance doesn’t have any active connections and so on. If the pre-patch script returns an error, the update to the instance is considered as failed.
A post-patch script allows you to check the instance and app state after the patch has been installed: is the application running, are there any active connections to your database, are there any error messages in the logs, or monitoring alerts being fired? If a post-patch script returns an error, the update to the instance is considered as failed.
These pre and post-patch signals can stop the entire patch deployment process proactively, limiting the potential impact.
4. Set a disruption budget
A disruption budget allows OS patch management to slow down the patching process, and ensure that a maximum of instances are patched at the same time. And if instances aren’t coming back online after the update has been installed, the process stops proactively.
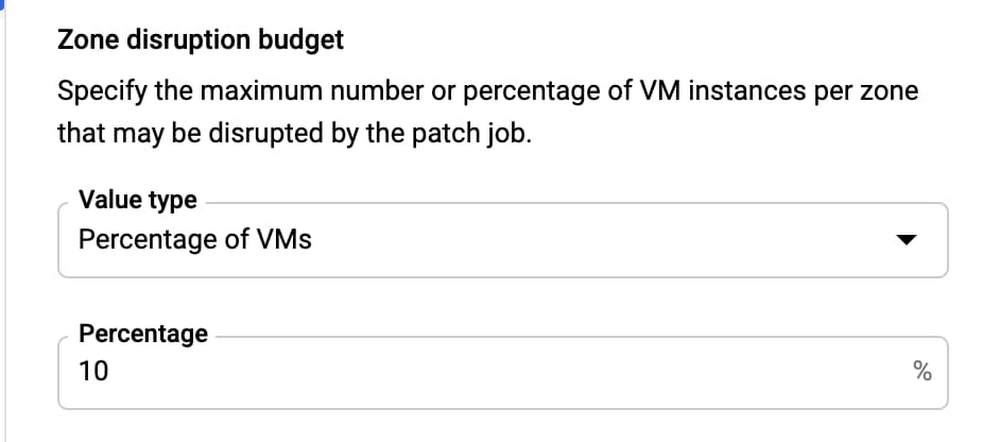

A disruption budget is defined as the maximum number of instances that can be unavailable at any time during an update. An instance might be temporarily unavailable, since updates take time and might involve reboots; an instance cannot be in-service while updates are being installed. An instance may also be unavailable if its VM hasn’t passed the post-patch check; these instances are considered failed and permanently unavailable during the update.
Let’s consider a specific example: you are updating a group of 20 web servers. It makes sense to update just a few of them first and make sure that the remaining instances can handle the workload. The disruption budget is set to 5 instances.
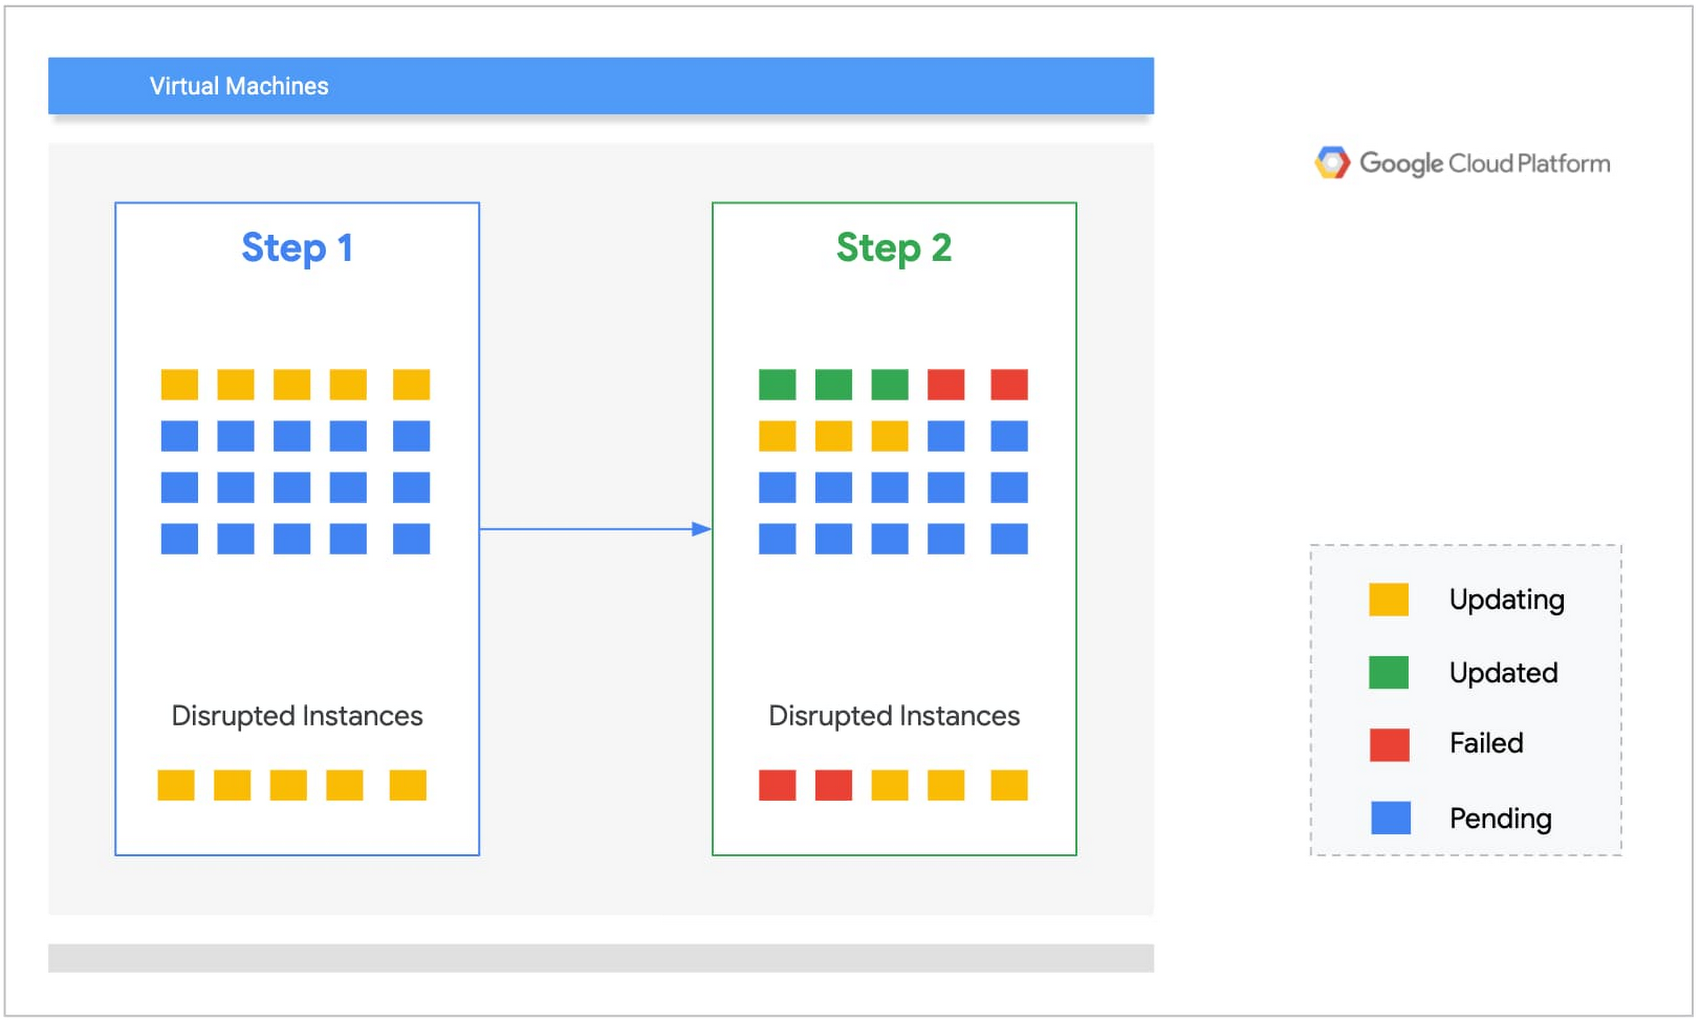

By definition the disruption budget is the maximum number of VMs that are unavailable during the patching process:
Disruption budget ≥ failed instances + instances in process of installing updates.
Step 1: The service starts by updating five instances first. Three instances update successfully and two fail.
Step 2: The two failed instances are consuming two-fifths of the disruption budget. For the second step, we can only patch three instances concurrently.
If at some point the number of failed instances matches the disruption budget, the update process stops for this zone.
5. Create your own patch installation process.
Every organization is different and its update strategy depends on a variety of factors: business requirements, application architecture, security requirements and so on. As a result it’s hard to find two organizations with exactly the same update strategy.
OS patch management provides a very flexible API to integrate your update process into your continuous delivery process. You might want to integrate it with existing tools or use native Google Cloud services to orchestrate patch deployments. For example, you may want to use Cloud Composer or the new Workflows service, which is a great tool for automating long-running operations like update deployments.
Patch with abandon
Patching your OS instances is one of the most important things you can do to maintain the reliability of your systems. Now, with the OS patch management service and these best practices under your belt, you can patch as often as you like, without worrying about disrupting your users and applications. Check out the OS patch management service documentation to learn more and get started.

