How to set up Google Cloud VMware Engine regional disaster recovery with VMware Site Recovery Manager
Jake Wells
Cloud Consultant
Raj Jethnani
Solutions Engineer
As a VMware admin, you understand the importance of business continuity and minimizing downtime. Google Cloud VMware Engine (GCVE) customers have several options of tools to choose from (such as GCVE Protected, Zerto, Veeam replication, VMware Site Recovery Manager (SRM) and other third-party tools) based on their RTO and RPO needs. Of these, VMware SRM is a popular way to enable disaster recovery (DR) in GCVE multi-region deployments. In this blog post, we present a guide to setting up SRM within GCVE, enabling failover and failback of your VMs between Google Cloud regions for DR purposes.
Architecture
Before we dive into implementation, let’s take a moment to review the architecture of GCVE and SRM. The following diagram shows an overview of GCVE Private Clouds configured with an SRM Deployment:
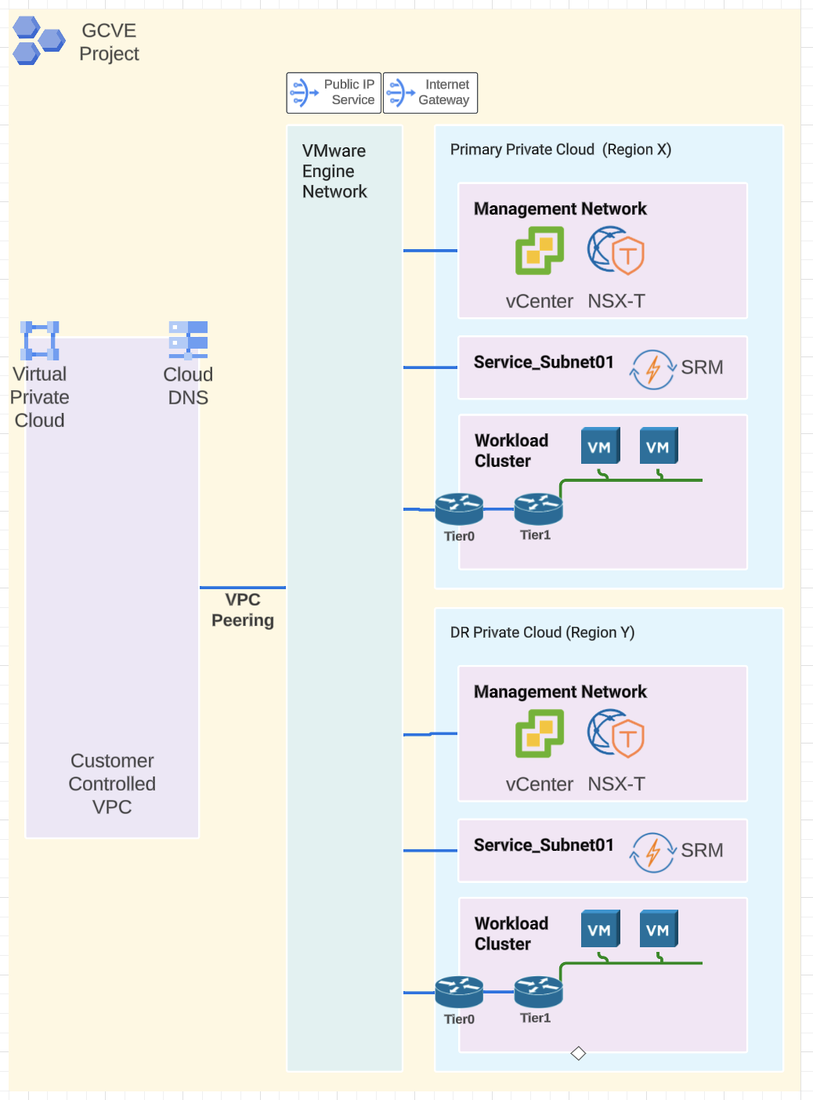

This architecture represents deployment of a primary Private Cloud (PC) in one region with the DR PC deployed to a separate region with connectivity between the PCs using a Standard VMware Engine Network. The SRM and vSphere Replication appliances are deployed to a service subnet within the PC for faster networking speeds as opposed to deploying the appliances within a network segment of the NSX-T Tier1 router. Cloud DNS is used for resolution of the SRM and vSphere replication appliances being deployed within the PCs.
Prerequisites
Before deploying the solution there are a few prerequisite steps we need to ensure are completed:
-
GCVE API enabled in a project on Google Cloud
-
Two GCVE PCs are deployed in different regions
-
VMware Engine Network deployed and connected to the PCs
-
Licenses for SRM
Set up disaster recovery for SRM
Now let's jump in and deploy SRM to enable regional site recovery for GCVE.
1. Assign address ranges for subnet Service-1(or preferred service subnet) image2


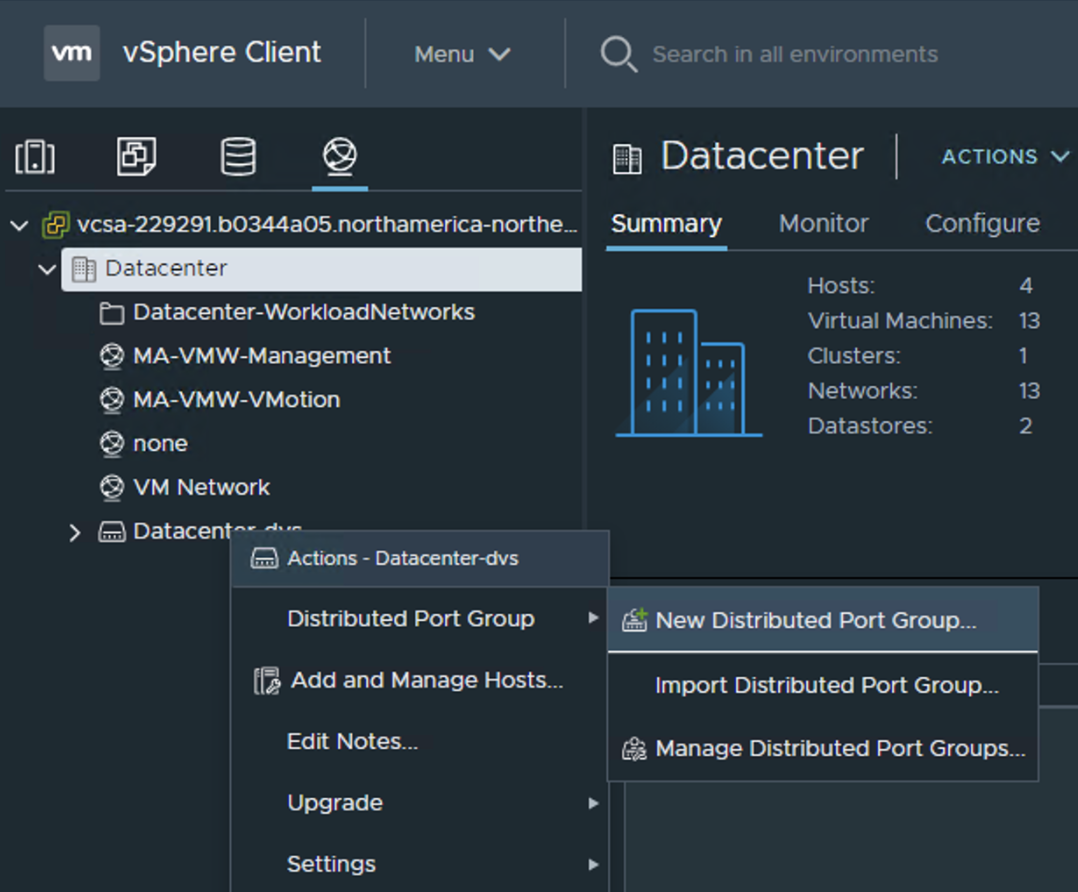
2. Create a port group in vCenter for the subnet; this requires a solution user account. (You’ll need the VLAN ID of Service-1 subnet for the creation of the port group.) image3

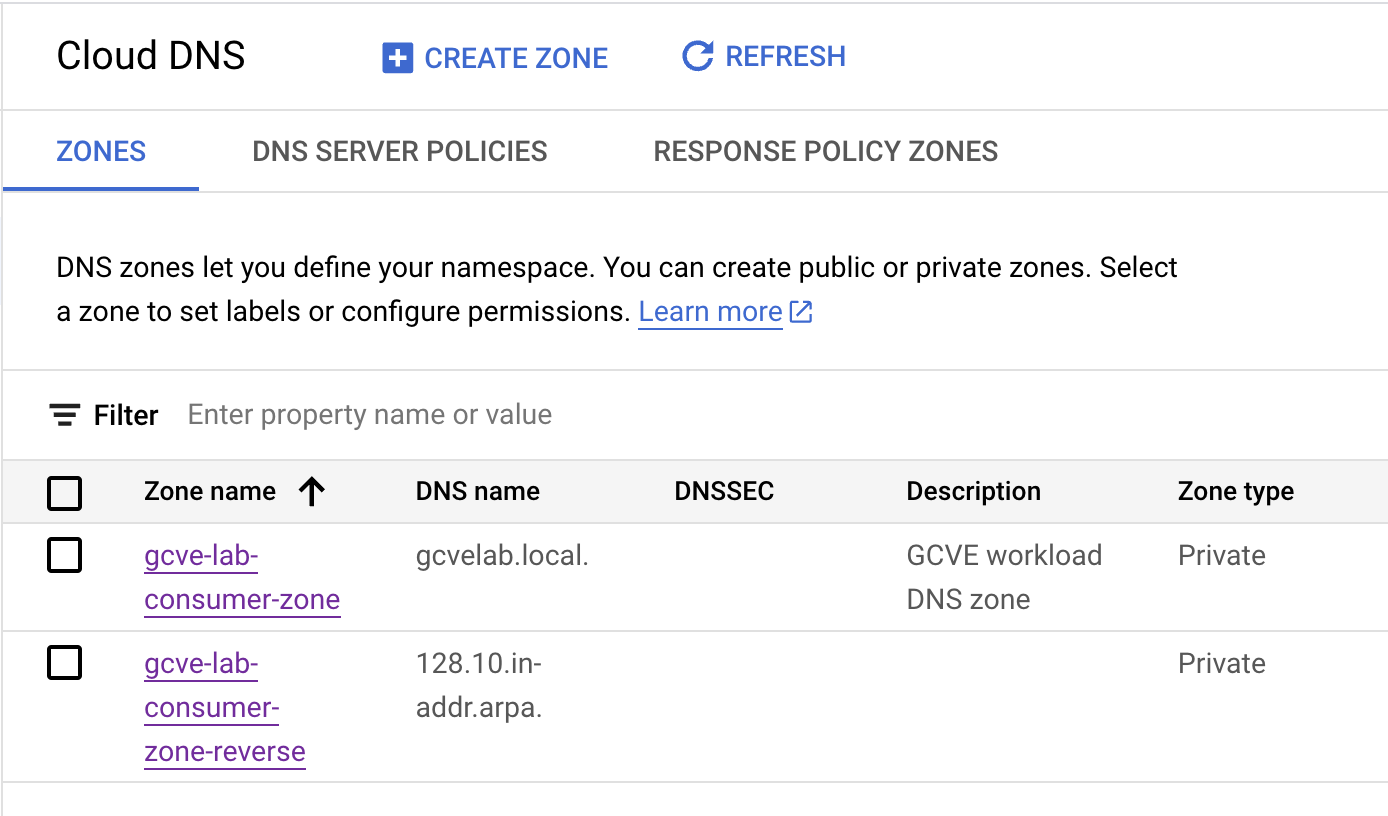

5. Create DNS records for the appliances within each zone.
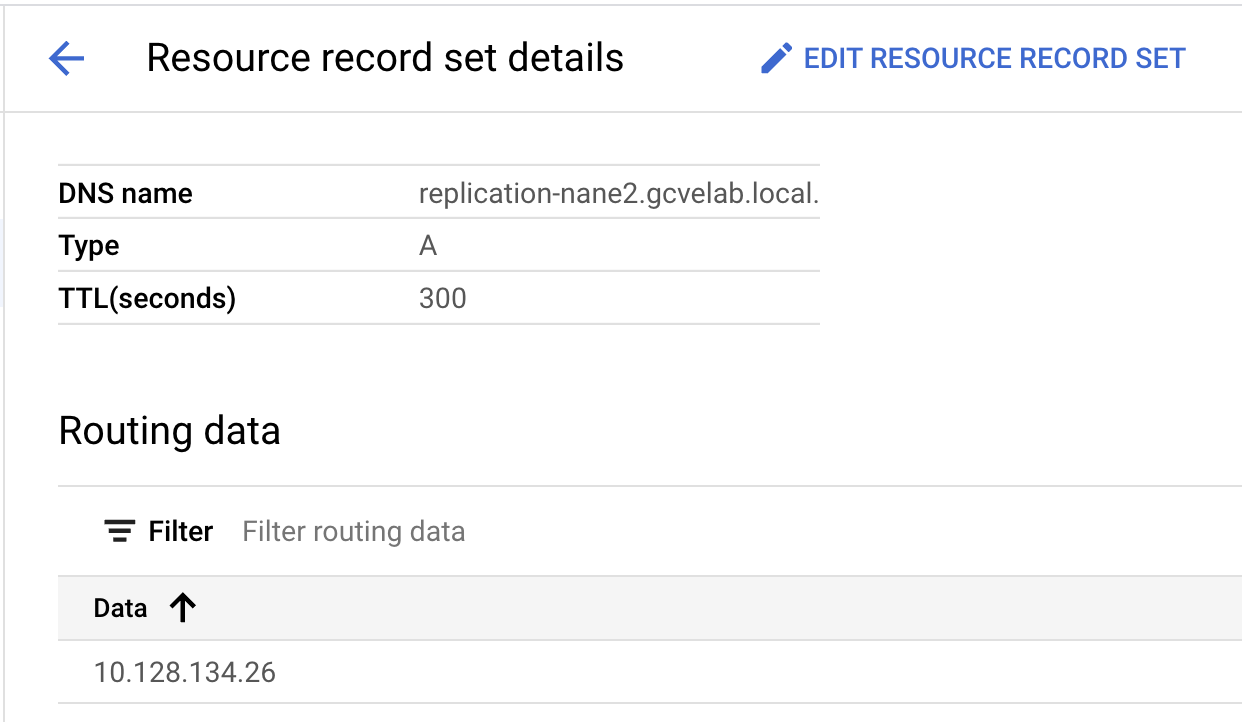

Reverse-lookup record:
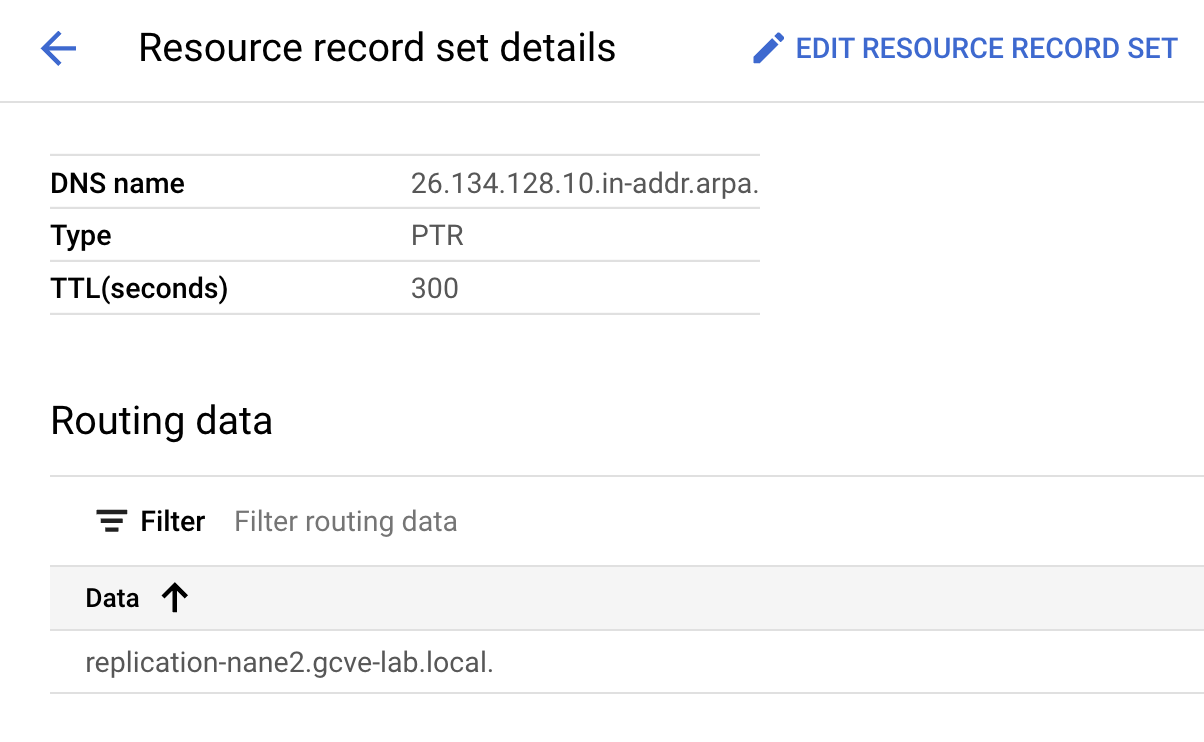

6. Update the binding for the private zones to the intranet VPC of the VMware Engine network. This facilitates DNS resolution for the appliances in the PCs. Once the bindings have been created, you can leverage the DNS server address within each private cloud as the DNS address for configuration within the SRM and vSphere replication appliances.
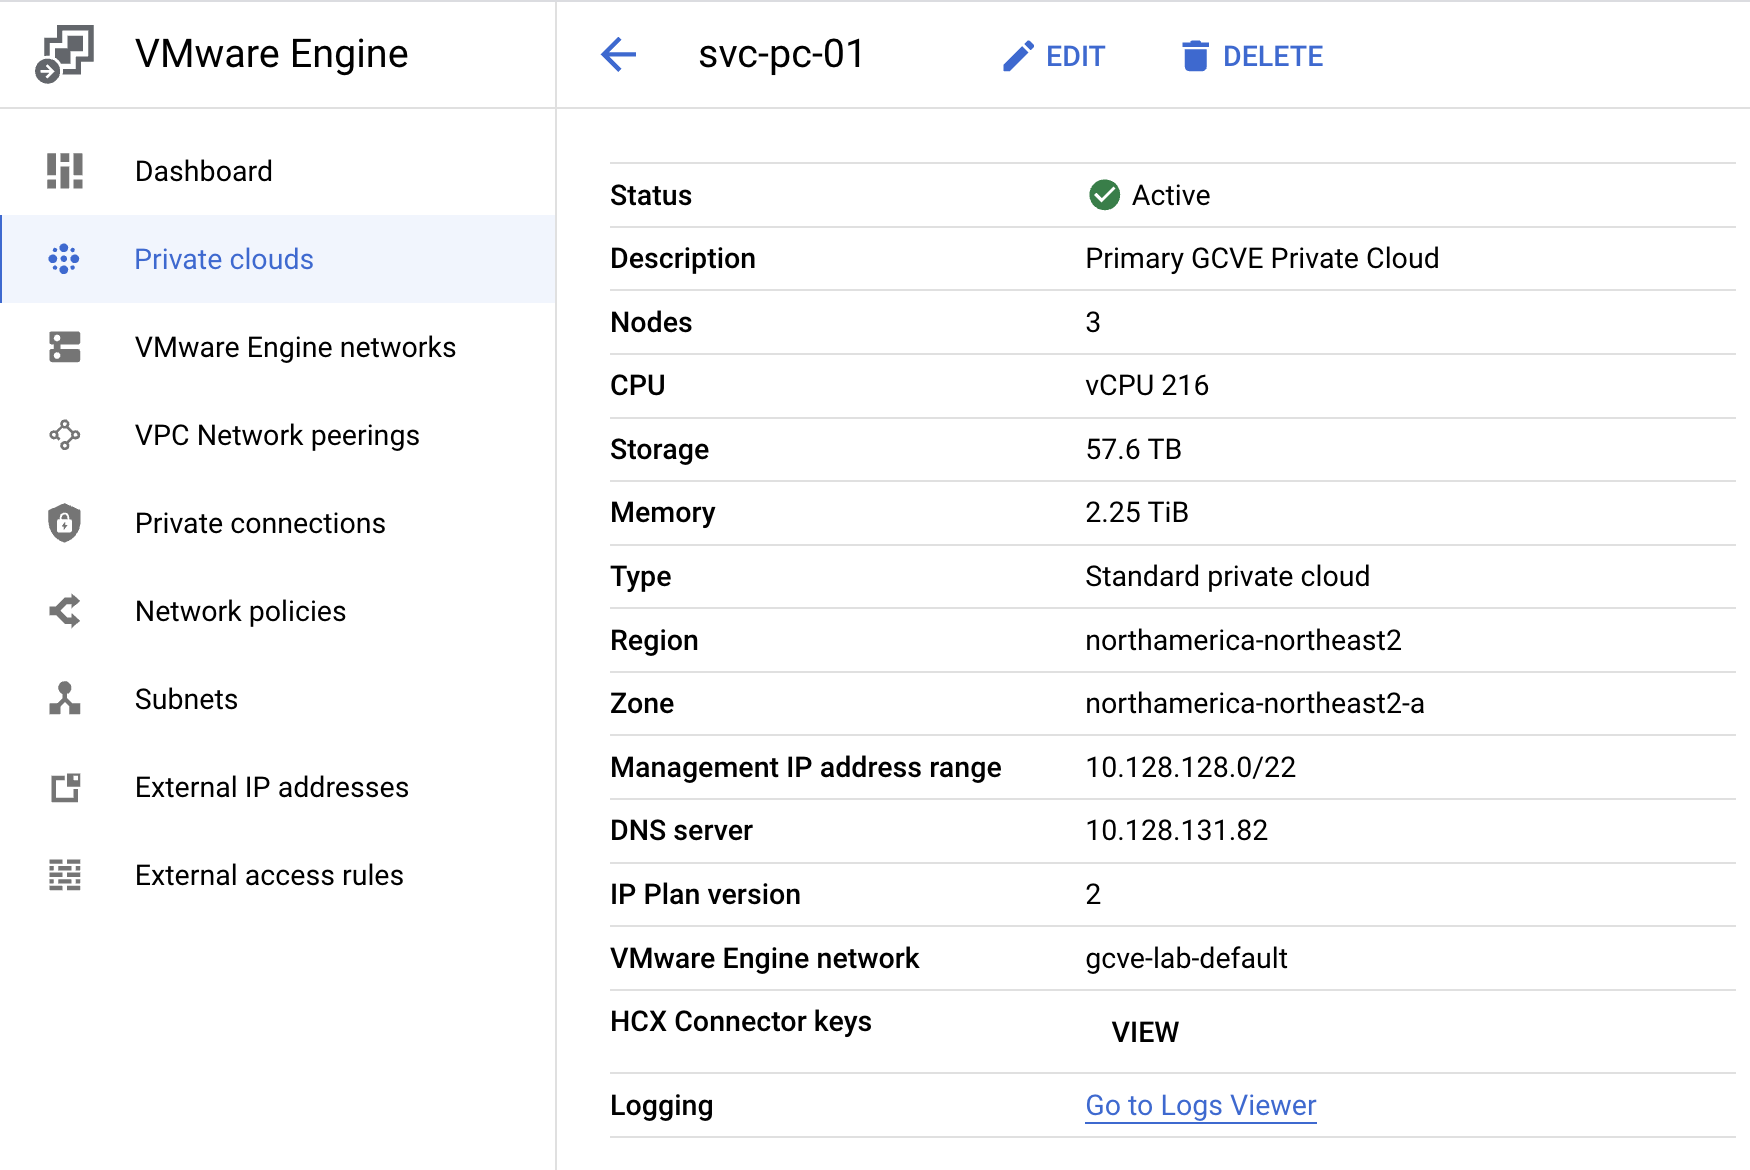

7. Log in to vCenter with a user that has similar permissions as the CloudOwner Role and deploy the vSphere Replication Appliance OVA. Be sure to leverage the Distributed port group that you created using service-1 subnet as the network. Repeat this at the DR site.
8. After successful deployment of the vSphere Replication appliances, log in and perform the configuration. If you used the shortname for the hostname on the appliance during the deployment, make sure to update the network settings in the configuration with the FQDN of the appliance. You will also need to use a solution-user account for connecting to vCenter in the configuration. Perform the configuration at both sites.
9. After configuration, log in to vCenter and navigate to Menu -> Site Recovery Manager and validate that vSphere Replication status is OK at both sites.
10. Log in to vCenter with a user that has similar permissions as the CloudOwner Role and deploy the SRM Appliance OVA. Be sure to leverage the Distributed port group that you created using service-1 subnet as the network. Repeat this at the DR site.
11. After successful deployment of the SRM appliances, log in and perform the configuration. If you used the shortname for the hostname on the appliance during the deployment make sure to update the network settings in the configuration with the FQDN of the appliance. You will also need to use a solution-user account for connecting to vCenter in the configuration. Perform the configuration at both sites.
12. After configuration log in to vCenter and navigate to Menu -> Site Recovery Manager and validate that Site Recovery Manager status is OK at both sites.
Now that the vSphere Replication and SRM appliances have been deployed and their status has been verified at both sites, you should be able to go into SRM to perform the site pairing between the two regions and configure the replication of VMs.
By following this guide, you should now be able to leverage the combined power of VMware SRM and Google Cloud VMware Engine to build a robust and reliable disaster recovery solution for your Google Cloud vSphere environments. Don't wait for a disaster to strike. Mitigate risk and protect your critical workloads by implementing disaster recovery on Google Cloud VMware Engine with SRM today.
