Protecting your GCP infrastructure with Forseti Config Validator part four: Using Terraform Validator
Adrien Walkowiak
Strategic Cloud Engineer
In the previous posts of this series, we discussed how you can secure your infrastructure at scale by applying security policies as code to continuously monitor your environment with the Config Validator policy library and Forseti. In this article, we’ll discuss how you can reuse the exact same policies and Terraform Validator to preventively check your infrastructure deployments, and block bad resources from being deployed in Google Cloud Platform (GCP).
The goal is to catch non-compliant resources before they get deployed in your CI/CD pipeline, since you now have a solution in place (Forseti) to continuously monitor your infrastructure for violations in your environment in the first place.
It is best practice to have your security policies into a separate repository, and integrate them with other tools from there, so that you have a single source of truth for your security requirements. Whenever you need a new policy to be applied everywhere, you can simply update your constraint repository once, making sure that your CI/CD pipeline and Forseti instances always use the latest version of your constraint repository.
Using Infrastructure as Code for your deployments
A good way to control what resources get deployed in your cloud environment is to automate your deployments (and remove direct write access from your users). This can be achieved using a variety of tools, but in this article we’ll focus on Terraform.
Terraform lets you describe the infrastructure you would like to deploy in code, or rather using template files, in HCL. One your template file is ready to get deployed, you can create a Terraform plan to preview what Terraform will deploy in your target environment before actually deploying the changes. Terraform compares your template to what it knows of the state of your infrastructure, and stores it in a state file, either locally, or in a remote target like a Cloud Storage bucket.
It’s a best practice to store this Terraform plan output into an artifact that can be tested or audited later on. Here is an example of how to create a Terraform plan:
As you can see, to actually apply the changes, you can run the Terraform apply command on the plan output file, if everything looks good to you.
In our example, we’ll add these steps to the CI/CD pipeline, and add some extra tests between creating the plan and applying it to our infrastructure. We will use a demo constraint to ensure that we can actually catch non-compliant resources before they get deployed in GCP.
Validating your policies in your CI/CD pipeline
Another best practice is to use a CI/CD pipeline to deploy your Terraform templates (or equivalent). It is important that all changes in your infrastructure go through a code change (and/or code review) and get deployed by your pipeline, unless there is an absolute necessity to bypass it (like a break-glass scenario).
Also, you don’t have to deploy your entire cloud environment using a single pipeline; this becomes hard to maintain, and when things go wrong, creates a large blast radius. It’s advisable to have different teams manage smaller pieces of your infrastructure, each with their own pipelines, and their own separate Terraform state files.
In general, your pipeline should follow these basic steps:
A code change triggers a build (either a merge to master, or a scheduled pull from your CI server).
The new code is checked out and some basic tests are run on it (sanity testing).
If all tests pass, run the terraform plan command on your template and store the output as an artifact (for instance in a GCS bucket).
Run the terraform-validator validate command on your cloud plans, applying the latest policies of your separate policy repository.
If everything passes, run your usual infrastructure deployments steps, according to your internal processes. This basically comes down to how your terraform apply command gets executed. This might happen as soon as all tests pass in a lower-level environment, or it could trigger a new set of tests for a higher-level environment (smoke tests, pen tests, load tests etc.), and/or manual reviews / approvals etc.
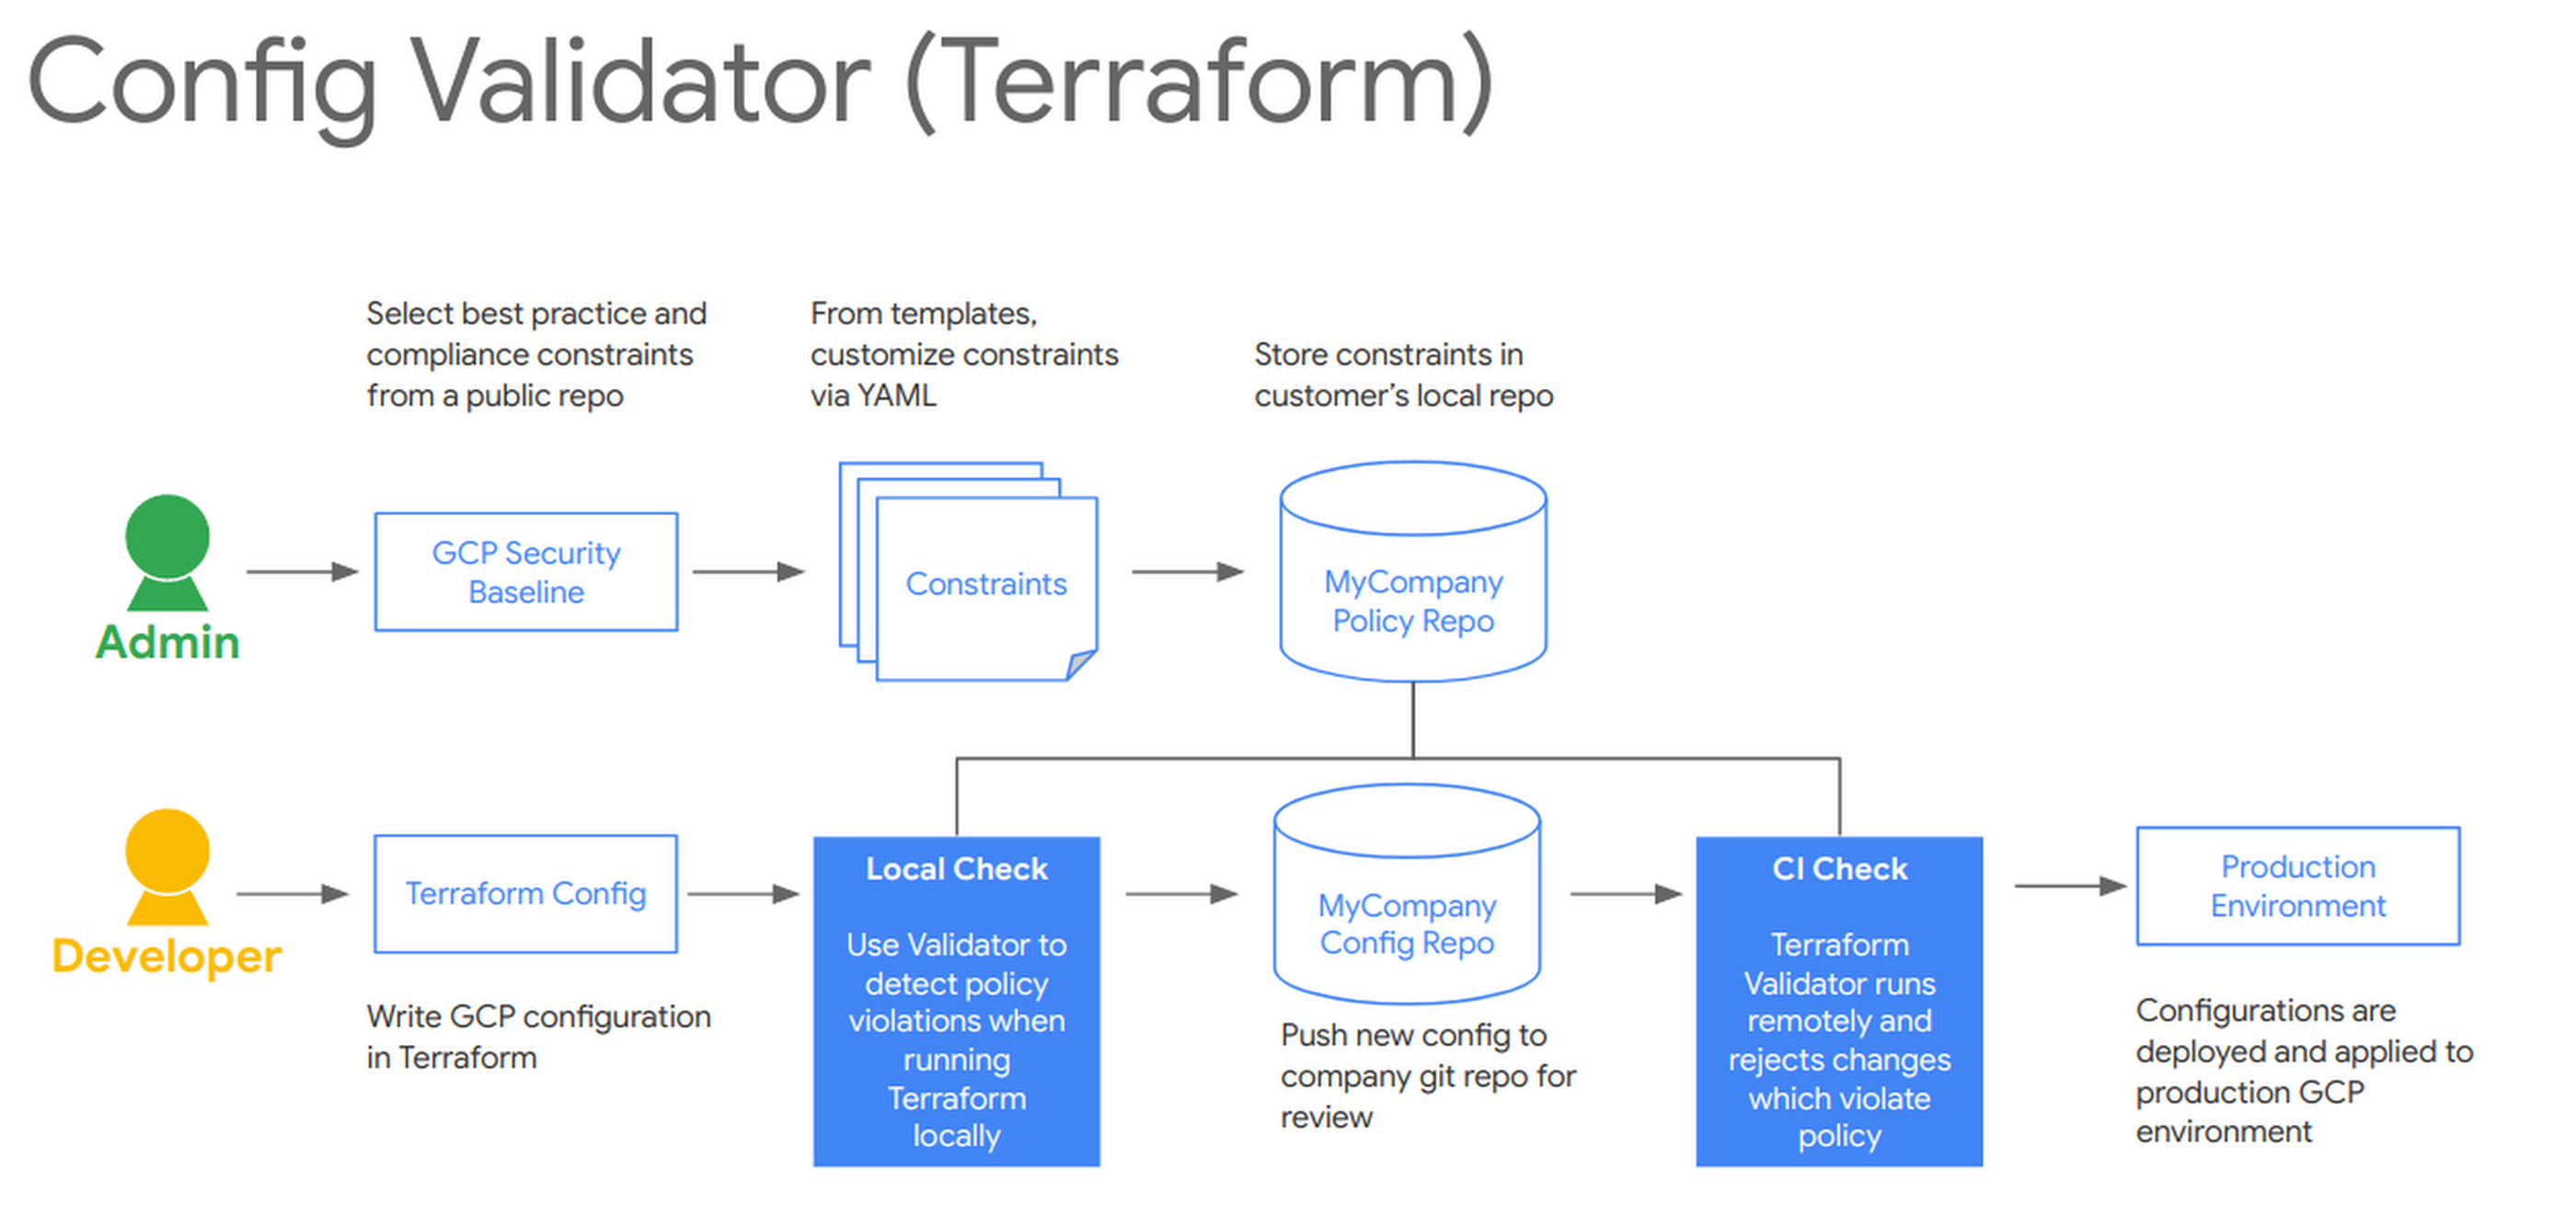
A fellow Googler, Morgante Pell, presented a demo of this pipeline at Next ‘19. Here is a basic diagram of how to integrate the Config Validator terraform-validator tool in your CI/CD deployments:

Cloud Build pipeline example
This pipeline uses a GitHub repository as a source for your Terraform templates, and each merge to master triggers a new build in Cloud Build, Google Cloud’s serverless CI/CD service, to test and deploy the new code.
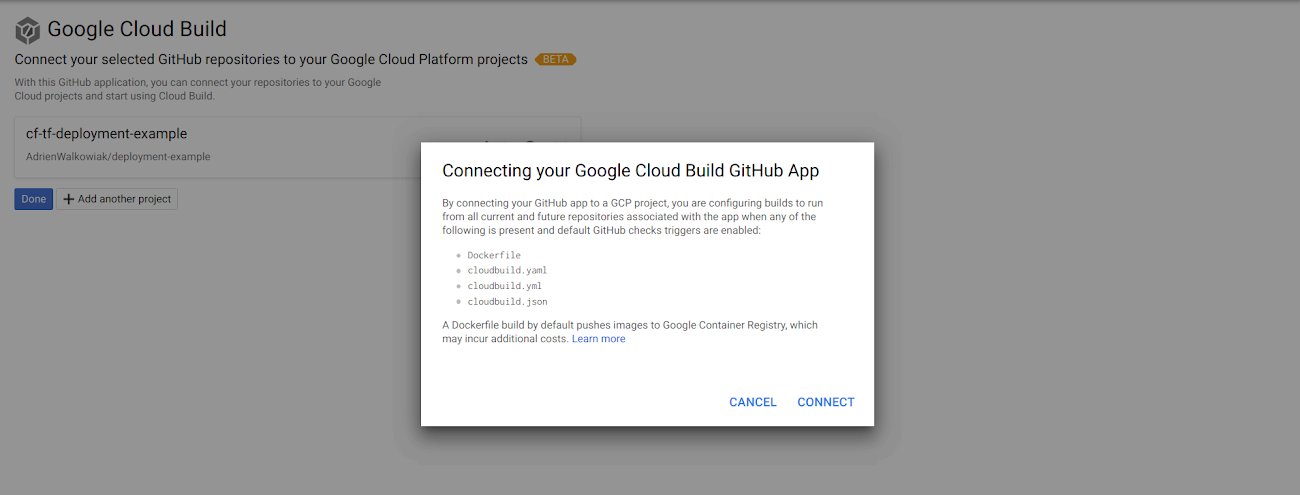
We won’t go over all the steps to deploy this particular solution, as there will be more public documentation on this soon, but you should install the Cloud Build App for Github to add the Cloud Build triggers on specific events in your repository.
At the end of your setup, you should see something like the following message to confirm that you allow Github to trigger your Cloud Build pipeline via the Cloud Build Github App:
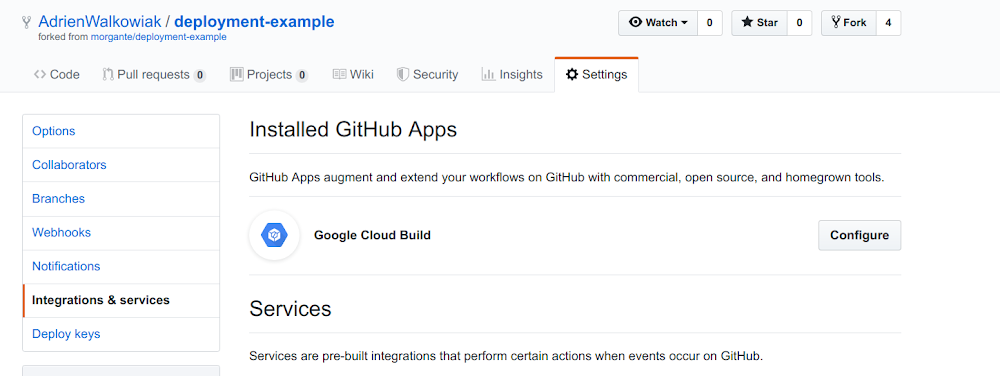
Next, verify in your GitHub repository that the Cloud Build App has been successfully installed:
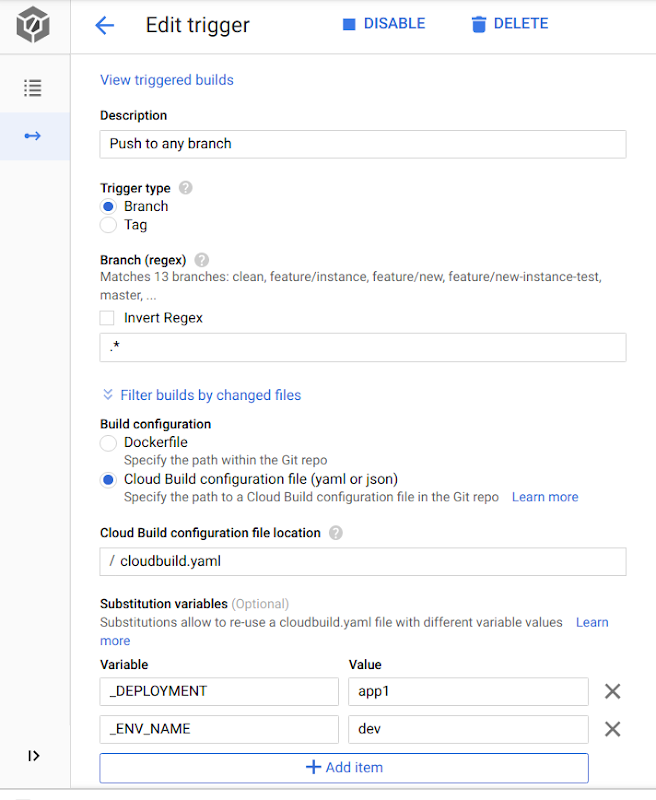
Finally, add the right triggers in your Cloud Build configuration, for instance:
In order for the Cloud Build service to be able to deploy your resources successfully, you need to ensure its service account has the right permissions (i.e., roles) in your target project.
This service account is formatted like: [PROJECT_NUMBER]@cloudbuild.gserviceaccount.com.
For instance, this demo repository needs at least the editor role for your CI/CD and application projects.
Here is a simple example of what your Cloud Build pipeline could look like, for the CI part of your deployments:
cloudbuild.yaml:This lets you configure a four-step Cloud Build pipeline for the deployments/app1/dev directory:
Run terraform init
Run terraform plan and save it into a terraform.plan file (binary)
Convert the terraform.plan file into JSON
Run terraform-validator validate on the Terraform plan to look for violations
Note: We are using the latest public builder image for the terraform-validator: gcr.io/config-validator/terraform-validator. This image contains the latest release of terraform-validator, which only supports Terrafom versions 0.12 or higher. If you need support for prior versions, you can use a previous release, or you can build your own that includes all the additional steps/tests that you need for your terraform deployments.
For the CD part of it, you can configure a second Cloud Build trigger to simply run terraform apply:
cloud-build-apply.yaml:Testing our setup
For our use case, we will simply add a policy to the policy-library/policies/constraints folder directly. In more realistic scenarios, these policies should be maintained by a separate team, in a different repository (you may want to use a Git submodule to maintain consistency between your repositories).
The policy that we will enforce here is simply the policy that restricts the location of Cloud Storage buckets to a fixed list of regions (say, for compliance reasons). For demonstration purposes, we set the authorized regions for our bucket to be any region in Europe.
This way, if someone needs to create a Cloud Storage bucket in your environment, they first need to create or modify a Terraform template and merge the code change to your repository. This triggers the Cloud Build build and runs the security checks, which include all the constraints in the policies/constraints folder.
A good practice before testing this setup is to test your code locally before pushing your Terraform templates to your common repository, which will trigger a Cloud Build build, and run all the tests referenced in your cloudBuild YAML file. Once you are confident enough in your code state, you can merge it to the right branch in your setup to trigger a Cloud Build build on it.
On our first try, we add a bucket in the asia-southeast1 region, which is non-compliant with our constraint.
Testing the code locally, we can see that it raises a violation:
Run terraform-validator:
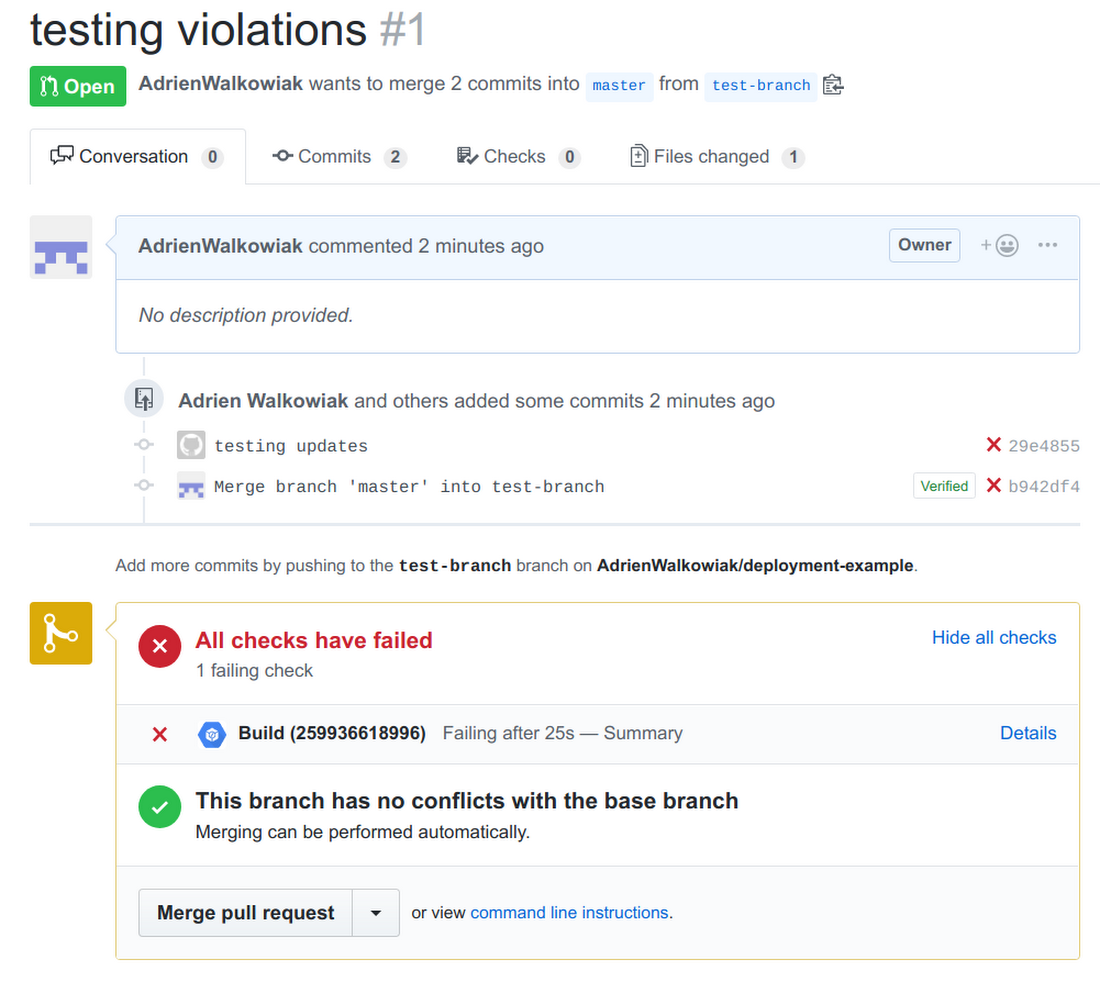
Now, let’s try to push this code to master anyway, to ensure our CI/CD pipeline catches the violation too:
Now we can try again to fix this violation, by fixing the value for bucket region in our template (updating it to europe-north-1 this time).
Now that our local tests pass, we can push to master, and test our CI/CD pipeline:
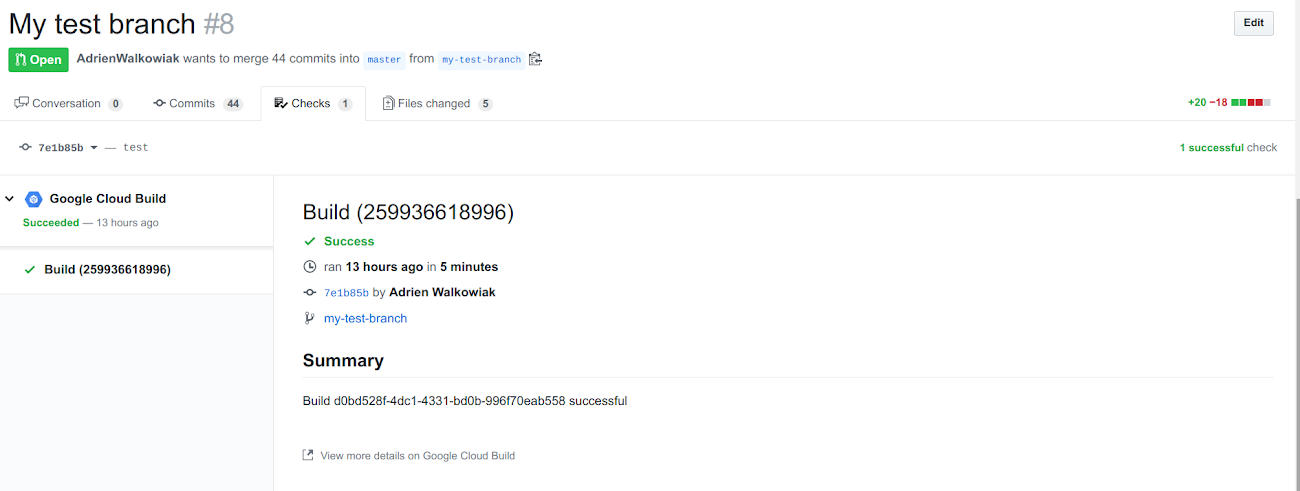
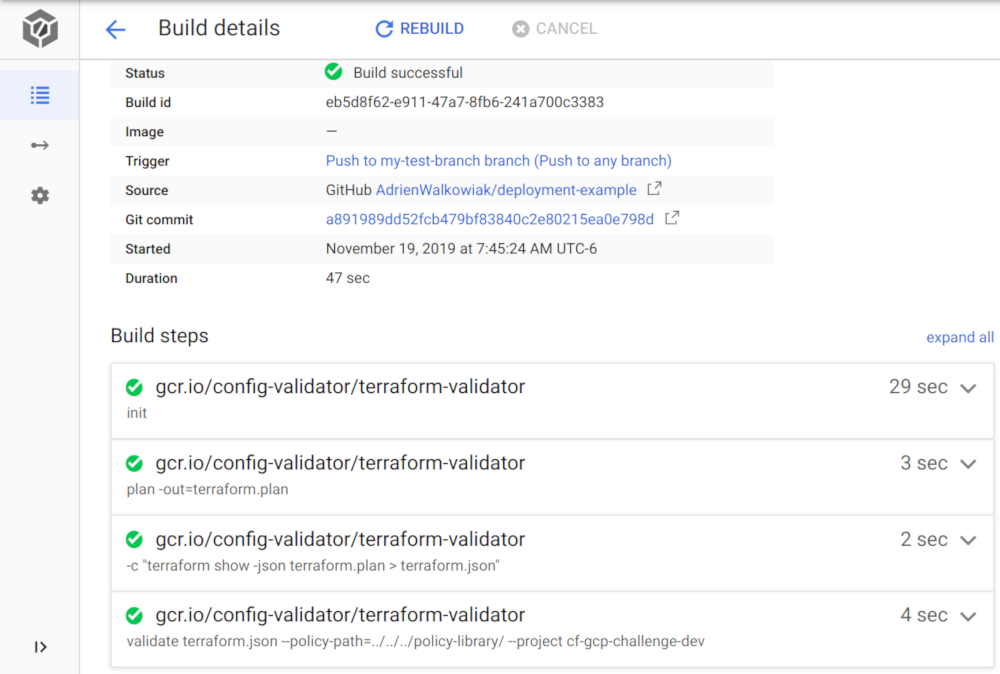
And double check that everything was tested and passed in Cloud Build:
Conclusion
This concludes this series on protecting your GCP Infrastructure at scale with Config Validator.
In the end, we have seen that it is possible to efficiently control what gets deployed in your environments, using Cloud Build, Terraform and the terraform-validator tool, in a serverless and fully automated way. This lets you enable your users to deploy in GCP while still adding strict guardrails about what they can deploy, where. You do this by enforcing that all deploys to the cloud be done via automation. The only backdoor to bypass your pipelines should be in case of an emergency, and it should be tightly controlled.
Finally, you can trust these controls to prevent bad resources from being deployed in the first place, but it is also a best practice to continuously monitor your existing infrastructure against the same policies, using Forseti and the config_validator scanner. This will let you catch any non-compliant, legacy infrastructure, and any resources that would have been deployed outside of your trusted CI/CD pipeline. If you have any questions or comments about this series, don’t hesitate to reach out.
Useful Links:
OPA / rego:
Repositories:


