Getting started with Ray on Google Kubernetes Engine
Winston Chiang
Product Manager
Richard Liu
Senior Software Engineer, Google Kubernetes Engine
The rapidly evolving landscape of distributed computing demands efficient and scalable frameworks. Ray.io is an open-source framework to easily scale up Python applications across multiple nodes in a cluster. Ray provides a simple API for building distributed, parallelized applications, especially for deep learning applications.
Google Kubernetes Engine (GKE) is a managed container orchestration service that makes it easy to deploy and manage containerized applications. GKE provides a scalable and flexible platform that abstracts away the underlying infrastructure.
KubeRay enables Ray to be deployed on Kubernetes. You get the wonderful Pythonic unified experience delivered by Ray, and the enterprise reliability and scale of GKE managed Kubernetes. Together, they offer scalability, fault tolerance, and ease of use for building, deploying, and managing distributed applications.
In this blog post, we share a solution template to get you started easily with Ray on GKE. We discuss the components of the solution and showcase an inference example using Ray Serve for Stable Diffusion.
Overview of the Solution
In this solution template we use KubeRay, an OSS solution for managing Ray clusters on Kubernetes, as the operator for provisioning our workloads. Follow the step-by-step instructions in the README file to get started. The solution contains two groups of resources: platform-level and user-level.
Platform-level resources are expected to be deployed once for each development environment by the system administrator. These include the common infrastructure and GCP service integrations that are shared by all users.
GKE cluster and node pool. Configurations can be changed in the main.tf file. This module deploys a GKE cluster with a GPU node pool, including required Nvidia drivers for GPUs. You can replace these with other machine types.
Kubernetes system namespace and service accounts, along with the necessary IAM policy bindings. This allows the platform administrator to provide fine-grained user access control and quota policies for Ray cluster resources.
KubeRay operator. The operator is responsible for watching for changes in KubeRay resources and reconciling the state of the KubeRay clusters.
Logging. The `logging_config` section enables logs from system components and workloads to write logs to Cloud logging.
Monitoring. The `monitoring_config` section enables Managed Prometheus integration. This allows the deployment to automatically scrape system-level metrics and writes them to the managed metrics service.
Workload identity. This enables your workloads to authenticate with other GCP services using Google IAM service accounts.
User-level resources are expected to be deployed once by each user in the development environment.
KubeRay cluster. This is the actual Ray cluster that we will be used for your workloads. It is configured to use a Workload Identity pool and a IAM-binded service account that provides fine-grained access to GCP services. You can customize the Ray cluster settings by editing the kuberay-values.yaml file.
Logging. The solution adds a side car container deployed alongside each KubeRay worker node. This uses fluentbit to forward Ray logs from the head node to Cloud logging. You can edit the fluentbit-config file to change how the logging container filters and flushes logs.
Monitoring. This module provides a PodMonitoring resource that scrapes metrics from the user’s Ray cluster and uploads data points to Google Managed Prometheus. An optional installation for Grafana dashboard is included and can be accessed through a web browser.
JupyterHub server. This module installs a JupyterHub notebook server in the user namespace, enabling users to interact directly with their Ray clusters.
Run a Workload on Your Ray Cluster
Let’s try running the provided example with Ray Serve to deploy Stable Diffusion. This example was originally taken from the Ray Serve documentations here. To open the example in Jupyter notebook, go to the external IP for proxy-public in your browser (instructions to get the IP). And then click on File -> Open from URL, and input the raw URL of the notebook to open it.
Since the notebook runs in the same Kubernetes cluster as the Ray cluster, it is able to talk directly to the latter using its cluster-internal service endpoint – thus there is no need to expose the Ray cluster to public internet traffic. For production workloads, you should secure your endpoints with GCP account credentials. Google Cloud Identity Aware Proxy (IAP) can be used to enable fine-grained access control to user resources, such as our Ray cluster, to protect your GCP resources from unnecessary exposure. A full tutorial on how to enable IAP on your GKE cluster can be found here.
The notebook contains code for deploying a pre-trained model to a live endpoint. The last cell makes a call to the created service endpoint:
Executing the notebook will generate a file with a unique picture of a cute cat. Here is an example we got:

Congratulations! You have now deployed a large model for image generation on GKE.
Logging and Monitoring
As mentioned earlier, this solution enables logging and monitoring automatically. Let’s find those logs.
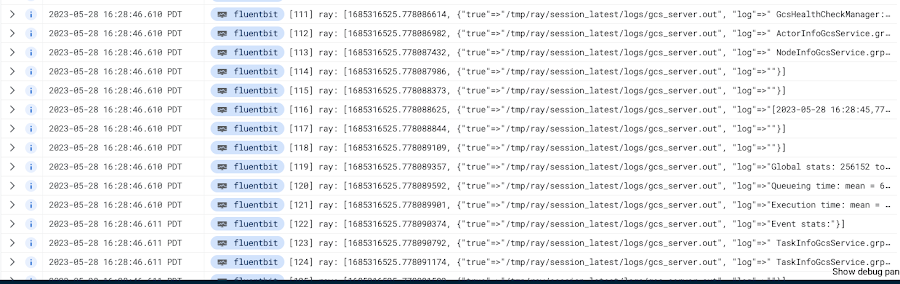
In your Cloud Console, open up Logging -> Log Explorer. In the query text box, enter the following:
You should see the Ray logs from your cluster forwarded here.
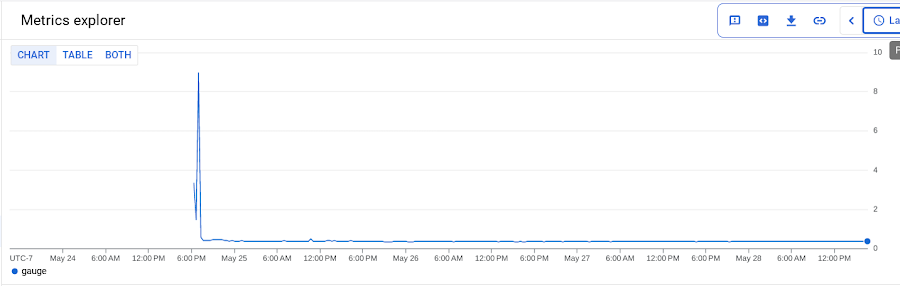
To see your monitoring metrics, go to Metrics Explorer in the Cloud Console. Under the menu for "Target", select "Prometheus Target" and then "Ray". Select the metric that you want to see, for instance `prometheus/ray_component_cpu_percentage/gauge`:
The deployment also comes with a Grafana deployment. Follow this guide to open it up and view your Ray cluster’s metrics.
Conclusion
The combination of Ray and GKE offers a simple and powerful solution for building, deploying, and managing distributed applications. Ray’s simplicity makes it an attractive choice for data and model developers while GKE’s scalability and reliability is the defacto choice for enterprise platforms. The solution template presented in this blog post offers a convenient way to get started quickly with KubeRay, the recommended approach to deploy Ray on GKE.
If you have any questions for building Ray on Kubernetes and GKE, you can contact us directly at ray-on-gke@google.com or comment in GitHub. Learn more about building AI Platforms with GKE by visiting our User Guide.