Introducing model co-hosting to enable resource sharing among multiple model deployments on Vertex AI
Nikita Namjoshi
Developer Advocate
When deploying models to the Vertex AI prediction service, each model is by default deployed to its own VM. To make hosting more cost effective, we’re excited to introduce model co-hosting in public preview, which allows you to host multiple models on the same VM, resulting in better utilization of memory and computational resources. The number of models you choose to deploy to the same VM will depend on model sizes and traffic patterns, but this feature is particularly useful for scenarios where you have many deployed models with sparse traffic.
Understanding the Deployment Resource Pool
Co-hosting model support introduces the concept of a Deployment Resource Pool, which groups together models to share resources within a VM. Models can share a VM if they share an endpoint, but also if they are deployed to different endpoints.
For example, let’s say you have four models and two endpoints, as shown in the image below.
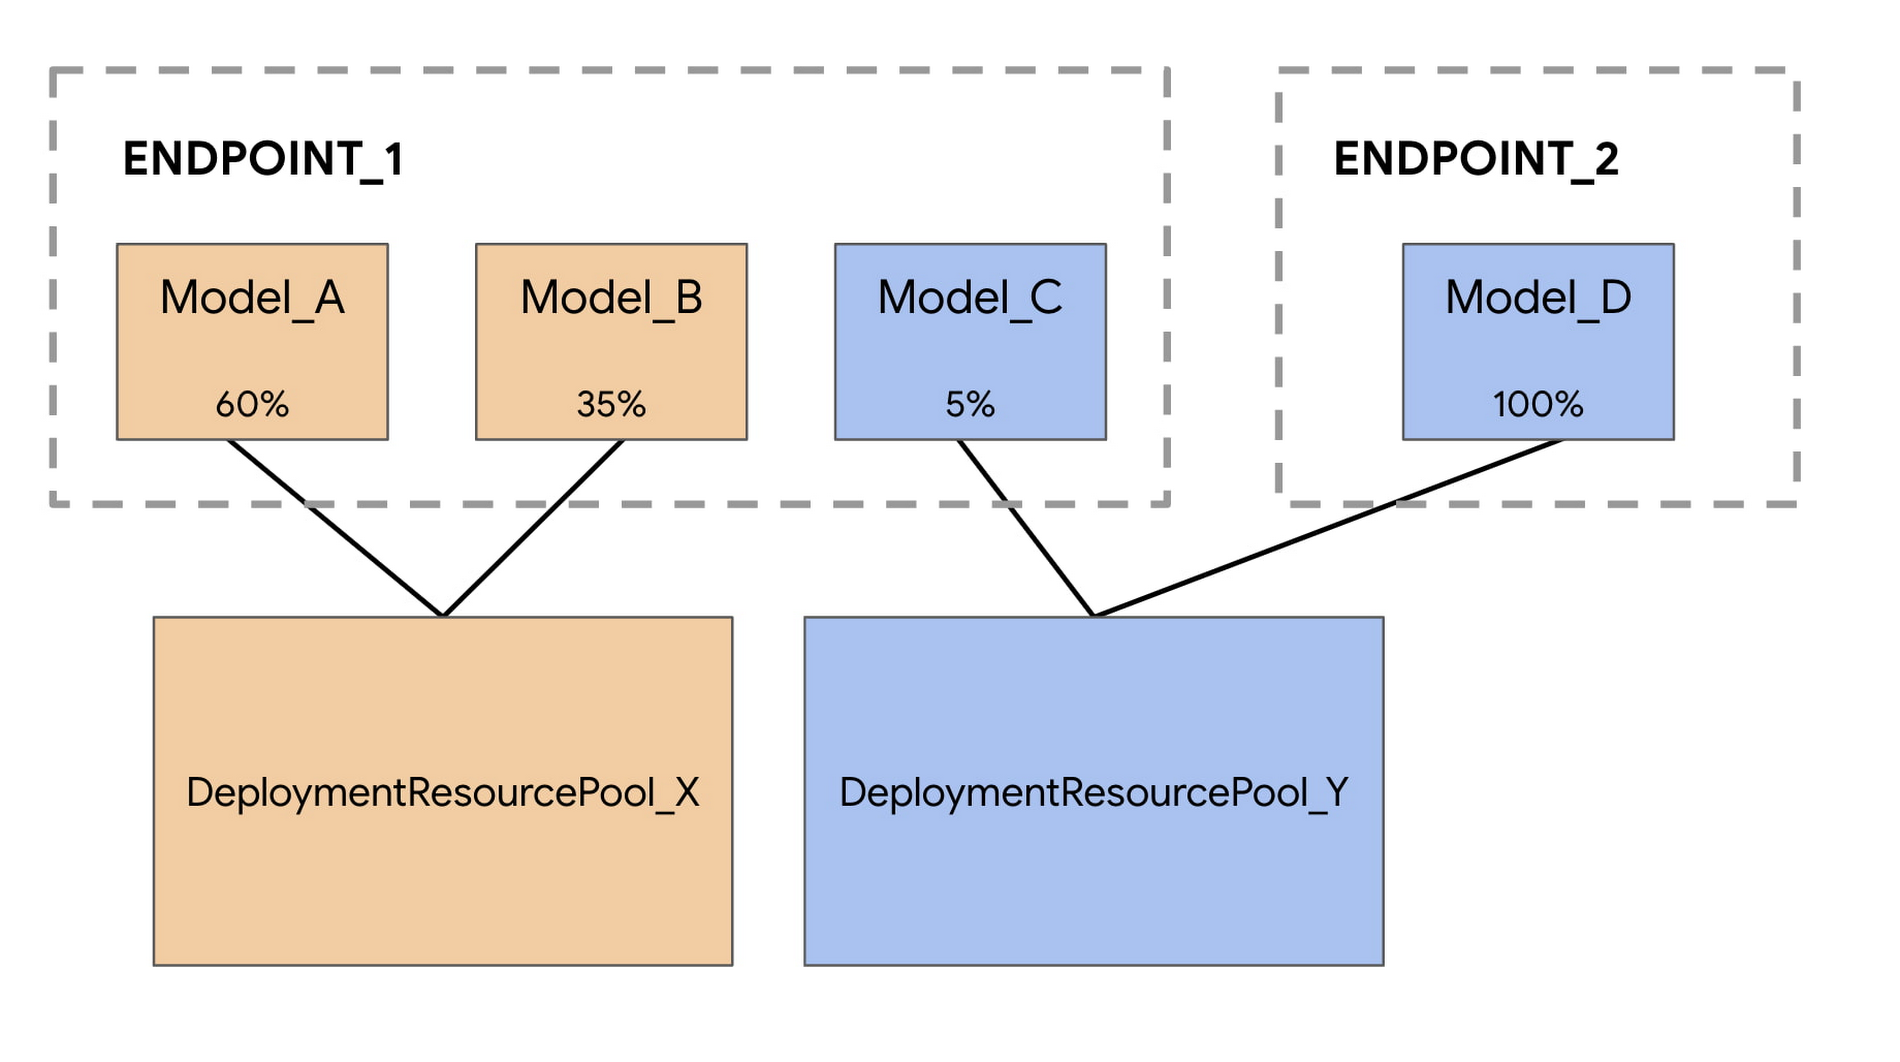

Model_A, Model_B, and Model_C are all deployed to Endpoint_1 with traffic split between them. And Model_D is deployed to Endpoint_2, receiving 100% of the traffic for that endpoint.
Instead of having each model assigned to a separate VM, we can group Model_A and Model_B to share a VM, making them part of DeploymentResourcePool_X. We can also group models that are not on the same endpoint, so Model_C and Model_D can be hosted together in DeploymentResourcePool_Y.
Note that for this first release, models in the same resource pool must also have the same container image and version of the Vertex AI pre-built TensorFlow prediction containers. Other model frameworks and custom containers are not yet supported.
Co-hosting models with Vertex AI Predictions
You can set up model co-hosting in a few steps. The main difference is that you’ll first create a DeploymentResourcePool, and then deploy your model within that pool.
Step 1: Create a DeploymentResourcePool
You can create a DeploymentResourcePool with the following command. There’s no cost associated with this resource until the first model is deployed.
Step 2: Create a model
Models can be imported to the Vertex AI Model Registry at the end of a custom training job, or you can upload them separately if the model artifacts are saved to a Cloud Storage bucket. You can upload a model through the UI or with the SDK using the following command:
When the model is uploaded, you’ll see it in the model registry. Note that the deployment status is empty since the model hasn’t been deployed yet.


Step 3: Create an endpoint
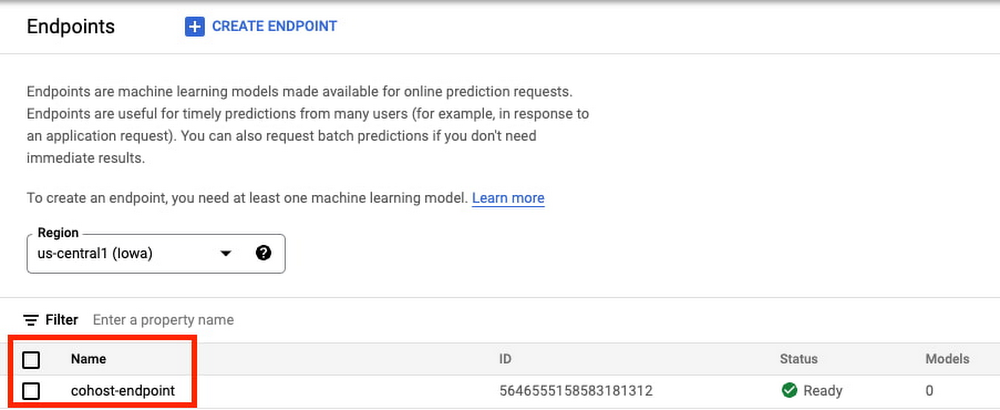
Next, create an endpoint via the SDK or the UI. Note that this is different from deploying a model to an endpoint.
endpoint = aiplatform.Endpoint.create('cohost-endpoint')
When your endpoint is created, you’ll be able to see it in the console.

Step 4: Deploy Model in a Deployment Resource Pool
The last step before getting predictions is to deploy the model within the DeploymentResourcePool you created.
When the model is deployed, you’ll see it ready in the console. You can deploy additional models to this same DeploymentResourcePool for co-hosting using the same endpoint we created already, or using a new endpoint.


Step 5: Get a prediction
Once the model is deployed, you can call your endpoint in the same way you’re used to.
x_test= ['The movie was spectacular. Best acting I’ve seen in a long time and a great cast. I would definitely recommend this movie to my friends!']endpoint.predict(instances=x_test)
What’s next
You now know the basics of how to co-host models on the same VM. For an end to end example, check out this codelab, or refer to the docs for more details. Now it’s time for you to start deploying some models of your own!
