How to train a ResNet image classifier from scratch on TPUs on AI Platform
Lak Lakshmanan
Machine Learning and Big Data Professional Services
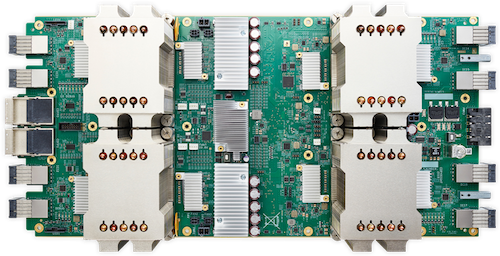
Tensor Processing Units (TPUs) are hardware accelerators that greatly speed up the training of deep learning models. In independent tests conducted by Stanford University, the ResNet-50 model trained on a TPU was the fastest (30 minutes) to reach the desired accuracy on the ImageNet dataset.
In this article, I’ll walk you through the process of training a state-of-the-art image classification model on your own data using Google’s Cloud TPUs. Best of all:
- These is no TensorFlow code to write (we took care of that for you)
- There is no software to install or infrastructure to spin up (AI Platform is serverless)
- You can train on the cloud, but deploy the model anywhere (use Kubeflow)
The complete code is in a notebook in GitHub. Use that notebook to follow along this tutorial. I have tested the notebook in Cloud Datalab.

1. CSV files pointing to JPEG data
To start, you need a folder full of image files and three comma-separated value (CSV) files that provide metadata about the images.First, you’ll need a CSV file consisting of images that you wish to use for training, along with their labels. Each line of the CSV file might look something like this:
The image files can be named whatever you want, but its path should be live and accessible on Google Cloud Storage . The label strings also can be anything you like, but they shouldn’t have commas in them. You should have at least 2 classes, and the training dataset should contain enough examples of each class. Because we are doing from-scratch image classification, I recommend that you have at least 1000 images per category and an overall dataset size of at least 20,000 images. If you have fewer images, consider the transfer learning tutorial (it uses the same data format).
Second, you’ll need a CSV file just like the one above, but this time for evaluation. I recommend having 90% of your data for training and 10% for evaluation. Make sure the evaluation dataset contains 10% of the images in each category.
Finally, you need a file that contains all the unique labels, one per line. For example:
The order in this file is important. If the final model gives you a prediction of 2, you have to recognize that this is roses (class 0 is daisy). You can get the list of classes from your training CSV file, of course:
In the above code, I’m simply extracting the second field from the training CSV file, sorting them, and finding the unique set of values within that output. Create these three files (train_set.csv, eval_set.csv and labels.txt) by whichever process you find most familiar, upload them to Cloud Storage, and you are in business: you’re ready to train a model.
2. Clone the ResNet code
Let’s copy over the ResNet code from the official TPU samples and make a submittable package. In order to do this, clone my GitHub repository and run a script there:The 1.8 above refers to TensorFlow version 1.8, the newest released version of TensorFlow at time of writing. I recommend using the latest version of TensorFlow, so change the 1.8 appropriately.
3. Enable the Cloud TPU service account
You need to allow the TPU service account to talk to ML Engine. You can find the service account and provide access using this script:4. [Optional] Try the preprocessing locally
To make sure that our package creation worked, you can try running the pipeline to convert JPEGs to TensorFlow records:Here /tmp/input.csv is a small slice of your training input file. Verify that both training and validation files have been created.
5. Run the preprocessing code
Run the code to convert JPEG to TFRecord in Cloud Dataflow. This will distribute the conversion code to many machines and autoscale it: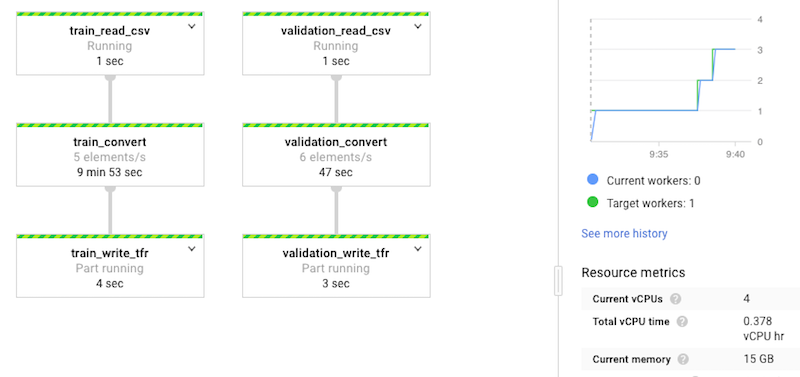

If you wish to retrain your model on newer data, simply run this pipeline on the new data, but make sure to write to a new output directory so that you don’t overwrite the earlier output.
6. Train the model
Simply submit the training job to AI Platform, pointing at the output directory of your Dataflow job:The bolded lines represent things that you might want to change:
- I’m deleting the
OUTDIRbefore launching the training job. This causes the training to start afresh. If you have new images and you simply want to update your existing model, then don’t delete the output directory. - I’m using ResNet-18, which is the smallest ResNet model. Your choices include 18, 34, 50, etc. (see full list in
resnet_main.py). As your dataset size increases, you can afford to use larger and larger models: a larger model runs the risk of overfitting on smaller datasets. So, as your dataset size increases, you can use the larger models. - TPUs work really well with batch sizes of around 1024 or so. My dataset is quite small, which is why I’m using smaller numbers.
- The
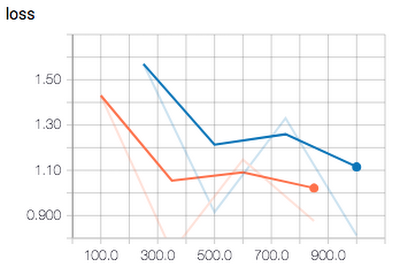
train_stepsflag controls how long (how many epochs) you intend to train for. You are showing the model train_batch_size images each time. To get a reasonable ballpark value, try to configure your training session so that the model sees each image at least 10 times. In my case, I have 3300 training images,train_batch_sizeis 128 and so, in order to see each image 10 times, I would need (3300*10)/128 steps or about 250 steps. The loss curve (see next section on TensorBoard) hadn’t plateaued (converged) at 250 steps, so I increased it to 1000. - The
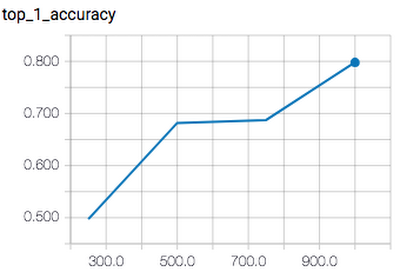
steps_per_evalflag controls the frequency of evaluation. Evaluation is quite expensive, so try to limit the number of evaluations. I am specifying this value so that I get just 4 evaluations overall. - You will have to specify the number of training images, number of evaluation images and number of labels exactly. I used this script to find them out (change the filenames to reflect your dataset):
Once the model is trained (this depends on the train_batch_size and the number of train_steps), the model files will be exported to Google Cloud Storage.
You can look at the quality of the resulting model using TensorBoard (point it at the output directory):


7. Deploy the model
You can now deploy the model to AI Platform as a web service (or you can install TensorFlow Serving yourself and run the model somewhere else):8. Predict with the model
To predict with the model, you need to send the webservice a base64-encoded version of the JPEG contents of the image. Here’s a Python snippet that will create the necessary dictionary:Wrapping the code into a template that does the necessary authentication and HTTP calls:
I got the expected result (sunflowers) when I called it on this image:


Tweet your cool/useful/interesting classification results at @lak_gcp.
