Build a chatbot resume on Google Cloud
Filipe Gracio, PhD
Customer Engineer, AI/ML for Public Sector
Getting the job you want requires you to stand out to potential employers—especially in the current job market. Recently I did just that by building a conversational chatbot on Google Cloud that answers questions about my professional experience (plus some surprises). Not only did I stand out, but I learned how to build and host my own chatbot on my website.
Creating a new Dialogflow agent
1. If you don’t have one, Create a Google Cloud project - for new users there's a $300 credit that was more than enough for this application in my case.
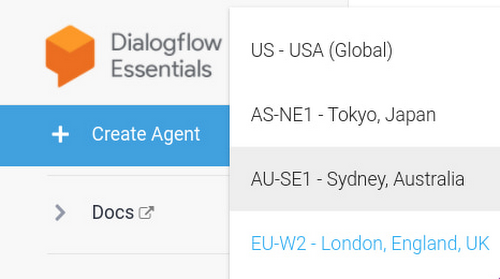
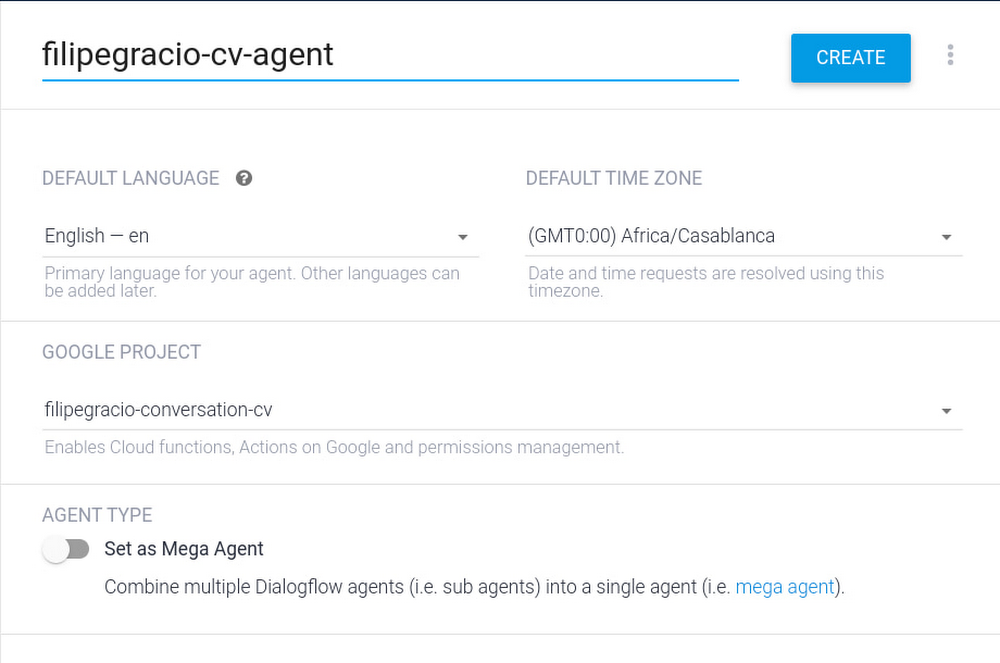
2. After you have a Google Cloud project and have your GCP account, go to the Dialgoflow Essentials Console. (Google has two different products Dialogflow CX and Dialogflow Essentials, and we’ll be using Essentials for this simple application). On the top left you should see something that allows you to choose a location first (in case you have data location requirements), and then create a new agent.
After you click that button, name your agent and associate it with your Google Cloud Project. Here are the values I chose for my agent:
Give your agent some understanding
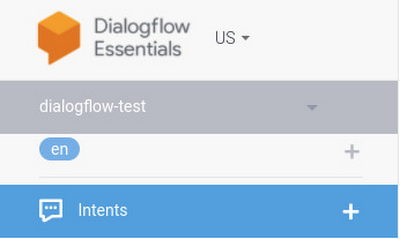
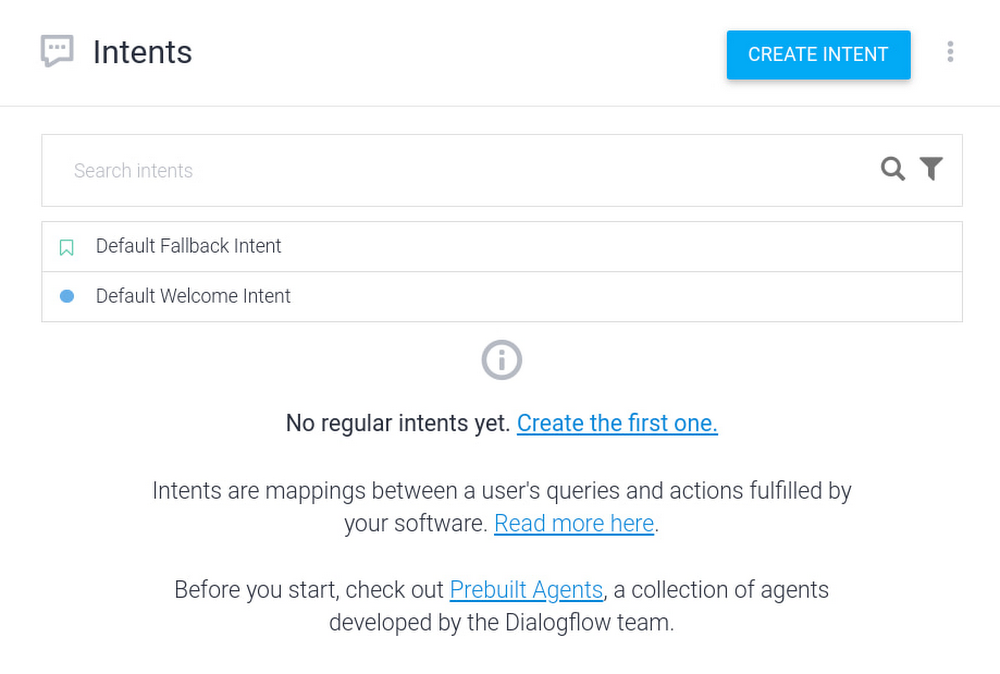
3. Let’s create an intent. The way the agent communicates is by inferring the “Intents'' of its interlocutor. When a user writes or says something the agent matches the expression to the best intent that you created in your Dialogflow agent. For each Dialogflow agent, you define many intents, where your combined intents can handle a complete conversation. So we need to create these: find the intents button on the left side navigation bar.
And then in the centre click “create intent” to create a new one.
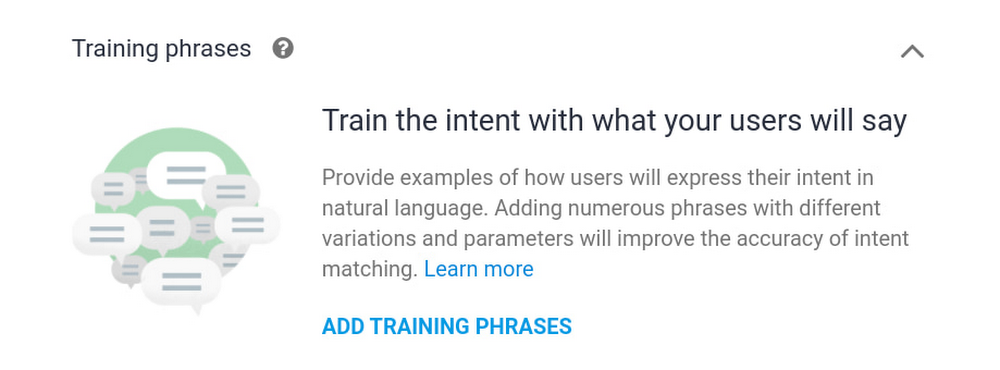
Creating an intent has two main parts: (1) what the agent expects its interlocutor to write or say and (2) what the agent says in response. For example, I want to create an intent where the interlocutor is asking about my certifications, and my agent responds with which certifications I have. For this I need to give it “Training Phrases”. In practice, it helps me to think about this as a sink or funnel: I start by deciding I want my agent to be able to talk about a topic (the response, the bottom of the funnel) so I’ll have to think about the kinds of sentences that I want to fall into that funnel (the training phrases, the catching area of the funnel). The example will make it clear:
3.1. Let’s create that top part of the intent. Click on “Add Training Phrases “
Add some training phrases that exemplify what the intent should capture. I name the intent “Certifications” and I add some sentences like this:
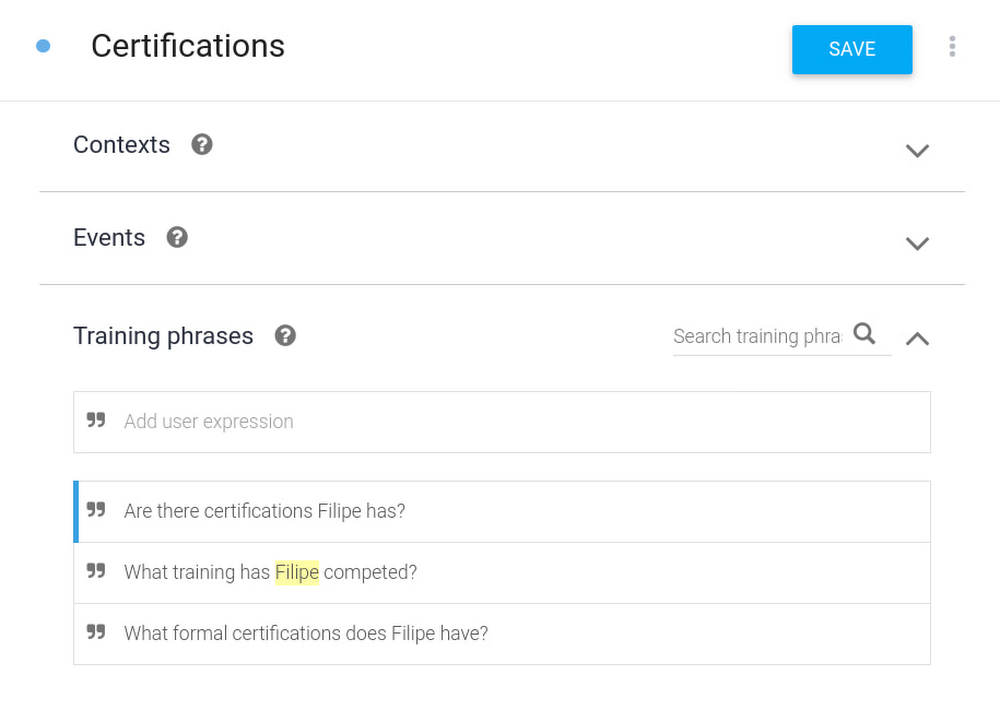
It’s best if you add more than 10 sentences that cover the range of ways you want to capture the conversation into the “Certifications” funnel response.
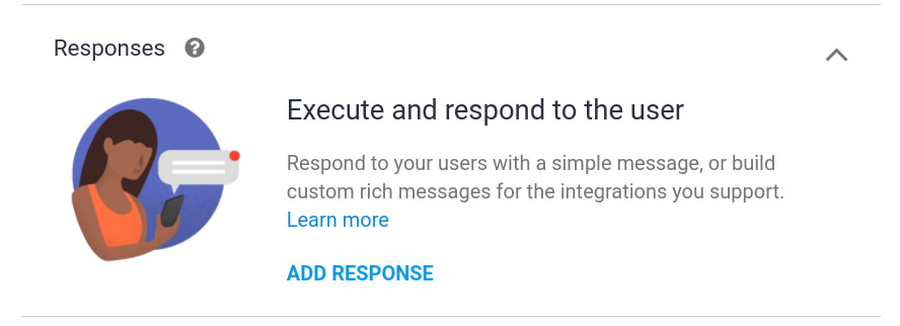
3.2. Now the bottom part of the funnel: what should the agent say in response? Click “Add Response”
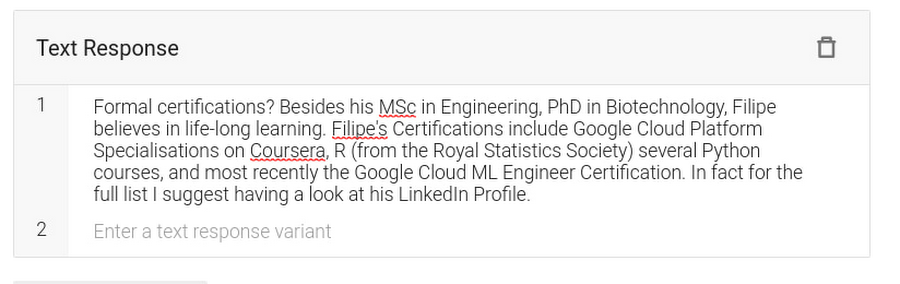
Here’s what I’ve put in my case:
Click “Save” on the top of the page. Let’s try it out: on the top right hand side of the page, look for “Try it now”. Notice how I can ask a question that has different words (accreditations, diploma) and still get the agent to understand what the intent is, and therefore what answer to give.
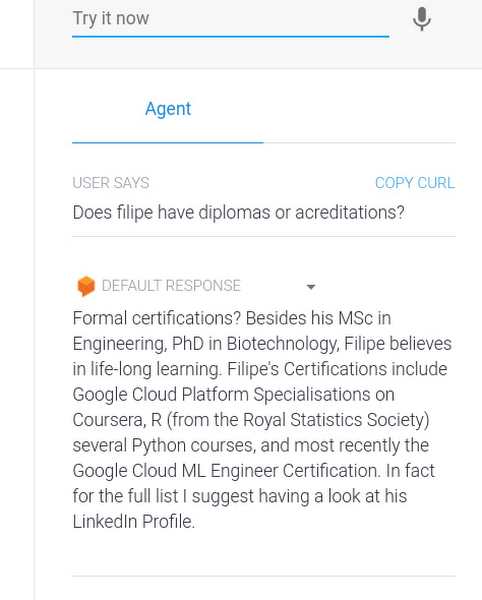
This is what the NLP models are doing for you: from your dozen examples, they understand the kinds of sentences that the agent should link to that intent, and then return the appropriate answer. In the funnel analogy: it’s capturing related questions into the same funnel and responding with the appropriate answer.
4. Next, let’s change the Welcome Intent. As a best practice, you should start the conversation with a greeting plus a few lines on what your specific agent can do for the user. This way you can direct the conversation in the right direction.
To change the Default Welcome intent, first save the work you have done earlier. Click on the “Save” button on the top right hand of the page. Next, click again on “Intents” on the left of the navigation bar and then click on “Default Welcome Intent” on the main menu. In the “Responses” section you’ll see the default responses.
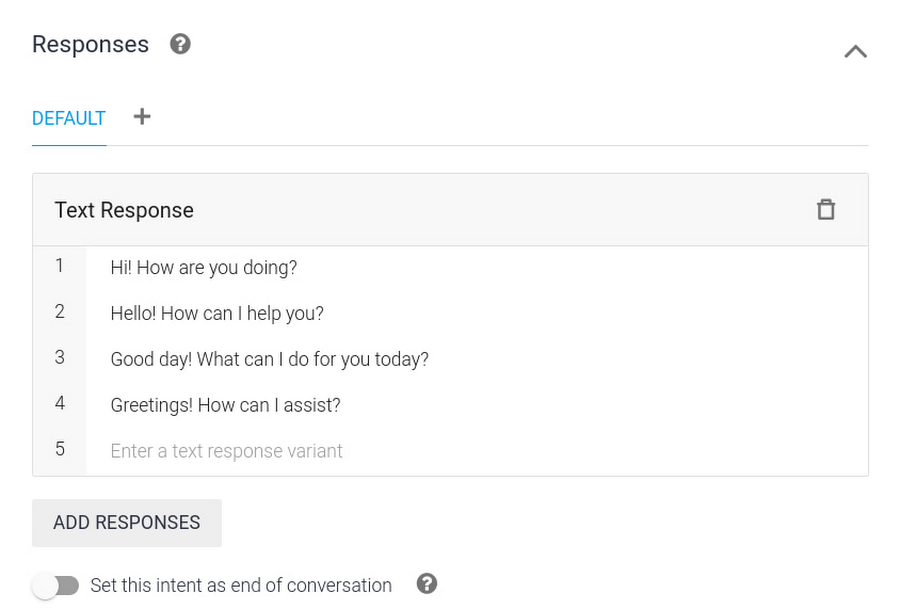
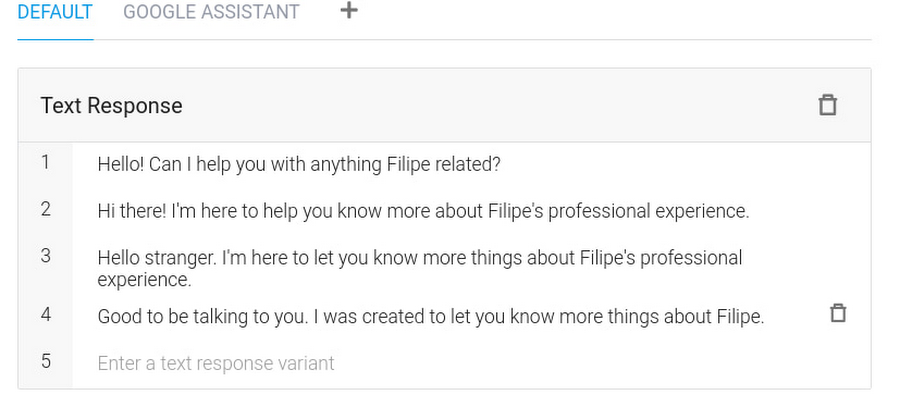
Which you can then change to something more appropriate, like:
Once you have changed the default responses to something that fits your application, click Save.
5. Go create more intents! For a conversational-resume these should be questions that you’d expect to get from a recruiter. I have some general intents like “Favourite Project” (trained with sentences like “What was Filipe’s favourite project in his career?” and “Tell me what Filipe is most proud of achieving. ”) or “Strengths'' (trained with sentences like “What are some of Filipe’s main strengths?” and “Tell me what kinds of tasks people turn to Filipe for?”). Because I have a background in data science and programming, I also have intents that ask about my statisticals skills, or familiarity with Cloud technologies.
Don’t forget to keep testing your agent on the panel on the right, to see if it responds as you want to inputs from interlocutors. Once done, you are ready to deploy your agent
Host your agent on a website
6. Let’s get a website! The easiest way here is to click here to get a google site. Just use a template or create a blank one. Later, if you buy your own domain, you can host it there. That’s what I did: www.filipegracio.com is built on top of a Google Site.
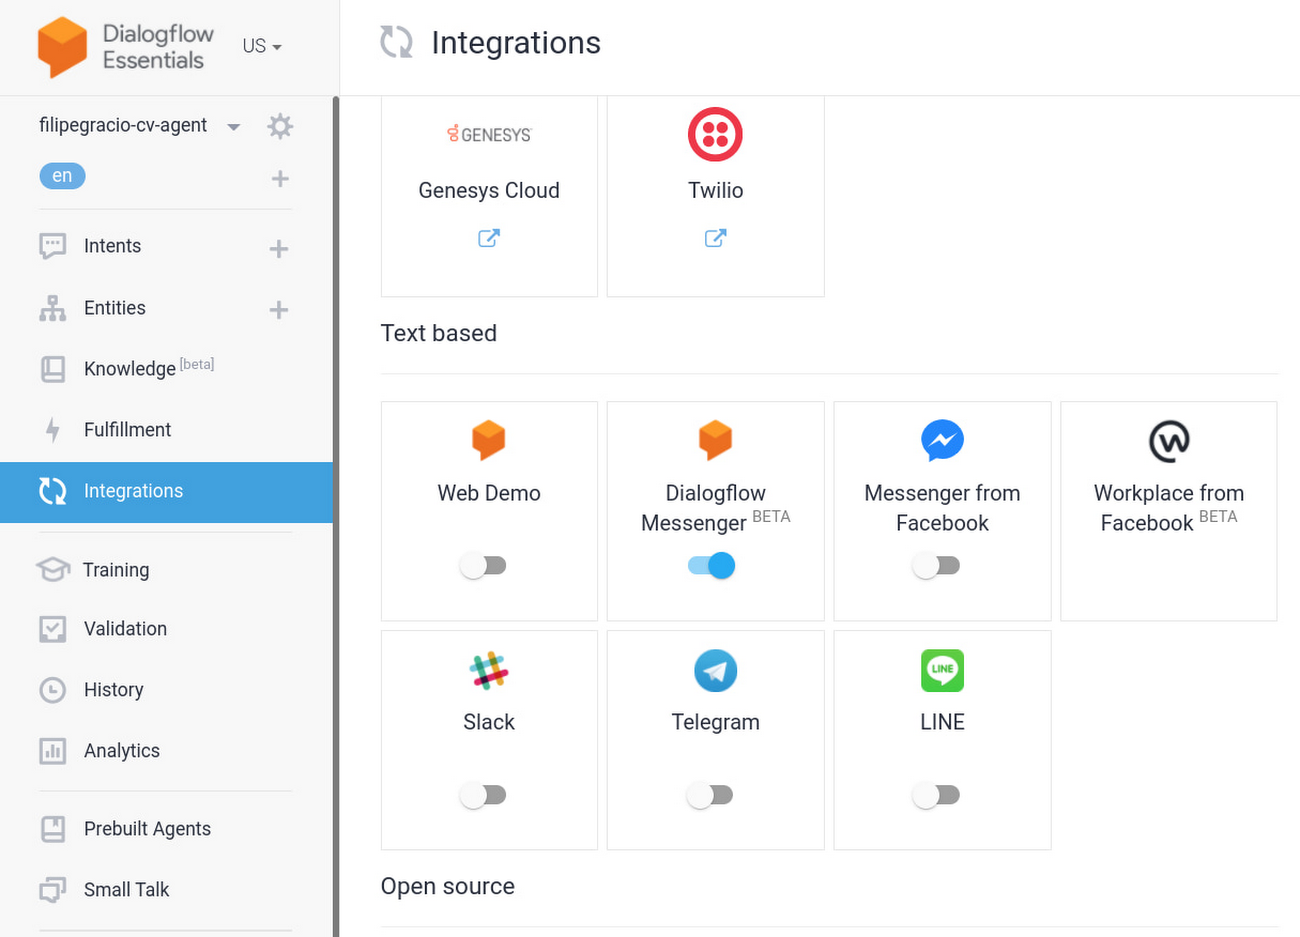
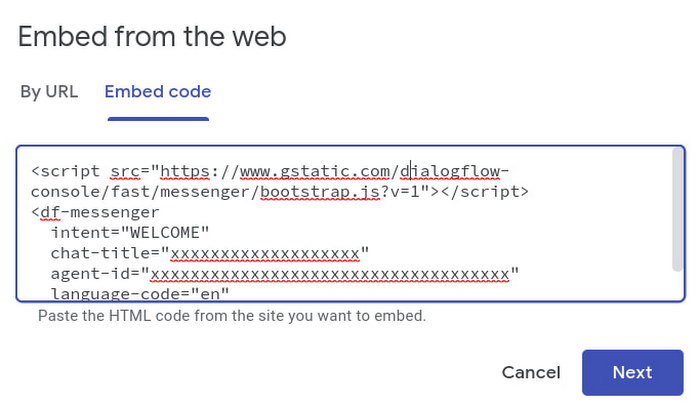
7. Now we’re going to get the agent on the website. Go back to the Dialogflow console, go to integrations, and turn on the Dialogflow Messenger option.
When you do this, you’ll see a new window appear with a bit of code you’ll be able to embed on your site. Make sure your integration is enabled. Here’s what the bit of code looks like:

Copy that code with the little clipboard symbol on the bottom right.
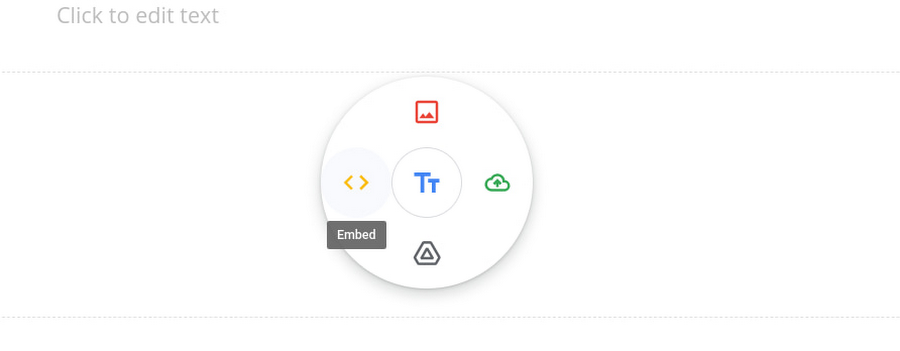
8. Next we just need to put the agent on your site! You do this back on your created website. While editing the content of Google website, on a blank page section, double click and you’ll see this wheel show up, click on Embed.
And now embed the code of the bot that you copied from the Dialogflow console. Like so:
After you do this, and “Publish” the website (on the top right there’s the button) your website should be available to the public with your agent ready to answer everything the visitors ask about.
Explore your creativity
You can make your chatbot be about whatever you want. It can help your business, it can promote your hobby, and it can help you find a job. If you use it like I did, put a link to the website on top of your resume, and make sure it’s visible on your social profiles, share it online. People will notice and you’ll be proving that you have skills, that you made a special effort, and that you think creatively. Good luck!