Data here, data there, look, there’s data everywhere! Replicating your data from Cloud SQL for SQL Server
Isabella Lubin
Senior Product Manager
Bryan Hamilton
Database Engineer, Cloud SQL
Data here, data there, look, there’s data everywhere! Replicating your data from Cloud SQL for SQL Server
Do you need an up-to-date copy of the data you’re storing in Cloud SQL for SQL Server? Cloud SQL now supports setting up replication from your Cloud SQL instance to an external subscriber (or to another Cloud SQL instance) using a SQL Server capability called transactional replication. This gives you another way to create an ongoing copy of your SQL Server data in another instance, which can enable a variety of scenarios, including data protection or data analysis. This blog will walk you through how you can set up a Cloud SQL for SQL Server instance to act as a publisher to another Cloud SQL instance.
What do you need to get started?
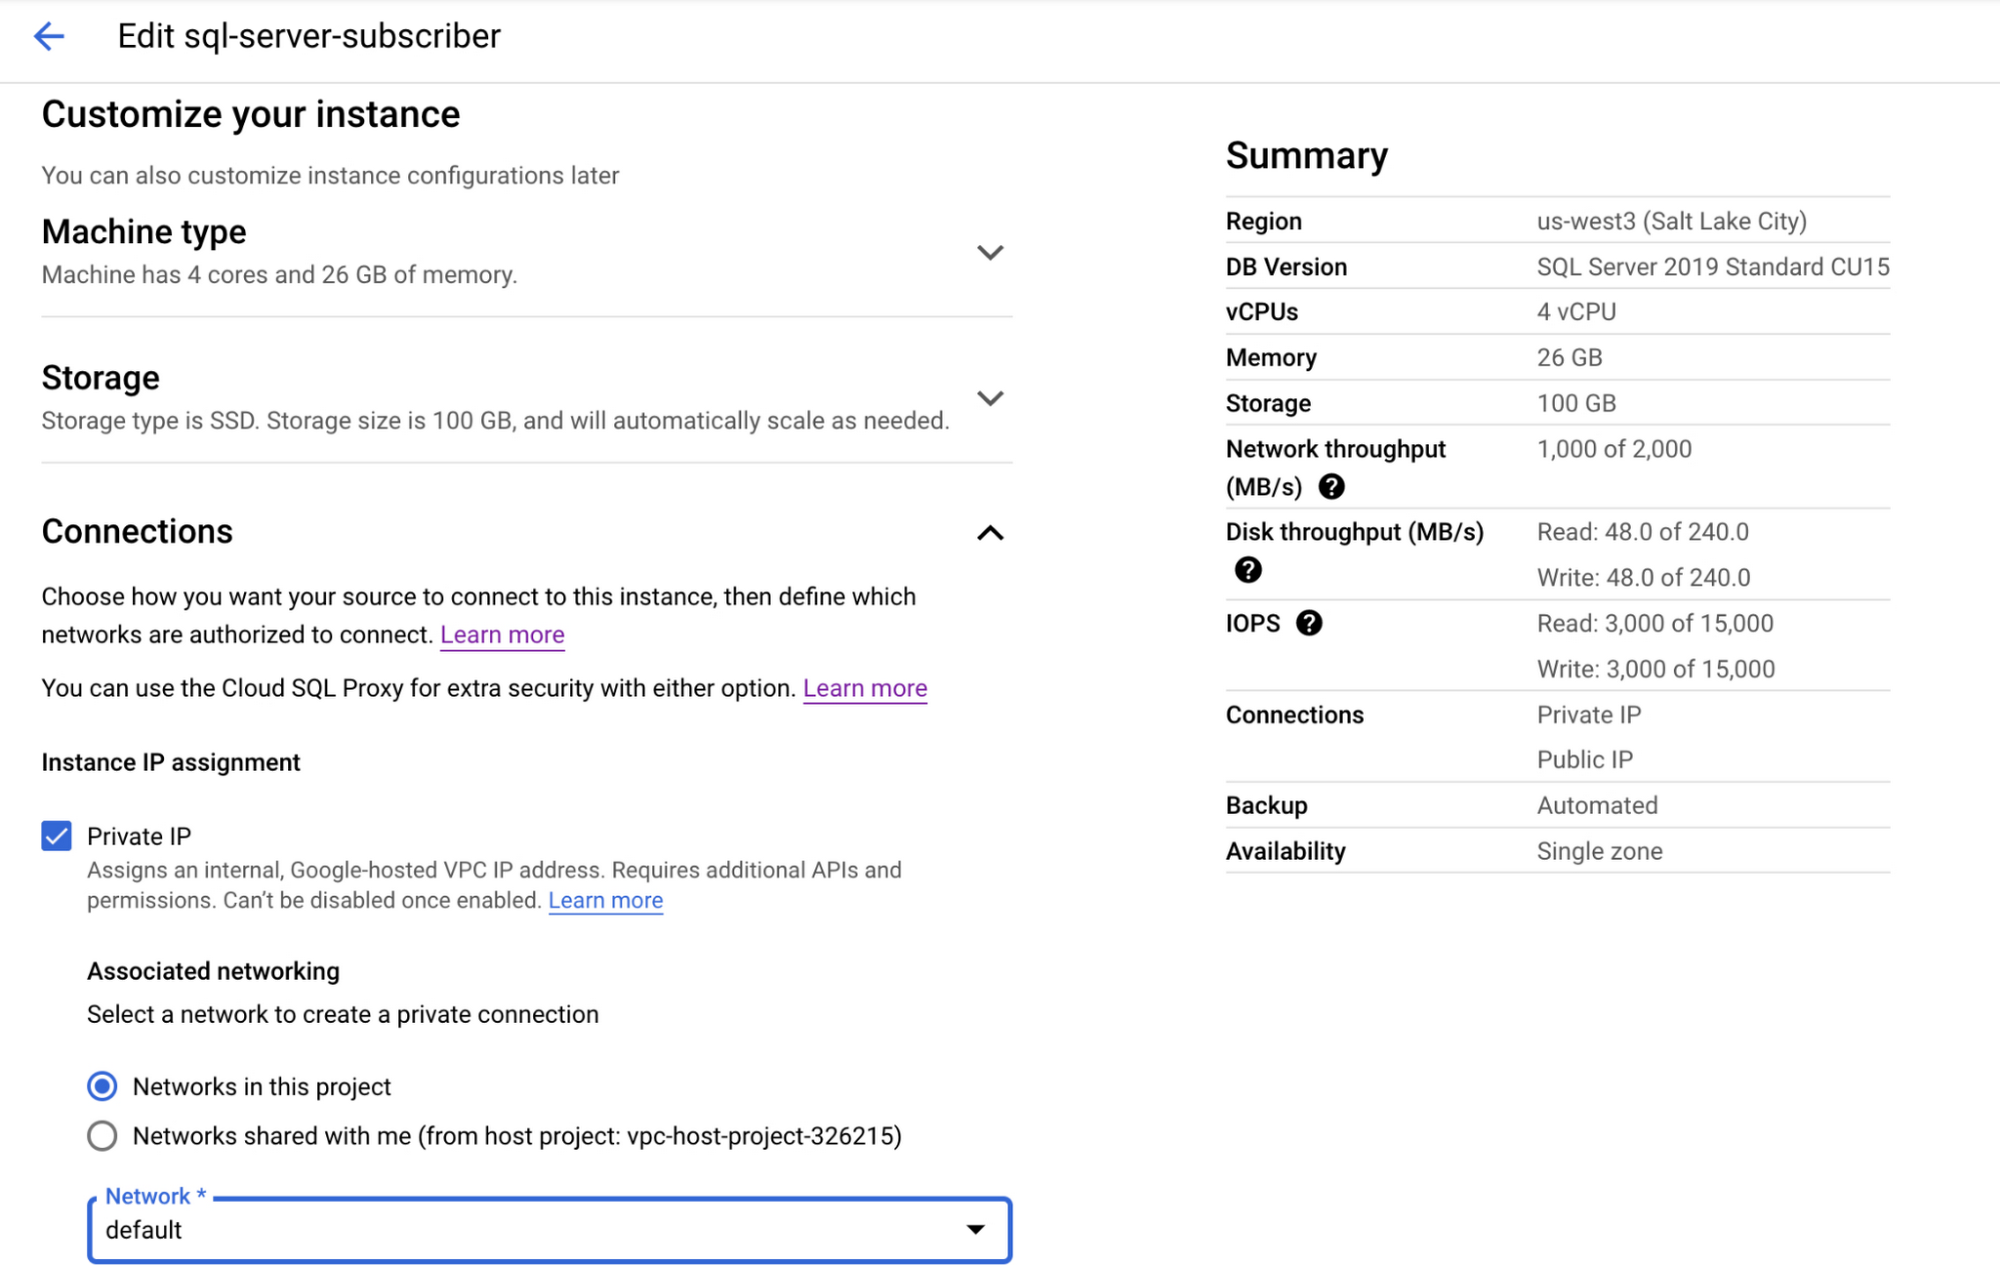
Begin by creating two Cloud SQL instances. Both instances will have Private IP enabled, and will be in the same VPC. Cloud SQL instances with Public IP enabled do not have a static outgoing IP, so you’ll need to ensure that you enable Private IP on any Cloud SQL instance that is serving as a Publisher. Transactional replication has some edition- and version- restrictions about what instances can serve as publisher and what instances can serve as subscribers, so make sure you review those restrictions and compatibility - for this blog, we’ll be using SQL Server 2019 Standard instances for both the publisher and the subscriber.
We’ll also create a Compute Engine VM, where we’ll run SQL Server Management Studio to connect to both of these instances.
First, create your Cloud SQL instances: in this example, we are creating one instance (the publisher) in us-central1, and one instance (the subscriber) in us-west3. Both instances have private IP enabled, and are connected to the same VPC.
We’ve also created a Compute Engine VM that we will run SQL Server Management Studio (SSMS) on, to connect to both the Publisher and the Subscriber. This VM is also connected to the same VPC as the primary and secondary. Follow the instructions outlined in this blog for creating a VM with SSMS installed and connecting to your Cloud SQL instance.
Creating a database and setting up publication
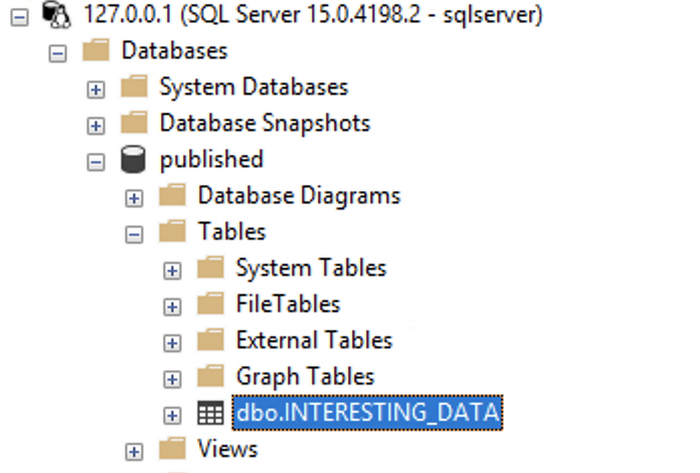
First, add a new database and table to the instance that will serve as publisher.
Insert some data into the table.
You now have a table that you can start replicating to your subscriber!
Setting up replication
Setting up transactional replication ten steps to prepare the publisher and subscriber. We’ll first explain what those steps are, and then detail example stored procedures you can run to prepare the publisher and the subscriber.
Create a distribution database, which sits on the same instance as the publisher. The distribution database stores metadata, data and historical transactions.
Enable publication on all databases you want to include in the publication - This ensures that the necessary internal objects are created that support publishing a database.
Add a log reader agent for each database, which will track changes made to the database to publish them. These are read from the transaction log files.
Create the publication.
Create a snapshot agent for the publication. This agent generates a snapshot file containing schema and data.
Create an article and add it to the publication. An article is a specific object that we want to replicate to the subscriber.
Create the subscriber database on the subscriber.
Add the subscription information to the publisher.
Add a scheduled agent job to the publisher to synchronize the push subscription.
Start the agent job.
The commands you’ll run are detailed in depth here as well.
1. Run this command to set up a distribution database:
EXEC msdb.dbo.gcloudsql_transrepl_setup_distribution @login='sqlserver', @password='<password>'
2. Run this command to enable your new test database for publication:
EXEC msdb.dbo.gcloudsql_transrepl_addpublication @db='to_publish', @publication='pub1
3. Run this command to add a log reader agent for your database:
EXEC msdb.dbo.gcloudsql_transrepl_addlogreader_agent @db='to_publish', @login='sqlserver', @password='<password>'
4. Run this command to create the publication:
EXEC msdb.dbo.gcloudsql_transrepl_addpublication @db='to_publish', @publication='pub1'
5. Create a snapshot agent for the publication:
EXEC msdb.dbo.gcloudsql_transrepl_addpublication_snapshot @db='to_publish', @publication='pub1', @login='sqlserver', @password='<password>'
6. Add the specific articles you want to publish. In this example, we are only publishing one article - our table called INTERESTING_DATA - but we could specify additional tables, functions, or stored procedures to replicate.
7. Create the database on the subscriber. If you’ve connected to your publisher via SSMS running on a Compute Engine VM and are running the Cloud SQL Auth Proxy, you can just switch the specified instance when you start the proxy.
For this guide, since the source database is called ‘to_publish’, we’ve called the database on the subscriber ‘published’:
CREATE DATABASE published;
GO
8. Add the subscription information to the publisher :
9. Add a new scheduled agent job to synchronize the push subscription
10. Start a publication snapshot agent job
You now have replication set up! If you connect to your subscriber instance, you will see that the table has been created and the data in your test table has been copied over.
You can insert a new row into the table on your publisher, and see that that data is replicated over as well.
Adding additional articles to an existing publisher setup
Now that you have successfully created a publisher setup you may need to add additional articles like a table into the replication setup. These steps below explain how this can be done without having to generate a full database snapshot. This can be very helpful, especially for very large databases.
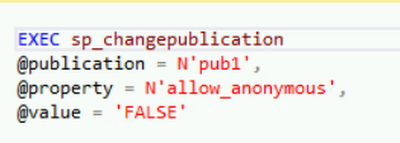
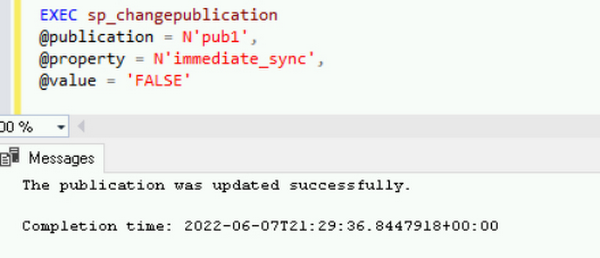
- Change the property of the publication setting allow_anonymous and immediate_sync to false.
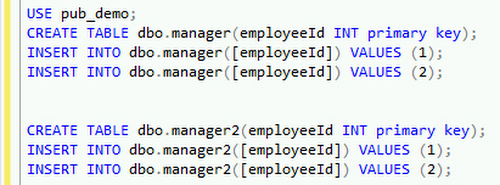
Create some tables that we will use for this example
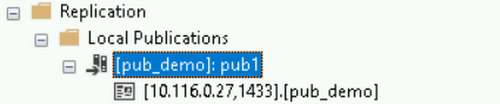
Right click on the publication and chose properties
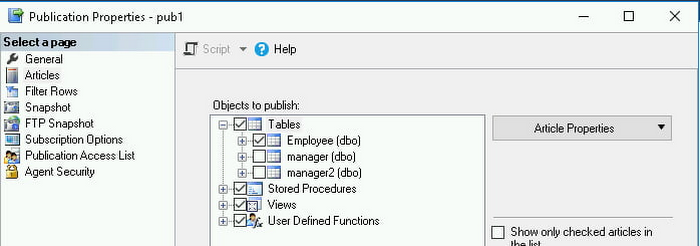
Check the box next to all the articles that you want to publish and click ok. You may need to uncheck the box “show only checked articles in the list” to see all articles.
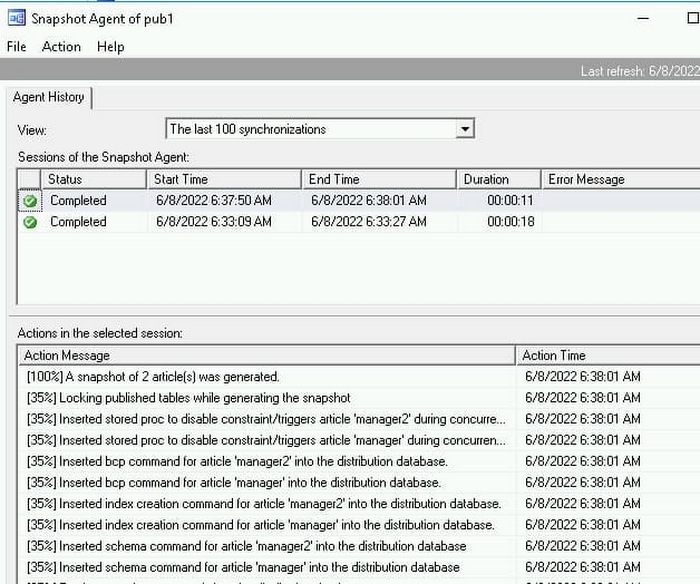
New we will start the snapshot agent
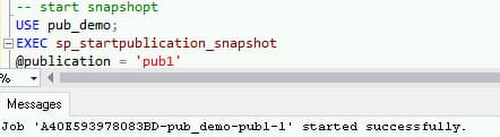
You should see a new snapshot generated for only the two articles we have added as shown below.
Troubleshooting issues
While setting up replication you may see an error that says “Length of LOB data (65754) to be replicated exceeds configured maximum 65536.” To resolve this error, you can adjust the max text repl setting to -1 which indicates no limit. You can do this easily using Cloud SQL database flags.
An example of this command is below
gcloud sql instances patch [INSTANCE_NAME] \
--database-flags="max text repl size (b)"=-1
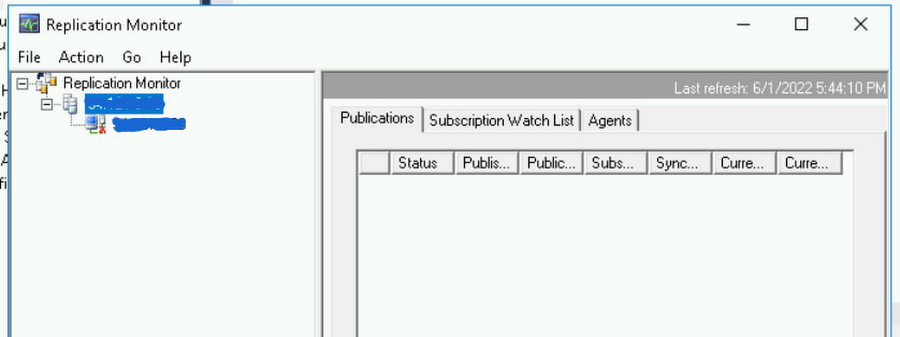
You can use Replication monitor to troubleshoot issues with replication or view the overall status of how replication is progressing.
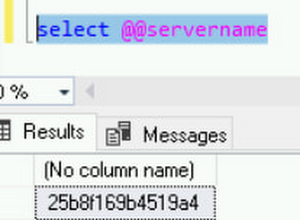
During the example setup for Cloud SQL as a publisher, we used the Cloud SQL Instance IP address in each wrapper to configure replication. This has the side effect of the replication monitor not being able to find the publisher. This is because it does not know the mapping between the hostname and the IP address we have used.
After launching the replication monitor, you’ll notice that the publications tab is empty and the only tab that has data is the agent tab.
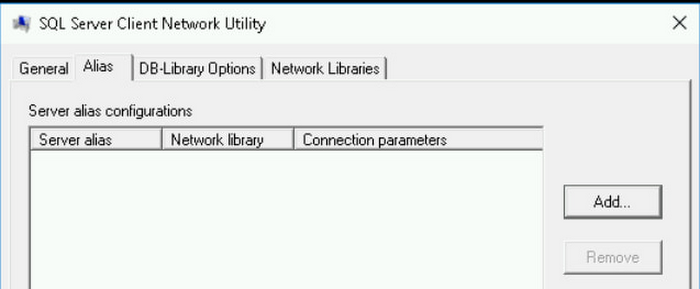
To work around this issue in SSMS, you can create aliases in the configuration manager between the SQL Server hostname of the publisher and the IP address we use to connect in SSMS. If the SQL Configuration Manager is not available, you can also use the SQL Client Configuration Utility if the SQL Configuration Manager is not available on windows.
Open the cmd prompt as administrator.
Open C:\Windows\System32\cliconfg.exe or Open C:\Windows\SysWOW64\cliconfg.exe
The above depends on whether your client is 64 or 32 bit
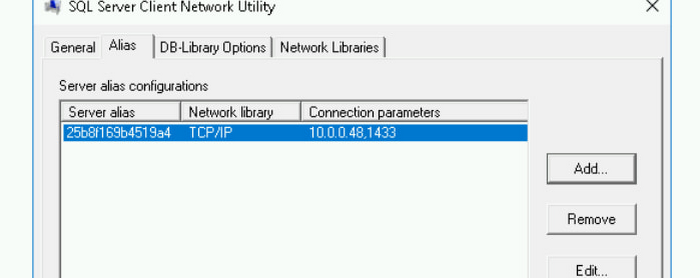
Click on the Alias tab then click Add
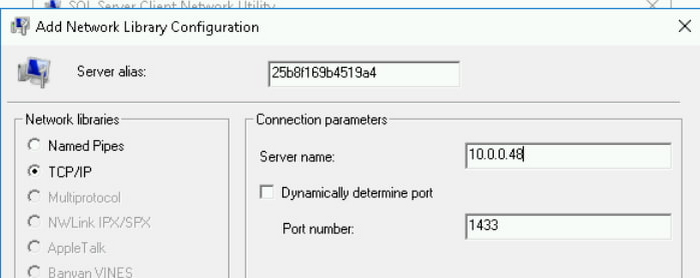
Choose TCP/IP, then make sure that Dynamically determine port is not selected.

In the Server Alias field, enter the actual host you get from SQL below.
In the Server name field, enter the actual IP then click Ok
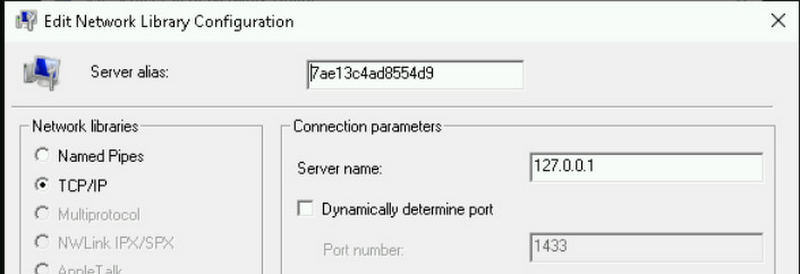
If you are using the Cloud SQL proxy, you can add the alias with the Server name of 127.0.0.1
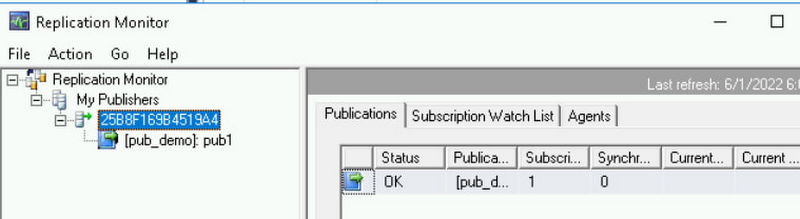
In SSMS, connect using this new alias, right click on the Replication node, then Launch Replication Monitor.

You should see the publication displayed as expected below.
Summary
We’ve walked through how to set up transactional replication from Cloud SQL for SQL Server to another Cloud SQL instance, how to update your publication to include more articles, and how to use the replication monitor to troubleshoot issues. You can use this configuration for a number of different scenarios, including keeping a copy of your primary instance in another region or environment.Although we’ve used two Cloud SQL instances for this blog, you could also set up Cloud SQL to act as a publisher to an external instance, such as an instance that is on-premises or running on Google Compute Engine. Learn more about replication from Cloud SQL and get started today!