| title | description | author | tags | date_published |
|---|---|---|---|---|
Creating a CI/CD environment for serverless containers on Cloud Run with GitHub Actions |
Learn how to use GitHub Actions to test and deploy Docker containers on Cloud Run. |
leozz37 |
Cloud Run, Golang, GitHub, Docker, cicd, devops |
2020-10-30 |
Leonardo Lima
Contributed by the Google Cloud community. Not official Google documentation.
In this article, you set up an environment for automated building, testing, and deployment, using Docker and Cloud Run.
For Docker, the language that you're using isn't important, but this tutorial uses the Go programming language. This tutorial doesn't go into a deep explanation of the sample code and its Dockerfile.

- Create a simple REST API with Go.
- Write a unit test for your code.
- Create a Dockerfile.
- Create a GitHub Action workflow file to deploy your code on Cloud Run.
- Make the code accessible for anyone.
This tutorial uses billable components of Google Cloud, including the following:
This tutorial should not generate any usage that would not be covered by the free tier, but you can use the pricing calculator to generate a cost estimate based on your projected production usage.
This tutorial assumes that you're using a Unix-like operating system.
This tutorial uses the Cloud SDK command-line interface to set up the environment, but you can also use the Cloud Console.
First, take a look at the infrastructure used in this tutorial:

Every time you push to your GitHub repository, it triggers a GitHub Actions workflow that builds and tests your code. If it builds and every test passes, your container is deployed to Cloud Run, making it accessible to everyone.
The author of this tutorial created a GitHub repository with all of the code used here, which you can check out.
This is what the work tree will look like:
|_.github/
  |_workflows/
    |_GCP-Deploy.yml
|_Dockerfile
|_go.mod
|_server_test.go
|_server.go
It's time to get your hands dirty!
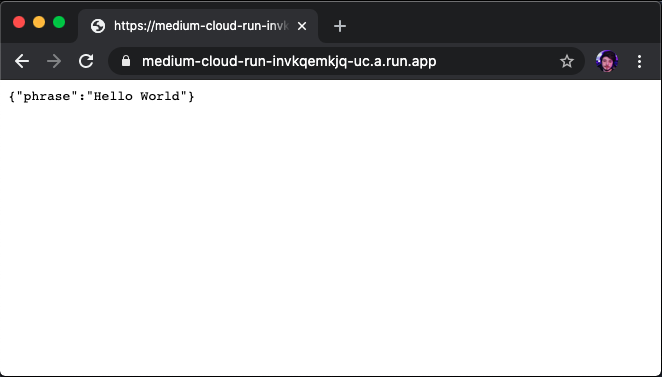
Begin with a simple Go program and test. Because the application's functionality doesn’t matter for this tutorial, this tutorial uses a simple example that returns a JSON response with "Hello, world".
package main

import (
    "encoding/json"
    "log"
    "net/http"
    "os"

    "github.com/gorilla/mux"
)

type Phrase struct {
    Text string `json:"phrase"`
}

func HelloWorld() Phrase {
    return Phrase{
            Text: "Hello, world",
    }
}

func GetPhrase(w http.ResponseWriter, r *http.Request) {
    json.NewEncoder(w).Encode(HelloWorld())
}

func main() {
    router := mux.NewRouter()
    router.HandleFunc("/", GetPhrase).Methods("GET")

    port := os.Getenv("PORT")
    log.Print("Started API on port: " + port)
    log.Fatal(http.ListenAndServe(":"+port, router))
}
Here is a unit test for the HelloWorld function that verifies whether the function returns a “Hello, world” string:
package main

import (
    "testing"
)

func TestHelloWorld(t *testing.T) {
    var expected Phrase

    expected.Text = "Hello, world"
    result := HelloWorld()

    if expected.Text != result.Text {
            t.Errorf("Phrase was incorrect. Got: %s, want: %s.", result.Text, expected.Text)
    }
}
Go needs a module file that tells all of the code dependencies. Create a GitHub repository (but don't push your code yet), copy its URL, and run the following command:
go mod init $"YOUR_GITHUB_URL"
For example, the command should look something like this:
go mod init github.com/leozz37/cicd-actions-cloud-run
FROM golang:alpine
ENV CGO_ENABLED=0

WORKDIR /app
COPY . .

RUN go mod download
RUN go build -o main .

EXPOSE $PORT

CMD [ "./main" ]
Cloud Run sets an environment variable for the port, and it's recommended that you get that port from the environment. But you can set a custom port if you need it.
-
To make your life easier, export these environment variables so that you can copy and paste the commands used here. Choose whatever name you want, but the
$PROJECT_IDhas to be a unique name, because project IDs can't be reused in Google Cloud.export PROJECT_ID= export ACCOUNT_NAME=For example, your commands should look something like this:
export PROJECT_ID=project-example export ACCOUNT_NAME=account-example -
Log in with your Google account:
gcloud auth login -
Create a project and select that project:
gcloud projects create $PROJECT_ID gcloud config set project $PROJECT_ID -
Enable billing for your project, and create a billing profile if you don’t have one:
open "https://console.cloud.google.com/billing/linkedaccount?project=$PROJECT_ID" -
Enable the necessary services:
gcloud services enable cloudbuild.googleapis.com run.googleapis.com containerregistry.googleapis.com -
Create a service account:
gcloud iam service-accounts create $ACCOUNT_NAME \ --description="Cloud Run deploy account" \ --display-name="Cloud-Run-Deploy" -
Give the service account Cloud Run Admin, Storage Admin, and Service Account User roles. You can’t set all of them at once, so you have to run separate commands:
gcloud projects add-iam-policy-binding $PROJECT_ID \ --member=serviceAccount:$ACCOUNT_NAME@$PROJECT_ID.iam.gserviceaccount.com \ --role=roles/run.admin gcloud projects add-iam-policy-binding $PROJECT_ID \ --member=serviceAccount:$ACCOUNT_NAME@$PROJECT_ID.iam.gserviceaccount.com \ --role=roles/storage.admin gcloud projects add-iam-policy-binding $PROJECT_ID \ --member=serviceAccount:$ACCOUNT_NAME@$PROJECT_ID.iam.gserviceaccount.com \ --role=roles/iam.serviceAccountUser -
Generate a
key.jsonfile with your credentials, so your GitHub workflow can authenticate with Google Cloud:gcloud iam service-accounts keys create key.json \ --iam-account $ACCOUNT_NAME@$PROJECT_ID.iam.gserviceaccount.com
In GitHub, you need to set up a secrets environment in your repository, with the following values:
GCP_PROJECT_IDis your$PROJECT_ID.GCP_APP_NAMEis your app name.GCP_EMAILis the email from the service account you created, which should look like this:$ACCOUNT_NAME@$PROJECT_ID.iam.gserviceaccount.comGCP_CREDENTIALSis the content from thekey.jsonfile that you just created.
For example, your settings should look something like this:
GCP_PROJECT_ID = project-example
GCP_APP_NAME = app-name
GCP_EMAIL = account-name@project-example.iam.gserviceaccount.com
Cat the key.json content and paste it into the GCP_CREDENTIALS secret value.
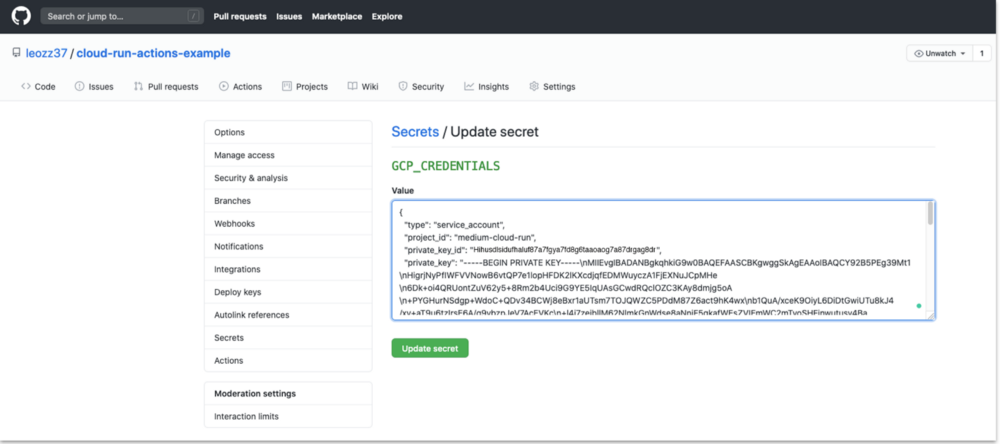
Your secrets should look like this:

Now you just need to create a YAML file telling which commands your workflow should run. In your project directory, create a folder called .github and create
another one inside it called workflows.
Create a GCP-Deploy.yml file and copy this content into it:
{% verbatim %}
name: Docker

on:
  push:
    branches: [ master ]
  pull_request:
    branches: [ master ]

jobs:

    deploy:

        name: Setup Gcloud Account
        runs-on: ubuntu-latest
        env:
          IMAGE_NAME: gcr.io/${{ secrets.GCP_PROJECT_ID }}/${{ secrets.GCP_APP_NAME }}
        steps:

        - name: Login
          uses: google-github-actions/setup-gcloud@v0
          with:
            project_id: ${{ secrets.GCP_PROJECT_ID }}
            service_account_email: ${{ secrets.GCP_EMAIL }}
            service_account_key: ${{ secrets.GCP_CREDENTIALS }}

        - name: Configure Docker
          run: gcloud auth configure-docker --quiet

        - name: Checkout repository
          uses: actions/checkout@v2

        - name: Build Docker image
          run: docker build . -t $IMAGE_NAME

        - name: Test Docker image
          run: docker run $IMAGE_NAME sh -c "go test -v"

        - name: Push Docker image
          run: docker push $IMAGE_NAME

        - name: Deploy Docker image
          run: gcloud run deploy ${{ secrets.GCP_PROJECT_ID }} --image $IMAGE_NAME --region us-central1 --platform managed
{% endverbatim %}
You work tree should look like this:
|_.github/
  |_workflows/
    |_GCP-Deploy.yml
Now commit all of your changes and push them to GitHub, and then go to your repository home page. While your build is running, you should see a yellow circle over your file list:

If you go into your Actions (click the yellow ball), you can see in real time your steps being executed:

You can list your service, get its link, and access it in your browser:
gcloud run services list
And that’s it! Each time you push a change to the default branch, GitHub builds, tests, and deploys it automatically.
To avoid incurring charges to your Google Cloud account for the resources used in this tutorial, you can delete the project.
To delete a project, do the following:
- In the Cloud Console, go to the Projects page.
- In the project list, select the project you want to delete and click Delete.
- In the dialog, type the project ID, and then click Shut down to delete the project.
- Learn more about Google Cloud developer tools.
- Try out other Google Cloud features for yourself. Have a look at our tutorials.