FLARE VM: A FLAREytale Open to the Public
Mandiant
Written by: Ana Maria Martinez Gomez, Blaine Stancill, Moritz Raabe
FLARE VM is a collection of software installations scripts for Windows systems that allows you to easily setup and maintain a reverse engineering environment on a virtual machine (VM). Thousands of reverse engineers, malware analysts, and security researchers rely on FLARE VM to configure Windows and to install an expert collection of security tools.
Our most recent updates make FLARE VM more open and maintainable. This allows the community to easily add and update tools and to make them quickly available to everyone. We’ve worked hard to open source the packages which detail how to install and configure analysis tools. The FLARE VM project now uses automatic testing, updating, and releasing to make packages immediately installable. Read on for more details and all the relevant project and documentation links.
FLARE VM Background
Starting in 2017, FLARE VM was designed to allow the automatic setup and configuration of a Windows malware analysis environment. Over the years the project became a standard reverse engineering tool collection curating the best software to solve common analysis tasks.
FLARE VM relies on two main technologies: Chocolatey and Boxstarter. Chocolatey is a Windows-based package management system, where a package is essentially an archive containing PowerShell installation scripts that download and configure a specific tool. Boxstarter leverages Chocolatey packages to automate the installation of software and to create repeatable, scripted Windows environments.
Our metrics show that FLARE VM is widely depended on by thousands of individuals. Between the years 2018-2022 we’ve counted roughly 70,000 installations of FLARE VM. The GitHub community has filed almost 400 issues that we’ve tried our best to accommodate. However, with limited resources we’ve often struggled to keep pace. Our newest updates hopefully attract many new users and project contributors.
Installation & Customization
Previous versions of FLARE VM allowed customization, but the process was a little complicated requiring the user to manually create and configure an external file. Now, installation and customization are easier than ever. We’ve revamped our installer to include a user-friendly graphical user interface (GUI) that allows customization of both the package selection and environment variables used by the installer. The installer GUI is shown in Figure 1.


Figure 1: FLARE VM installer GUI
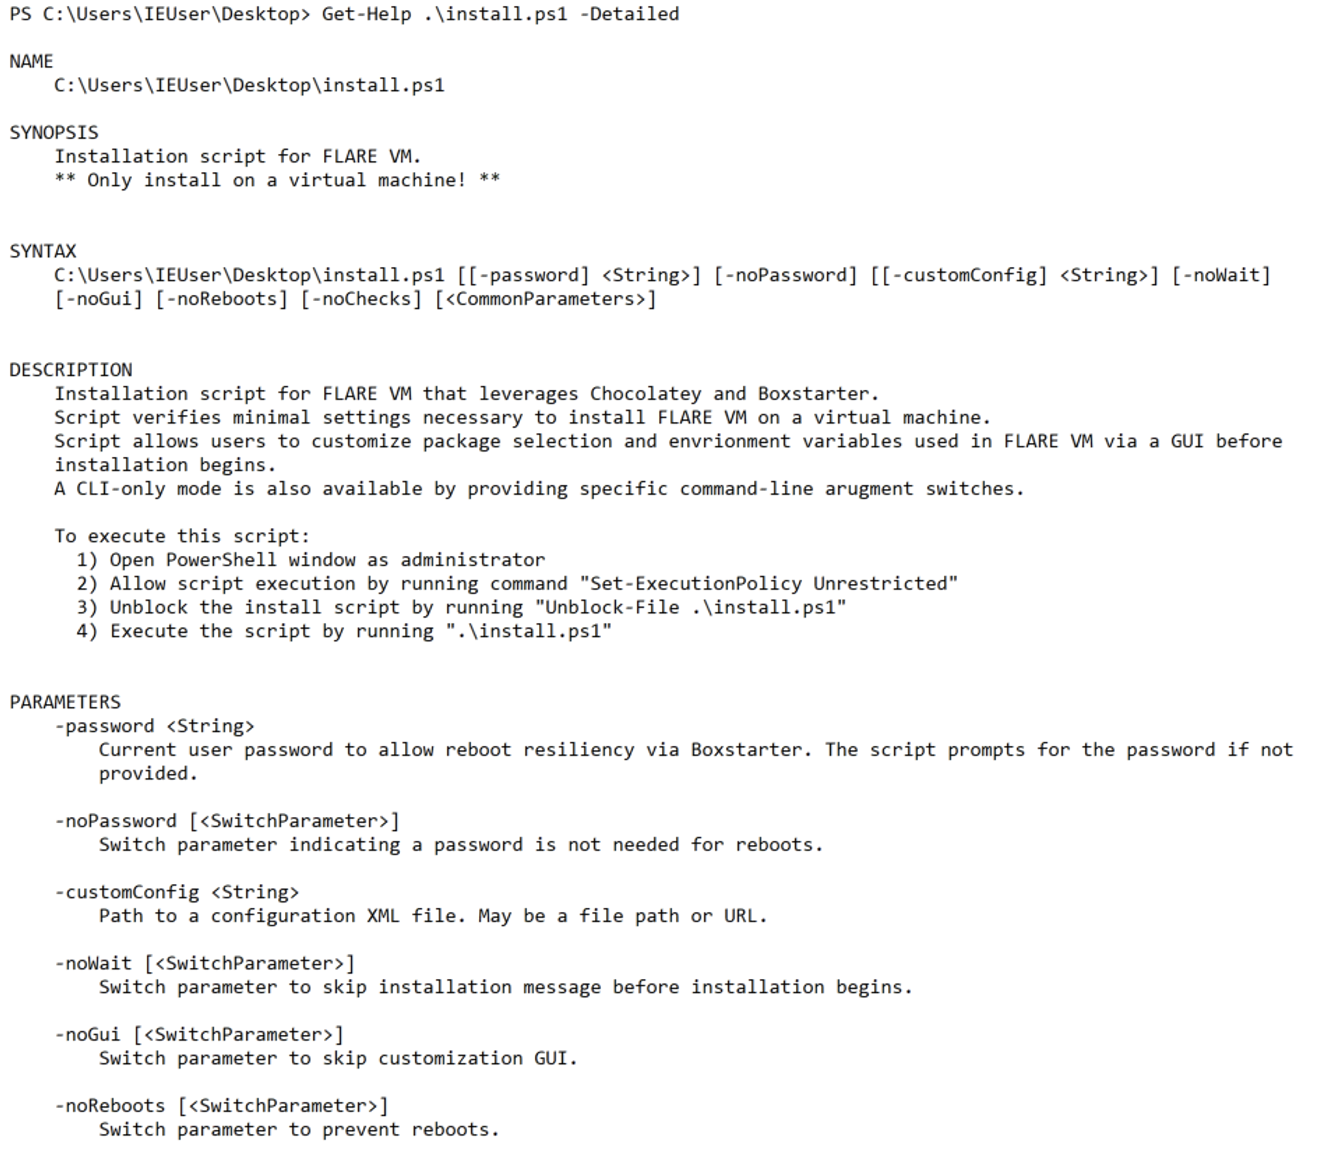
The installer also comes with built-in documentation that is available by executing the following command:
Get-Help .\install.ps1 -Detailed
Figure 2 shows an example of the documentation.


Figure 2: FLARE VM installer documentation
You don’t like using a GUI and are more of a command-line interface (CLI) person? No worries, the installer can also be run in CLI-only mode by providing the “-noGui” argument. Please see all the command-line parameters in the installation script header documentation.
A high-level overview of the installation process is outlined as follows:
- Prepare a Windows 10+ virtual machine
- The new FLARE VM has been tested on Windows 10 1809 x64.
- We recommend a disk capacity of at least 70-80 GB and memory of at least 2 GB.
- Disable Windows Updates (at least until installation is finished)
- Disable Tamper Protection and any Anti-Malware solution, especially Windows Defender
- Download the installation script, install.ps1, from the FLARE VM GitHub repository
- Open a PowerShell window as administrator
- Unblock the downloaded file via the command:
Unblock-File .\install.ps1
- Allow script execution via the command:
Set-ExecutionPolicy Unrestricted
- Execute the script as follows:
.\install.ps1
To get the code and detailed installation steps, go to the project page on GitHub. That’s where you’ll find the most up to date documentation and can ask questions if you have any issues related to the installation process.
Open Sourcing Packages
Shortly after releasing FLARE VM as an open-source tool on GitHub, a motivated and active community formed that wanted to help improve FLARE VM. Users suggested new tools and reported broken tools. Unfortunately, it was not possible for users to fix the issues themselves. While the FLARE VM installer was open source, the packages to install each tool were not.
The FLARE team maintained the project internally but could not implement all the fixes and improvements suggested by the community. This caused a lot of frustration around outdated and broken packages.
So, we’ve decided to open source the packages on GitHub, which has the following advantages:
- Allows the community to not only suggest new tools, improvements, and report bugs, but to help implement them.
- Makes transparent how and what FLARE VM installs.
- Uses GitHub Actions (free for open-source repositories) for testing and automations. This reduces manual maintenance and simplifies contributions.
Contributing New Tools and Updates
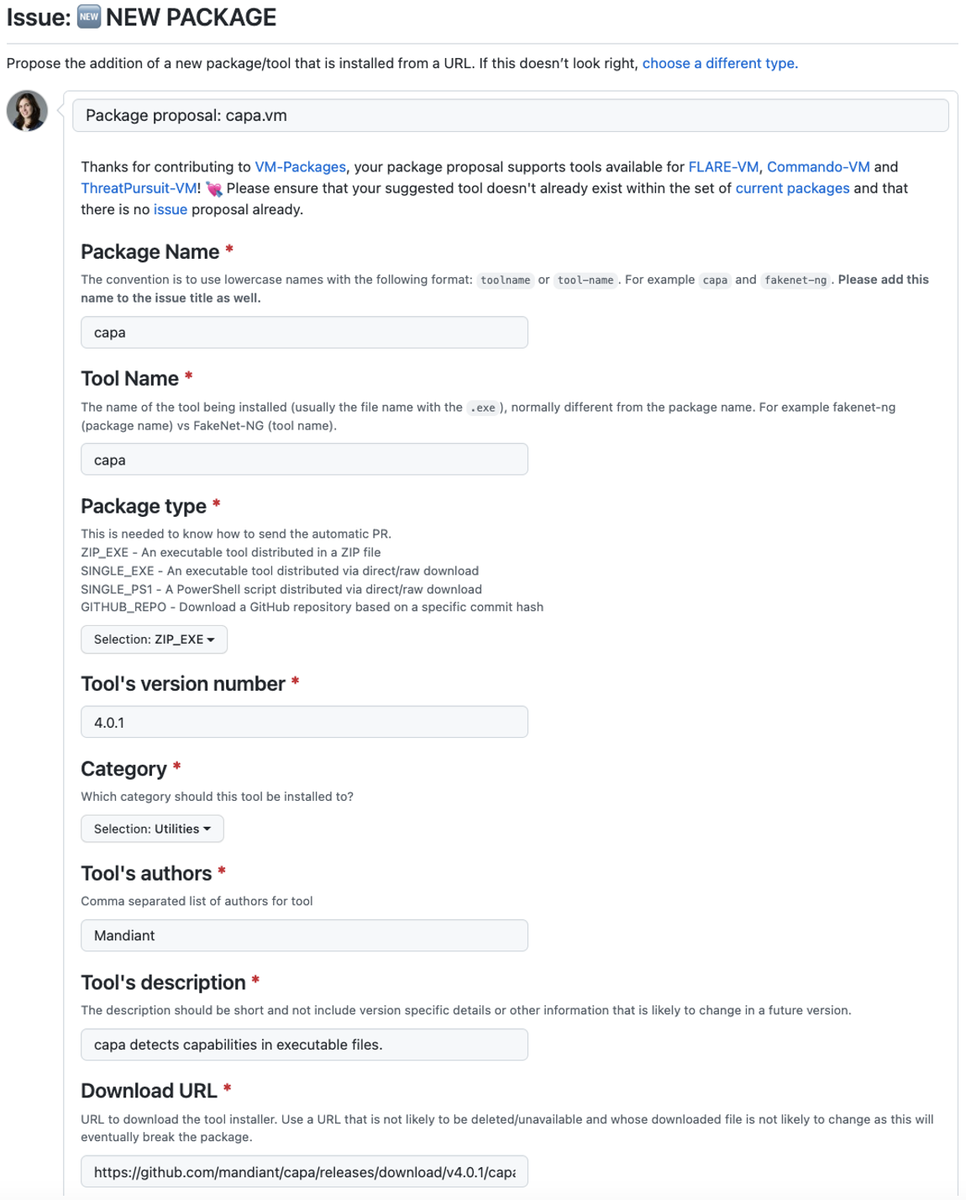
Often packages have a very similar structure. To save you, the FLARE VM contributor, time we created templates for the most common installation types. This means that you can create, test, and submit a new tool via a GitHub issue—just by using your browser! The issue template will ask for the relevant information and, if approved by a maintainer, can automatically create the package. An example is shown in Figure 3. Our hope is that by making the submission process very easy we can crowd-source the best set of software used for reverse engineering.


Figure 3: Issue template to add the capa tool
The documentation contains further details on how to get started creating a package manually. In summary, the steps involve:
- Identify a new tool and its installation template type
- Use the template to create a new package (modify it if necessary)
- Test your package and submit for review
We’ve created a testing workflow via GitHub Actions to verify and test the installation of packages. After successful testing and approval, new packages get automatically added to the custom FLARE VM package feed. This means they’re immediately available to be installed in everyone’s VM.
If you know of a great analysis tool but don’t want to dive into the details of package creation, please open an issue for the new tool you want to see supported.
Please consult the documentation Wiki for more details on how to create and submit a new package for a tool.
Automatic Tests, Updates, and Releases
Using GitHub Actions, we can automatically test tool additions and updates. Moreover, once approved, a new package is automatically pushed to our package repository, making it immediately available to be installed by FLARE VM!
To quickly detect broken packages, we run a daily install of all the packages. Previously, we rarely noticed that something was broken unless the community reported it. Since FLARE VM relies on external URLs to install packages, broken or changed download locations can cause issues. Now, such problems quickly become apparent and can be fixed sooner. This should give you more confidence to update your FLARE VM installations regularly.
In the same vein, we’re able to automatically update supported tools to the newest versions using GitHub Actions (see an example of this). That means no manual maintenance is needed and users can install the most recent tools shortly after they’ve been released.
Working with the Community
Currently, the VM-Package repository contains fewer tools than were previously supported. We found that many tools were outdated and infrequently used so we took the opportunity to prune them. As users highlight missing tools, we can regain a healthy ecosystem of up-to-date and useful software.
We hope that the community will take advantage of the new possibilities and help forge an expert-driven Windows security distribution. Is there an analysis tool you think should be in FLARE VM? Or do you have an idea to improve one of the current packages? Then check the following documentation links and join the community.
- FLARE VM installation script and configuration
- Submit ideas and issues related to the installer script and configuration
- Repository of all tool packages
- Submit new tool packages or report related issues
- Documentation and contribution guides for tool packages
Conclusion
The newest version of FLARE VM prioritizes transparency, customization, and automation. The updates empower anyone to contribute. Get started on your FLARE VM installation now. We hope to bring a much better experience to analysts around the world. Please check out the project and provide your feedback on GitHub.
