Creating a SQL Server instance integrated with Active Directory using Google Cloud SQL
Jonathan Simon
Developer Programs Engineer, Google Cloud
SQL Server instances in Google Cloud SQL now integrate with Microsoft Active Directory (AD) as a pre-GA feature that you can try out for yourself right now. This post describes the basic steps required to create a SQL Server instance with this new functionality. If you're looking for complete details see the official documentation.
Create a domain with Managed Service for Microsoft Active Directory
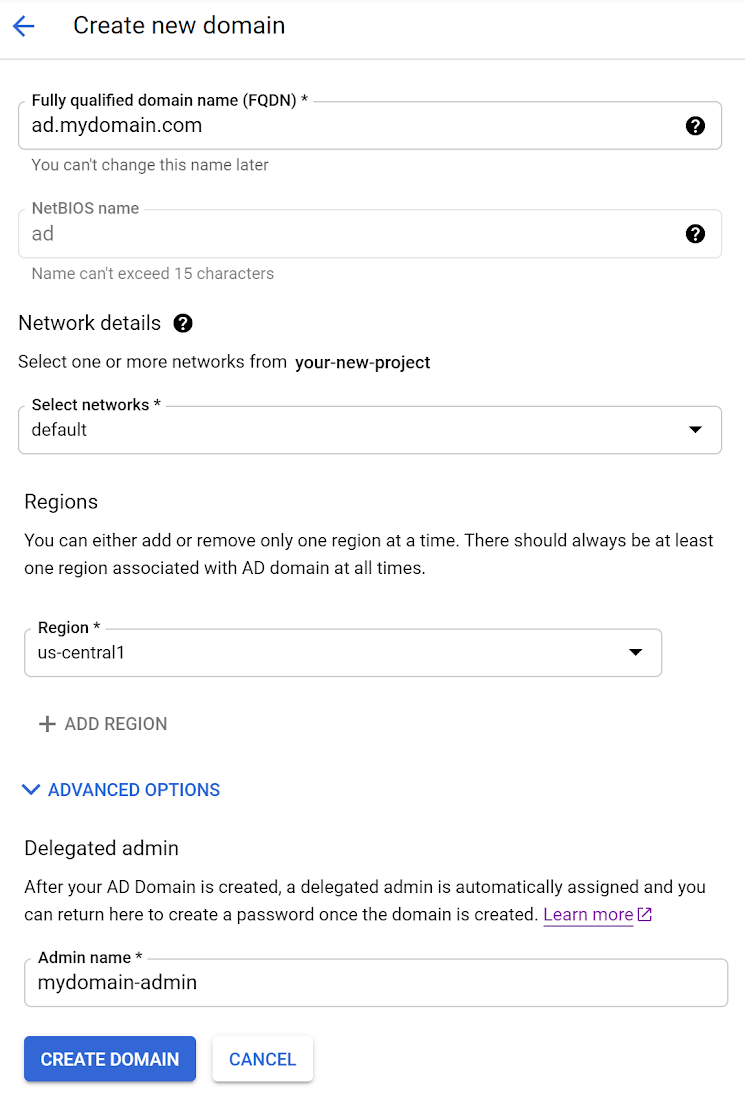
The first step is to create a domain with Managed Service for Microsoft AD. This can be done easily via the "Managed Microsoft Active Directory" section in the Google Cloud Console. Click the "CREATE NEW AD DOMAIN" button and enter the following information:
Specify a Fully Qualified Domain Name
Example: ad.mydomain.com
Select a VPC network
Example: default
Specify a suitable CIDR range for the AD domain
Example: 10.1.0.0/24
- Select a Region where the AD domain should be located
Example: us-central1
Specify an admin name for the AD domain's delegated administrator
Example: mydomain-admin
With all of that information provided it should look something like this:
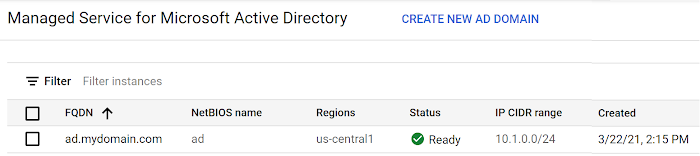
Click "CREATE DOMAIN" to complete the process of creating the AD domain. You'll have to be patient for a bit since it can take up 60 minutes for the domain to be available for use. Once it is ready it will look like this in the list of domains:
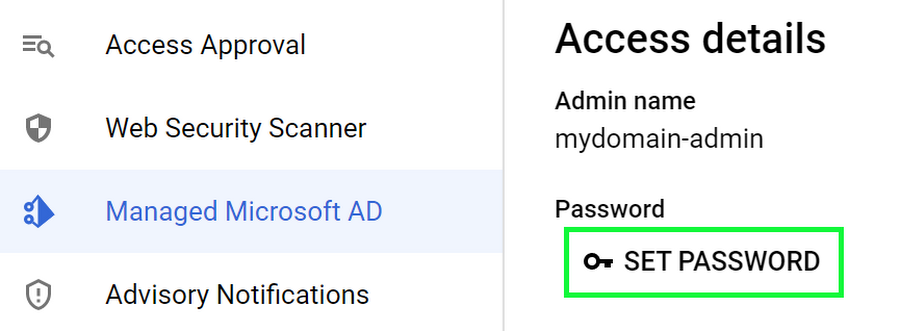
The final step to configure the AD domain is to set the "Delegated admin" password. Click the domain name in the list of domains to go to its details page. On that page, click the "SET PASSWORD" link and make a note of the password which we'll use in a later step of this blog post.
Create a SQL Server instance with Windows Authentication
After your AD domain is available for use you can start creating SQL Server instances that utilize the AD domain to enable Windows Authentication with AD-based identities. Go ahead and try out creating a new SQL Server instance by going to the Cloud SQL section of the Google Cloud Console. Click the "CREATE INSTANCE" button. Then click "Choose SQL Server" and enter the following information:
Specify an Instance ID
Example: sql-server-with-ad
Enter a password for the 'sqlserver' user and make a note of this for use in a later step.
Select a Database version. All versions will work with Active Directory. I selected "SQL Server 2017 Standard".
Select a Region where the instance should be located. It is recommended that you locate the SQL Server instance in the same region as the AD domain for the lowest network latency and the best performance.
Example: us-central1
Select whether the instance should be located in a "Single zone" or "Multiple zones". For production instances "Multiple zones" is recommended to achieve high availability which provides automatic failover to another zone within your selected region.
Select "SHOW CONFIGURATION OPTIONS"
Click the "Connections" section to expand it and select both the "Private IP" and "Public IP" options.
Note, if this is the first time creating a Private IP for the "Network" you select, you'll be prompted that a "Private service connection is required".
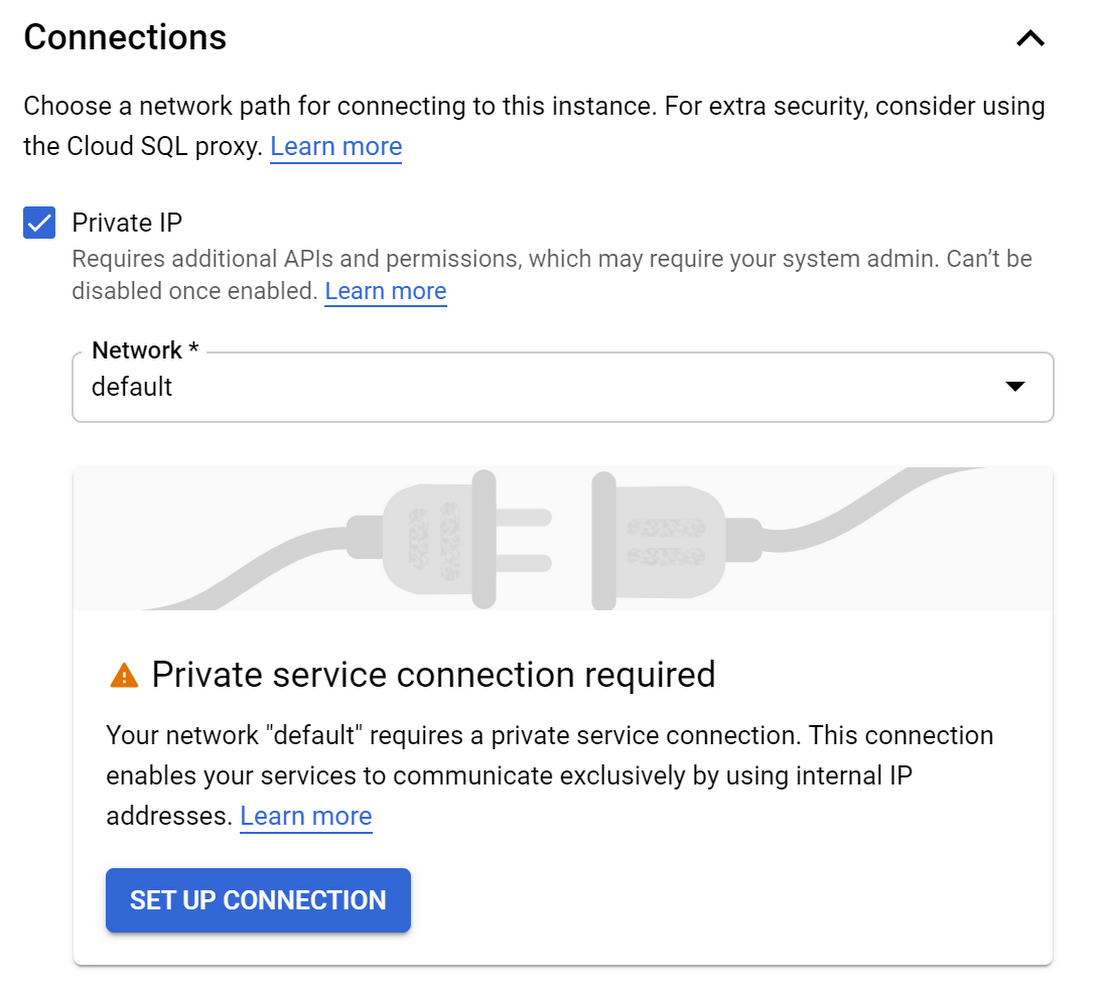
Click "SET UP CONNECTION" and select "Use an automatically allocated IP range" in the "Enable Service Networking API" dialog that appears:
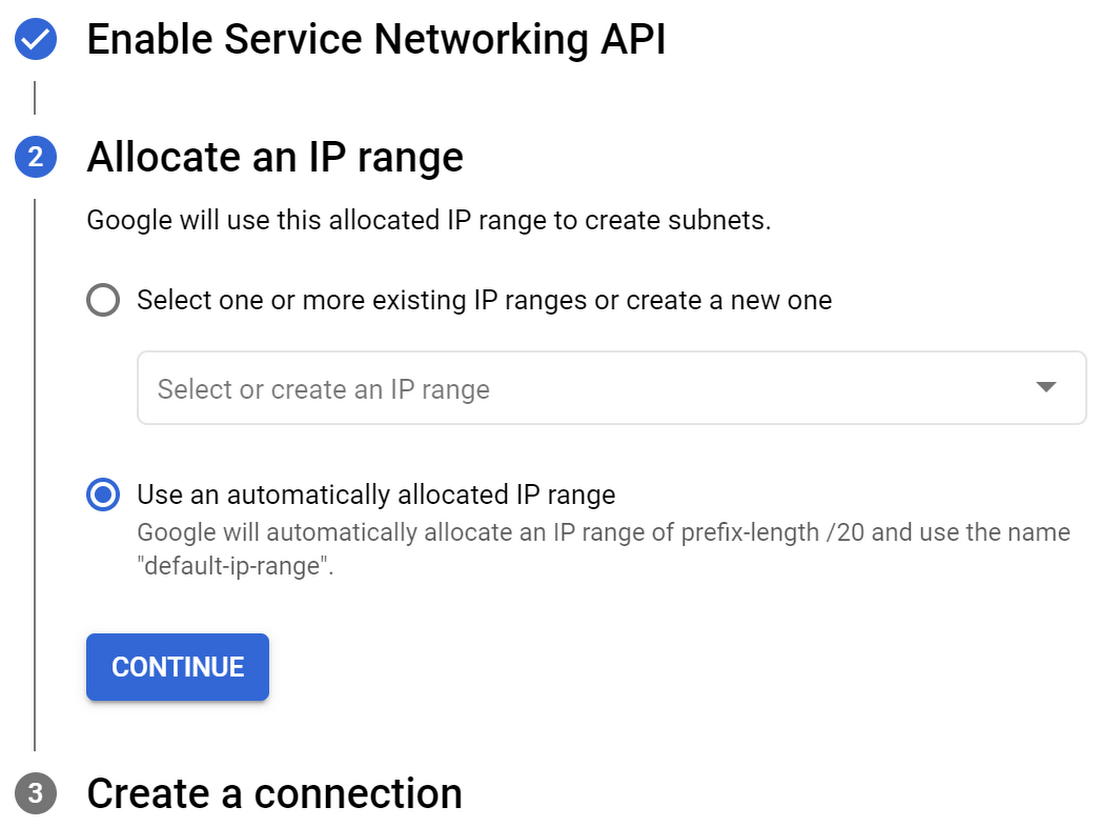
Then click the "Continue" button to complete the process.
Back in the instance "Configuration Options", click the "Authentication" section to expand it.
From the dropdown menu for joining a managed Active Directory domain, select the domain that you created in the first step of this blog post.
Cloud SQL will automatically create a Per-Product, Per-Project Service account used for authentication to the instance. You will be prompted to grant the service account the "managedidentities.sqlintegrator" IAM role.
With all of that information provided the create instance form should look something like this:
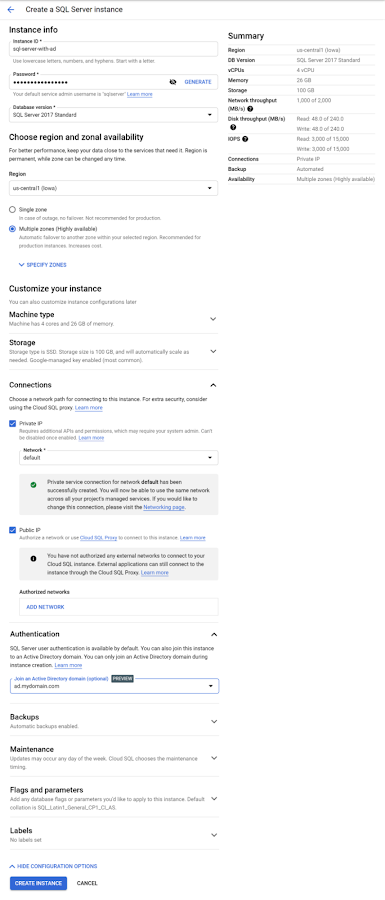
Click "CREATE INSTANCE" to complete the process of creating the instance. Once the instance is created you should see the new instance's overview page that should look something like this:

Well done! You now have a SQL Server instance on Google Cloud that you can log into using Windows Authentication with an AD-based identity.
Connecting to the SQL Server instance using Windows authentication
Let's go ahead and confirm that everything works as expected. To do so I'll create a Windows Server 2019 VM using Google Compute Engine. Using it I can add a new user to the Managed Active Directory, give that user access to the SQL Server instance in Cloud SQL and then connect to the SQL Server instance as that user with Windows Authentication.
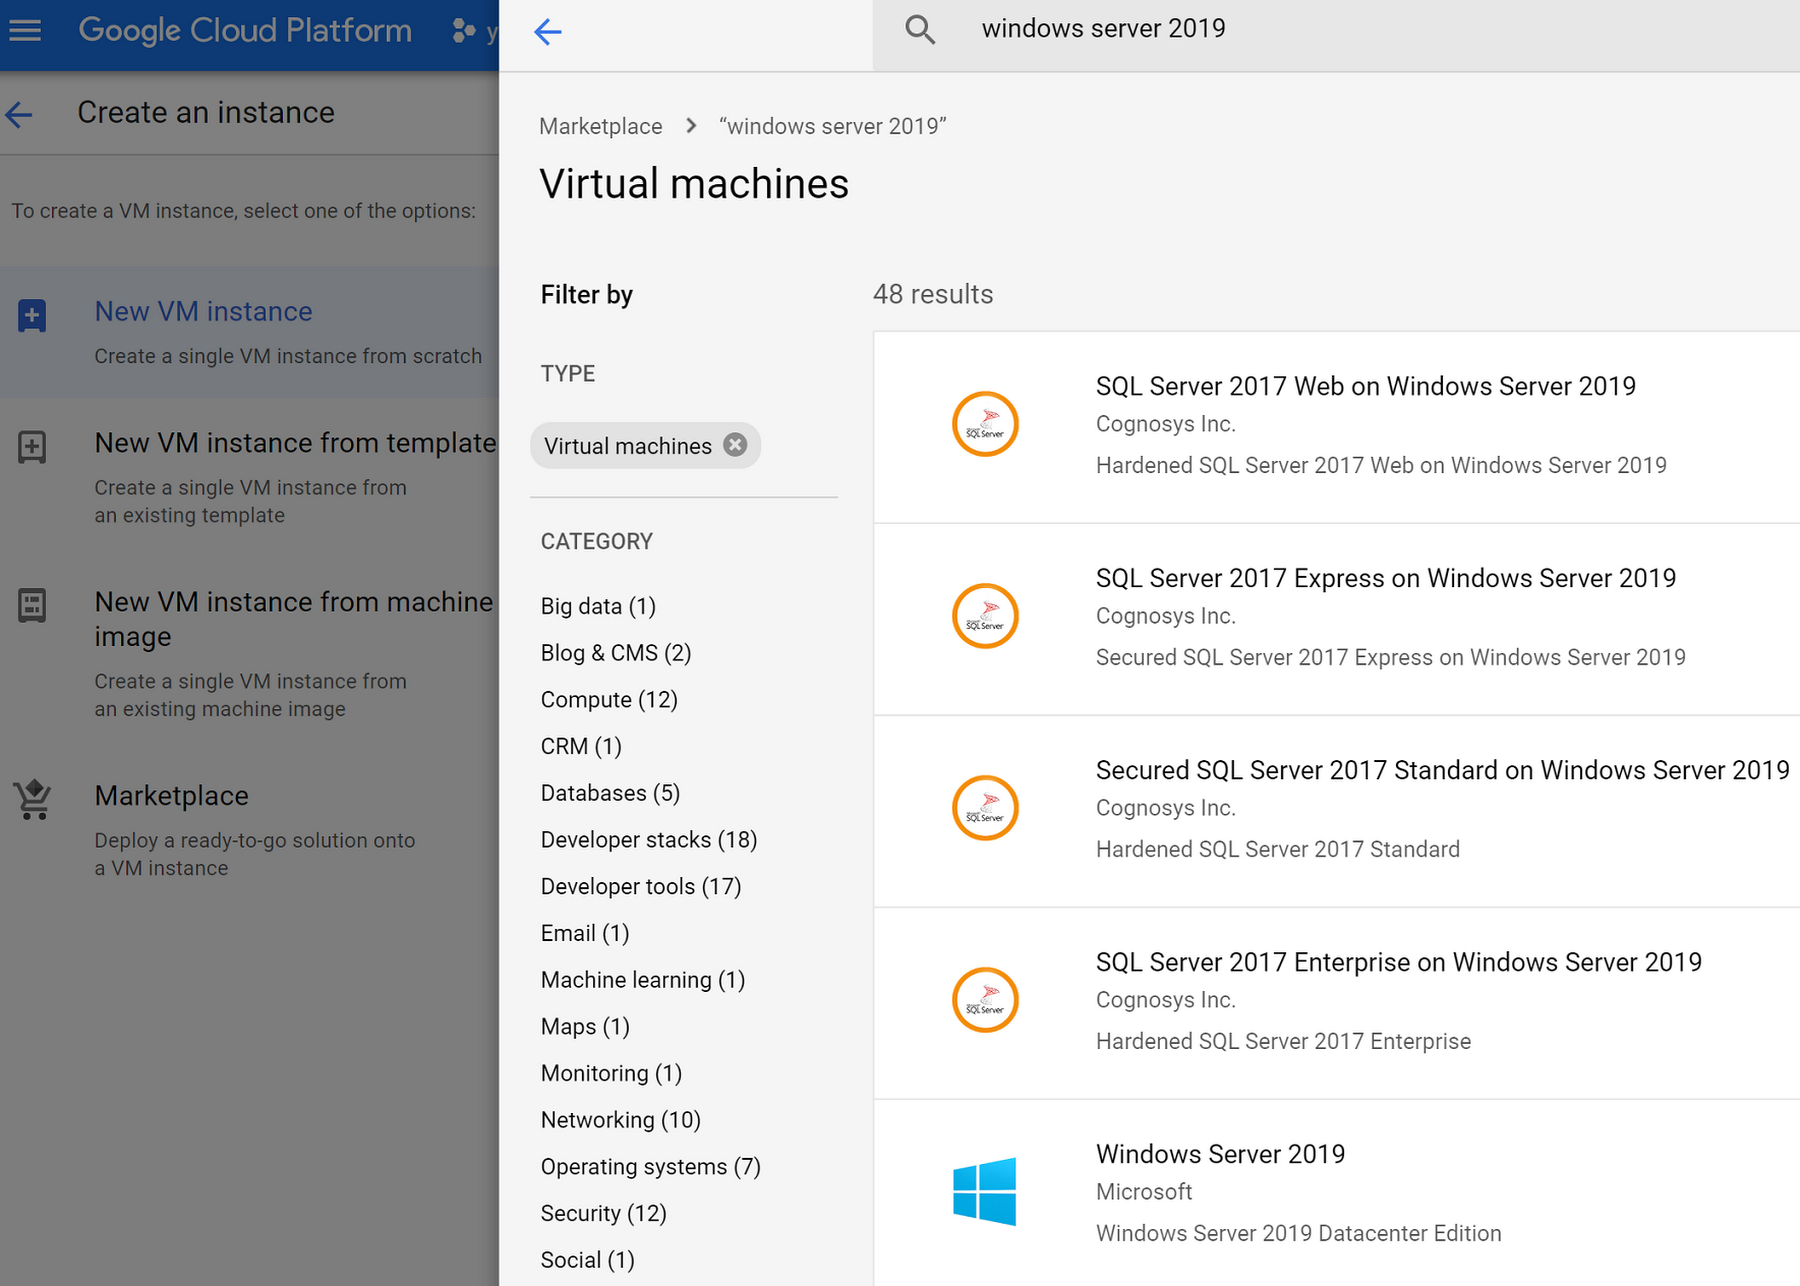
Windows Server VM's are easy to create using Google Compute Engine's marketplace.
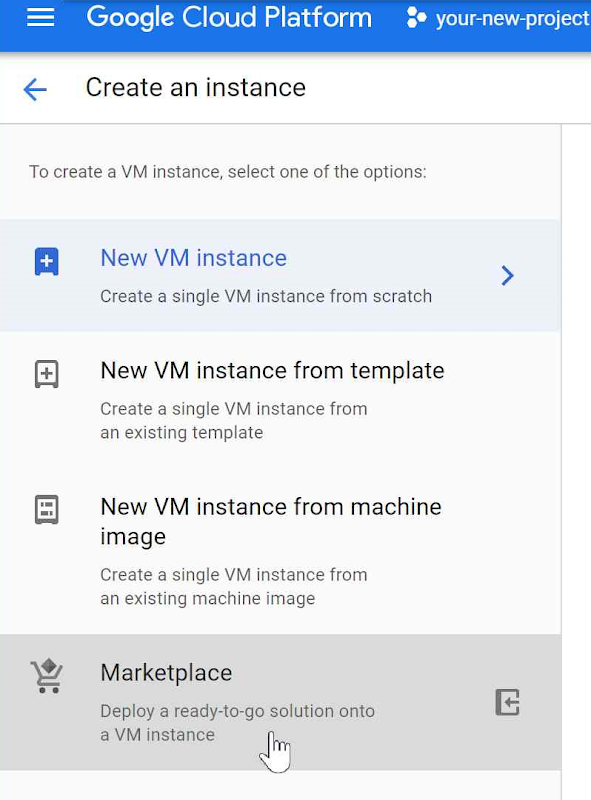
Searching for "Windows Server 2019" in the marketplace returns many options to choose from.
I'll create a VM using the "Secured SQL Server 2017 Standard on Windows Server 2019" option.
After choosing the VM option, click the "Launch" button and you'll be taken to the instance creation page. Review the settings of the VM instance to be created, especially the "Network" selection under the "Networking" section, to ensure that the selected "Network" is a network that is included in your Active Directory domain. Then scroll to the bottom of the instance creation page and click the "Create" button.
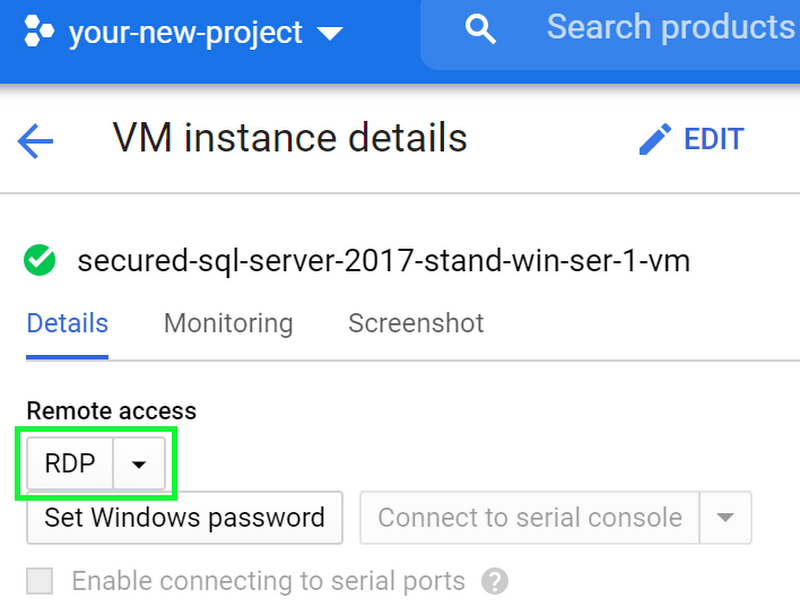
Once the VM creation process is complete, you'll be taken to the instance detail page. Click the "Set Windows password" button to set a password to use for logging into the VM. Then use the "Remote Desktop Protocol" (RDP) button to login in to the VM.
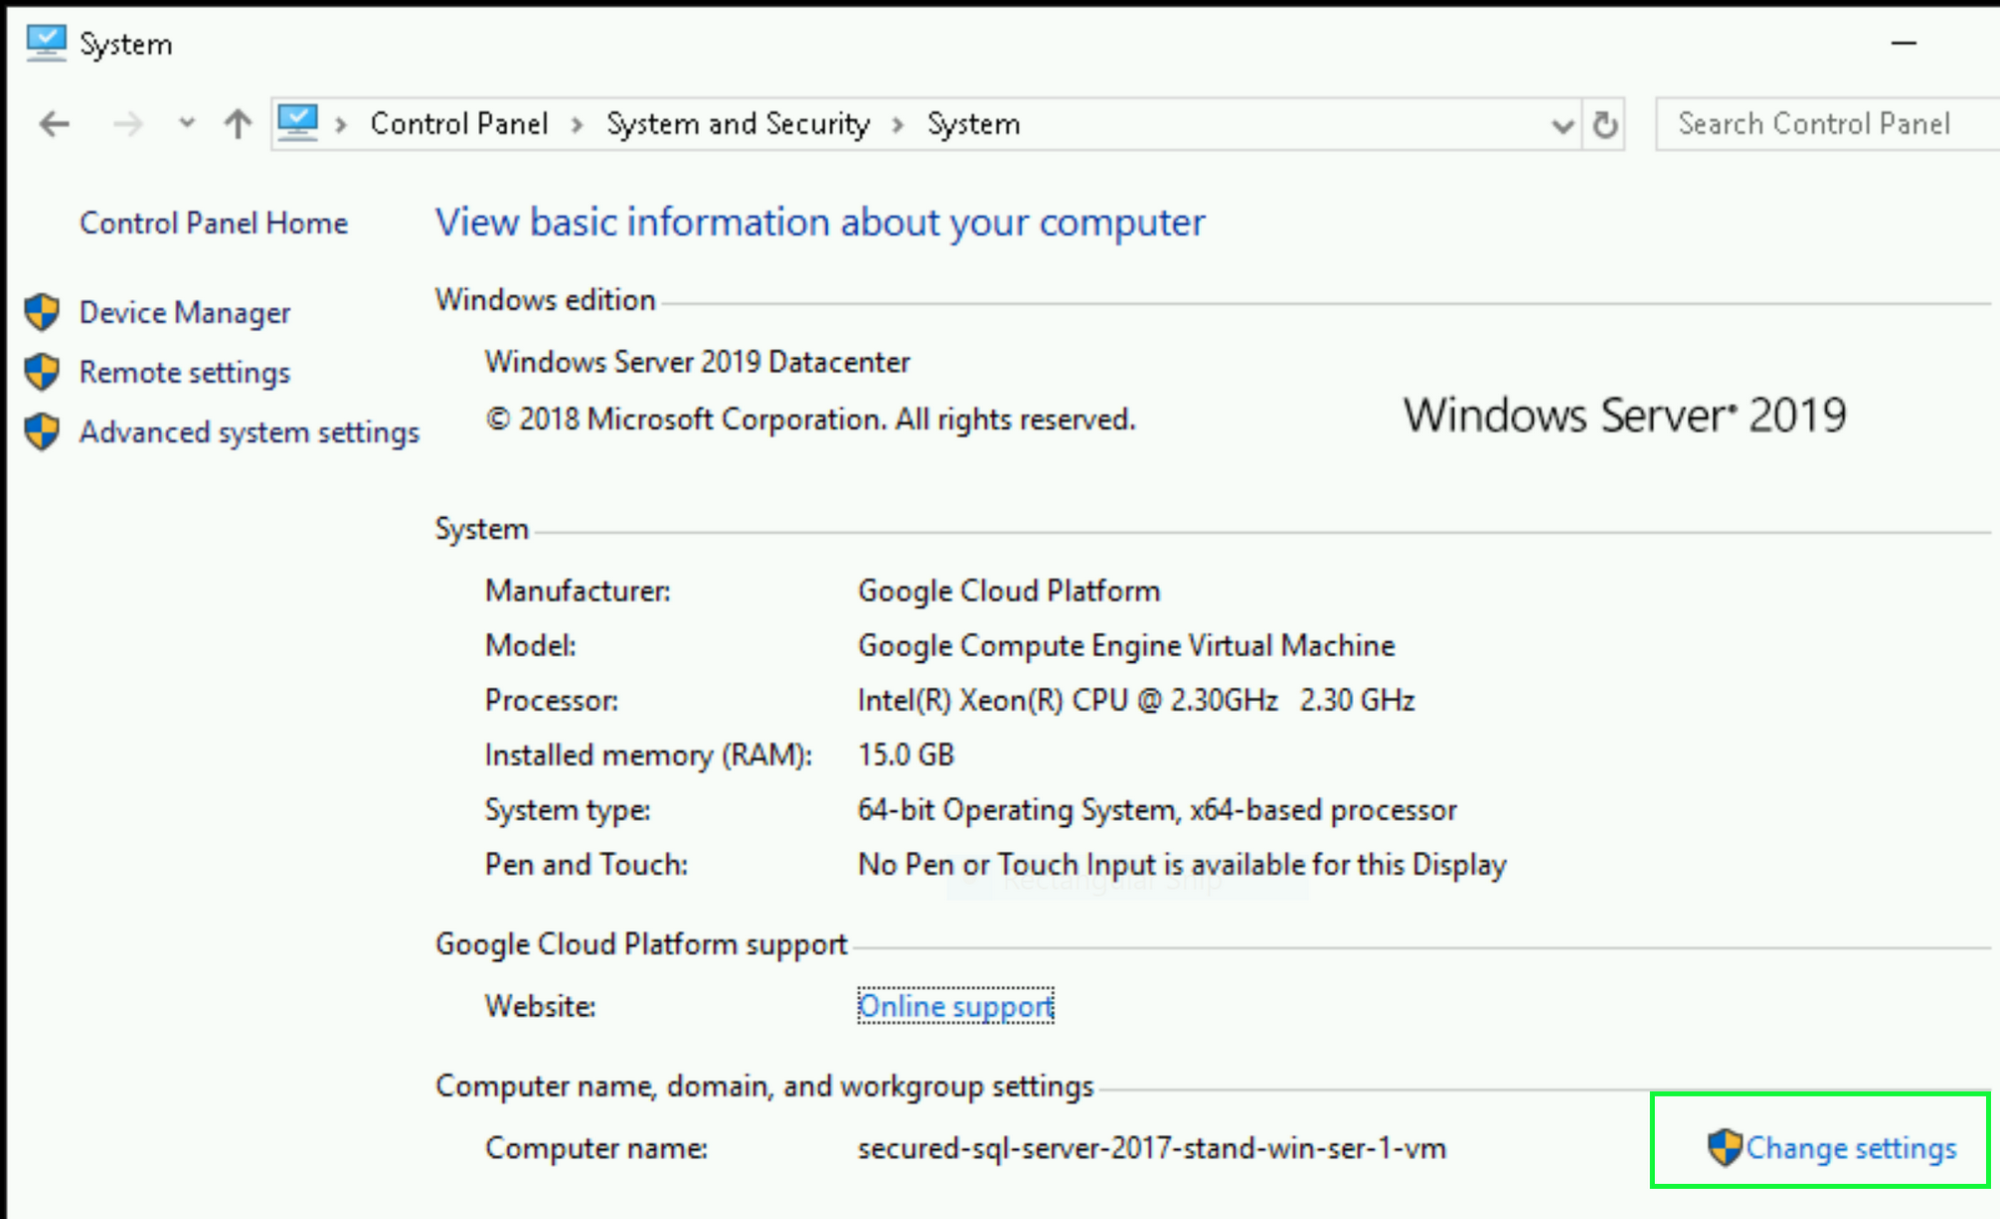
Once you are logged into the VM instance you can now join the VM to the Managed Active Directory domain. Click the "Windows" icon on the bottom left of the screen, type "Control Panel", and then press ENTER. Navigate to "System and Security", and then click "System". Under Computer name, domain, and workgroup settings, click "Change settings".
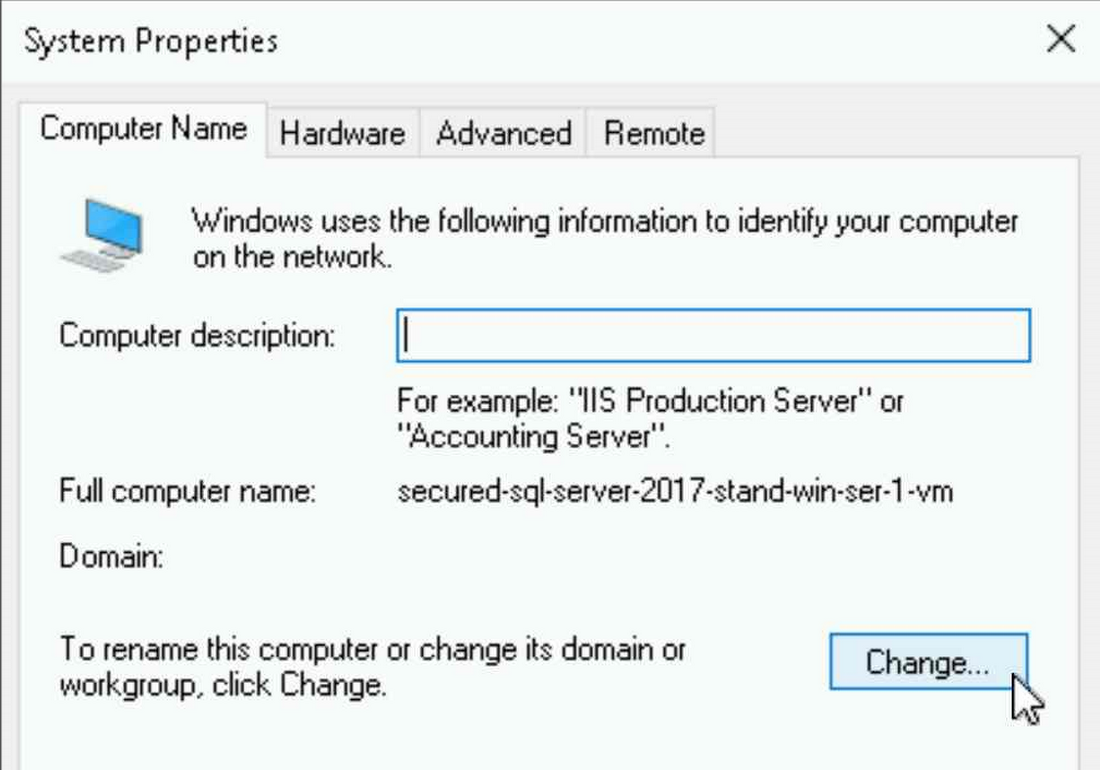
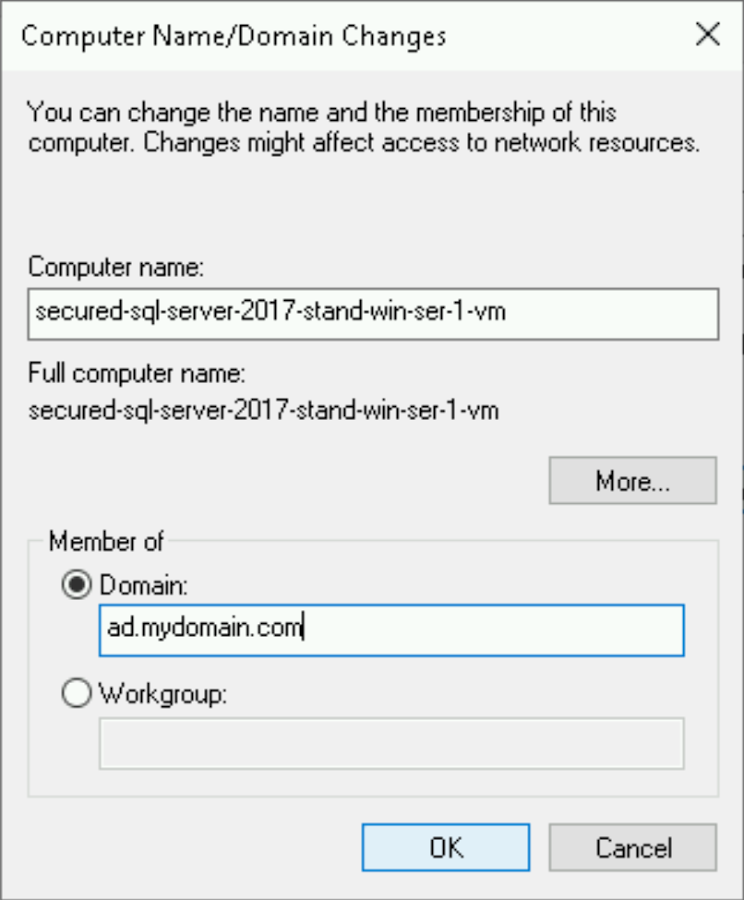
Then click the "Change" button in the System Properties dialog box.
Enter the name of your Managed Active Directory in the "Domain" input text box and click the "OK" button.
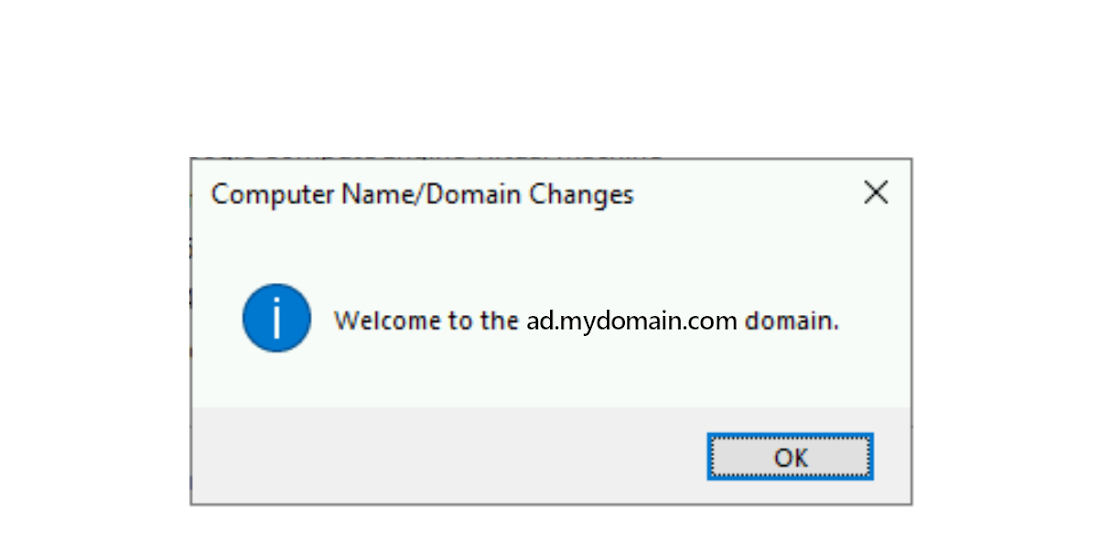
A welcome to the domain message should appear that looks something like this:
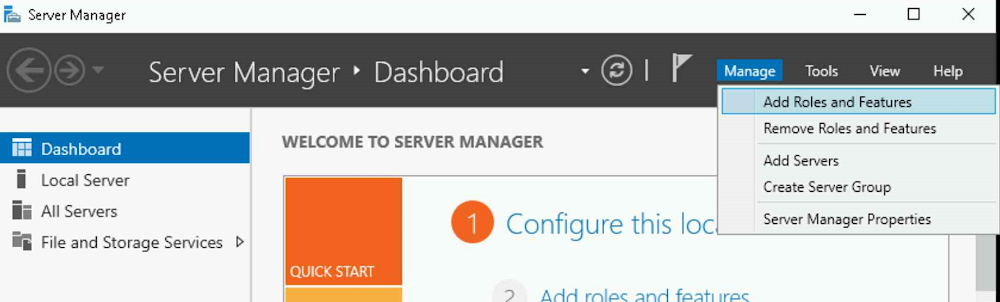
Now that we have a Windows Server VM in our Managed Active Directory, we can add a User. To do so, we'll need to install the necessary Remote Server Administration Tools (RSAT). Open "Server Manager" and click the "Manage" menu item and select "Add Roles and Features" wizard.
In the wizard, advance to the Select features page. You can select Features from the sidebar or select Next until you reach it.
On the Select features page, in the Features list, expand Remote Server Administration Tools, and then expand Role Administration Tools.
Under Role Administration Tools, select AD DS and AD LDS Tools. This enables the following features:
Active Directory module for Windows PowerShell
AD LDS Snap-Ins and Command-Line Tools
Active Directory Administrative Center
AD DS Snap-Ins and Command-Line Tools
Optional: You may also want to enable the following features:
Group Policy Management
DNS Server Tools (under Role Administration Tools)
Close the wizard.
Excellent! Now the Windows Server VM is enabled with the tools to add Users to the Managed AD domain. Remember the "Delegated admin" that we specified when we created the AD domain at the beginning of this blog post? Well now it's time to use it. We'll log out of the Windows Server VM and log back in as the "Delegated admin". Log out of the Windows VM by clicking the "Windows" icon at the bottom left of the VM instance screen, then clicking the "power" icon and selecting "Disconnect".

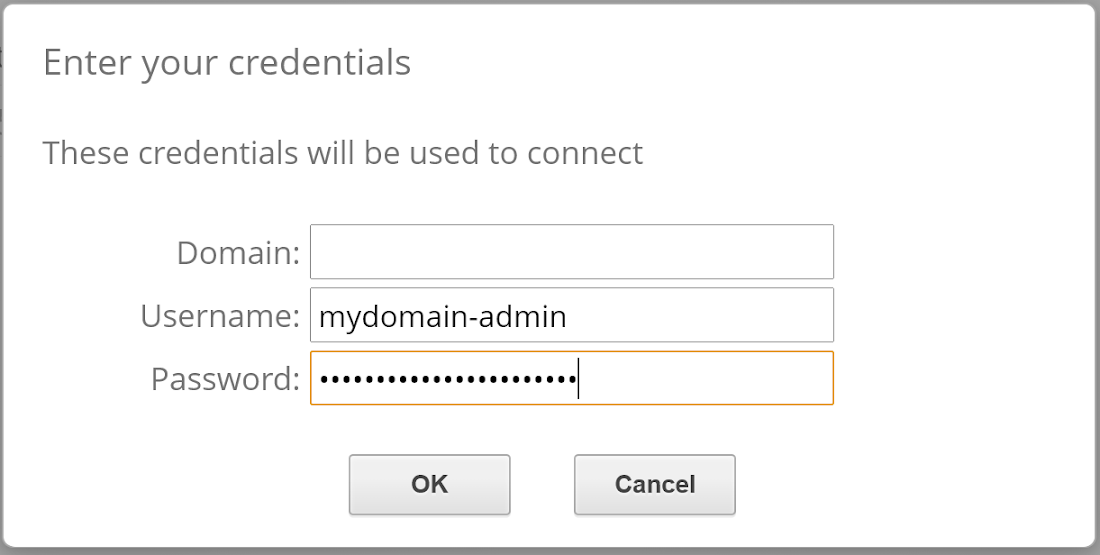
Back on the Google Compute Engine instances page click the "RDP" button to log back into the Window Server VM, but this time do so with the AD domain "Delegated admin" username and password.
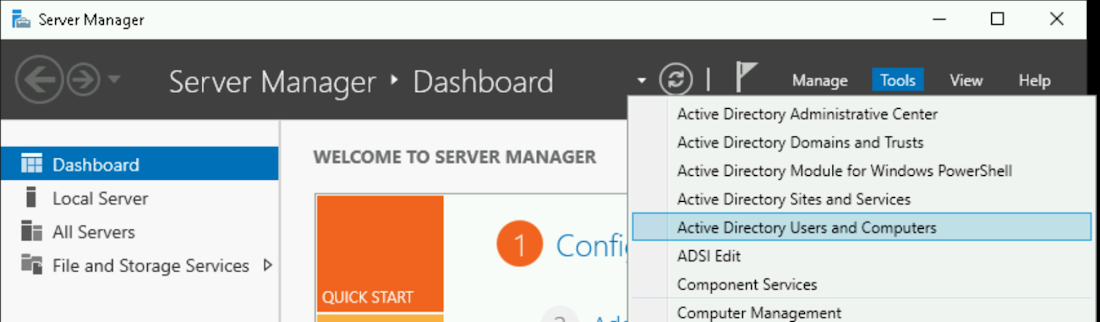
Once logged in, open "Server Manager", click the "Tools" menu item and select "Active Directory Users and Computers".
In the "Active Directory Users and Computers" dialog window that appears, expand the ad.mydomain.com item and click the "Cloud" sub-item. Then Click the "Create a New User in the current container" icon to create a new User.
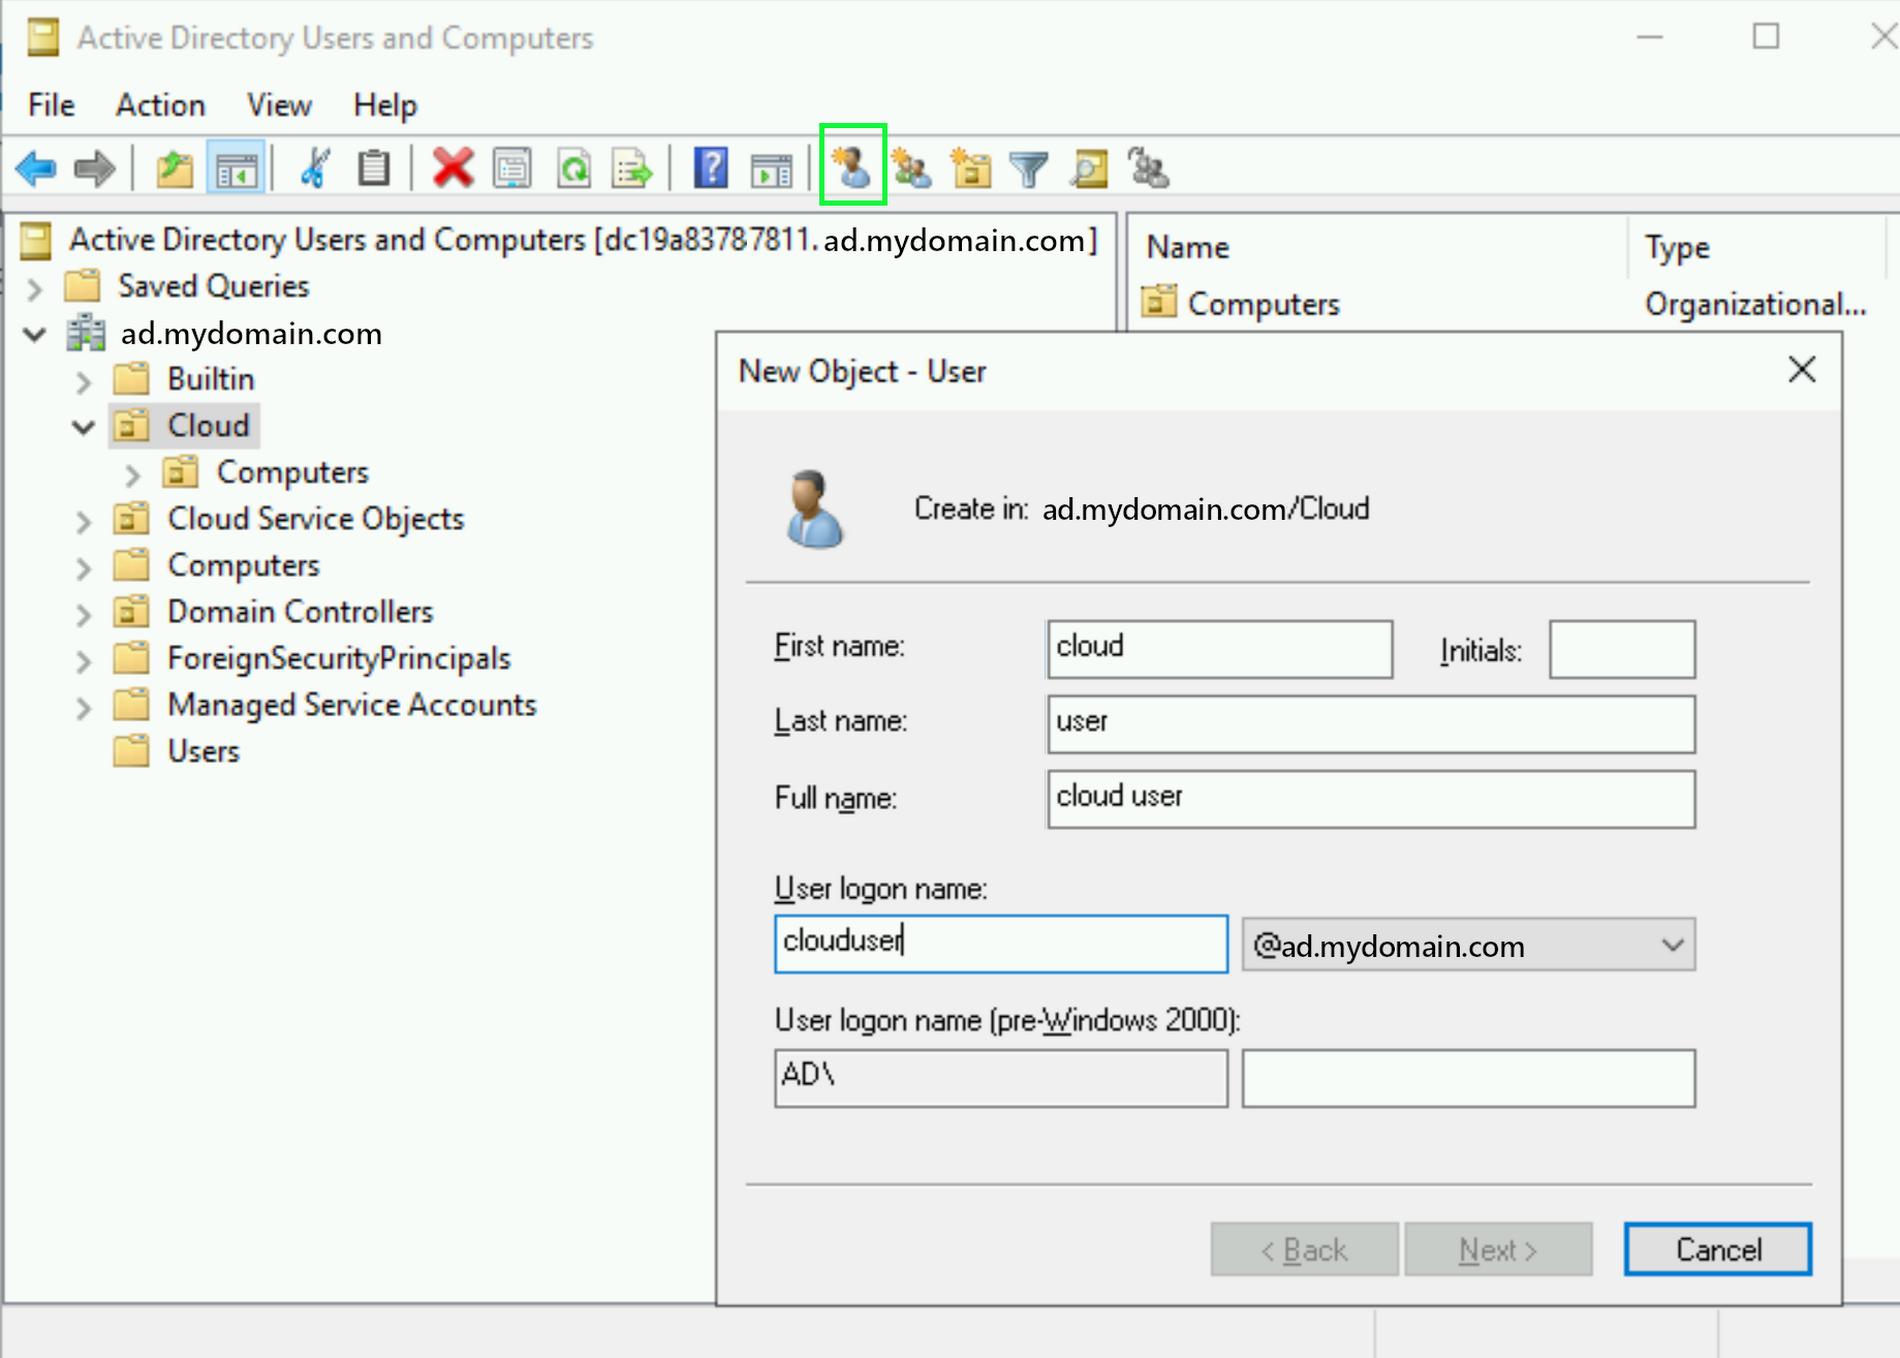
Enter a First and Last name for the User along with a logon name and click the "Next" button.
Enter and confirm a Password for the User, then click the "Next" button again. Finally click the "Finish" button in the confirmation dialog box to create the User.
Great! Now we've got a new AD domain User. But they still need to be granted access to the SQL Server instance on Cloud SQL. We can do that with Azure Data Studio. Open a browser on the Windows Server VM and go to the Azure Data Studio download page.
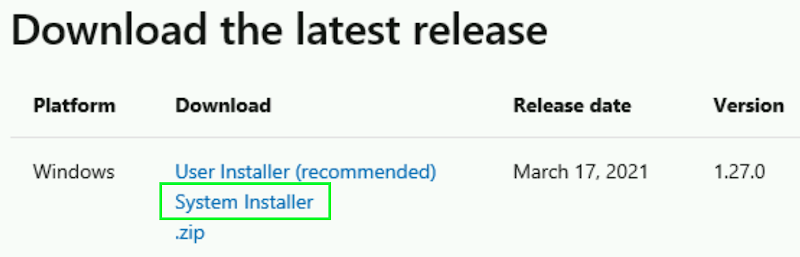
Click the "System Installer" link to initiate the download, and click the "Run" button in the download dialog window that appears

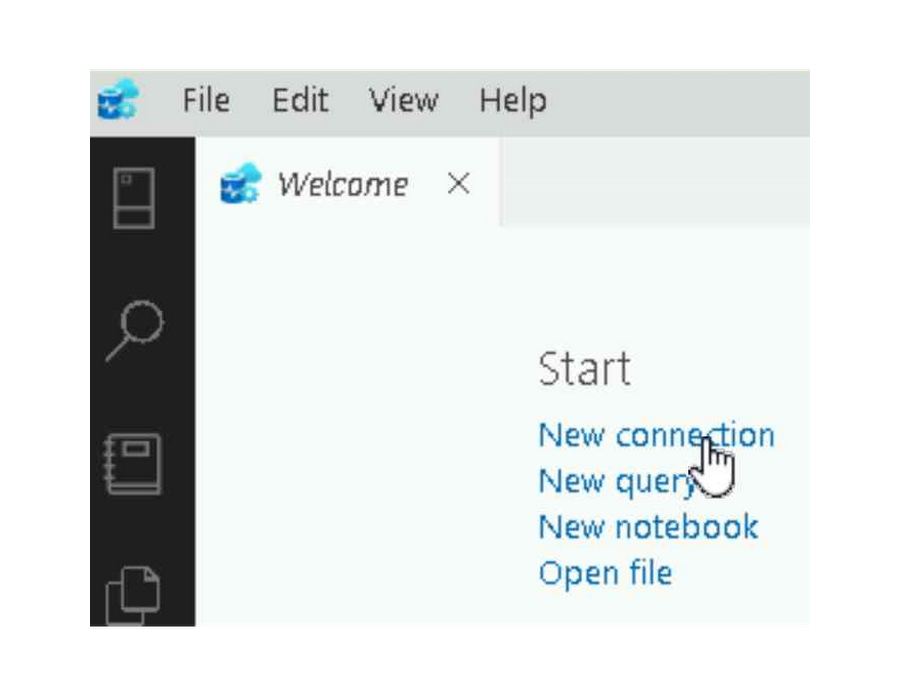
After the Azure Data Studio installation wizard completes, with "Launch Azure Data Studio" checkbox selected, click the "Finish" button to open the program. In the start screen Azure Data Studio click the "New Connection" link.
For "Server" enter the "Active Directory FQDN (Private)" value from the Cloud SQL - SQL Server instance details page:
Example: private.sql-server-with-ad.us-central1.your-new-project.cloudsql.ad.mydomain.com
For Authentication type select "SQL Login"
For the "User name" enter "sqlserver" and for "Password" enter the password for the "sqlserver" User that you specified when you created the SQL Server instance.
With all of that information specified the Connection Details should look something like this:
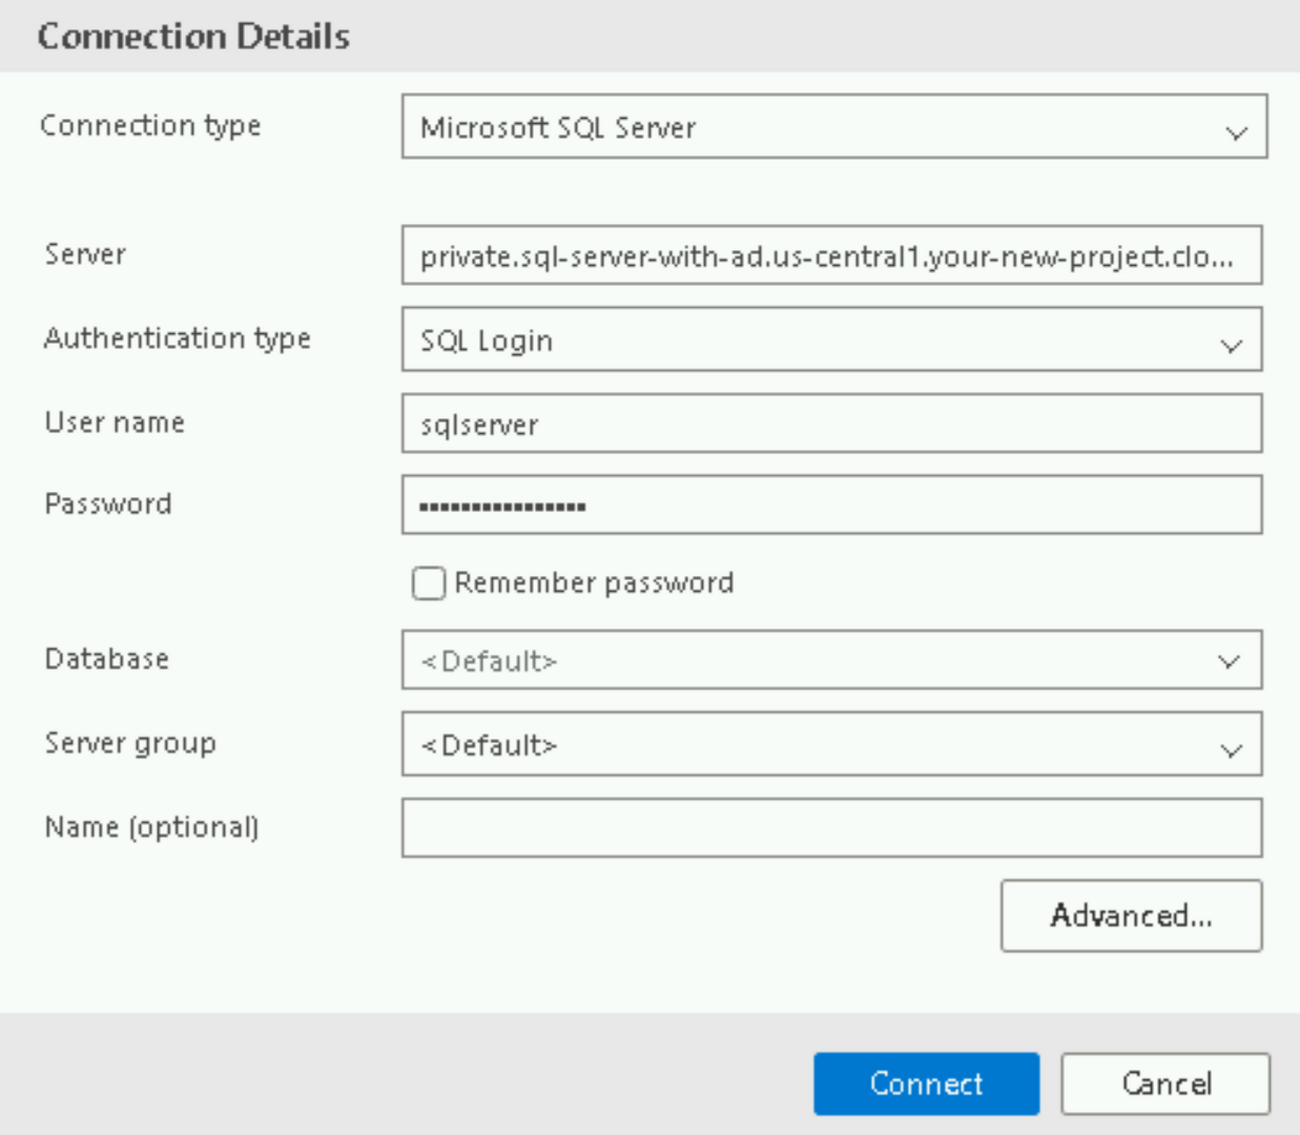
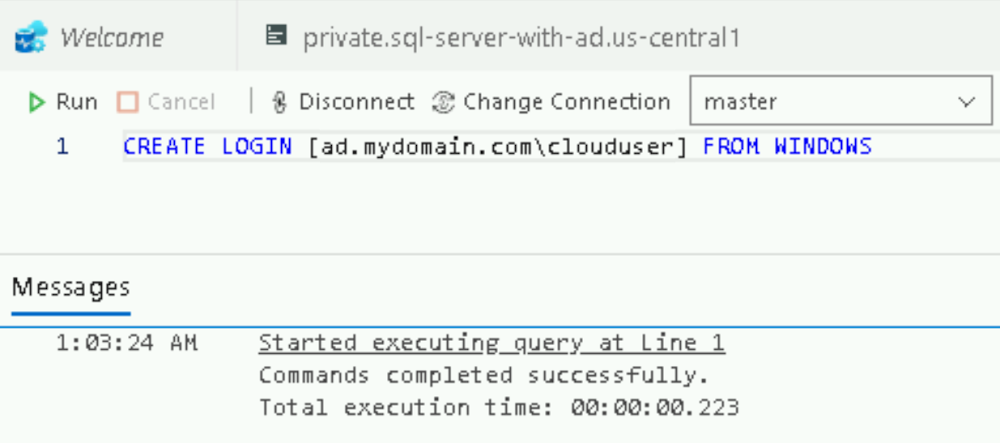
Click the "Connect" button to connect to the SQL Server instance. Once the connection is made, click the "New query" link and enter the following query:
CREATE LOGIN [ad.mydomain.com\clouduser] FROM WINDOWS
and click the "Run" button.
Wonderful! We're completely done with the setup and now it is time for the moment of truth.
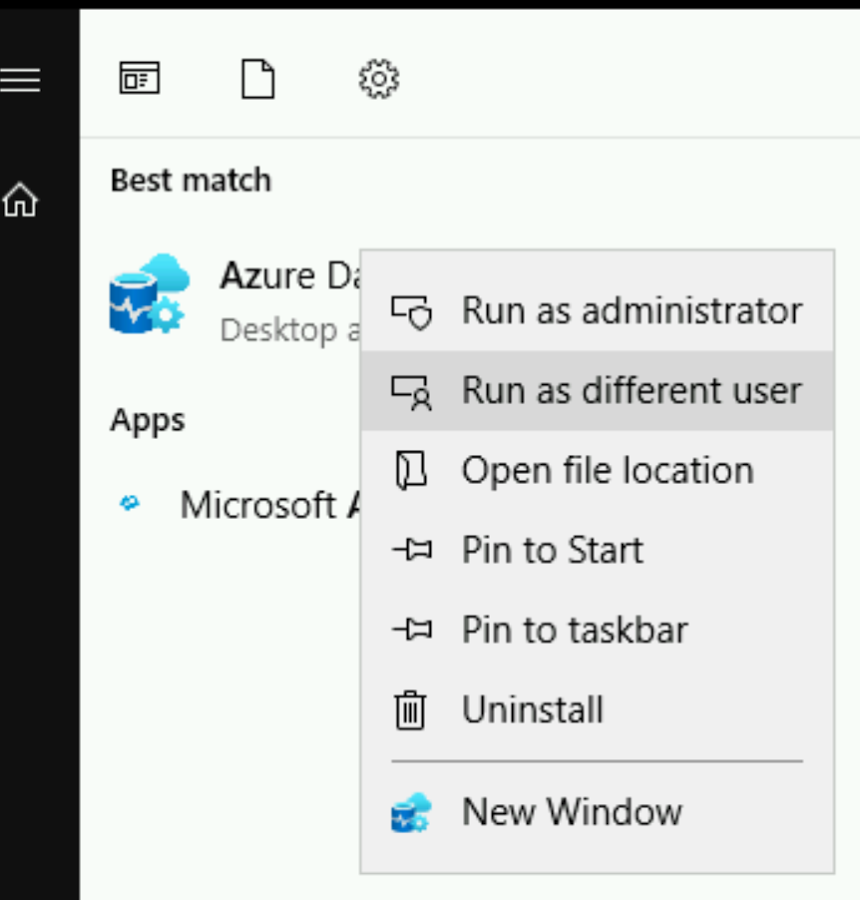
Let's test out connecting to our SQL Server instance as our new AD domain User via Windows Authentication. Close the Azure Data Studio. Now we'll reopen Azure Data Studio but we'll do so as the new AD domain User. Click the "Windows" icon at the bottom left of the VM instance screen and type "Azure Data Studio". Right-click the "Azure Data Studio" icon and select "Run as a different user".
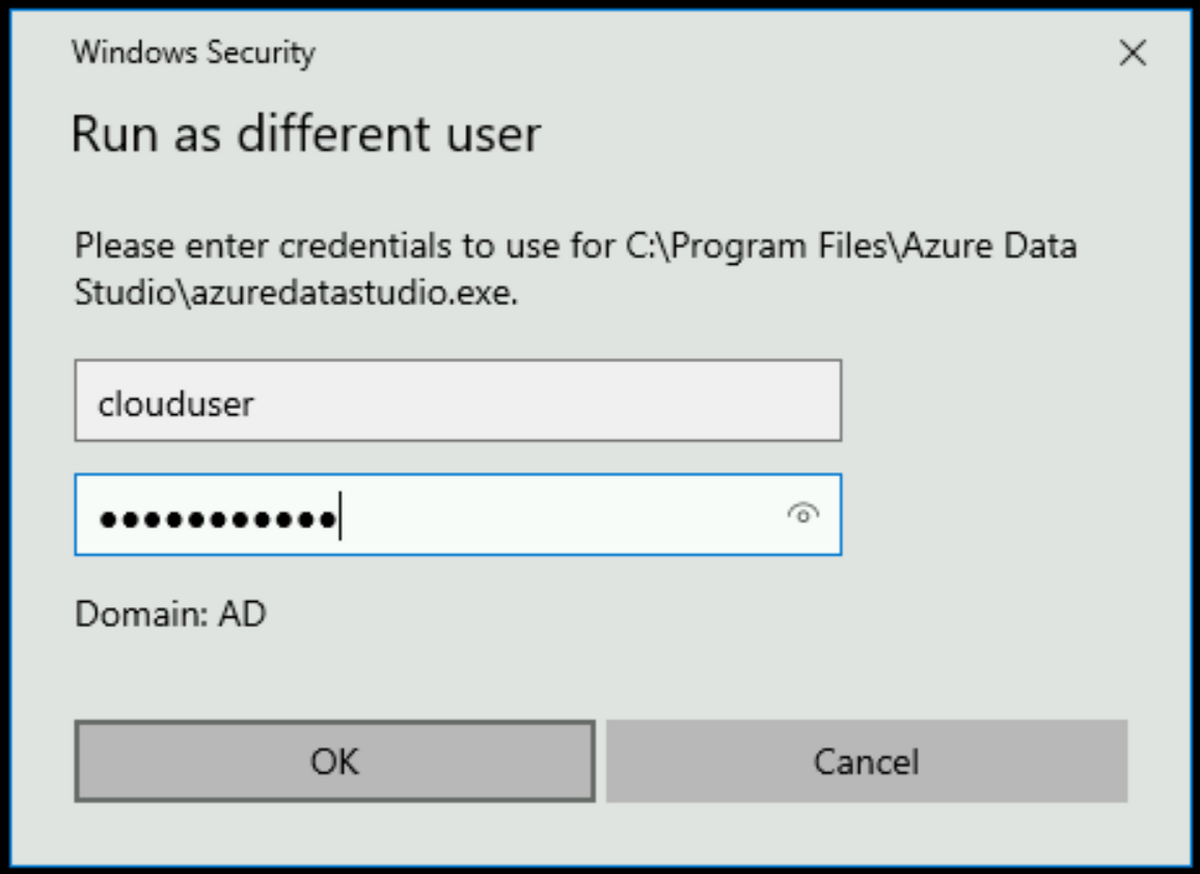
Enter the "User name" and "Password" for the AD domain User in the dialog box that appears.
On the Azure Data Studio start page, click the "New Connection" link.
For "Server" enter the "Active Directory FQDN (Private)" value from the Cloud SQL - SQL Server instance details page:
Example: private.sql-server-with-ad.us-central1.your-new-project.cloudsql.ad.mydomain.com
For Authentication type select "Windows Authentication".
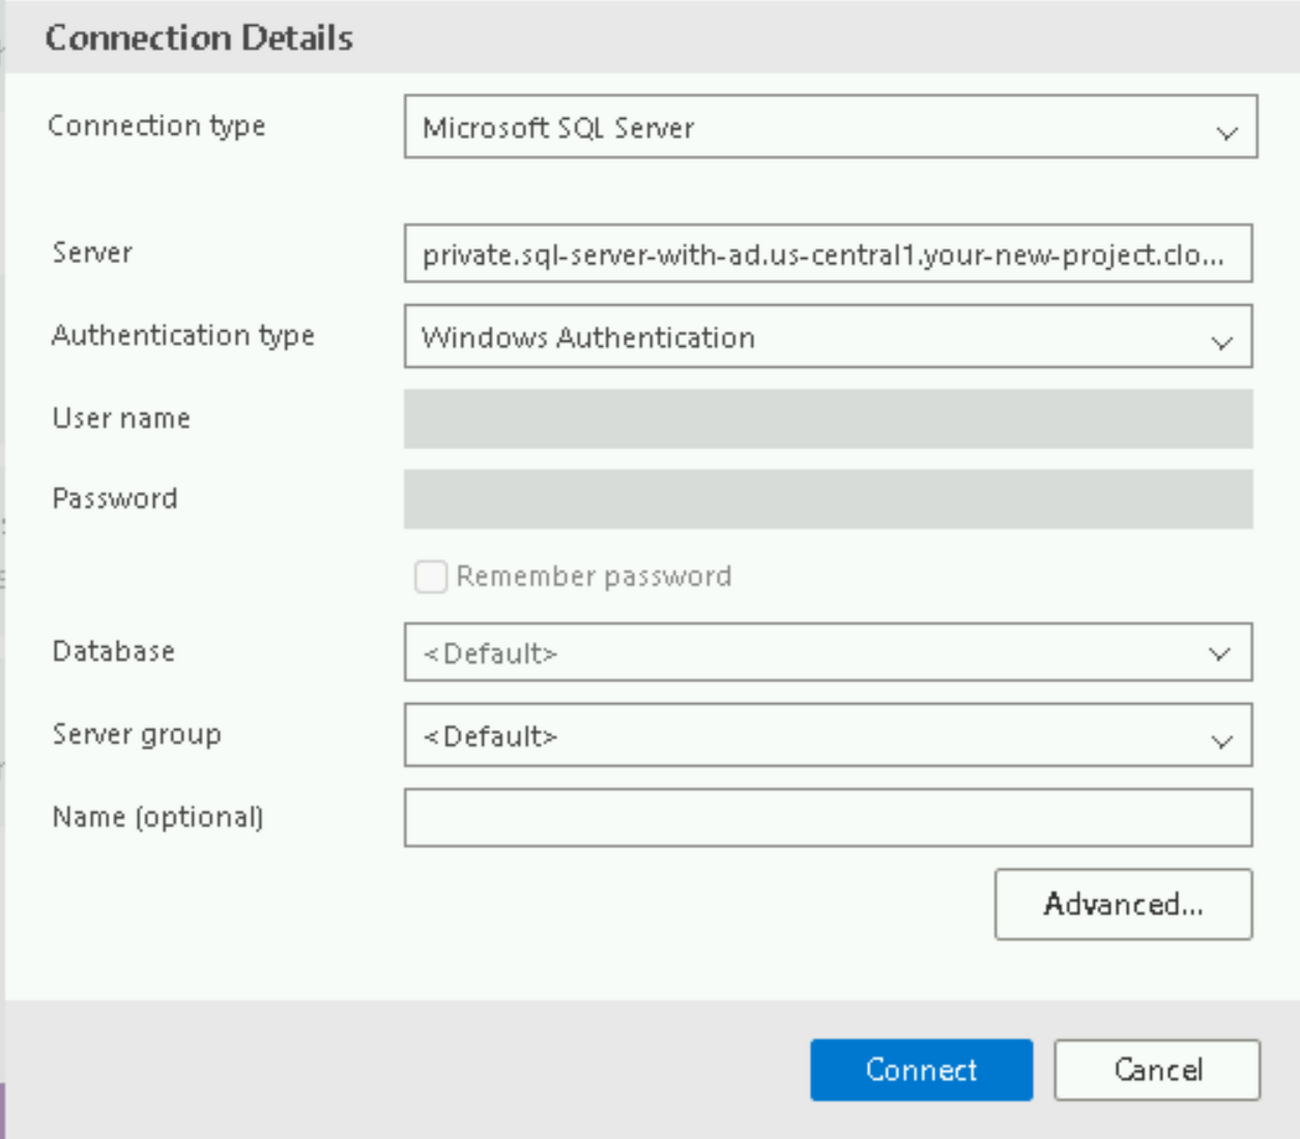
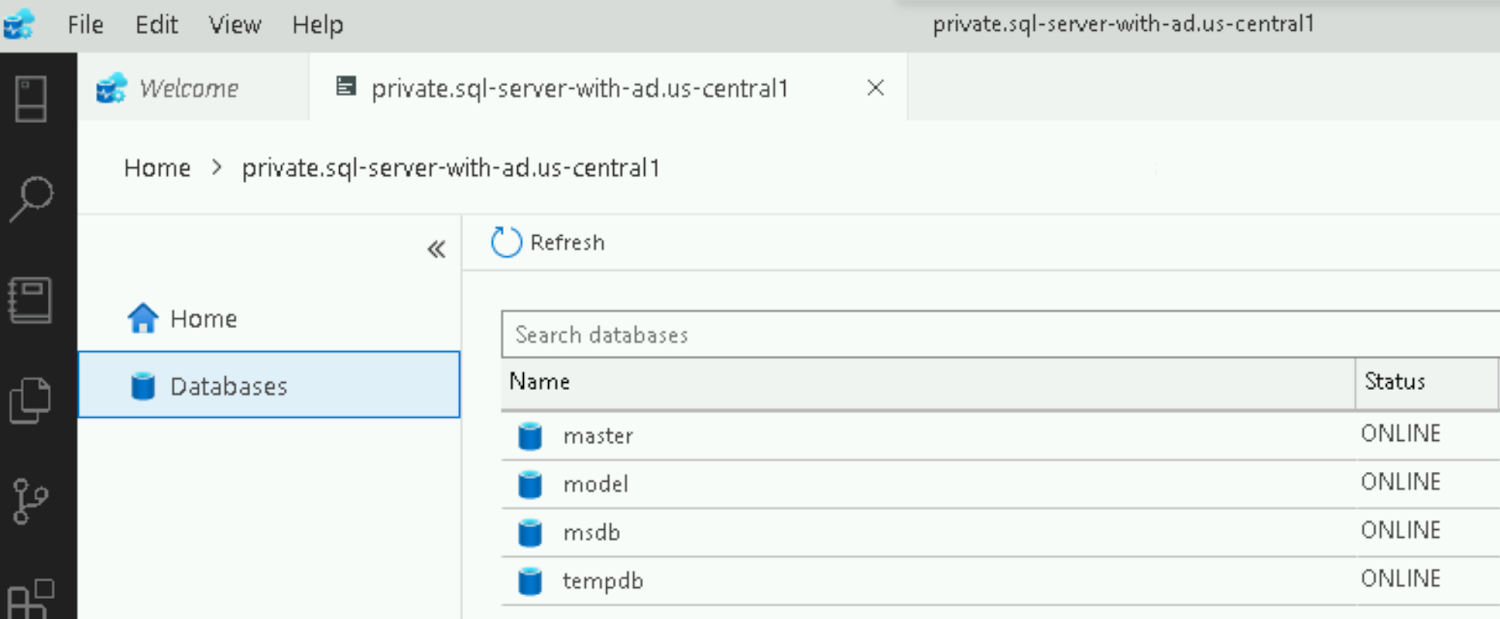
Click the "Connect" button... and smile because your SQL Server on Cloud SQL is now integrated with Managed Active Directory.
Getting started
Windows Authentication for Cloud SQL for SQL Server is available in preview for all customers today! Learn more and get started.