Add preprocessing functions to Tensorflow models and deploy on Vertex AI
Juan Acevedo
Enterprise AI/ML Customer Engineer
Dale Markowitz
Applied AI Engineer
One does not simply productionalize machine learning models.
If you’ve developed models before, you know that most of the time input features need to be preprocessed before they are ready to be consumed by a model. Often this preprocessing step is done by another application before sending the processed output to the prediction engine. This adds a layer of complexity when productizing machine learning models and makes integrations difficult.
Fortunately, TensorFlow supports preprocessing layers which can be attached to any model so that preprocessing and prediction can all be performed in the same application.
In this post, we’ll download a vision model from TensorFlow Hub, attach an image preprocessing function and upload it to Vertex’s prediction service, which will host our model in the cloud and let us make predictions with it through a REST endpoint. Not only does this make app development easier, but it also provides more flexibility and ease of use; Clients can send their data as-is and let the model do the heavy lifting. Furthermore, Vertex’s prediction service lets us take advantage of hardware like GPUs and performs model monitoring and autoscaling.
Prefer doing everything in code from a Jupyter Notebook? Check out this colab.
Download a model from TensorFlow Hub
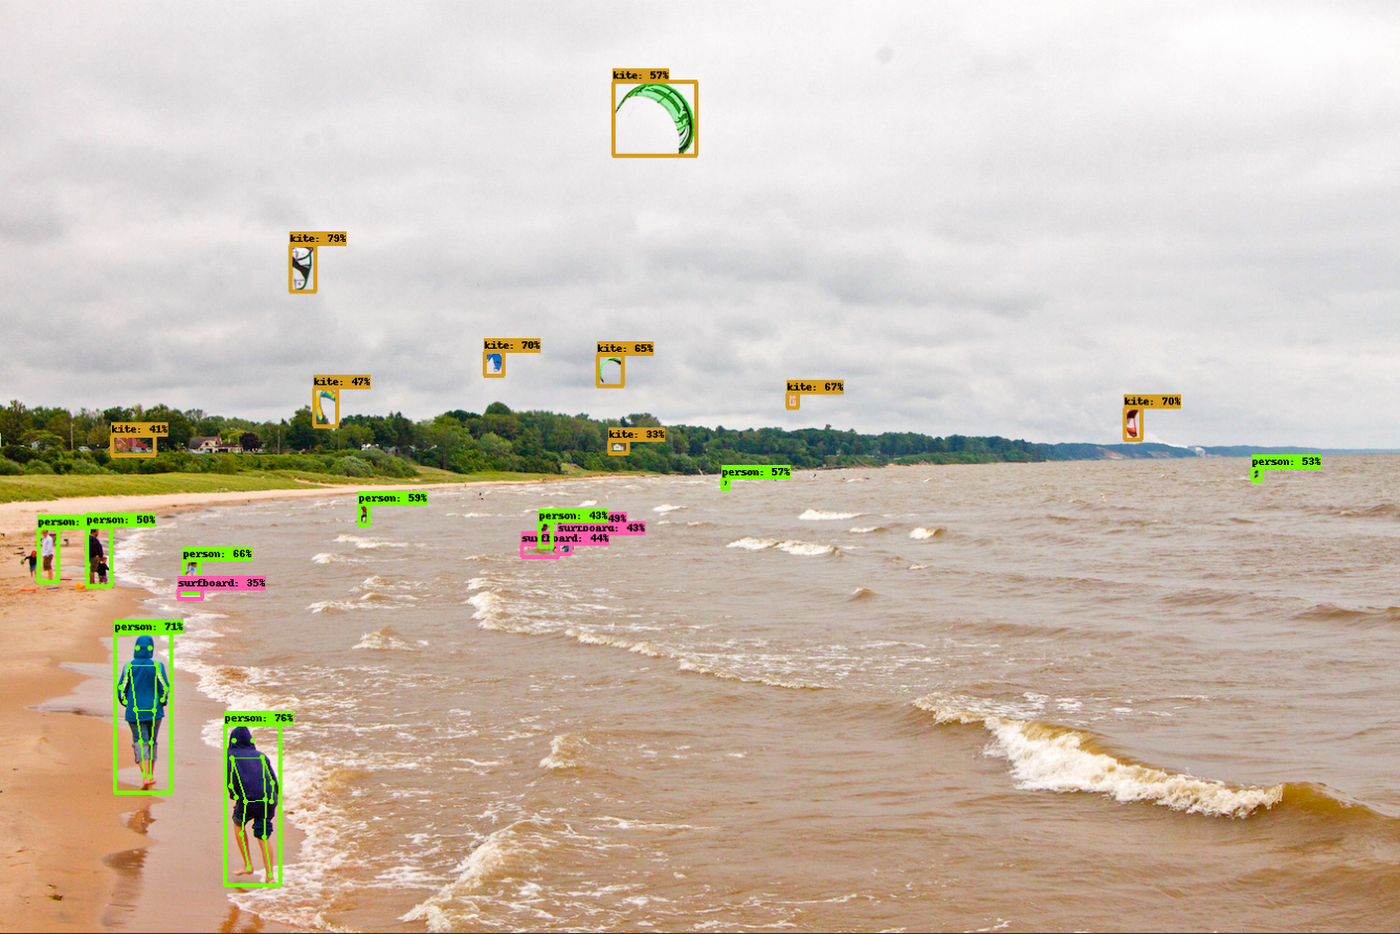
On https://tfhub.dev/ you’ll find lots of free models that process audio, text, video, and images. In this post, we’ll grab the CenterNet Object and Keypoints detection model. This model takes as input an image and returns object detection bounding boxes and detection keypoints. Detection keypoints are used to detect object parts, such as human body parts and joints.

On the CenterNet Object and Keypoints detection model page click “Download” to grab the model in TensorFlow’s SavedModel format. You’ll download a zipped file that contains a directory formatted like so:
Here the saved_model.pb file describes the structure of the saved neural network, and the data in the variables folder contains the network’s learned weights.
On the model’s hub page, you can see its example usage:
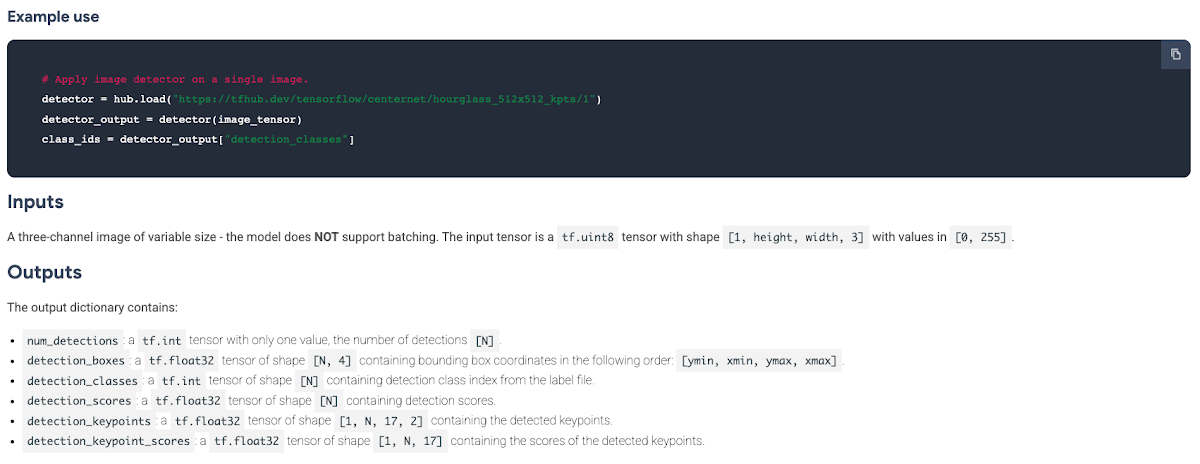

You feed the model an input Tensor and it spits out a dictionary with the number of detection objects, the localized box and keypoint coordinates. Unfortunately, this model only supports Tensor-like objects such as tf.tensors and Numpy arrays. This makes it quite difficult for clients as it requires them to create pre-processing logic before sending the inputs to the model. More so in other languages such as Javascript and Java.
TensorFlow preprocessing layers
TensorFlow models contain a signature definition which defines the signature of a computation supported in a TensorFlow graph. SignatureDefs aim to provide generic support to identify inputs and outputs of a function. If you’ve got TensorFlow installed on your computer, in the directory of the Hub model you downloaded, run:
saved_model_cli show --dir . --tag_set serve --signature_def serving_default
For this model, that command outputs:
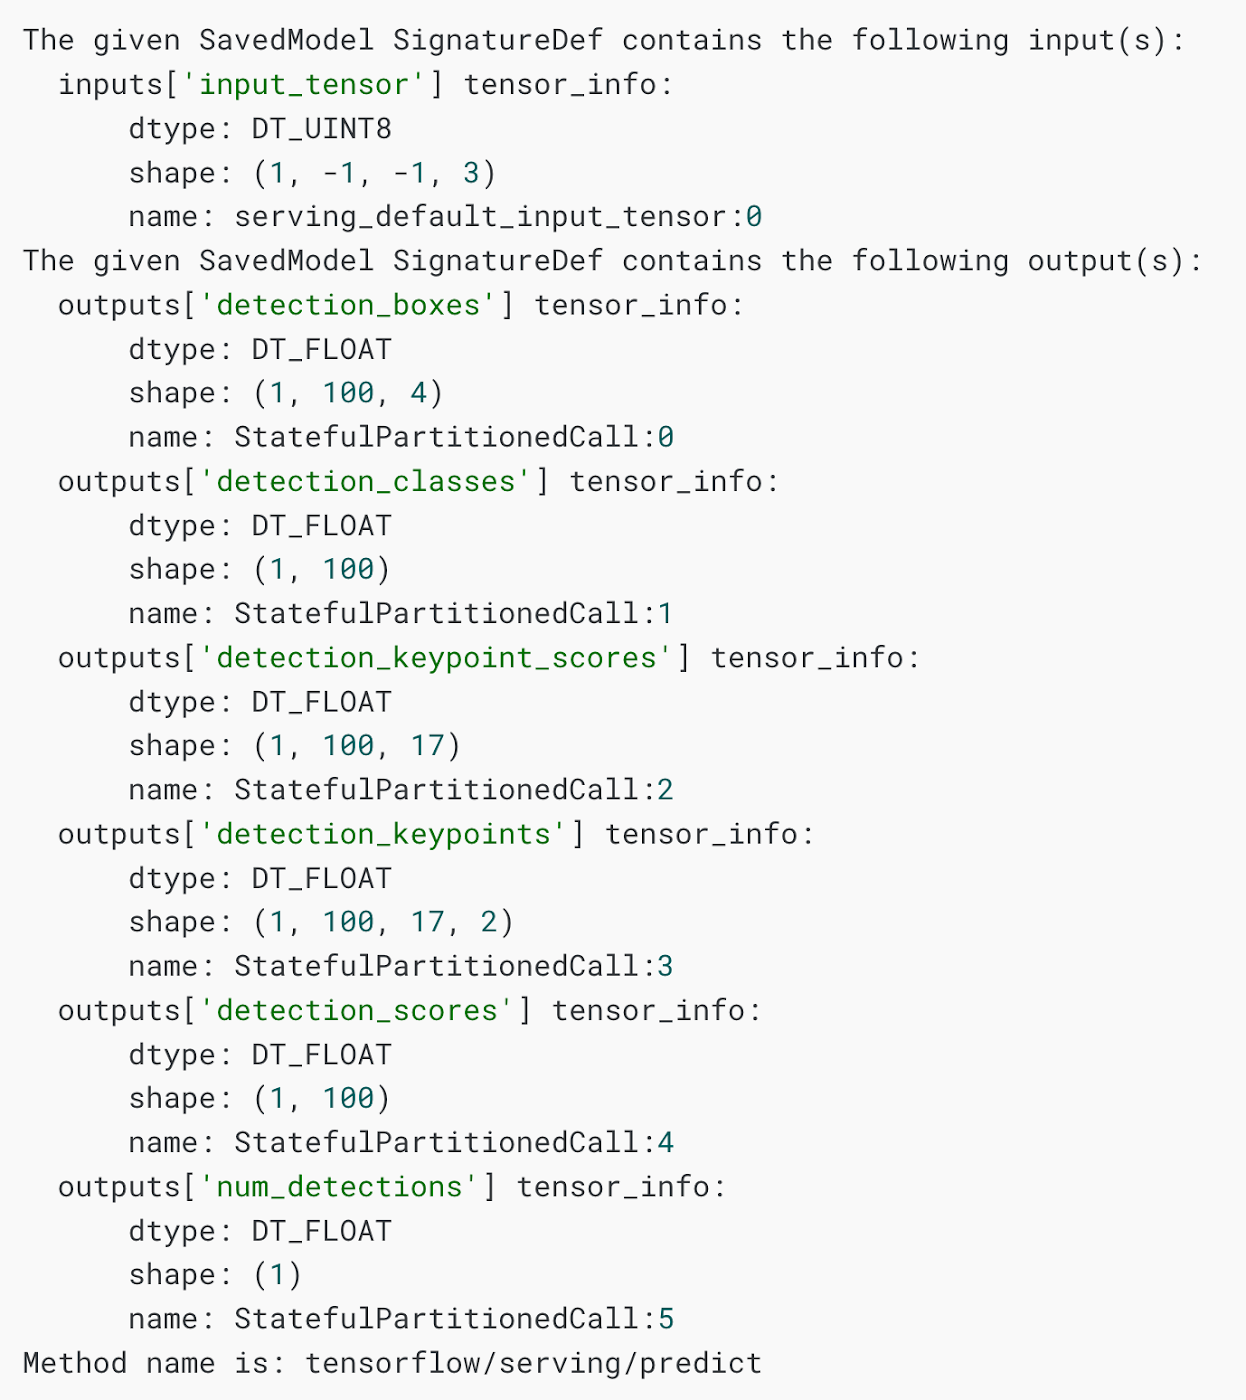

We can modify this input layer with a preprocessing function so that clients can use base64 encoded images, which is a standard way of sending images through RESTFUL APIs. To do that, we’ll save a model with new serving signatures. The new signatures use python functions to handle preprocessing the image from a JPEG to a Tensor.
The base64 decoding is done natively by Vertex’s prediction endpoint service. More on that next.
Getting started with Vertex AI
Vertex AI is Google Cloud’s new platform for training, deploying and monitoring machine learning models and pipelines.
For this project we’ll use the prediction service, which will wrap our model in a convenient REST endpoint.
To get started, you’ll need a Google Cloud account with a GCP project set up. Next, you’ll need to create a Cloud Storage Bucket which is where you’ll upload the TensorFlow Hub model. You can do this from the command line using gsutil.
If this model is big, this could take a while!
In the side menu, enable the Vertex AI API.
Once your Hub model is uploaded to Cloud Storage, it’s straightforward to import and deploy the model into Vertex AI using the Google Cloud aiplatform python SDK and gcloud cli commands.
You can use python’s standard package manager, pip, to install the SDK on your machine.
pip install –upgrade google-cloud-aiplatform
To install the gcloud cli, follow the steps outlined in this page based on your environment.
To create the model in Vertex AI, run the following through command line.
Don’t forget to change the PROJECT_ID and BUCKET_NAME values.
Once this is done, you can create a Vertex AI endpoint using the gcloud cli.
Now that we have uploaded the model and created the Vertex AI endpoint, let's grab the model and endpoint ids. These will be used for deployment.
The model id can be found from the Vertex AI console under Models.


Similarly, the endpoint id is found under Endpoints.


Optionally, you can run the following command to fetch these values from the command line.
With these values set, we deploy the model to the endpoint.
This can take a while as Vertex AI provides a machine to serve the model.
Making predictions
When uploading is finished, we can start making predictions against our model. Vertex AI endpoints accept POST requests with a JSON body. We’ll base 64 encode our image and send it to the model in the JSON body. If the body contains the “b64” element inside, then it knows to decode the image before passing it to the model.
Let’s try this out. Download an image from the web and save it in your local environment. Make sure the image is smaller than 1.5 megabytes (As of March 1, 2022, Vertex AI public endpoints impose request limits of this size in order to keep containers from crashing during heavy load times). Once you have an image ready, you can create a request body using the command line.
To test our new endpoint, we can use curl to call the endpoint.
The resulting JSON contains the response spec described in the CenterNet Object and Keypoints detection model page.
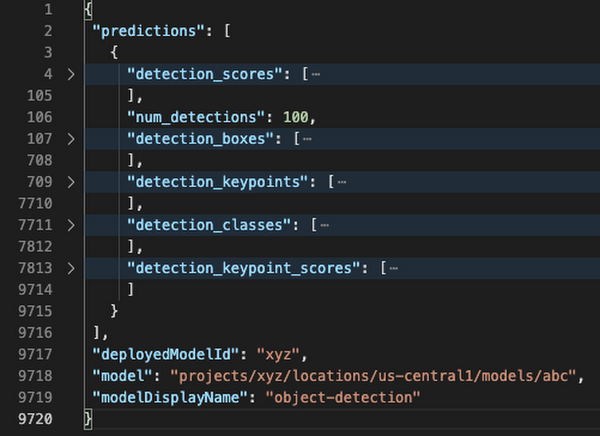

The tensorflow models github repository has Python libraries to visualize these results onto the images. If you would like to, please take a look this colab.
Now that we’ve set our TensorFlow Hub model on Vertex, we can use it in our app without having to think about (most of) the performance and ops challenges of using big machine learning models in production. It’s a nice serverless way to get building with AI fast.
