Getting started with Identity Platform
Marc Jordan
Product Manager, Google Cloud
Vladimir Petrosyan
Director, Product Management
Modern businesses need to manage not only the identities of their employees but also the identities of customers, partners, and Things (IoT). In April, we made Identity Platform generally available to help you add Google-grade identity and access management functionality to your apps and services, protect user accounts, and scale with confidence.
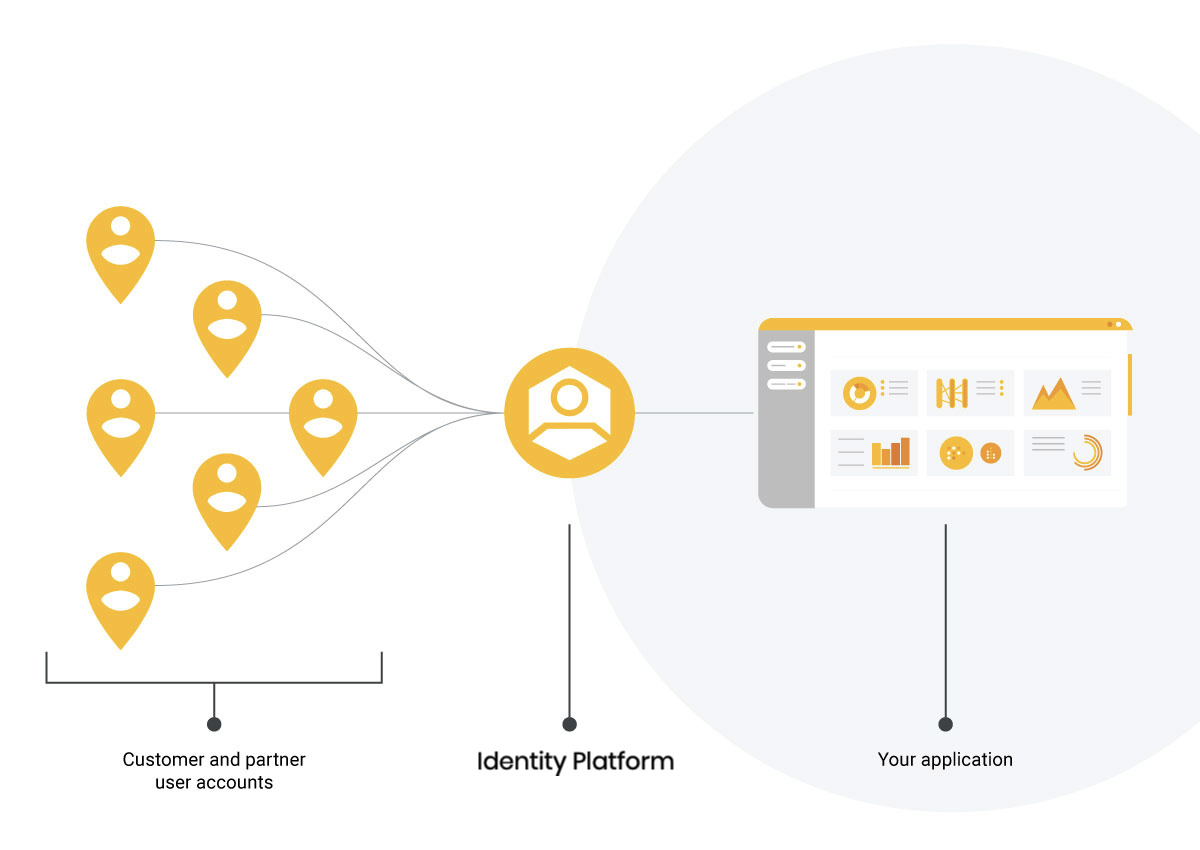

Customers are already using Identity Platform to add authentication and identity management to apps for their customers, build data intelligence platforms, enhance device management, and issue tokens for Things. Let’s now take a deeper look at how to use Identity Platform to add identity and access management functionality to your apps and services.
Before you begin
Before you get started, you need to have a Google Cloud Platform (GCP) project for which you're a Project Owner, with billing enabled for the project.
Enable Identity Platform
The first step is to enable Identity Platform in GCP Marketplace:
Go to the Identity Platform Marketplace page in the GCP Console.
Turn on Identity Platform by clicking Enable Identity Platform.
Navigate to the GCP Console.
Now you are ready to start using Client and Admin SDKs for your apps and services.
Configure authentication methods
After you enable Identity Platform, you can configure authentication methods (e.g. email/password, social login, etc), so that your users can sign in to your applications and services.
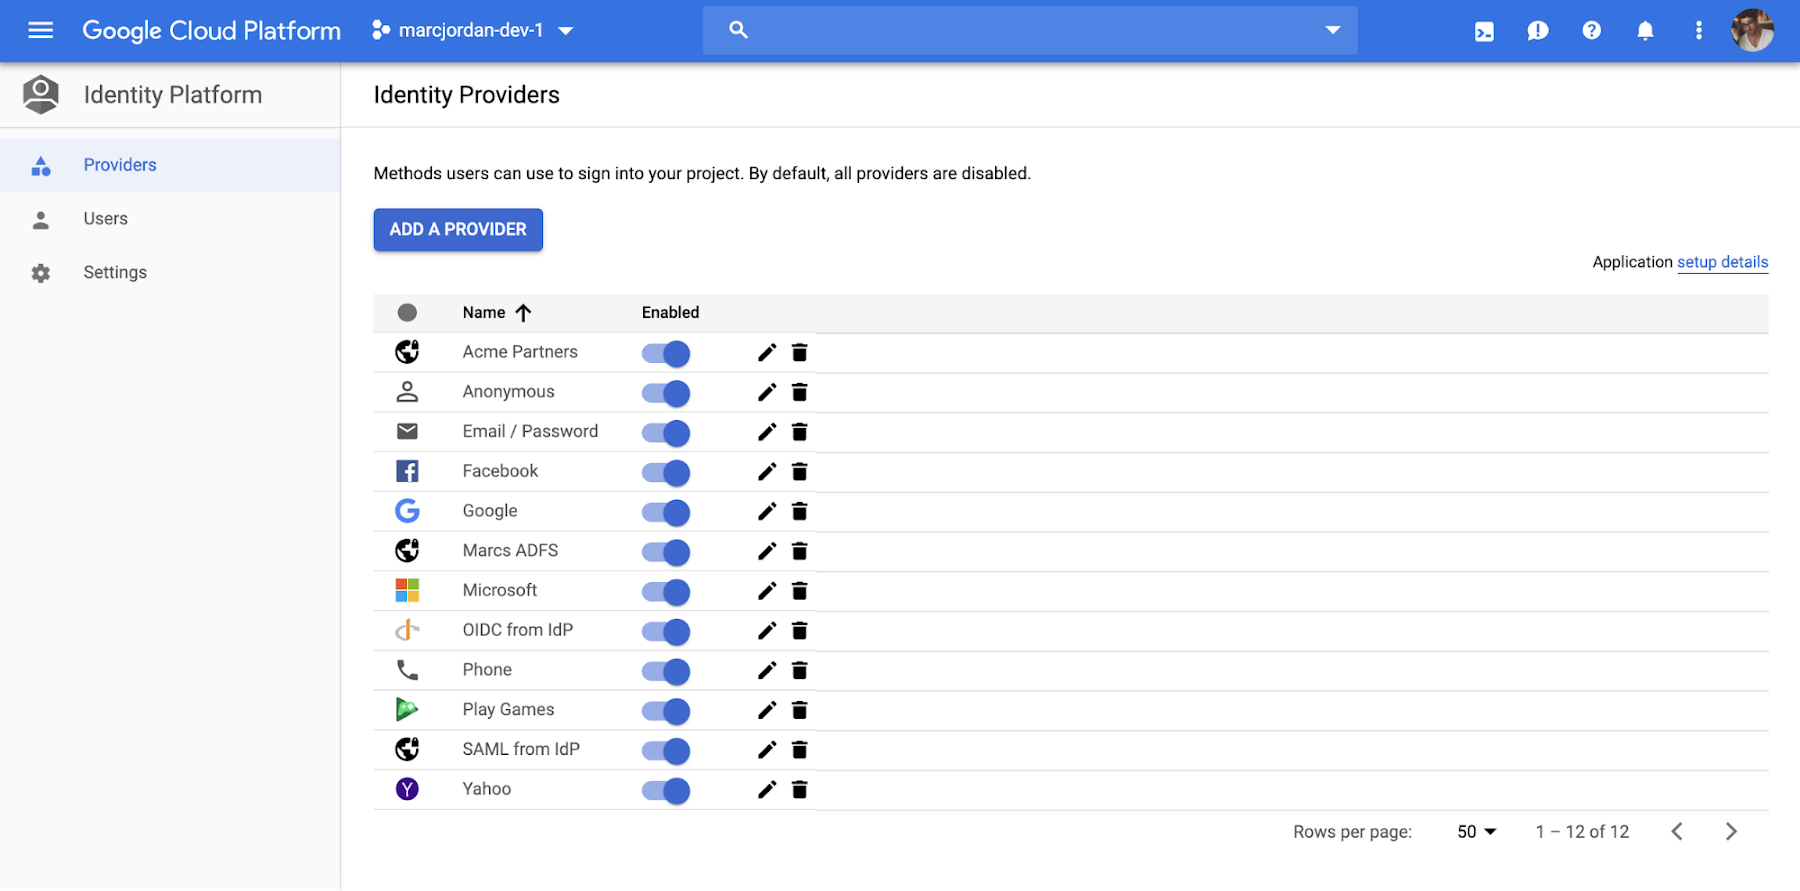

To enable an authentication method:
1. Go to the Identity Providers page in the GCP Console.
2. Click Add A Provider.
3. Select the provider you want to use from the list of providers and enterprise federation standards:
- Email & Password/Passwordless
- Phone
- Social providers
- SAML
- OpenID Connect
- Anonymous
4. After you select a provider, enter your provider’s relevant details, like Client ID, secret, and other provider-specific information.
You can find more information on configuring authentication methods here.
Using the Client SDKs
You can use Identity Platform Client SDKs for Android, iOS, and Web to allow end-users to authenticate to your service. You can obtain the SDKs and learn more about them here.
You can also use Identity Platform with the pre-built, open-source UI components that are available on the Web, iOS or Android via GitHub. You can customize the UI components to align with the look and feel of your app. A web quickstart is available for the UI components for all three clients. You can also see an example of integrating the UI components with a web app here.
Using the Admin SDKs
The Admin SDKs let you interact with Identity Platform from privileged environments to perform actions like:
Read and write custom claims and attributes to Identity Platform objects
Generate and verify Identity Platform ID tokens.
Access GCP resources like Cloud Storage buckets and Firestore databases associated with your Identity Platform projects.
Create your own simplified admin console to do things like look up user data or change a user's email address for authentication.
The Admin SDKs are available across major platforms. To learn more and get the SDKs, see add the SDK.
Migrate users to Identity Platform
The Admin SDKs can also help you import a collection of email and password users into Identity Platform, helping you move from an existing provider without requiring users to reset their passwords. This is a common process for existing applications. You can see an example here.
Summary
You can set up Identity Platform with few clicks and at no additional cost to get started (up to 49,999 monthly active users). To learn more, watch a webinar, check out our Next ‘19 presentation, and follow the quickstart for step-by-step instructions.
