4 steps to stop data exfiltration with Google Cloud
Andy Chang
Group Product Manager, Google Cloud Security, Security & Privacy
Kelly Anderson
Product Marketing Manager
Editor's note: This the fifth blog and video in our six-part series on how to use Cloud Security Command Center. There are links to the four previous installments at the end of this post.
Compliance is a complex, ever changing issue that can put a real strain on your IT department—and your bottom line. As the cost of data breaches and compliance violations continues to rise, it’s never been more important to prevent sensitive data from being exposed.
Cloud Data Loss Prevention (Cloud DLP) helps you better understand and manage sensitive data and personally identifiable information (PII) to meet your specific compliance requirements. It does this by providing fast, scalable classification and redaction of information like credit card numbers, names, social security numbers, US and selected international identifier numbers, phone numbers, and GCP credentials. With just a few clicks directly from the Cloud Storage interface, Cloud DLP scans Cloud Storage buckets, folders, and objects for sensitive data, helping you stay in compliance with regulations and keep your data safe.
In this blog, we’ll look at how you can get started protecting sensitive data with Cloud DLP, and then send the results directly to Cloud Security Command Center (Cloud SCC).
Step 1: Select your storage repositories
The first step is to choose the storage repository you want Cloud DLP to scan. If you want to scan your own existing Cloud Storage bucket, BigQuery table, or Cloud Datastore kind, simply open the project that the repository is in.

Step 2: Enable Cloud DLP
For Cloud DLP to scan a project, that project must be in the same organization where you enable Cloud SCC, and must contain the Cloud Storage bucket, BigQuery table, or Cloud Datastore kind you want to scan.
Once you’ve confirmed this information, go to APIs and Services in the menu on the left, then Library. Then all you have to do is search for the Cloud DLP API and enable it.

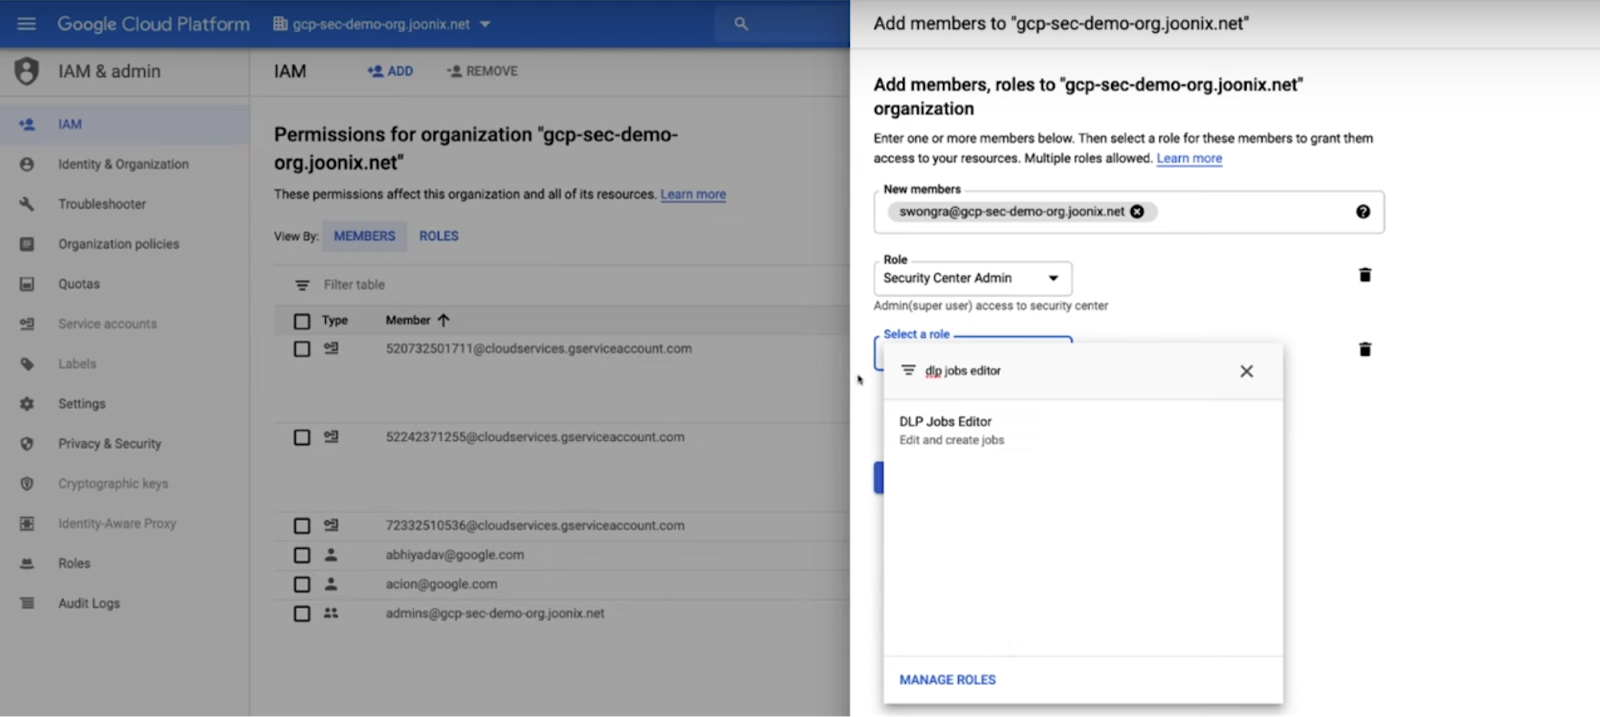
Step 3: Choose the Organization Administrator IAM role
Before you can use Cloud DLP to send the results of your scans to Cloud SCC, you need to first ensure that you have the Organization Administrator IAM role before you can enable additional Cloud IAM roles. To set this up, click on the Organization drop down list and select the organization for which you want to enable Cloud SCC. Find the username in the Member column or add a new user, then add the Security Center Admin and DLP Jobs roles.
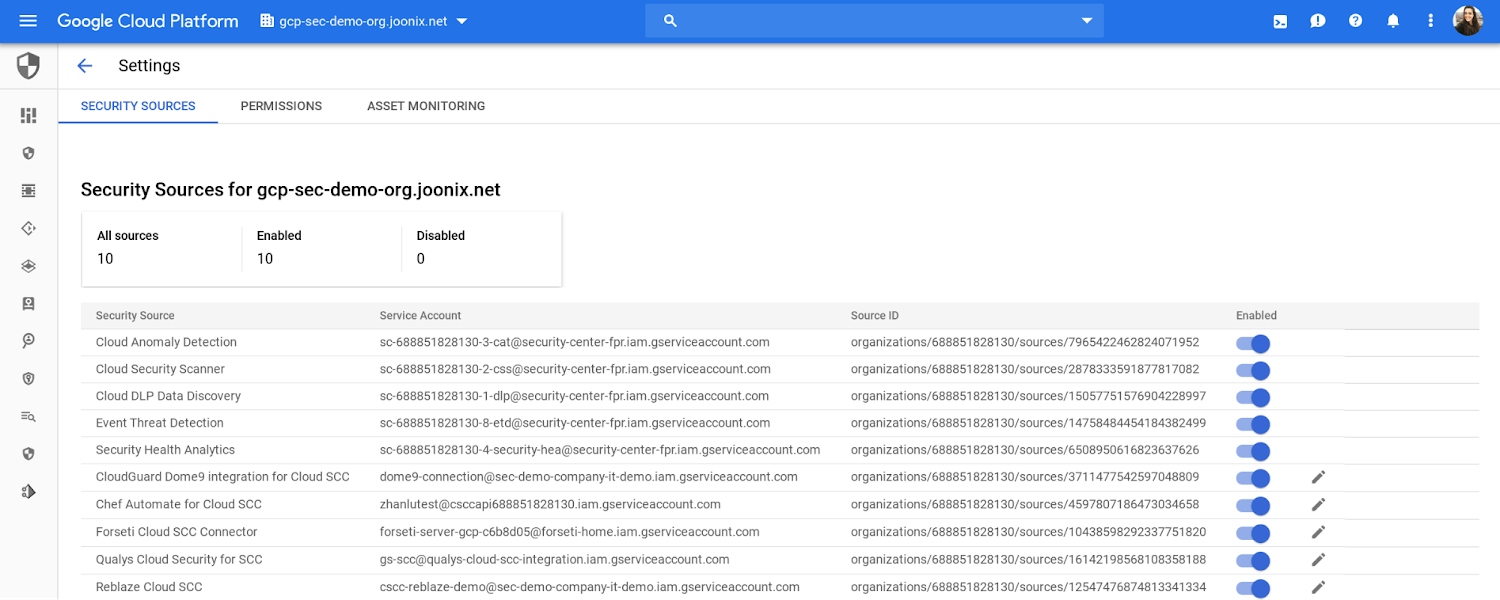
Step 4: Enable Cloud DLP as a Security Source for Cloud SCC
From Cloud Security Command Center, go to Security Sources and toggle on Cloud DLP. Findings for Cloud DLP will display in the Findings cards on the Cloud SCC dashboard—which lets you view security information from Cloud DLP and other security products in one centralized location.
Cloud DLP uses information types—or infoTypes—to define what it scans for. An infoType is a type of sensitive data, such as a name, email address, telephone number, identification number, credit card number, and so on. You can find out more about infoTypes in the Cloud DLP documentation.
To learn more about how to enable Cloud DLP and how you can use it from Cloud Security Command Center, check out the video embedded below.
Previous blogs in this series:
5 steps to improve your cloud security posture with Cloud Security Command Center
Catch web app vulnerabilities before they hit production with Cloud Web Security Scanner
3 steps to detect and remediate security anomalies with Google Cloud
Detect and respond to high-risk threats in your logs with Google Cloud