Bi-directional replication for Cloud SQL for PostgreSQL using logical replication
M Indra Bangsawan
Customer Engineer - Data Management Specialist
Cloud SQL for PostgreSQL supports logical replication and decoding which enables the mirroring of database changes between two PostgreSQL instances in a storage-agnostic fashion. Logical replication allows selective replication of tables and even table rows. Additionally, the replication target does not need to be read-only and can host other tables and databases that can be modified. This flexibility makes it easy to set up bi-directional replication between two PostgreSQL instances.
In this blog, we will walk through how PostgreSQL logical replication works, the use cases for bi-directional replication and the steps to set it up for Cloud SQL for PostgreSQL.
How logical replication works
Logical replication is a method of replicating data objects and their changes based upon their replication identity (usually a primary key). Logical replication uses a publish and subscribe mechanism with one or more subscribers that subscribe to one or more publications on a publisher node. Subscribers pull data from their publications and may subsequently re-publish data to allow cascading replication or more complex configurations.
When PostgreSQL performs logical replication, the changes that are streamed to replicas are extracted from the WAL logs using logical decoding. The decoded changes are independent of the underlying physical storage format. The changes reflect only the changes in data from a SQL level, in terms of INSERTs, UPDATEs, and DELETEs. It provides flexibility and enables a wide array of functionality by consumers of the change streams.
The primary instance (source database) defines the publication and is called the publisher. The publisher always sends changed data (DMLs) to the target database replica instance called the subscriber. The subscriber accepts the data from multiple publishers and applies the changes to the target database.
The pglogical extension performs conflict resolution based on the value set for the parameter pglogical.conflict_resolution. This parameter supports five values:
apply_remote (default for Cloud SQL for PostgreSQL)
error
keep_local
last_update_wins
first_update_wins
For more information about each of the settings, see here.
Note that the values keep_local, last_update_wins and first_update_wins require track_commit_timestamps to be enabled on both instances. Enabling the track_commit_timestamps flag can result in a measurable impact on database performance for some workloads. It is strongly recommended that database performance is validated in the production environment with this feature enabled.
In this post, we will configure the pglogical.conflict_resolution with the last_update_wins option.
When to use bi-directional replication
Typically bi-directional replication is recommended if you have a need for a global or regional database infrastructure with low read/write latency. With Bi-directional replication, it is possible to co-locate the read/write instances to users in the region while propagating those changes to other instances serving users in other regions. In most cases, often you want only a small number of tables in a database to be updatable from multiple places while the rest are either local or centrally managed via unidirectional replication
One downside of bi-directional replication is that maintaining the data consistency and replication topology can quickly get complicated. If your application’s primary requirements are read scaleout and resiliency to regional failures, you should instead create a High Availability Cloud SQL for PostgreSQL instance and add multiple same-region or cross-region read replicas.
Setting up bi-directional replication
Create and Setup your Cloud SQL for PostgreSQL instances
In this task, you will create 2 Cloud SQL for PostgreSQL 13 instances and configure them to support logical replication. In this example, the instances will be in different GCP regions, in asia-southeast1 and asia-southeast2.
1. Go to the Cloud SQL page in the Google Cloud Console.
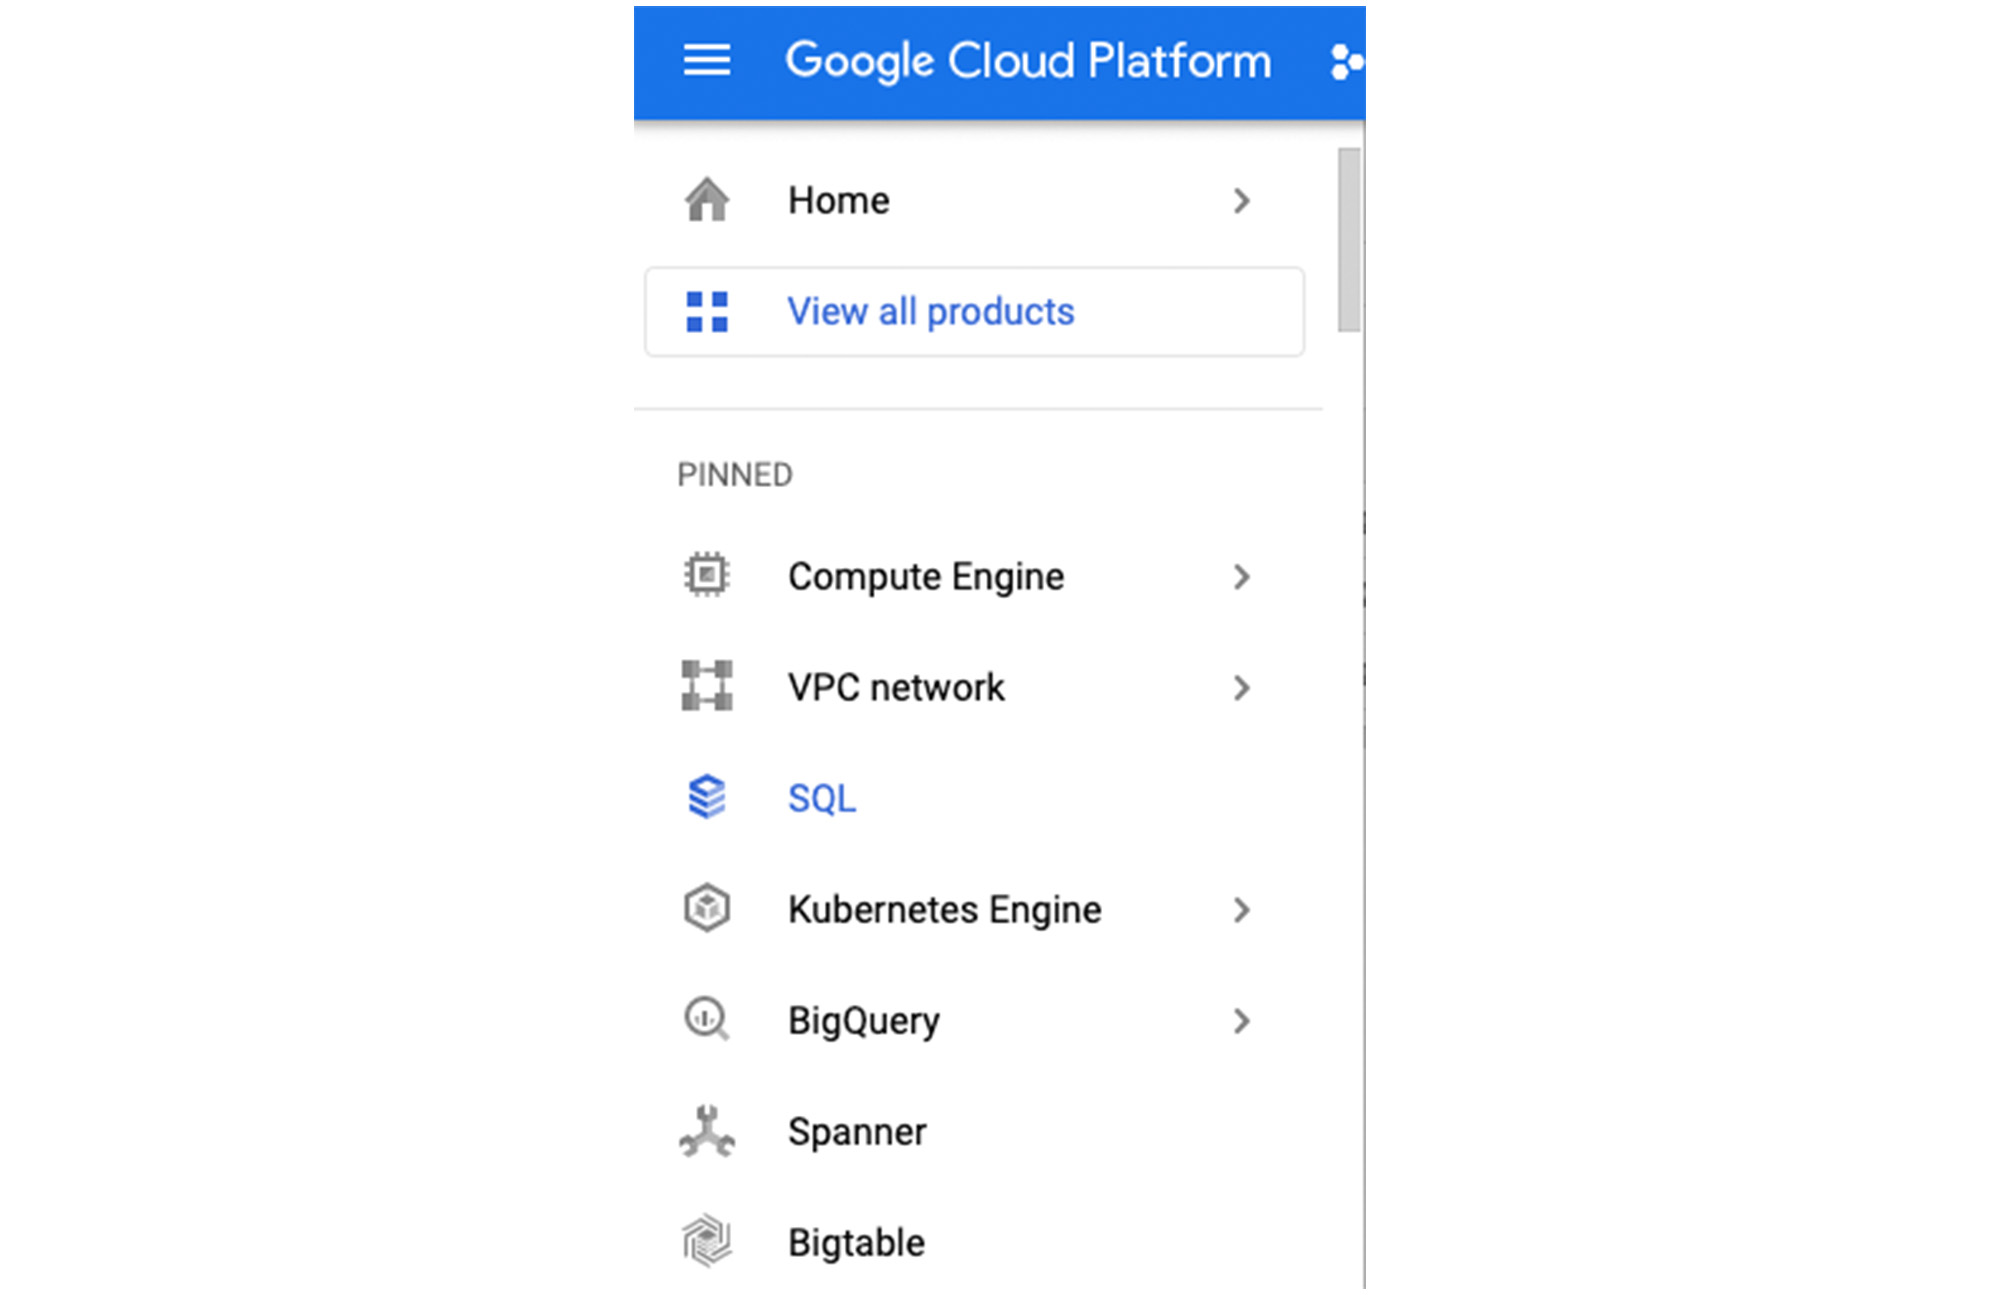
2. After clicking on SQL Menu, proceed by creating the Cloud SQL for PostgreSQL instance.
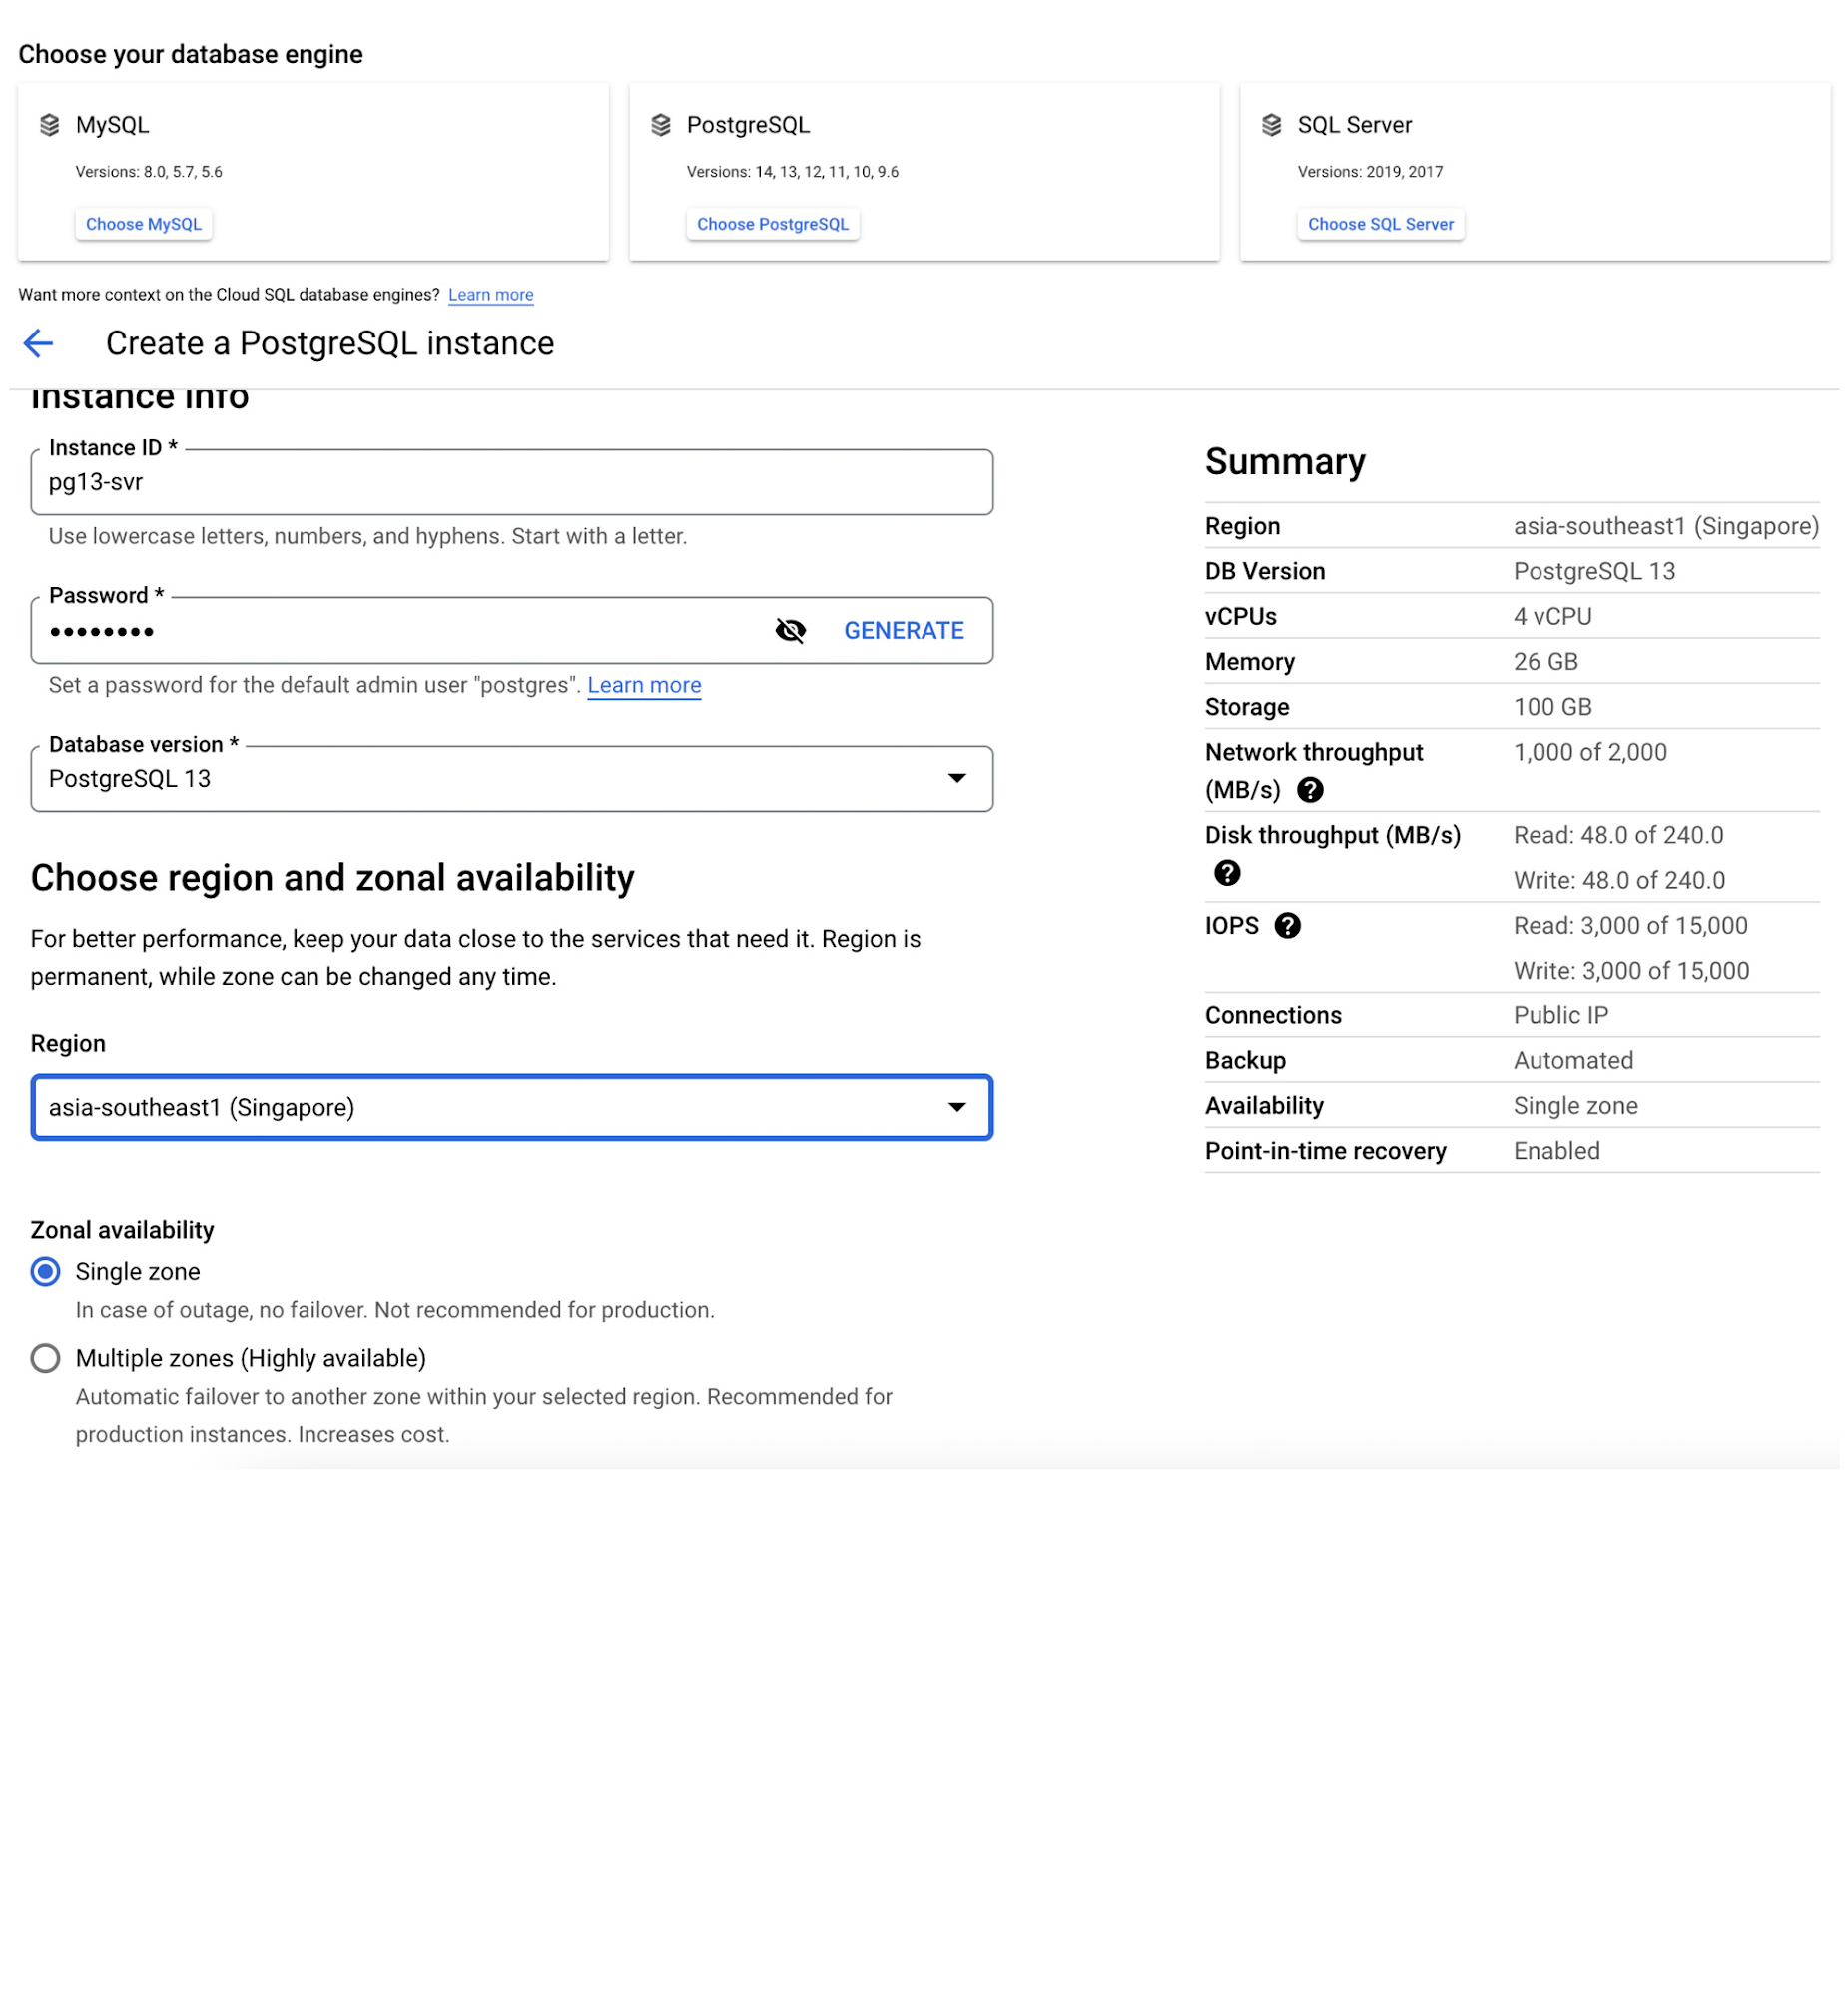
The detailed steps to create a Cloud SQL for PostgreSQL instance are available here.
In this post, we will use a Public IP Address to communicate with each other. In the Connections configuration, ensure we select the Public IP.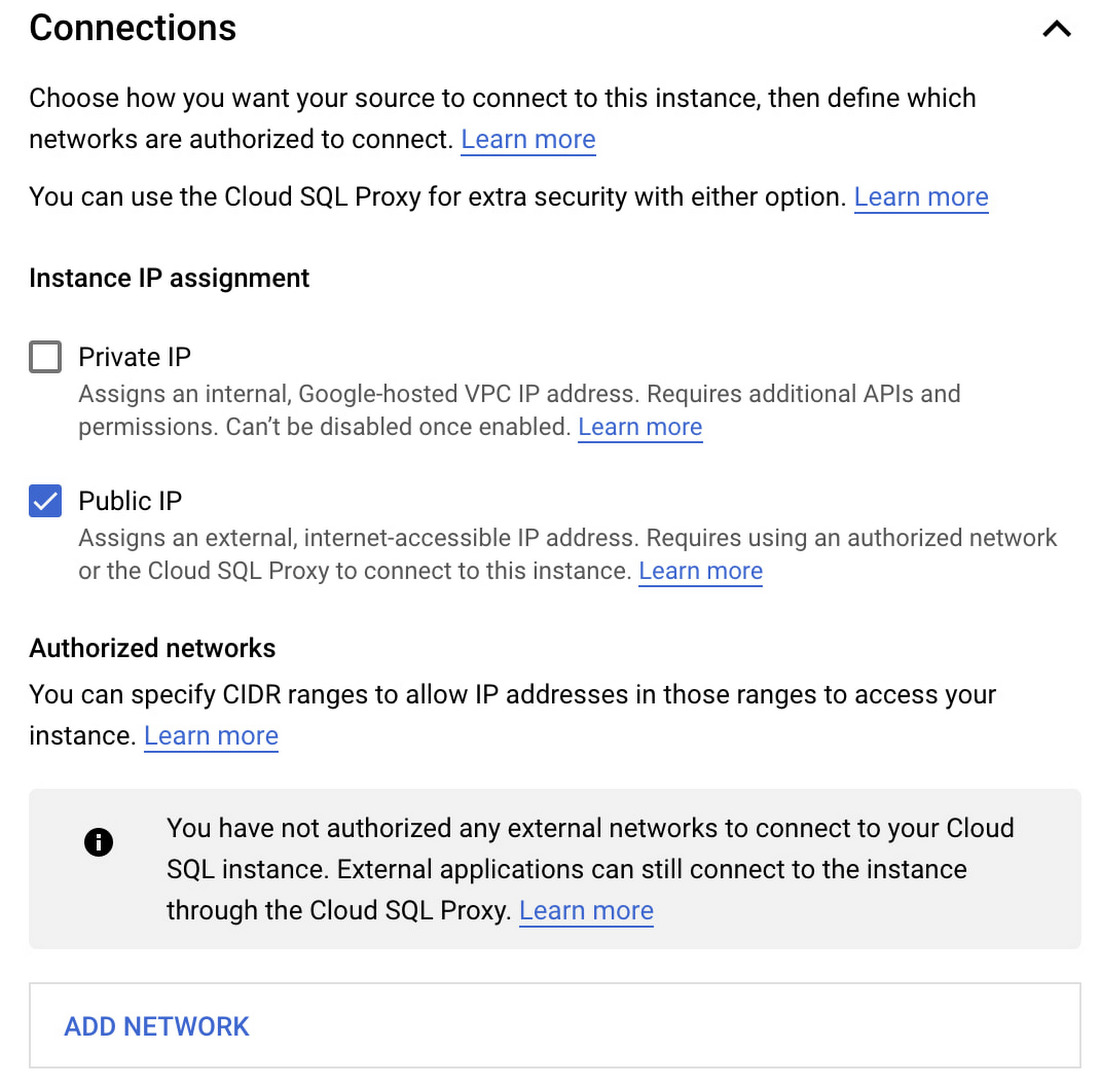
For more information, see Configuring access for IP connections.
3. Next, click on the Flags configuration to set up the pglogical replication. Add and set the following flags:

Cloudsql.enable_pglogical = ON
Cloudsql.logical_decoding = ON
Max_replication_slots = 10
Max_worker_processes = 8
Max_wal_senders = 10
Track_commit_timestamp = ON
Pglogical.conflict_resolution = last_update_wins
Note that the values used here are standard values. Refer to the PostgreSQL resources page for more detail.
4. Click on the create instance button and wait for the Cloud SQL instance provisioning to complete.
5. Follow steps 1-4 above to create a second Cloud SQL for PostgreSQL instance in a different GCP region.
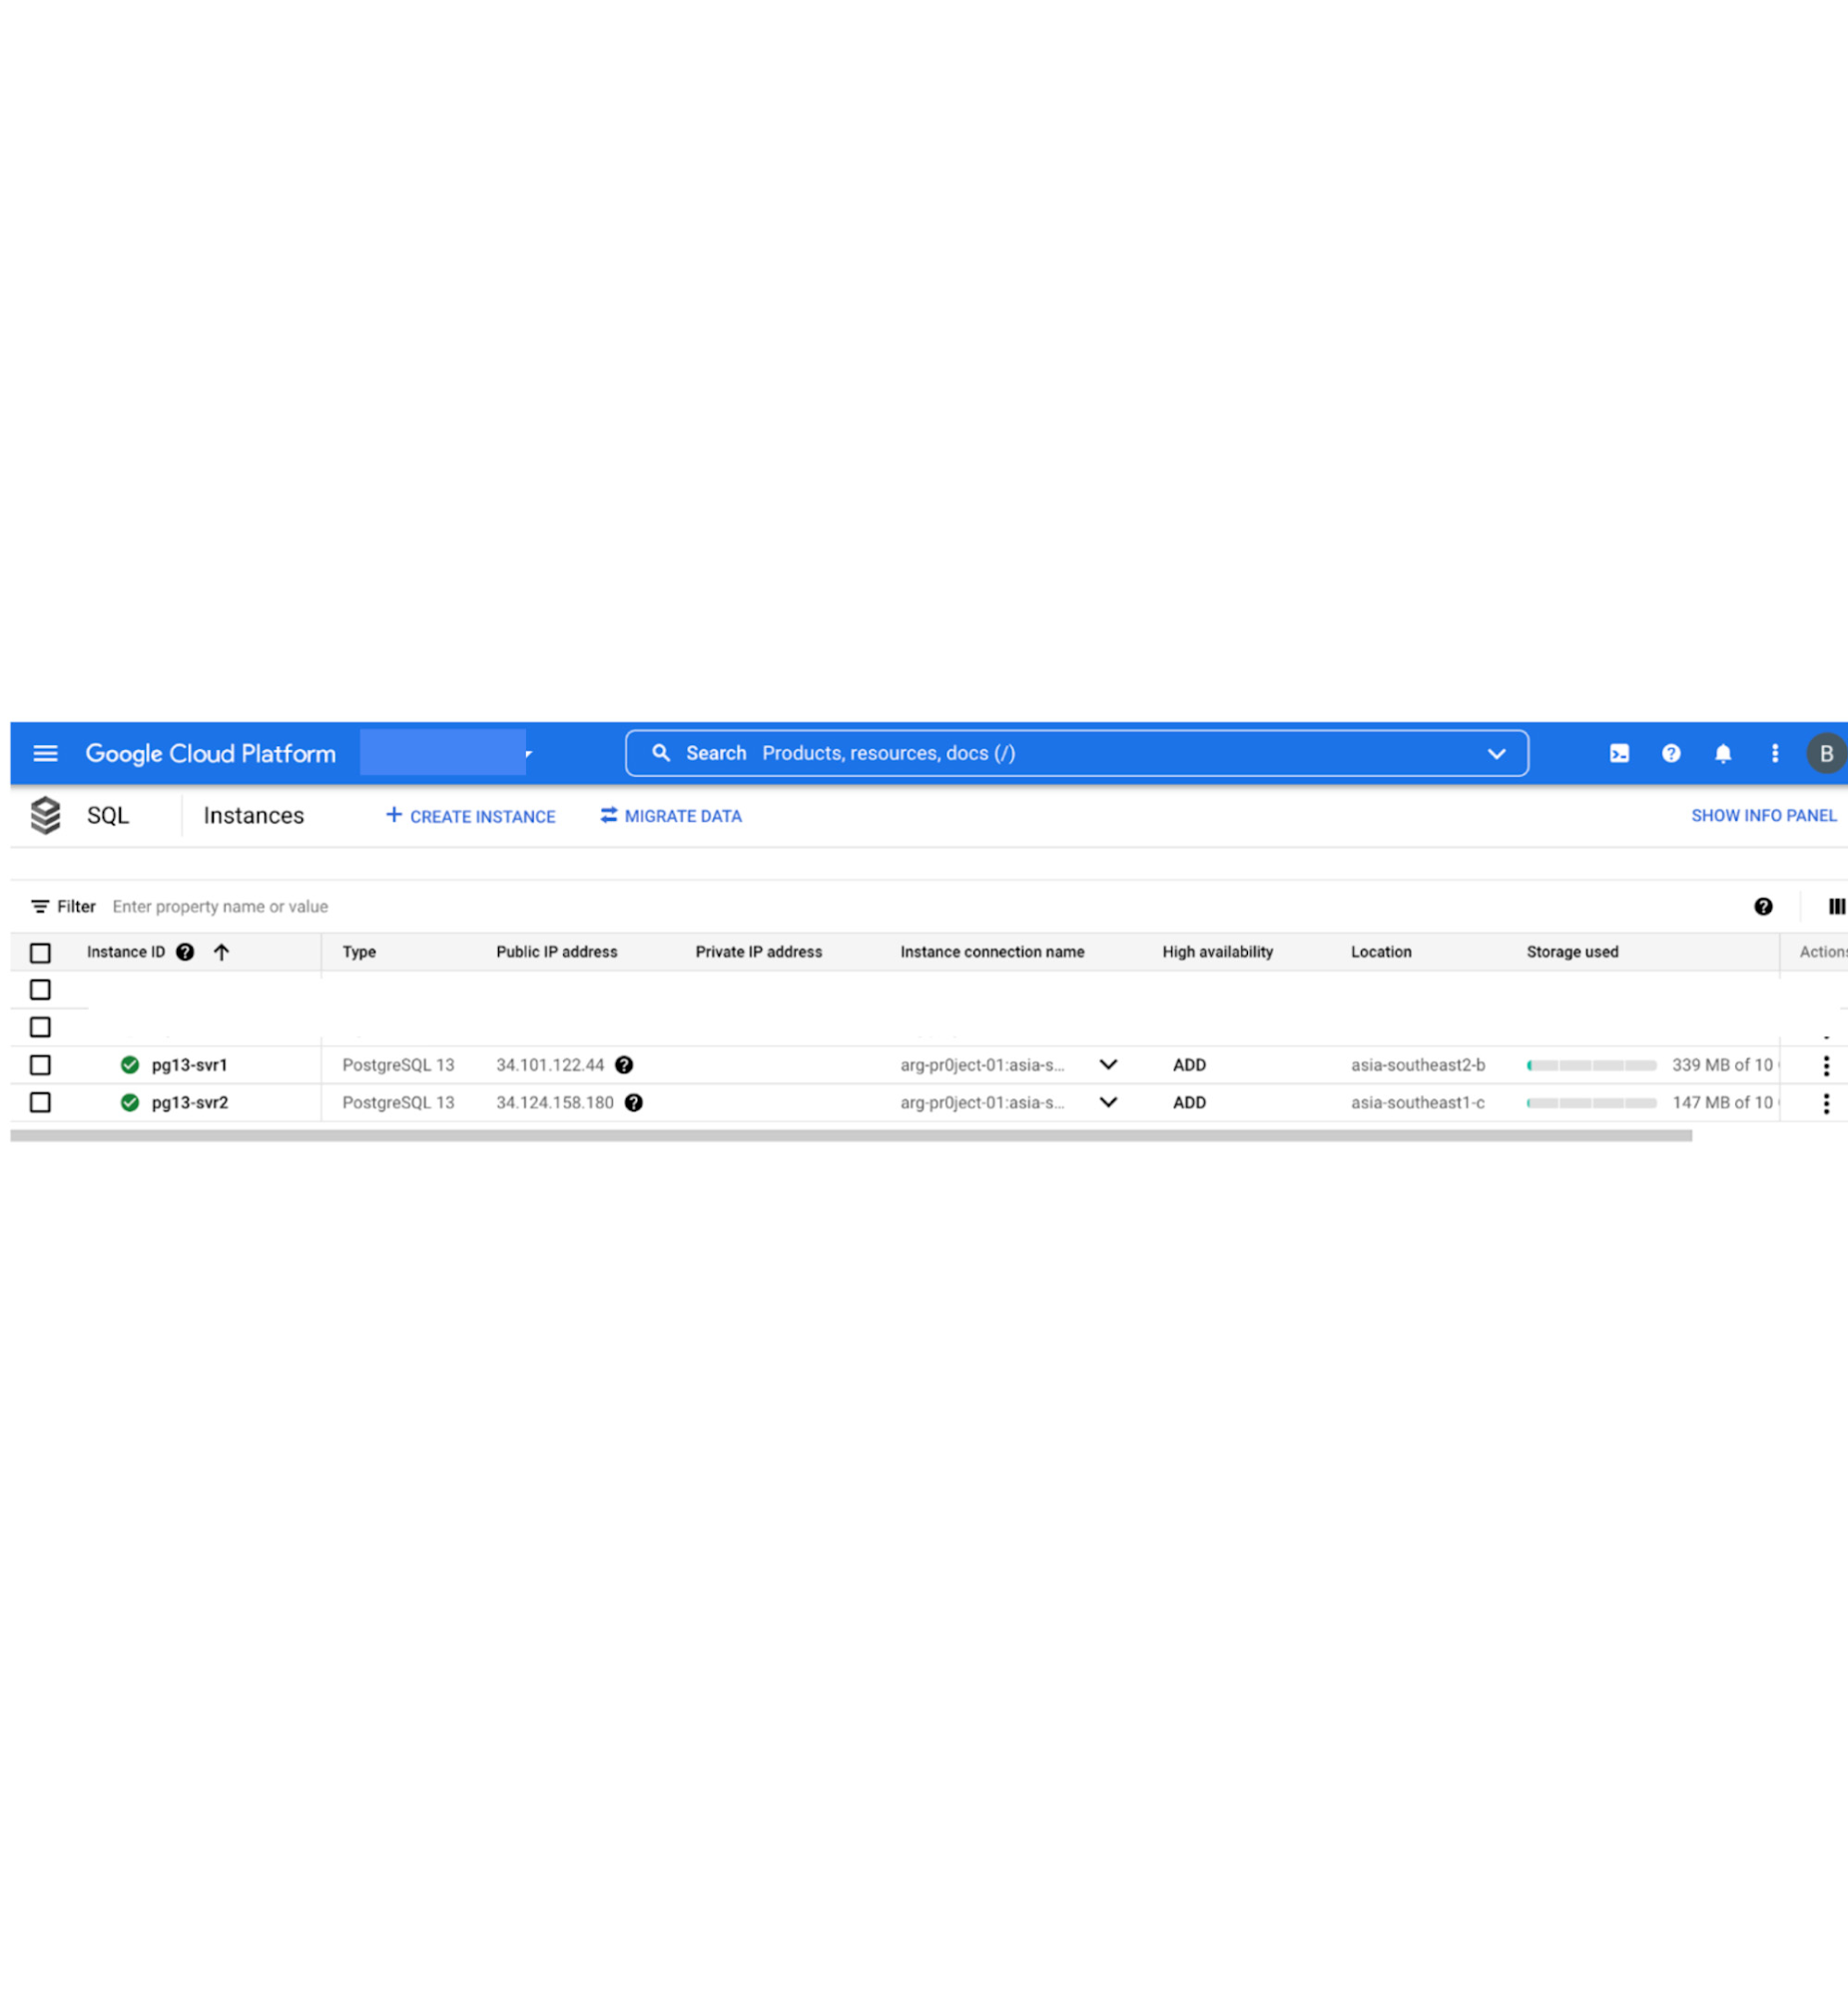
Your two instances should look similar to the image below.
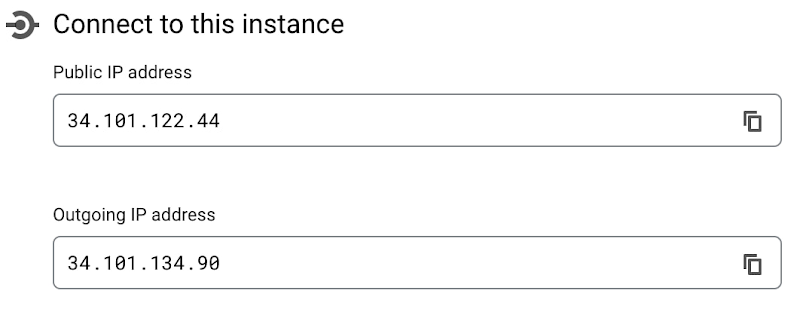
6. Cloud SQL for PostgreSQL instance will generate 2 public IP addresses, the Public IP address of the Cloud SQL instance and the Outgoing Public IP address. Since we will be using the Public IP address to set up the replication, we need to specify the outgoing IP address of the Cloud SQL instances in the CloudSQL Authorized Network parameter. You can find the outgoing IP address of the Cloud SQL instance on the instance's Overview page.
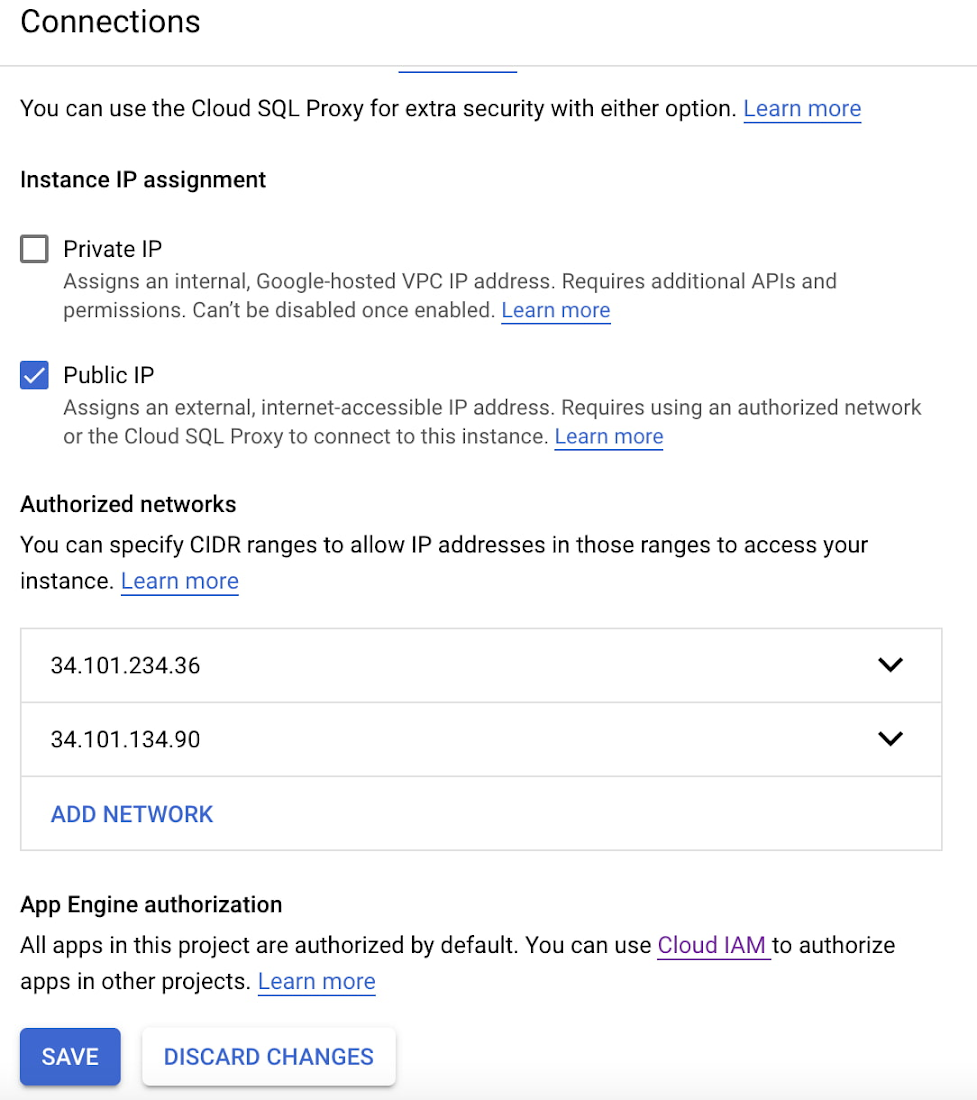
7. Based on the Outgoing IP address from the previous step, add the outgoing IP address of our Cloud SQL instances to the Authorized networks list. Click the Cloud SQL for PostgreSQL instance and select Connections on the left menu and click on Add Network.
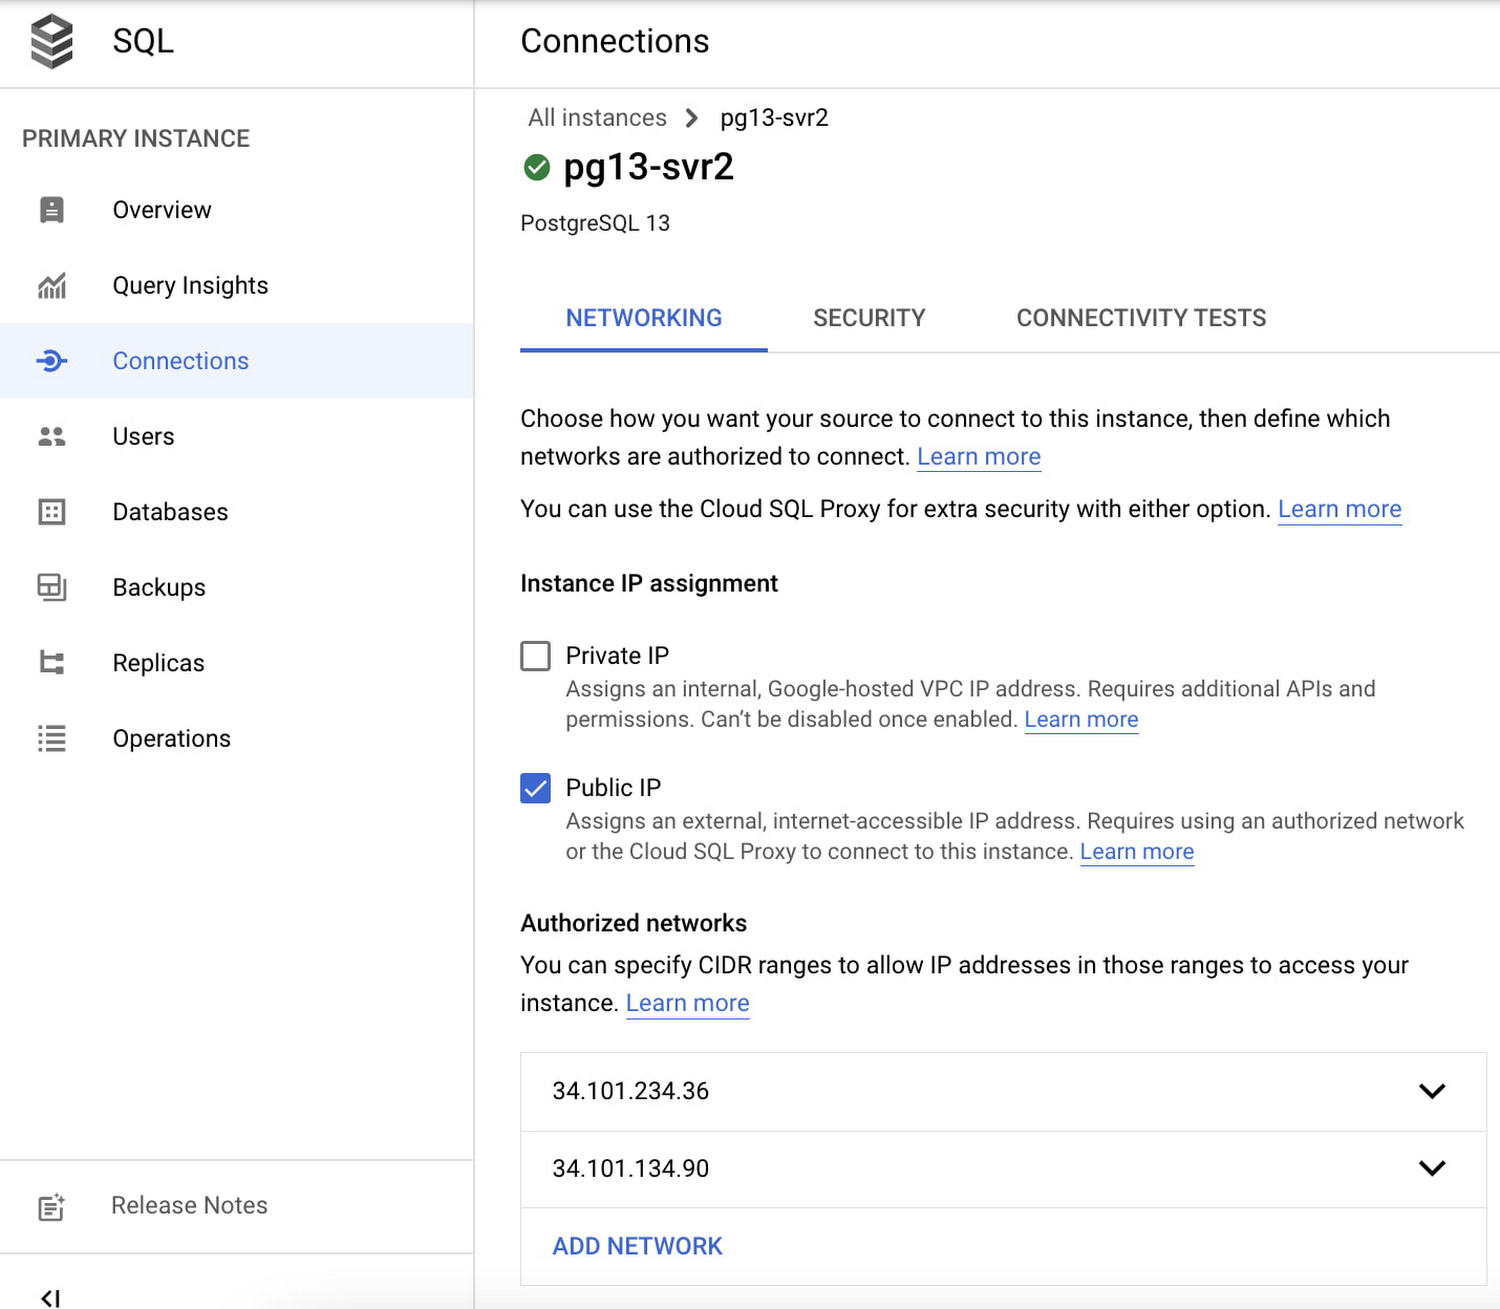
Below is the example of adding the outgoing public IP address of pg13-svr1 into the pg13-svr2 authorized network list. Do the same for the pg13-svr1 instance.
8. After setting up and configuring the Cloud SQL for PostgreSQL instances, we proceed to set up the replication.
Setup the Replication
In this section, you will set up the replication from Server #1 to Server #2. After completing the Cloud SQL for PostgreSQL creation, create a test table for your workflows on both Cloud SQL for PostgreSQL instances.
Server 1
1. Connect to the Cloud SQL for PostgreSQL instance.
2. Enter the root password specified during the Cloud SQL instance creation. You should then see the postgres prompt.
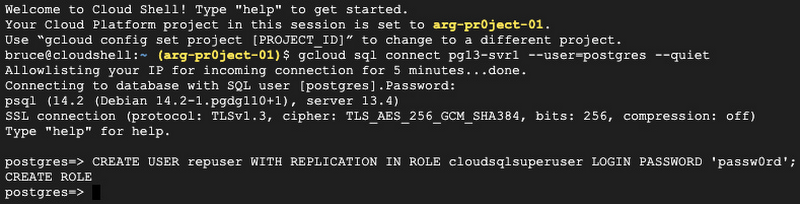
3. Create a PostgreSQL user with the REPLICATION attribute. You need a user with replication privileges and the cloudsqlsuperuser role on both servers when using pglogical extension.
4. Login to PSQL as the replication user and run:
5. Create a pglogical node
A pglogical _node_ represents a physical PostgreSQL instance, and stores connection details for that instance.
Example:

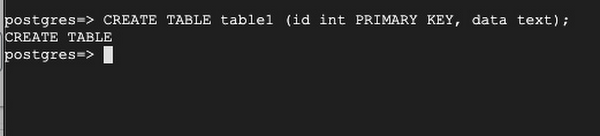
6. Login to PSQL as the replication user to create a sample new table:
7. Add the table into replication set with below command:

Server 2
1. Connect to the Cloud SQL for PostgreSQL instance.
2. Enter the root password specified during the Cloud SQL instance creation. You should then see the postgres prompt.
3. Create a PostgreSQL user with the REPLICATION attribute. You need a user with replication privileges and the cloudsqlsuperuser role on both the primary and replica instances when using pglogical.
4. Login to PSQL as the replication user and run
Create a same table as in the server 1:
5. Create a pglogical node:
A pglogical _node_ represents a physical PostgreSQL instance, and stores connection details for that instance.

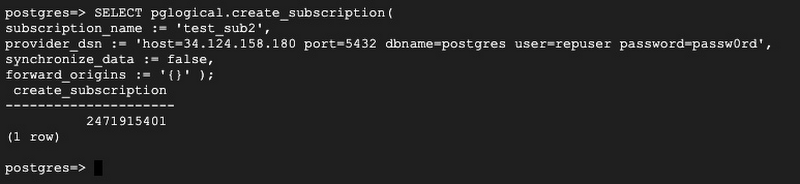
6. Create pglogical Subscription:
The forward_origins parameter is the most important part (or magic part) which makes bi-directional replication possible. The forward_origins := '{}' means it will forward only the changes originating on the node itself and not forward changes which were already a result of incoming replication.
This parameter will avoid the replication going into an infinite loop, replicating the same change back and forth. Details of these settings can be found here.

Check the Subscription:

Testing our Replication Setup from Server 1 to Server 2
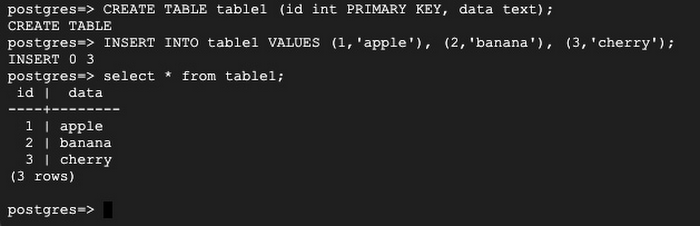
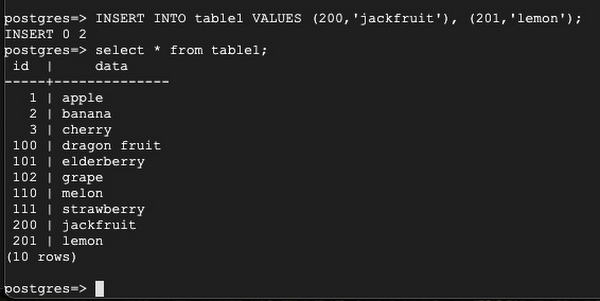
For testing, in Server 1, insert more rows:
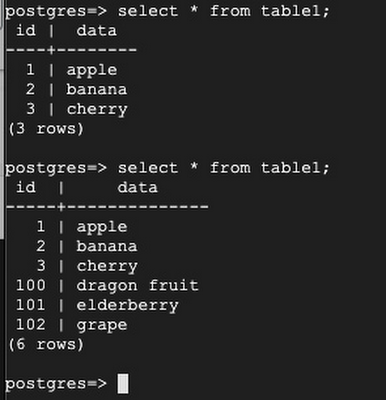
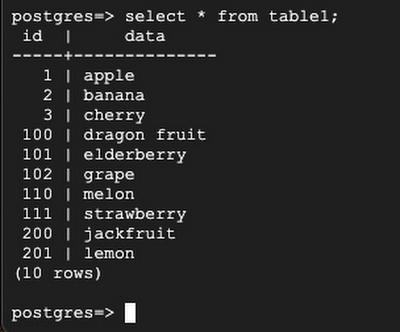
After insert some rows in Server 1, on Server 2, select the same table to ensure the newly added rows are replicated:
Set Up the Bi-Directional replication from Server 2 to Server 1:
On Server 2:
1. Add table1 in the replication set by running the command:

On Server 1:
1. Create a subscription so that it starts fetching the changes from Server 2
Check the Subscription:

Test the Bi-directional Replication:
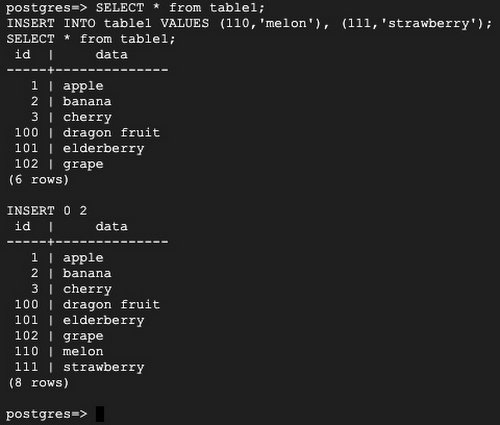
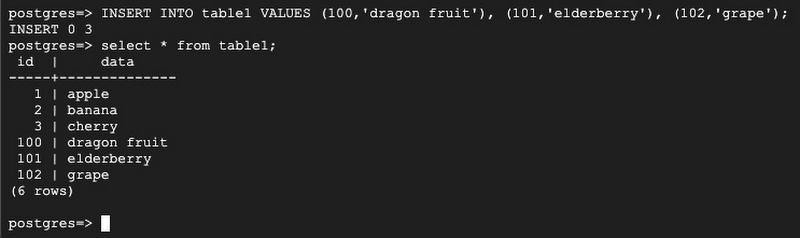
Check on Server 2 and add new rows:
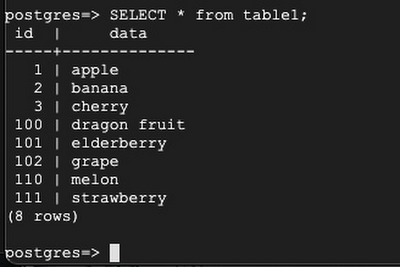
Back to Server 1:
You can see that the bi-directional replication setup is successful and the data is replicating in both directions.
Conclusion
This is a guide to set up bi-directional replication for Cloud SQL for PostgreSQL with logical replication.
If your application requires multiple writers writing to the database in different regions and sharding the database is not an option, bi-directional replication is the right solution. For achieving regional disaster recovery with low RTO, RPO and a minimal operational overhead, consider using cross-region replica instead.