Agentic data science with the Data Agent Kit

Jeff Nelson
Developer Relations Engineer, Google
Imagine your compliance team notices that payments are taking longer than expected to clear. They suspect fraud, and you’re the data scientist helping figure out which transactions to investigate first. Assembling that shortlist requires ingesting and cleaning raw transaction logs, training a model on past fraud, scoring new records, and scheduling the pipeline to run daily. Here’s how you can build that workflow end to end with an agent, using the Data Agent Kit inside the Antigravity IDE.
Introducing the Data Agent Kit
Data Agent Kit helps you work with Google Cloud data through a plugin for coding agents or an extension for Visual Studio Code-based IDEs. It brings two significant additions to the workflow:
-
Help for your agent: MCP tools connect your agent to data services. Skills are Markdown files that give it instructions and best practices for working with your data stack
-
Tools in your IDE: work with Google’s Agentic Data Cloud, from querying databases to deploying an Airflow pipeline, without leaving your editor
Loading the data
Let’s start with the raw transaction logs in Google Cloud Storage. You can ask the agent to create a notebook that loads them into BigQuery using Spark:
The agent generates a Jupyter notebook that loads the JSON logs into a BigQuery table named raw_transactions. You can open the notebook, review the code, and run it using a preconfigured Spark Serverless runtime from the IDE.
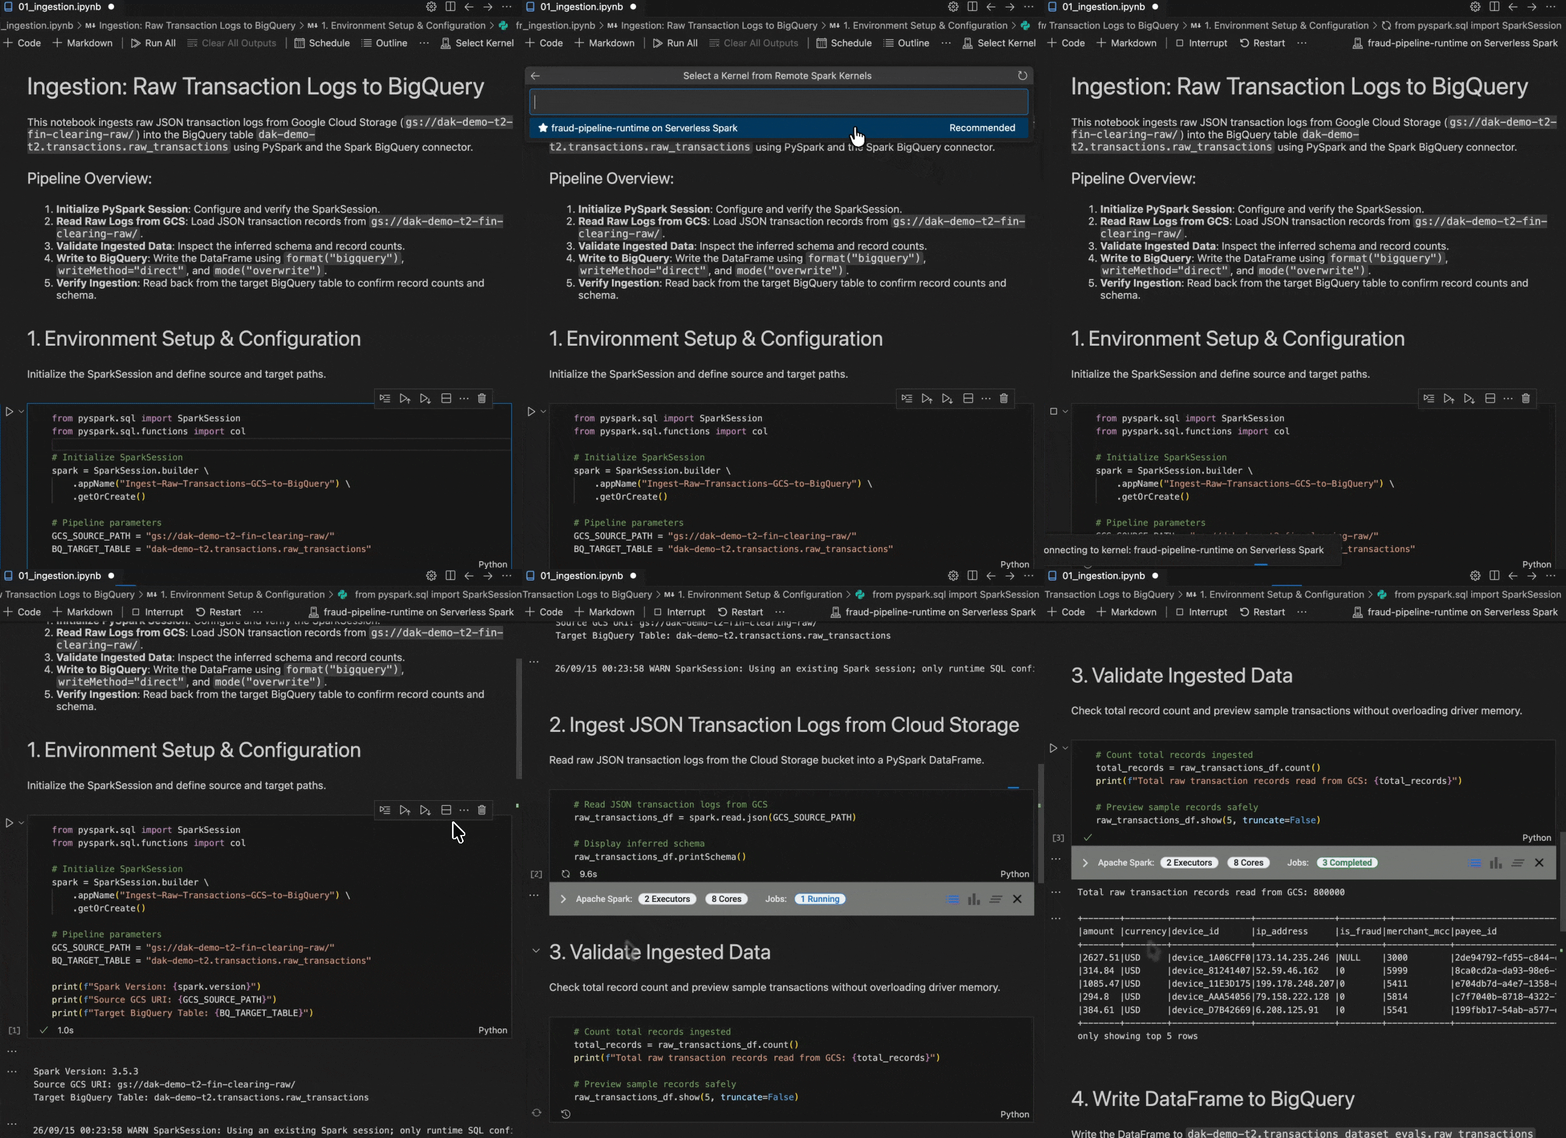
Running a generated PySpark notebook
After the notebook runs, you can open the raw_transactions table with the Data Agent Kit. The extension allows you to browse the table and inspect its metadata right from the IDE.
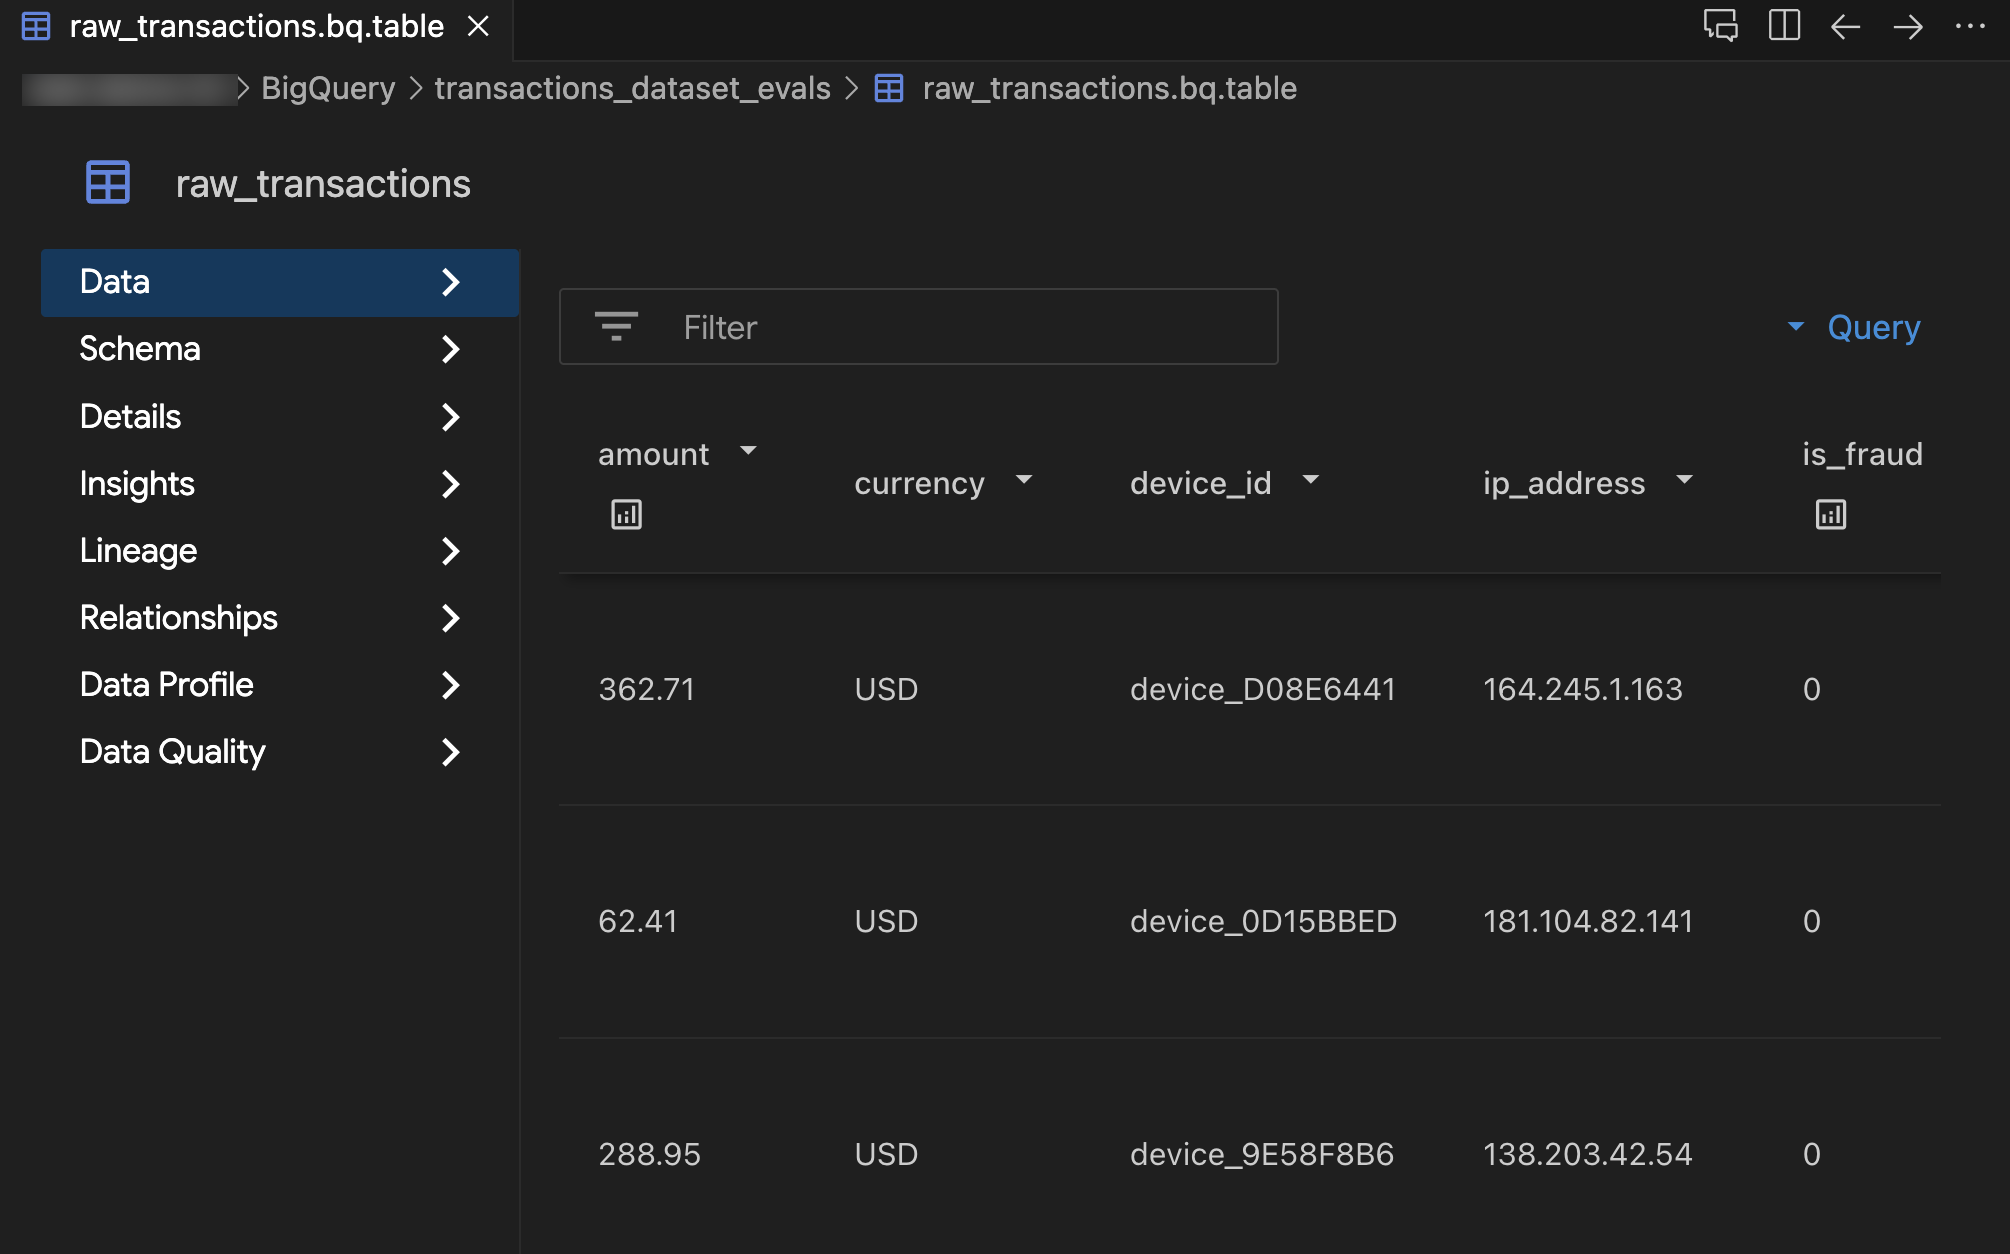
Inspecting a BigQuery table in the IDE
The records are now in BigQuery, but they aren’t ready for model training yet. First, we’ll handle duplicate and incomplete records, then join the remaining records with info about who sent and received each payment.
Cleaning it up
Let’s put the cleanup logic into a dbt project so we can run it on each new batch of data. We’ll also test that each transaction appears only once. Prompt the agent:
The agent generates a dbt project with SQL models for cleaning and enriching the data. Take a look at the generated code to check how it handles duplicates and joins reference tables. Then run dbt build in the terminal. This builds the staging and enriched tables in BigQuery, along with a separate table for records with missing transaction IDs. dbt also runs the uniqueness test.
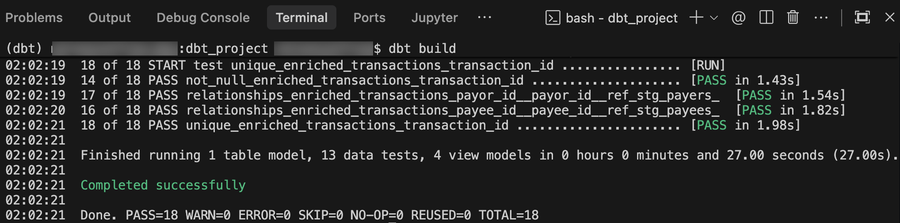
Validating dbt models in the integrated terminal
We also keep the is_fraud column, which indicates whether a past transaction was fraudulent. We’ll train the model on records with known labels and use it to score new transactions, where we’re unsure yet whether fraud occurred.
Building the review queue
With the data prepared, let’s ask the agent to create a training notebook using a Random Forest classifier running on Spark Serverless.
Review and run the notebook, then check its evaluation output to see how well the model separates fraudulent transactions from legitimate ones. You can also use the Data Agent Kit extension to verify that the trained model artifacts were saved to Google Cloud Storage.
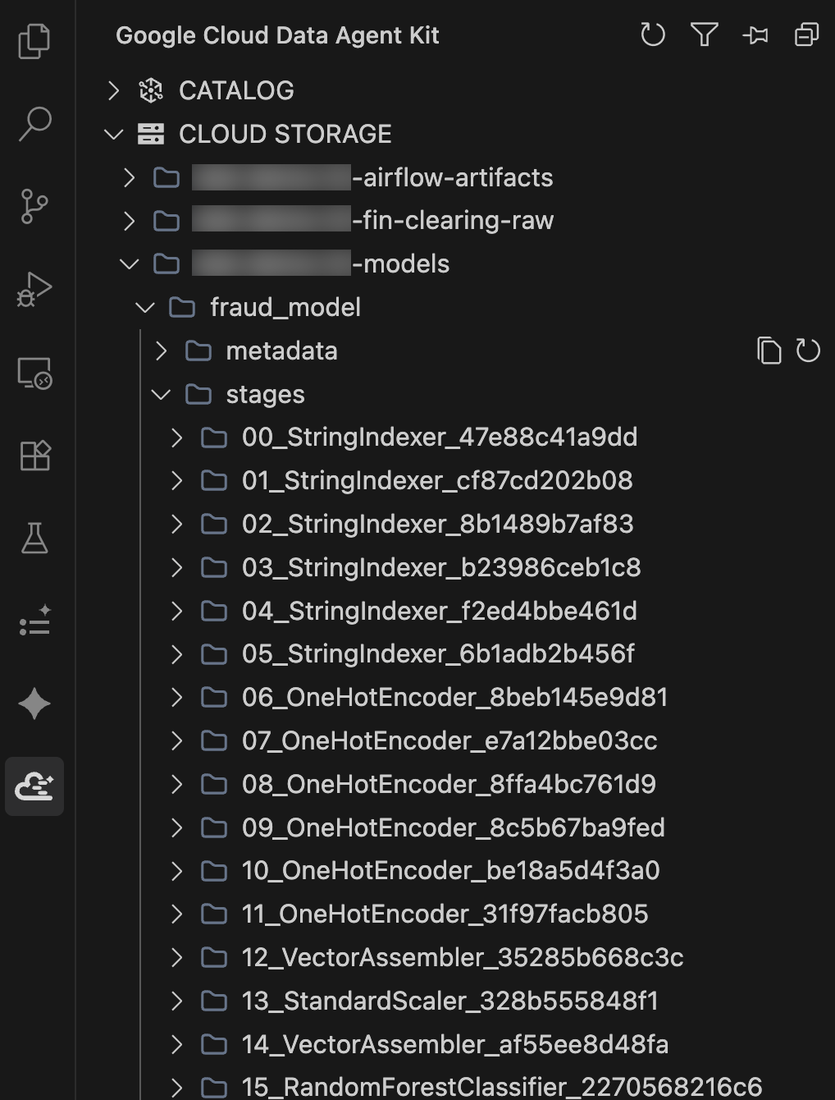
Verifying the trained model artifacts in Google Cloud Storage
Now we can use the saved model to score transactions that don’t have an is_fraud value yet:
In this example, the inference notebook scores the unlabeled transactions in BigQuery and sends those with an estimated fraud probability of 50% or higher to the Spanner review queue. The flagged records help the team decide where to investigate, but they still need to determine whether fraud occurred.
Look at how the inference notebook filters and writes flagged records, then run it. Once it finishes, query the Spanner table in the IDE to inspect the results.
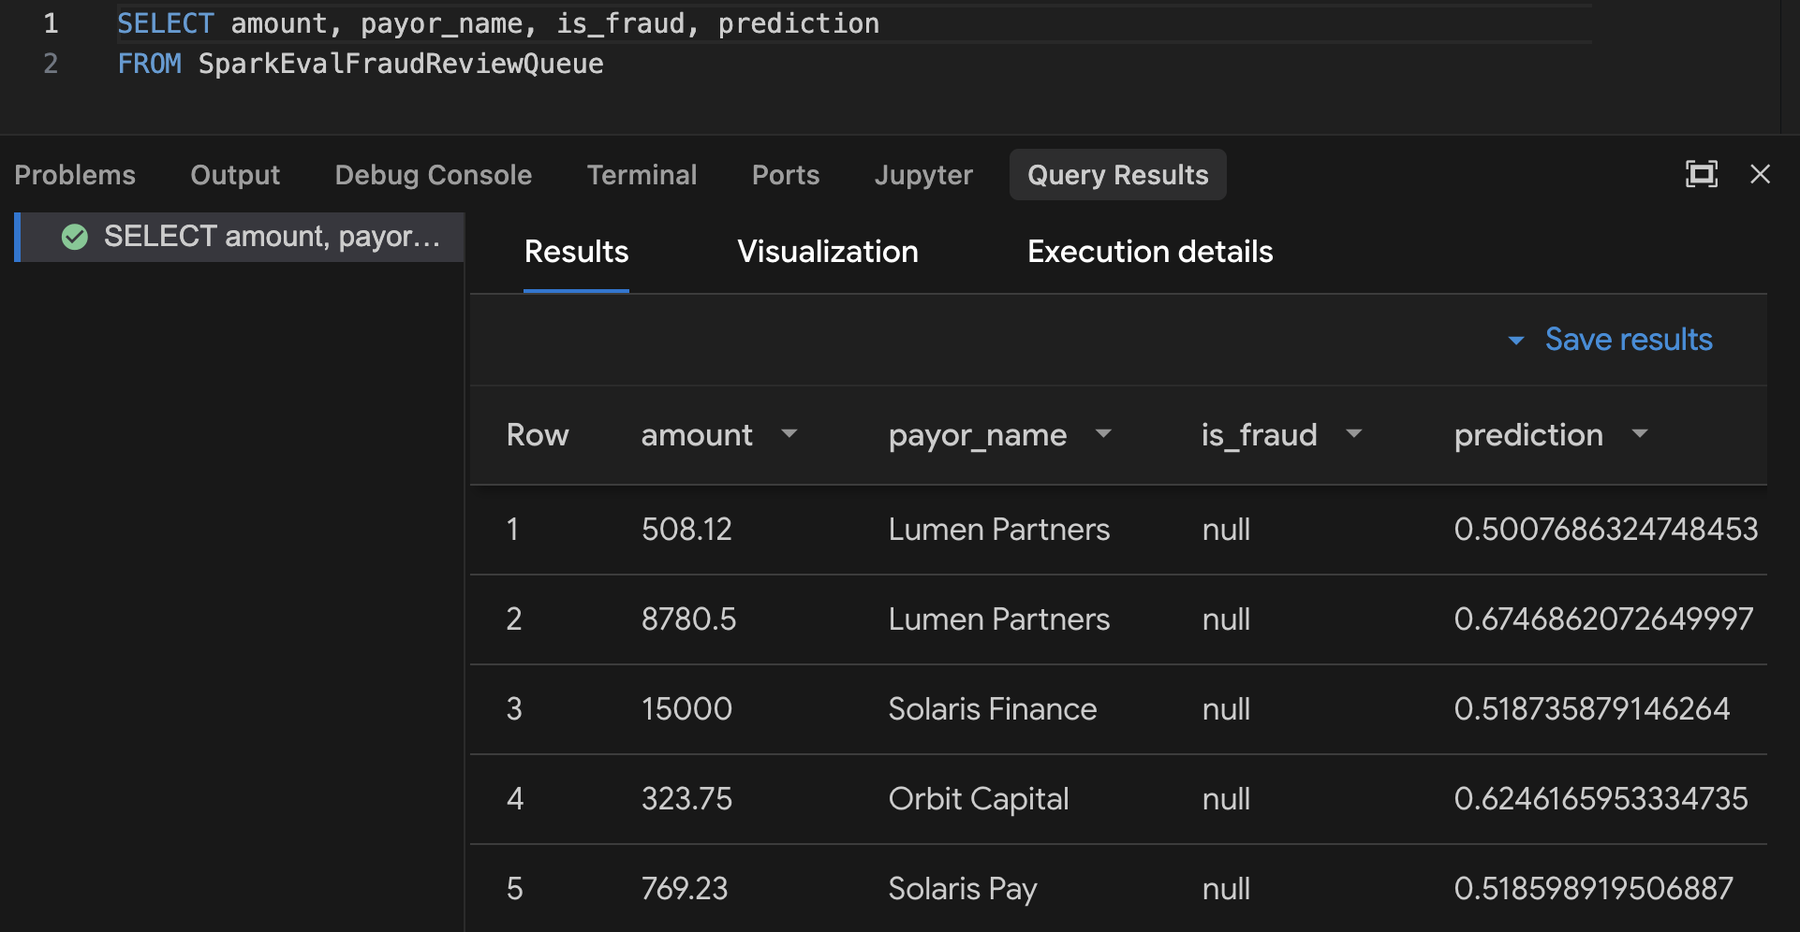
Querying flagged transactions in the Spanner table
This table is the list we set out to build. The compliance team can now start reviewing transactions, and we have a workflow that gets records from raw logs into the queue.
So far, we have been kicking off each step ourselves. We can now connect them so the workflow runs automatically each day.
Running it again tomorrow
Each day we will load the latest logs, apply the dbt transformations, and score unlabeled transactions using the saved model. We’ll use the Managed Service for Apache Airflow to run these steps in order. Ask the agent:
The agent generates a YAML pipeline definition and deployment configuration. The pipeline definition sets the schedule and dependencies between steps. Meanwhile, the deployment configuration specifies the Airflow environment where it will run.
Data Agent Kit then turns the definition into an Airflow DAG, which you can explore as an interactive graph in the IDE. Open the pipeline under “Orchestration Pipelines” and click a task to inspect it. For notebook tasks, you can follow the link straight back to the code.
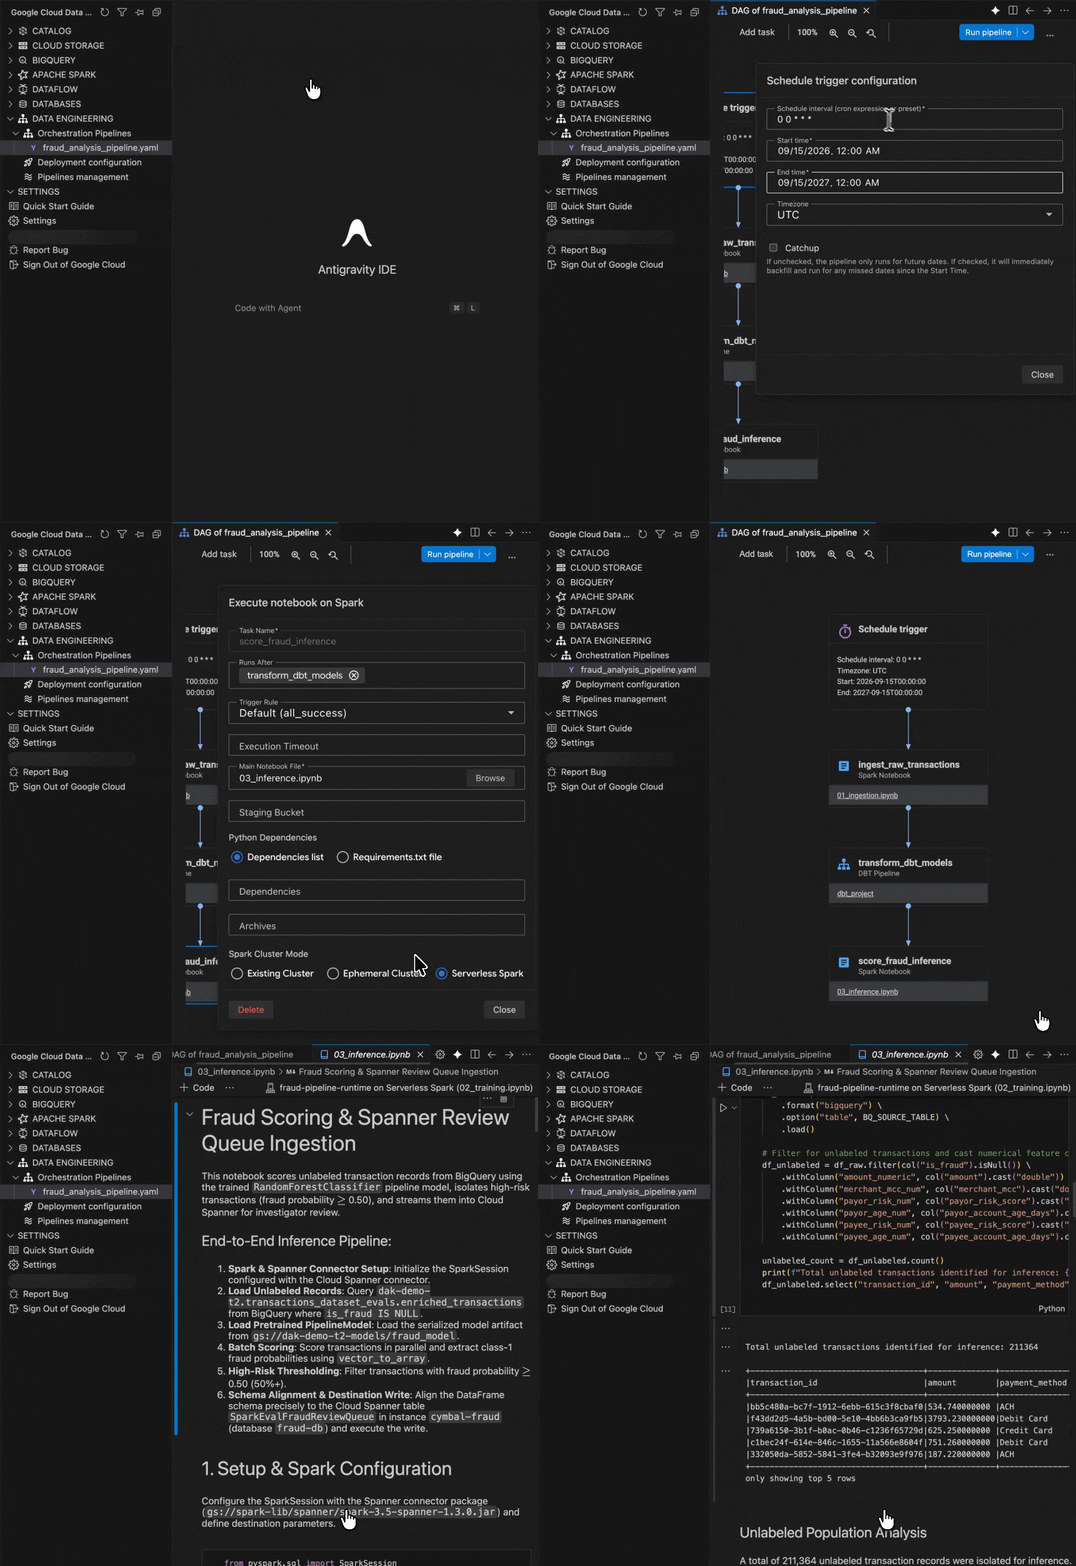
Inspecting a data pipeline
With the Airflow environment configured, click “Run pipeline” in the canvas. Data Agent Kit packages the notebooks and dbt project, deploys the DAG, and triggers a run. Open the pipeline’s execution history to follow its progress. You can also select individual tasks to inspect their status, duration, and logs.
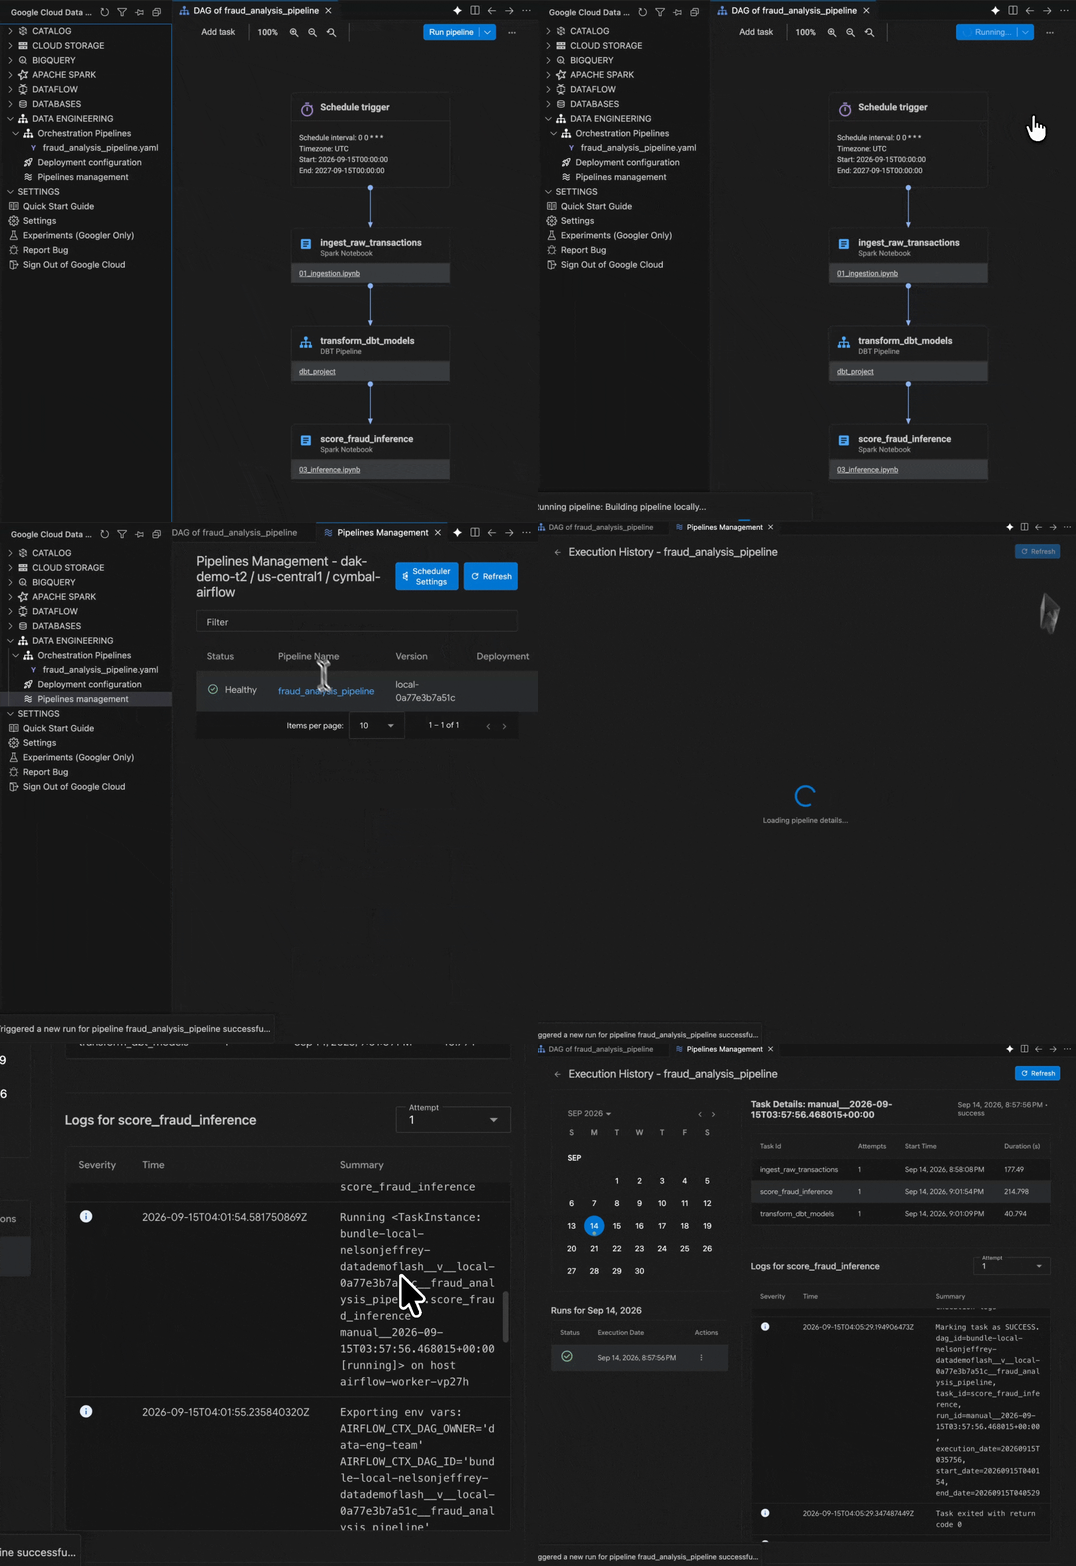
Kicking off an Airflow DAG and inspecting the logs
Airflow will run the pipeline every day, taking new batches of data from raw logs to the review queue. The compliance team can now focus on flagged transactions, and you’ve automated the work of getting those records to them!
Try it yourself
If you are ready to try this for yourself, we have designed a codelab that walks you through the full setup so you can build and run this workflow. You can also read our documentation or check out the skills and tools in the open-source repository on GitHub.