Let's build a Windows virtual machine
Laurie White
Developer Relations Engineer
Creating a virtual machine (VM), a computer you can use without needing to purchase, set up, or keep around, is one of the most basic functions of the cloud. You can rent as many computers as you need and delete them when you're done with them.
But VMs are only a benefit if setting up a virtual machine is easy. In Google Cloud, creating a VM is done with the Compute Engine service. There's a short (about 5 minutes) interactive tutorial to get you started. I'll explain what's going on in that tutorial here, but you should walk through the tutorial as well to see all of the exact steps.
Once you've finished this tutorial, be sure to check the references to learn more about creating and using VMs.
Selecting a project
Everything in your application will be in a project, so you'll either need to create or select a project to do this tutorial in. Projects need to be associated with a billing account, so if you don't have one, consider signing up for the Free Trial. You'll start in the Cloud Console.
Enabling APIs
Normally you will go to APIs and services from the Navigation menu to enable the Compute Engine API, but the tutorial will let you do this by just clicking a button. If you've already enabled the Compute Engine API for a project, you won't need to enable it again.
Creating a VM
In this tutorial, you'll create a Windows Server VM. (Don't worry; if you want a Linux VM, there's a tutorial for that too!) From the Navigation menu, select Computer Engine. By default, you'll go to the first item in the submenu, which is VM instances.
You can then click Create instance to create a new VM. You'll notice there are a lot of options, allowing you to change the name, the machine configuration, the boot disk, and far more. As you change options, notice how the price for the VM changes in the upper right of the screen.
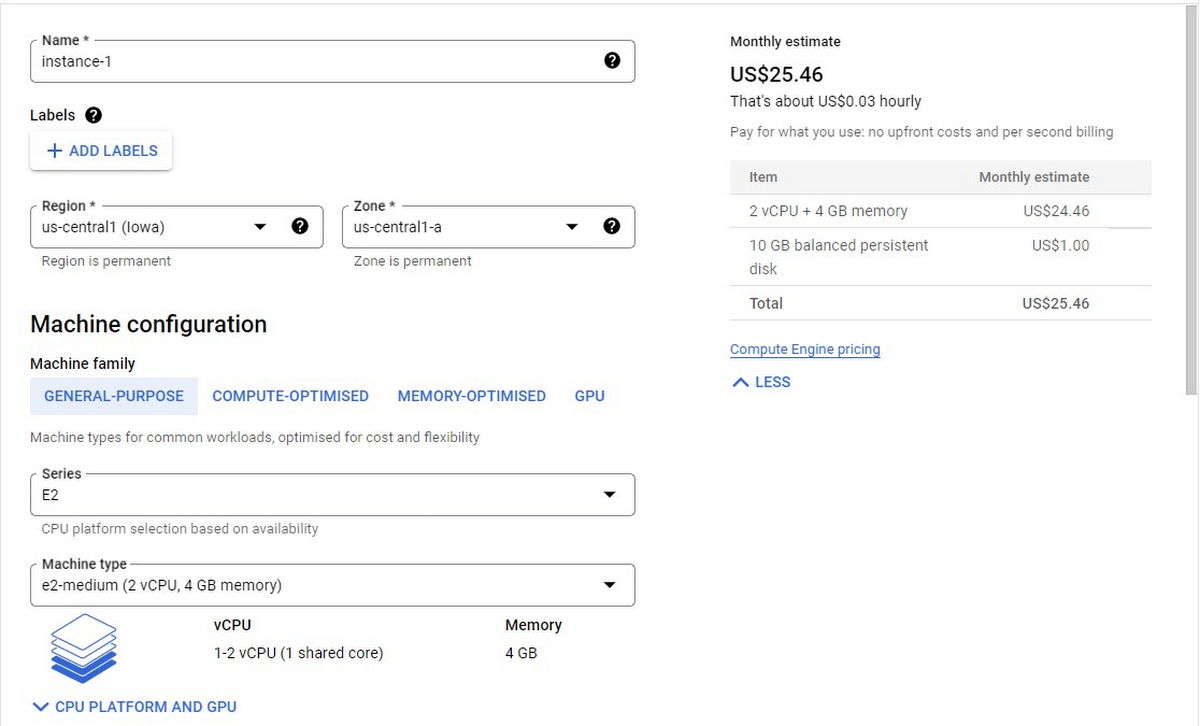
The tutorial will give you suggested changes to make to change the operating system and allow HTTP traffic. These options can be seen further down the options screen, as shown in Figure 2. It will also help you find the right places to enter this information--the first time you see these screens they may be a bit overwhelming!
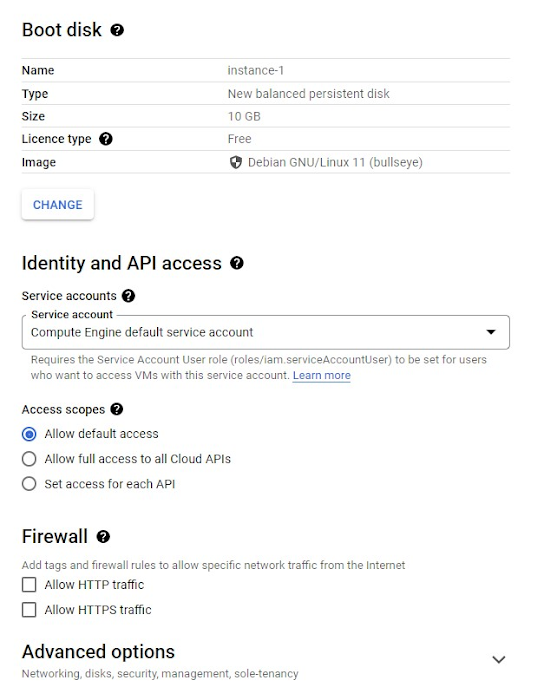
There are a variety of different operating systems available as shown in the Boot disk section (Figure 3). Once you've selected an operating system, you may also need to select the particular version of that OS. For operating systems with a licensing fee, that fee will be included in the price of the VM. Try some out and see how the price changes.
The boot disk section also gives you the ability to use custom images, snapshots, and existing VMs to create your image. You can find out more about these in the reference section.

Connecting to the VM
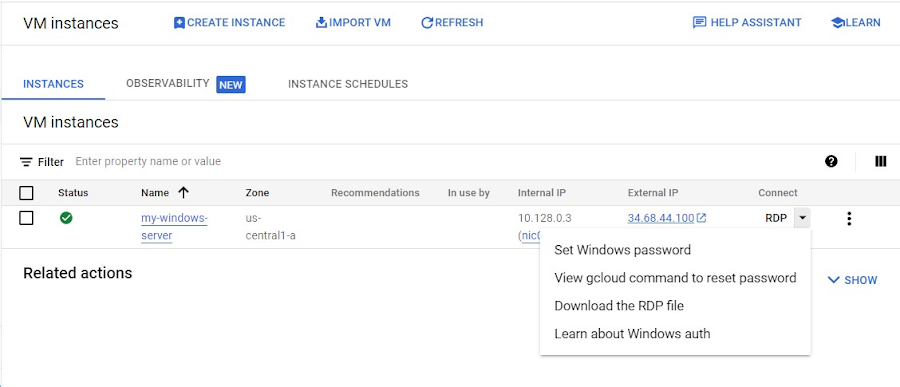
Once you've set the options, select Create, which will return you to the VM instances page, as shown in Figure 4. Once there's a checkmark next to the VM, it's ready to go. Before accessing the VM, you'll need to set up a password. This is easy enough to do by clicking the down arrow in the Connect column and selecting Set Windows password. Be sure to save the password!
Once you have a password, you can connect to the server using your RDP client. If you have problems, information on troubleshooting RDP is available. At this point you can administer the machine, set up accounts, install software, etc. just as you'd do with any Windows machine.
Cleaning up
There is a charge to both keep a VM running and to store its boot disk. You can stop the charge to run the VM by selecting it on the VM instances page and then clicking stop. If you won't be using this VM again, you can select the VM and press Delete instead.
Yes, the tutorial shows you exactly how to do this!
While there are lots more details about Compute Engine, you've got the big picture now. Go do something creative and useful with it!
So what now?
What are you ready to explore next? There are lots of Compute Engine interactive tutorials available, but some good next steps include:
Create a Linux VM instance in Compute Engine: interactive tutorial, documentation page
Transfer files to a Windows VM: interactive tutorial, documentation page
Create an IIS web server VM: interactive tutorial, documentation page
Create a new template instance: interactive tutorial, documentation page
Restoring a VM from a snapshot: interactive tutorial, documentation page
Troubleshoot VM shutdowns and reboots: interactive tutorial, documentation page