Want to use AutoML Tables from a Jupyter Notebook? Here’s how
Karl Weinmeister
Director, Developer Relations
While there’s no doubt that machine learning (ML) can be a great tool for businesses of all shapes and sizes, actually building ML models can seem daunting at first. Cloud AutoML—Google Cloud’s suite of products—provides tools and functionality to help you build ML models that are tailored to your specific needs, without needing deep ML expertise.
AutoML solutions provide a user interface that walks you through each step of model building, including importing data, training your model on the data, evaluating model performance, and predicting values with the model. But, what if you want to use AutoML products outside of the user interface? If you’re working with structured data, one way to do it is by using the AutoML Tables SDK, which lets you trigger—or even automate—each step of the process through code.
There is a wide variety of ways that the SDK can help embed AutoML capabilities into applications. In this post, we'll use an example to show how you can use the SDK from end-to-end within your Jupyter Notebook. Jupyter Notebooks are one of the most popular development tools for data scientists. They enable you to create interactive, shareable notebooks with code snippets and markdown for explanations. Without leaving Google Cloud's hosted notebook environment, AI Platform Notebooks, you can leverage the power of AutoML technology.
There are several benefits of using AutoML technology from a notebook. Each step and setting can be codified so that it runs the same every time by everyone. Also, it's common, even with AutoML, to need to manipulate the source data before training the model with it. By using a notebook, you can use common tools like pandas and numpy to preprocess the data in the same workflow. Finally, you have the option of creating a model with another framework, and ensemble that together with the AutoML model, for potentially better results. Let's get started!
Understanding the data
The business problem we'll investigate in this blog is how to identify fraudulent credit card transactions. The technical challenge we'll face is how to deal with imbalanced datasets: only 0.17% of the transactions in the dataset we’re using are marked as fraud. More details on this problem are available in the research paper Calibrating Probability with Undersampling for Unbalanced Classification.
To get started, you'll need a Google Cloud Platform project with billing enabled. To create a project, follow the instructions here. For a smooth experience, check that the necessary storage and ML APIs are enabled. Then, follow this link to access BigQuery public datasets in the Google Cloud console.
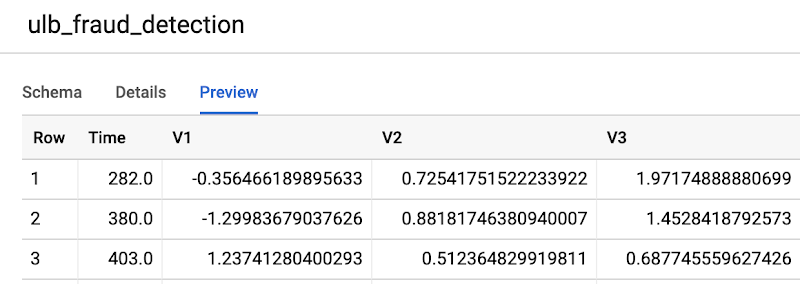
In the Resources tree in the bottom-left corner, navigate through the list of datasets until you find ml-datasets, and then select the ulb-fraud-detection table within it.


Click the Preview tab to preview sample records from the dataset. Each record has the following columns:
- Time is the number of seconds between the first transaction in the dataset and the time of the selected transaction.
- V1-V28 are columns that have been transformed via a dimensionality reduction technique called PCA that has anonymized the data.
- Amount is the transaction amount.

Set up your Notebook Environment
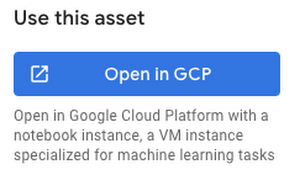
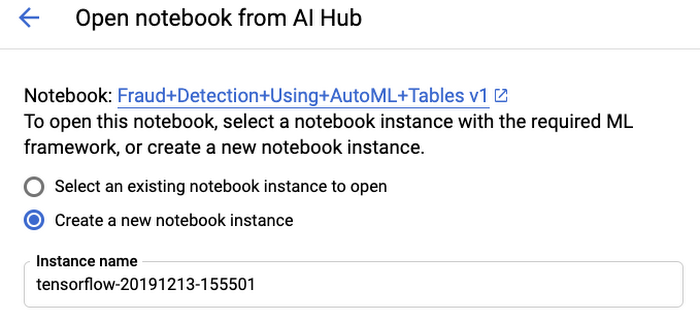
Now that we’ve looked at the data, let's set up our development environment. The notebook we’ll use can be found in AI Hub. Select the "Open in GCP" button, then choose to either deploy the notebook in a new or existing notebook server.


Configure the AutoML Tables SDK
Next, let’s highlight key sections of the notebook. Some details, such as setting the project ID, are omitted for brevity, but we highly recommend running the notebook end-to-end when you have an opportunity.
We've recently released a new and improved AutoML Tables client library. You will first need to install the library and initialize the Tables client.
By the way, we recently announced that AutoML Tables can now be used in Kaggle kernels. You can learn more in this tutorial notebook, but the setup is similar to what you see here.
Import the Data
The first step is to create a BigQuery dataset, which is essentially a container for the data. Next, import the data from the BigQuery fraud detection dataset. You can also import from a CSV file in Google Cloud Storage or directly from a pandas dataframe.
Train the Model
First, we have to specify which column we would like to predict, or our target column, with set_target_column(). The target column for our example will be "Class"—either 1 or 0, if the transaction is fraudulent or not.
Then, we’ll specify which columns to exclude from the model. We’ll only exclude the target column, but you could also exclude IDs or other information you don't want to include in the model.
There are a few other things you might want to do that aren't necessary needed in this example:
Set weights on individual columns
Create your own custom test/train/validation split and specify the column to use for the split
Specify which timestamp column to use for time-series problems
Override the data types and nullable status that AutoML Tables inferred during data import
The one slightly unusual thing that we did in this example is override the default optimization objective. Since this is a very imbalanced dataset, it’s recommended that you optimize for AU-PRC, or the area under the Precision/Recall curve, rather than the default AU-ROC.
Evaluate the Model
After training has been completed, you can review various performance statistics on the model, such as the accuracy, precision, recall, and so on. The metrics are returned in a nested data structure, and here we are pulling out the AU-PRC and AU-ROC from that data structure.
Deploy and Predict with the Model
To enable online predictions, the model must first be deployed. (You can perform batch predictions without deploying the model).
We'll create a hypothetical transaction record with similar characteristics and predict on it. After invoking the predict() API with this record, we receive a data structure with each class and its score. The code below finds the class with the maximum score.
Conclusion
Now that we’ve seen how you can use AutoML Tables straight from your notebook to produce an accurate model of a complex problem, all with a minimal amount of code, what’s next?
To find out more, the AutoML Tables documentation is a great place to start. When you're ready to use AutoML in a notebook, the SDK guide has detailed descriptions of each operation and parameter. You might also find our samples on Github helpful.
After you feel comfortable with AutoML Tables, you might want to look at other AutoML products. You can apply what you've learned to solve problems in Natural Language, Translation, Video Intelligence, and Video domains.
Find me on Twitter at @kweinmeister, and good luck with your next AutoML experiment!
