Set up workstations
Learn how to set up workstation clusters, workstation configurations, and workstations for your team. Check the prerequisites for this quickstart before you begin, and then follow these steps:
If you no longer need the resources created in this quickstart, make sure that you clean up to avoid incurring extra costs.
To follow step-by-step guidance for this task directly in the Google Cloud console, click Guide me:
Before you begin
Before you begin using Cloud Workstations, be sure that you have the required permissions and that you complete these required setup steps:
- Sign in to your Google Cloud account. If you're new to Google Cloud, create an account to evaluate how our products perform in real-world scenarios. New customers also get $300 in free credits to run, test, and deploy workloads.
-
In the Google Cloud console, on the project selector page, select or create a Google Cloud project.
-
Make sure that billing is enabled for your Google Cloud project.
-
In the Google Cloud console, on the project selector page, select or create a Google Cloud project.
-
Make sure that billing is enabled for your Google Cloud project.
-
Enable the Cloud Workstations API.
-
If you are an administrator, make sure that you have a Cloud Workstations Admin IAM role on the project so that you can create workstation configurations.
If you are a developer and you don't have workstation configurations available in the Google Cloud console, ask your organization's Cloud Workstations Admin to create a workstation configuration for you, or make sure that you have a Cloud Workstations Admin IAM role on the project so that you can create these resources yourself. To check your IAM roles, go to the IAM page in the Google Cloud console:
Create a workstation cluster
The first step is to create a workstation cluster. Workstation clusters define a group of workstations in a particular region, manage workstations during their lifecycle, and provide configurable network connectivity.Workstation clusters aren't related to Google Kubernetes Engine (GKE) clusters. To create a workstation cluster, follow these steps:
In the console, navigate to the Cloud Workstations > Cluster management page.
From the workstations Cluster management page, click add_boxCreate.
In the Name field, enter
test-clusteras the name of your workstation cluster.Select the Region that is closest to you.
Skip the Network settings.
Click Create, which begins the cluster creation process.
Workstation cluster creation can take up to 20 minutes, but in most cases is only needed once.
Create a workstation configuration
This quickstart takes you through the most basic workstation configuration. To get started quickly, accept the defaults for defining machine settings, for customizing the environment, and for adding users. To configure the basics of a workstation configuration, follow these steps:In the console, navigate to Cloud Workstations > Workstation configurations.
From the Workstation configurations page, click add_boxCreate.

In the Name field, enter
test-configurationas the name of your workstation configuration.Choose
test-clusterfrom the list of available workstation Clusters and click Continue. If no workstation cluster is available, make sure that you completed the steps to= Create a workstation cluster.For Quick start workstations, select Disabled for lower cost.
If you were customizing a workstation configuration for your team, you might define Machine settings, customize Environment settings, and add users to the IAM policy. For this exercise, you can skip those steps.
To create your workstation configuration, click Create.
For more information about creating a workstation configuration with the options that were skipped in this quickstart, see the detailed section about workstation configurations.
Create and launch a workstation
A workstation is a preconfigured development environment that administrators or platform teams define in a workstation configuration. To create a workstation, follow these steps:In the Google Cloud console, navigate to the Cloud Workstations > Workstations page.
Click add_boxCreate.
The Create link might be disabled if there aren't any workstation configurations in the project or if you don't have permissions to view them. Ask your organization's Cloud Workstations Admin to create a workstation configuration for you.
Accept the default workstation Name.
Click the arrow_drop_downexpander arrow in the Configuration field and select the workstation configuration to define your workstation. For example, if you named your workstation configuration
test-configurationin the prior step, select that from the list.Click
Create to create your workstation.
- Click Workstations.
- Find the workstation that you created in the list of available workstations, select the checkbox beside it, and then click Start. This starts your workstation, and matches it to the parent workstation configuration.
- If prompted to start your workstation, click Start to confirm. The status changes to Starting and the status icon refreshspins while the start operation is in progress. It might take a few minutes to start your workstation.
- When your workstation is ready, the status changes to Running and the status icon changes to a check_circle checkmark.
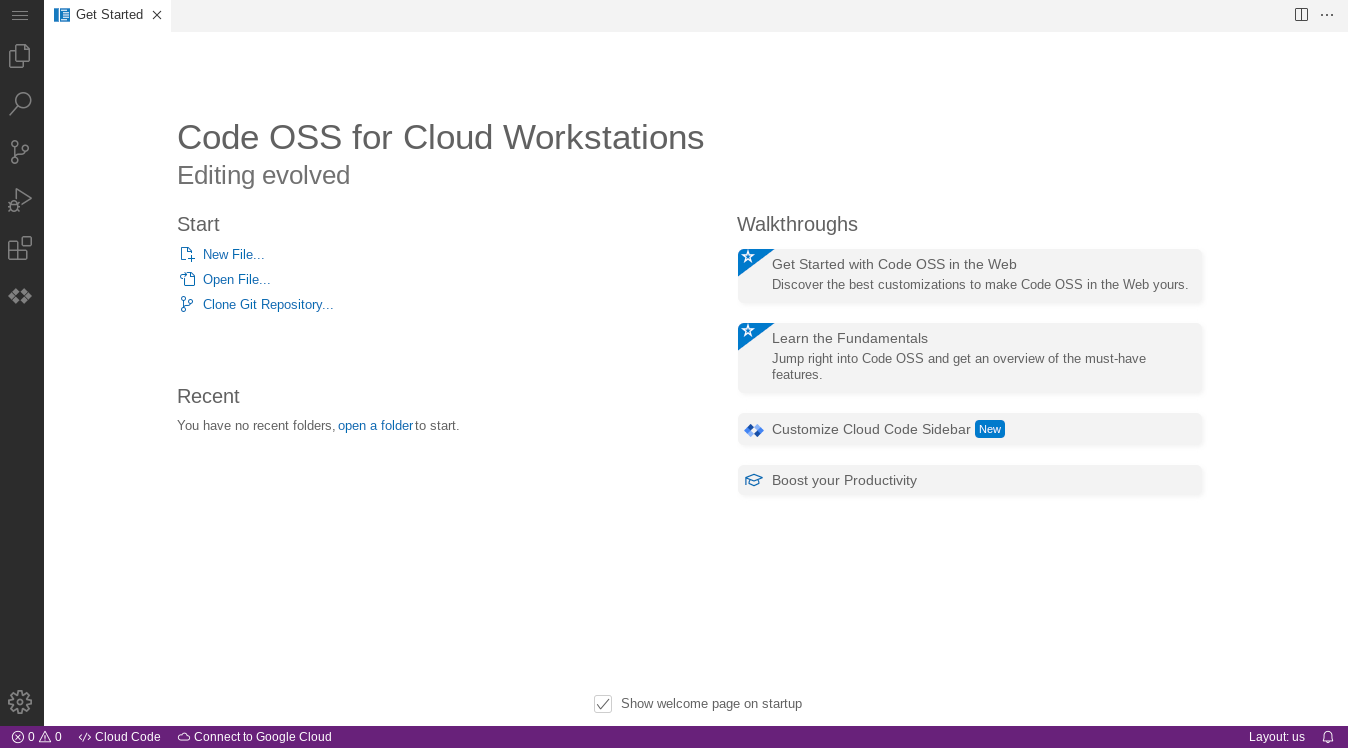
Click Launch. The workstation connects to port
80by default.The following example shows the welcome page for the Cloud Workstations base editor. Your page might look different, depending on how you define your workstation configuration:
For more information about connecting through SSH, see SSH support.
For more information about connecting to a web apps running on your workstation, see Access HTTP servers running on a workstation.
Clean up
To avoid incurring charges to your Google Cloud account for the resources used on this page, make sure that you delete resources that you no longer need.
To delete a Google Cloud project from the Google Cloud console or from the
gcloud CLI:
Console
- In the Google Cloud console, go to the Manage resources page.
- In the project list, select the project that you want to delete, and then click Delete.
- In the dialog, type the project ID, and then click Shut down to delete the project.
gcloud
Delete a Google Cloud project:
gcloud projects delete PROJECT_ID
What's next
Use the Cloud Workstations base editor.
Learn more about configuring additional options in your workstation configuration.
Use Cloud Workstations with JetBrains IDEs such as IntelliJ IDEA Ultimate and PyCharm Professional.