Label images by using the AutoML Vision Edge API
This quickstart walks you through the process of:
- Using AutoML Vision Object Detection to create your dataset, train a custom AutoML Vision Edge model, and make a prediction.
- Exporting and using your AutoML Vision Edge model.
In this quickstart you use the user interface (UI) to interact with the AutoML Vision API and export your AutoML Vision Edge model.
Before you begin
Before you can use AutoML Vision Object Detection, you must create a Google Cloud project (one never used with any other AutoML product) and enable AutoML Vision Object Detection for that project.
- Sign in to your Google Cloud account. If you're new to Google Cloud, create an account to evaluate how our products perform in real-world scenarios. New customers also get $300 in free credits to run, test, and deploy workloads.
-
In the Google Cloud console, on the project selector page, select or create a Google Cloud project.
-
Make sure that billing is enabled for your Google Cloud project.
-
Enable the Cloud AutoML and Storage APIs.
-
In the Google Cloud console, on the project selector page, select or create a Google Cloud project.
-
Make sure that billing is enabled for your Google Cloud project.
-
Enable the Cloud AutoML and Storage APIs.
Beta requirements
- This Beta feature requires you to use
us-central1as the specified region.
Preparing a dataset
In this quickstart you use a dataset created from Open Images Dataset V4.
This publicly available Salads dataset is located at
gs://cloud-ml-data/img/openimage/csv/salads_ml_use.csv.
The CSV format is as follows:
TRAINING,gs://cloud-ml-data/img/openimage/3/2520/3916261642_0a504acd60_o.jpg,Salad,0.0,0.0954,,,0.977,0.957,,
VALIDATION,gs://cloud-ml-data/img/openimage/3/2520/3916261642_0a504acd60_o.jpg,Seafood,0.0154,0.1538,,,1.0,0.802,,
TEST,gs://cloud-ml-data/img/openimage/3/2520/3916261642_0a504acd60_o.jpg,Tomato,0.0,0.655,,,0.231,0.839,,

3916261642_0a504acd60_o.jpgEach row corresponds to an object localized inside a larger image, with each
object specifically designated as test, train, or validation data. The three
lines included here indicate three distinct objects located inside the same
image available at
gs://cloud-ml-data/img/openimage/3/2520/3916261642_0a504acd60_o.jpg. Each row
has a different label: Salad, Seafood, Tomato, in addition
to other rows with Baked goods or Cheese labels.
Bounding boxes are specified for each image using the top left and bottom right vertices:
- (0,0) corresponds to the top left-most vertex.
- (1,1) corresponds to the bottom right-most vertex.
For the first row shown above, the (x, y) coordinates for the top left vertex
of the Salad labeled object are (0.0,0.0954), and the coordinates for the
bottom right vertex of the object are (0.977,0.957).
For more detailed information on how to format your CSV file and the minimum requirements for creating a valid dataset, see Preparing your training data.
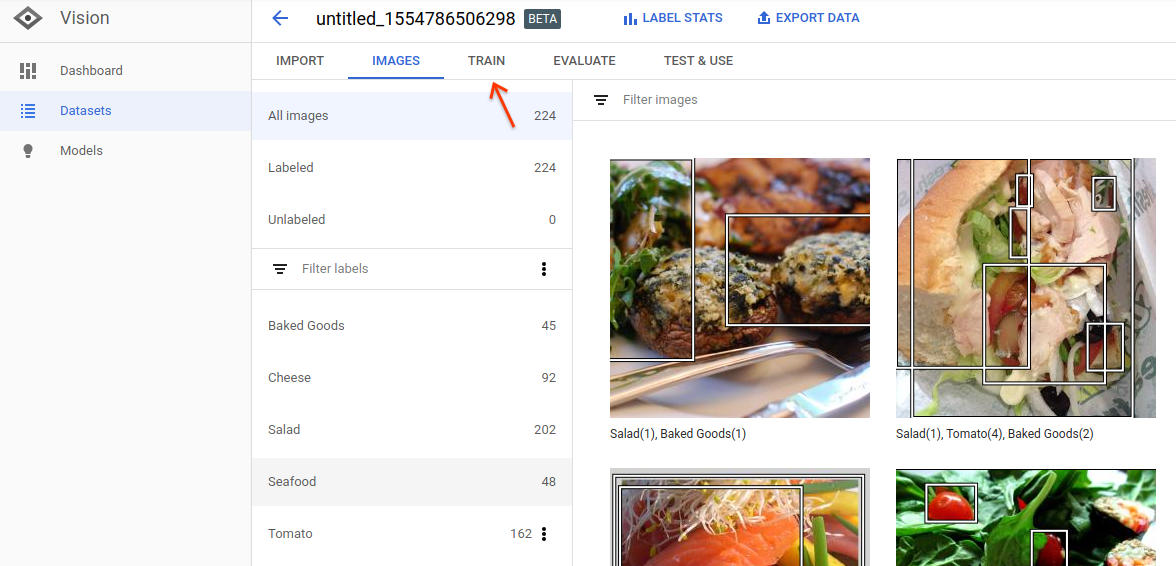
Create your dataset
-
Open the AutoML Vision Object Detection UI
and select your project from the drop-down list in the title bar.
The first time you open the AutoML Vision Object Detection UI you will need to Enable AutoML API if it isn't already enabled.
- Select Get started in the pop-up window when prompted.
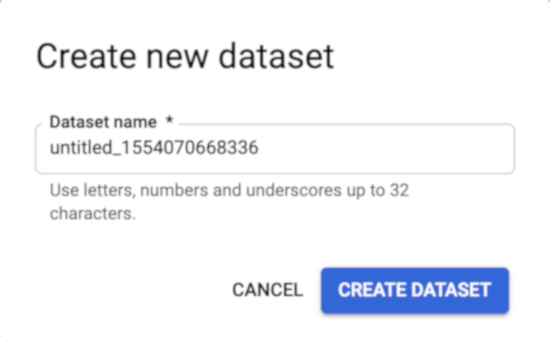
-
You will be taken to the datasets list page. Create a new dataset by selecting
New Dataset.
Enter a unique name for your dataset.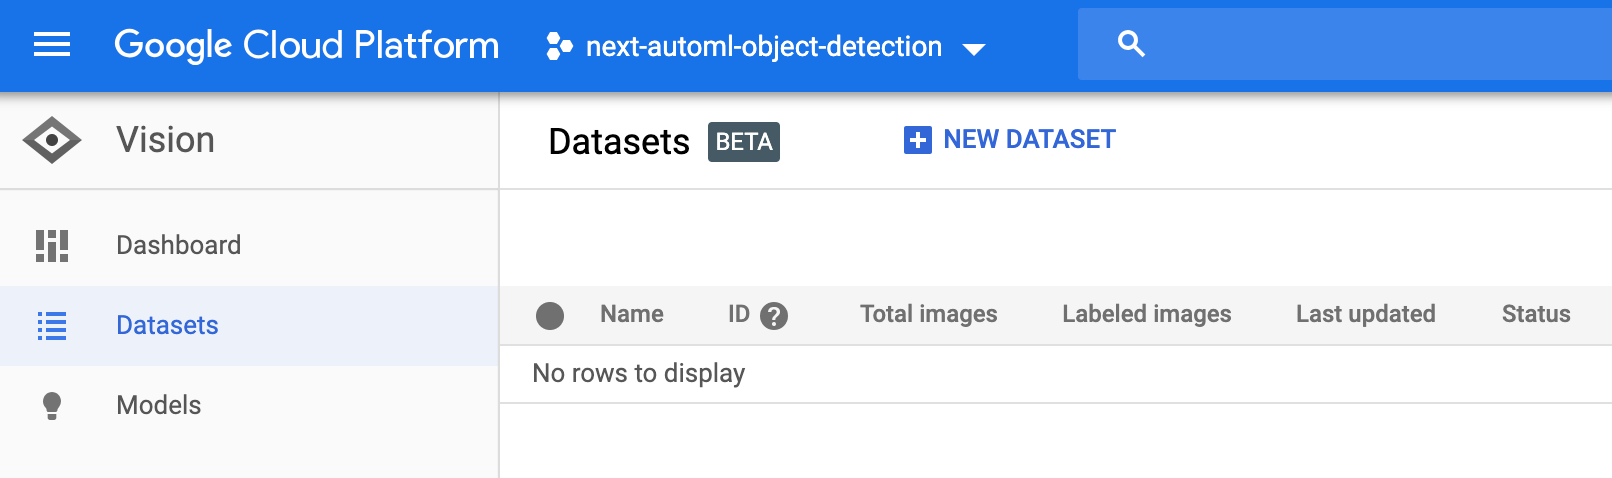
-
Enter the location of the training data to import in the window that follows.
In the Select a CSV file on Cloud Storage text box, enter the path for the sample CSV file (the
gs://prefix is added automatically):cloud-ml-data/img/openimage/csv/salads_ml_use.csv
Alternatively, you can select Browse and navigate to the CSV file in one of your Google Cloud Storage buckets.
This quickstart uses sample data staged in a public Google Cloud Storage bucket. The training data are sample JPG images annotated with the bounding box and label of the objects you want the model to learn to identify. To import the training data into the dataset, use a CSV file that points to the image (JPEG, PNG, GIF, BMP, or ICO) files; see Preparing your training data for information about the format and image specifications.
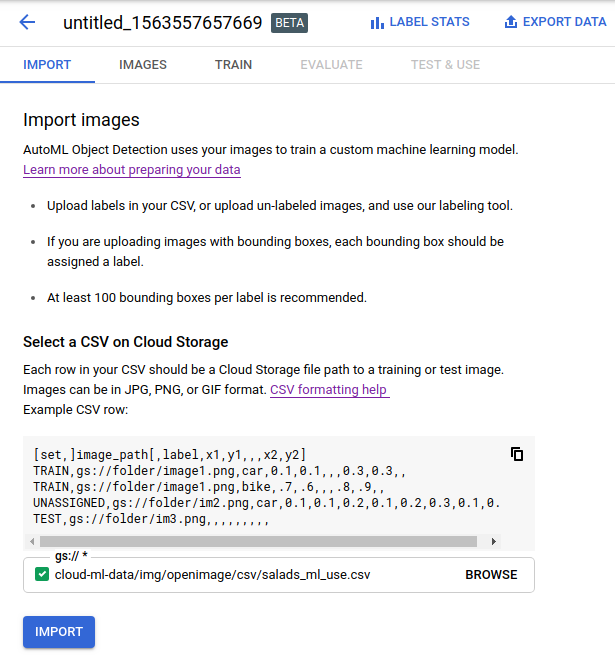
-
Select Import.
Your dataset will show a Status of
Running:importing imageswhile your images are being imported. This process takes just a few minutes.
When your training data has been successfully imported, the Status column
says Success:Creating dataset and the UI shows the generated ID for the
dataset (used when making AutoML API calls) as well as the number of items imported.

If there are any problems importing images you will see Warning: Importing
images as the status. Select the dataset name and Details to see the
errors with specific image import.

Train your model
Once your dataset has been created and processed, select the Train tab to initiate model training.
Select Start training to continue.
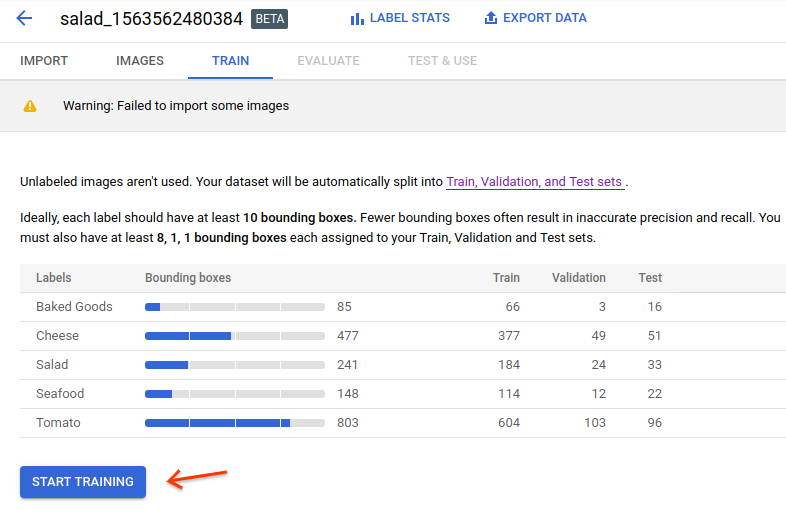
This will open a side window with training options.
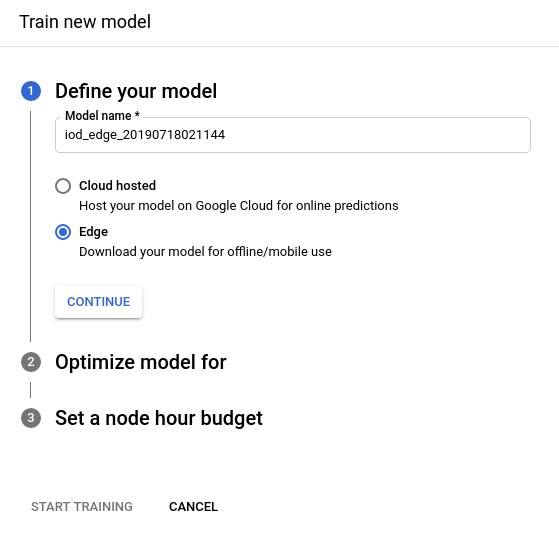
From the training Define your model section, change the model name and select radio_button_checked Edge as the model type. After selecting to train an Edge model select Continue.
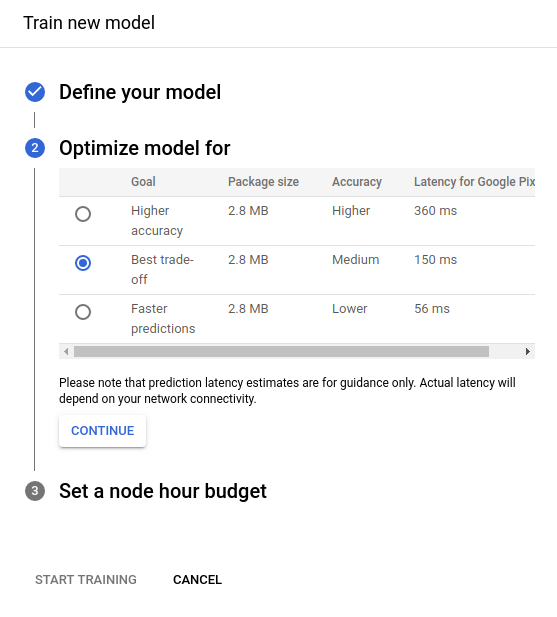
In the following Optimize model for section, select the default radio_button_checked Best trade-off option. After selecting the optimization criteria select Continue.
In the following Set a node hour budget section use the recommended node hour budget (24).
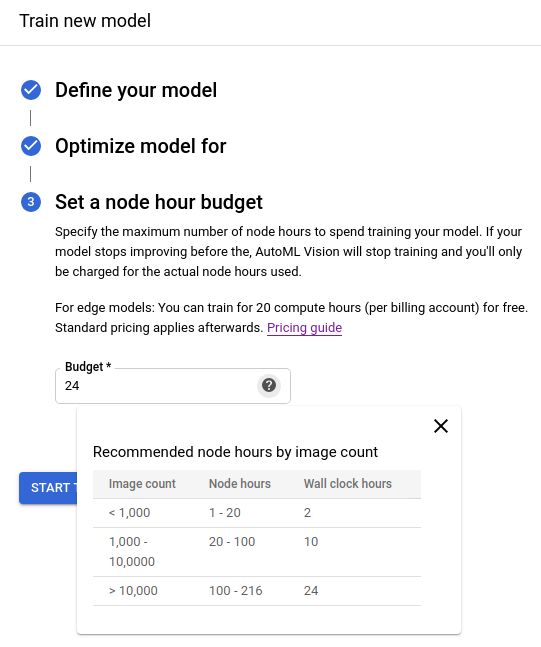
Select Start training to begin model training.
Training is initiated for your model, and should take about an hour. The training might stop earlier than the node hour you selected. The service will email you once training has completed, or if any errors occur.
Once training is complete, you can refer to evaluation metrics, as well as test and use the model.
Select the Evaluate tab to get more details on F1, Precision, and Recall scores.
Select an individual label under Filter labels to get details on true positives, false negatives and false positives.
Make a Prediction
Once training is complete your model must be manually deployed before you can make online predictions with the model.
Select the Test & use tab to deploy (and undeploy) your model. The Test & use page also has instructions on sending an image to your model for a prediction. You can also refer to Annotating images for examples.
Export and use the Edge model
The final step in using an AutoML Vision Edge model is to export (optimize and download) and use your model.
There are multiple ways you can export and use your models for prediction on Edge devices.
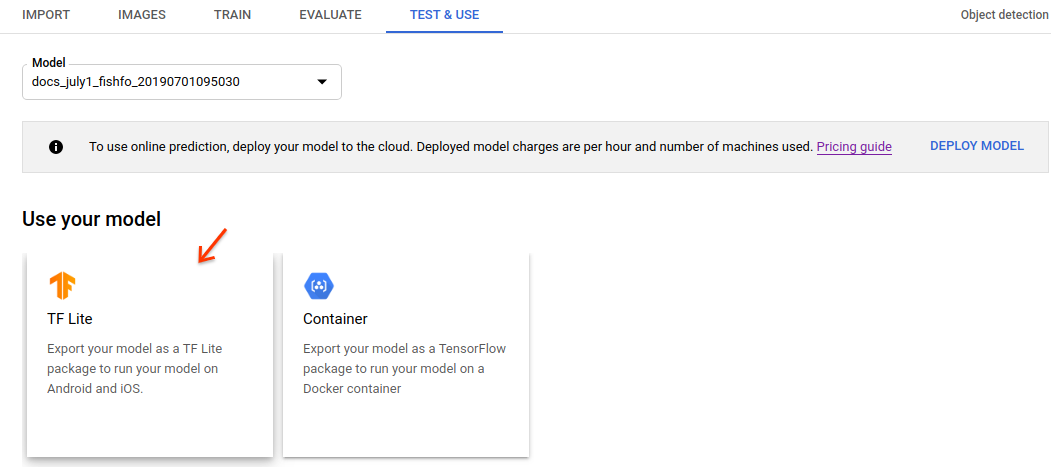
In this quickstart you will use Tensorflow Lite (TF Lite) as an example. TF Lite models are both easy to use and have a wide set of use cases.
Under Use your model, select the TF Lite option.
In the side window that opens indicate a Google Cloud Storage location for your exported model.
After you have given a storage location, select Export to export a TF Lite package into your Cloud Storage storage bucket. The export process typically takes several minutes.
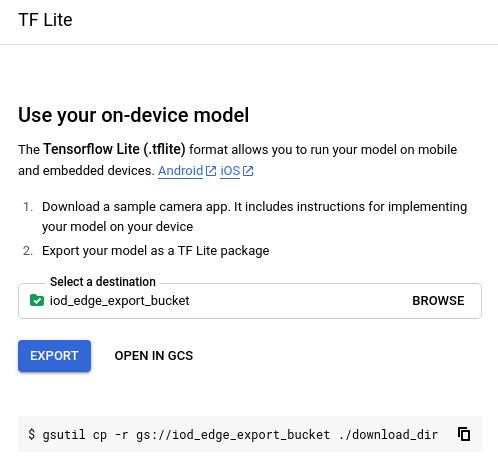
After the export is completed select the Open in Google Cloud Storage link to go to the Google Cloud Storage destination folder in the Google Cloud Platform Console.
In the Google Cloud Storage destination location you will find a folder named with timestamp and model format, under which you can find the following files:
- a tflite file (
model.tflite), - a dictionary file (
dict.txt) - a metadata file (
tflite_metadata.json)
Clean up
To avoid incurring charges to your Google Cloud account for the resources used on this page, follow these steps.
Undeploy & delete instructions
If you no longer need your custom model or dataset, you can delete them.
To avoid unnecessary Google Cloud Platform charges, use the GCP Console to delete your project if you do not need it.
Undeploy your model
Your model incurs charges while it is deployed.
- Select the Test & Use tab just below the title bar.
- Select Remove deployment from the banner beneath your model name to open
the undeploy option window.
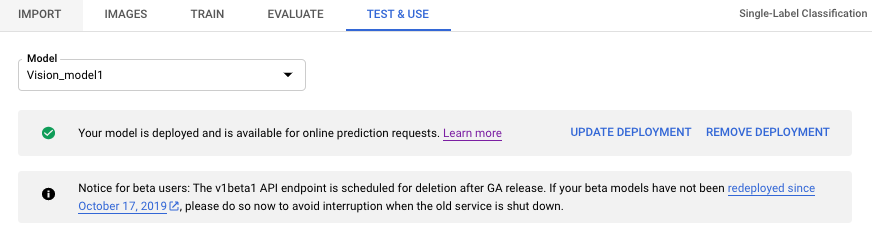
- Select Remove deployment to undeploy the model.
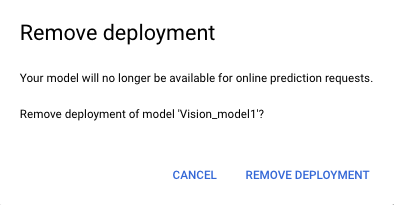
- You will receive an email when model undeployment has completed.
Delete your project (optional)
To avoid unnecessary Google Cloud Platform charges, use the Google Cloud console to delete your project if you do not need it.
What's next
With these files, you can follow tutorials to use on Android devices, iOS devices, or Raspberry Pi 3.
Other options to use the model:
- You can also export the model as TensorFlow SavedModel and use it with a Docker container in the Container tab. See the container tutorial on how to export to a container.
- You can export the model for running on Edge TPU in the Edge devices tab. You can follow this Edge TPU official documentation to use the model.