Tracking objects in videos
After you have created (trained) a model, you can request a prediction for
one or more videos using the batchPredict
method. You supply a CSV file with a list of videos to the batchPredict method.
The batchPredict method annotates videos by detecting and tracking
objects that your model predicts.
The maximum lifespan for a model is two years. After two years, you must create and train a new model to continue annotating your videos.
Predict Example
To request a batch of predictions from AutoML Video Object Tracking, create a CSV file that lists the Cloud Storage paths to the videos that you want to annotate. You can also specify a start and end time to tell AutoML Video Object Tracking to only annotate a segment of the video. The start time must be zero or greater and must be before the end time. The end time must be greater than the start time and less than or equal to the duration of the video.
The following example shows how to annotate an entire video by
specifying a start and end time as 0,inf.
gs://my-videos-vcm/cow_video.mp4,0,inf
gs://my-videos-vcm/bird_video.mp4,10.00000,15.50000
You must also specify an output file path where AutoML Video Object Tracking should write the results of the predictions from your model. This path must be a Cloud Storage bucket and object where you have write permissions.
Each video can be up to 3 hours in duration with a maximum file size of 50GB. AutoML Video Object Tracking can generate predictions for approximately 100 hours of video in 12 hours of processing time.
Web UI
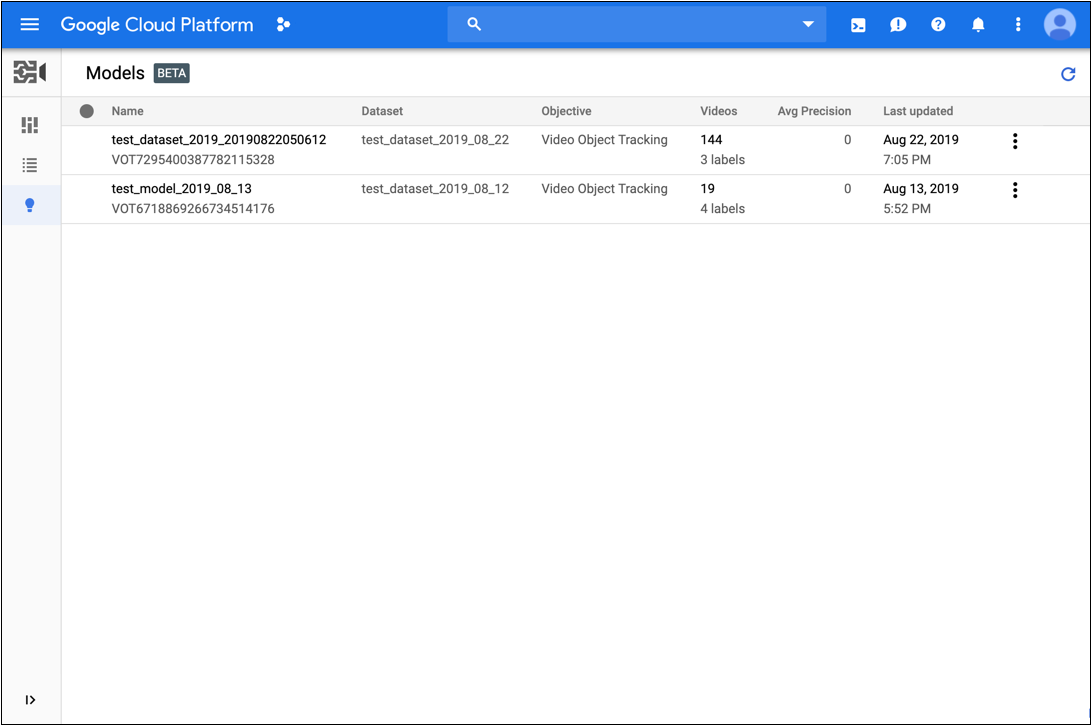
- Open the AutoML Video Object Tracking UI.
- Click the model that you want to use from the displayed
list.
- On the Test & Use tab for the model, do the following:
- Under Test your model, select a CSV file to use for the prediction. The CSV file must provide a list of videos that you want to annotate.
Also under Test your model, select a directory within your Cloud Storage bucket to receive the annotation results.
You may actually want to create a specific 'results' folder in your Cloud Storage bucket to hold the annotation results.
- Click Get Predictions.
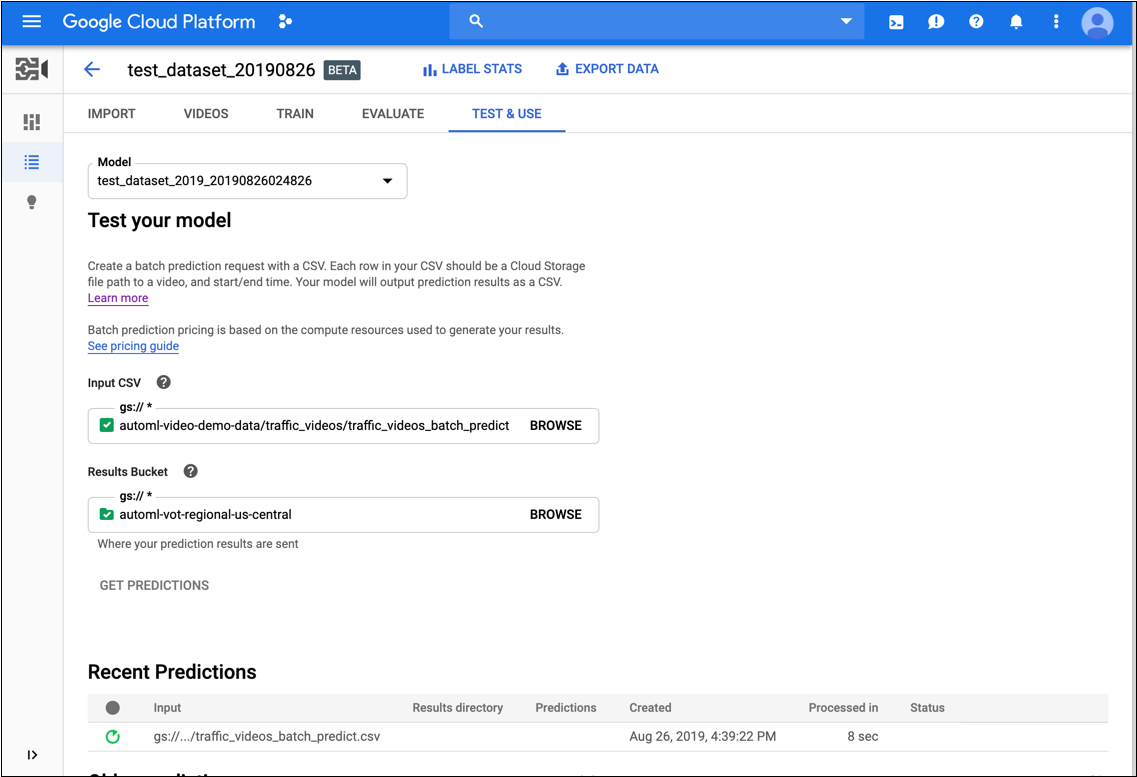
The process for getting predictions can take some time, depending on the number of videos that you want annotated.
When the process has completed, the results appear on the page for the model under Recent Predictions. To view the results, do the following:
- Under Recent Predictions in the Predictions column, click View for the prediction you want to look at.
- Under Video, select the name of the video you want to see the results for.
REST
Before using any of the request data, make the following replacements:
- model-id: replace with the ID of your model. The ID is the last element of the
name of your model. For example, if the name of your model is
projects/project-number/locations/location-id/models/VOT6312181905852727296, then the ID of your model isVOT6312181905852727296. - request-id: assign any digital value to this field.
- bucket-name: replace with the name of your Cloud Storage
bucket. For example:
my-project-vcm. - input-file: replace with the name of your CSV file that identifies the videos to annotate.
- output-storage-path: replace with the path to the
Cloud Storage bucket where the output of the predictions are to be stored.
AutoML Video Object Tracking creates a sub-folder for the results
in this path named using the following format:
prediction-model_name-timestamp. The sub-folder will contain a prediction file for each video in the batch request. You must have write permissions to this path. - Note:
- project-number: number of your project
- location-id: the Cloud region where annotation
should take place. Supported cloud regions are:
us-east1,us-west1,europe-west1,asia-east1. If no region is specified, a region will be determined based on video file location.
HTTP method and URL:
POST https://automl.googleapis.com/v1beta1/projects/project-number/locations/location-id/models/model-id:batchPredict
Request JSON body:
{
  "request_id": "request-id",
  "inputConfig": {
    "gcsSource": {
      "inputUris": ["gs://bucket-name/input-file.csv"]
    }
  },
  "outputConfig": {
    "gcsDestination": {
      "outputUriPrefix": "gs://output-storage-path"
    }
  },
  "params": {
    "score_threshold": "0.0"
  }
}
To send your request, choose one of these options:
curl
Save the request body in a file named request.json,
and execute the following command:
curl -X POST \
     -H "Authorization: Bearer $(gcloud auth print-access-token)" \
     -H "x-goog-user-project: project-number" \
     -H "Content-Type: application/json; charset=utf-8" \
     -d @request.json \
     "https://automl.googleapis.com/v1beta1/projects/project-number/locations/location-id/models/model-id:batchPredict"
PowerShell
Save the request body in a file named request.json,
and execute the following command:
$cred = gcloud auth print-access-token
$headers = @{ "Authorization" = "Bearer $cred"; "x-goog-user-project" = "project-number" }

Invoke-WebRequest `
    -Method POST `
    -Headers $headers `
    -ContentType: "application/json; charset=utf-8" `
    -InFile request.json `
    -Uri "https://automl.googleapis.com/v1beta1/projects/project-number/locations/location-id/models/model-id:batchPredict" | Select-Object -Expand Content
VOT1741767155885539328.
Java
To authenticate to AutoML Video Object Tracking, set up Application Default Credentials. For more information, see Set up authentication for a local development environment.
Node.js
To authenticate to AutoML Video Object Tracking, set up Application Default Credentials. For more information, see Set up authentication for a local development environment.
Python
To authenticate to AutoML Video Object Tracking, set up Application Default Credentials. For more information, see Set up authentication for a local development environment.
Get the status of the predict operation
You can query the status of your batch predict operation by using the following
curl or PowerShell commands.
REST
Before using any of the request data, make the following replacements:
- project-number: the number of your project
- location-id: the Cloud region where annotation should take
place. Supported cloud regions are:
us-east1,us-west1,europe-west1,asia-east1. If no region is specified, a region will be determined based on video file location. - operation-id: the ID of the long-running operation created
for the request and provided in the response when you started the
operation, for example
VOT12345....
HTTP method and URL:
GET https://automl.googleapis.com/v1beta1/projects/project-number/locations/location-id/operations/operation-id
To send your request, choose one of these options:
curl
Execute the following command:
curl -X GET \
     -H "Authorization: Bearer $(gcloud auth print-access-token)" \
     -H "x-goog-user-project: project-number" \
     "https://automl.googleapis.com/v1beta1/projects/project-number/locations/location-id/operations/operation-id"
PowerShell
Execute the following command:
$cred = gcloud auth print-access-token
$headers = @{ "Authorization" = "Bearer $cred"; "x-goog-user-project" = "project-number" }

Invoke-WebRequest `
    -Method GET `
    -Headers $headers `
    -Uri "https://automl.googleapis.com/v1beta1/projects/project-number/locations/location-id/operations/operation-id" | Select-Object -Expand Content
projects/project-number/locations/location-id/operations/operation-id
When the batch predict task is complete, the output of the prediction is stored in the Cloud Storage bucket that you specified in your command. There is a JSON file for each video segment. The JSON files have a format similar to my-video-01.avi.json, where file extension .json is appended to the original file name.
{
  "inputUris": ["automl-video-demo-data/sample_video.avi"],
  "object_annotations": [ {
    "annotation_spec": {
      "display_name": "Cat",
      "description": "Cat"
    },
    "confidence": 0.43253016
    "frames": [ {
      "frame": {
        "time_offset": {
          "seconds": 4,
          "nanos": 960000000
        },
        "normalized_bounding_box": {
          "x_min": 0.1,
          "y_min": 0.1,
          "x_max": 0.8,
          "y_max": 0.8
        }
      }
    }, {
      "frame": {
        "time_offset": {
          "seconds": 5,
          "nanos": 960000000
        },
        "normalized_bounding_box": {
          "x_min": 0.2,
          "y_min": 0.2,
          "x_max": 0.9,
          "y_max": 0.9
        }
      }
    } ],
    "segment": {
      "start_time_offset": {
          "seconds": 4,
          "nanos": 960000000
      },
      "end_time_offset": {
          "seconds": 5,
          "nanos": 960000000
      }
    }
  } ],
  "error": {
    "details": [ ]
  }
}