Chirp is the next generation of Google's speech-to-text models. Representing the culmination of years of research, the first version of Chirp is now available for Speech-to-Text. We intend to improve and expand Chirp to more languages and domains. For details, see our paper, Google USM.
We trained Chirp models with a different architecture than our current speech models. A single model unifies data from multiple languages. However, users still specify the language in which the model should recognize speech. Chirp does not support some of the Google Speech features that other models have. See below for a complete list.
Model identifiers
Chirp is available in the Speech-to-Text API v2. You can leverage it like any other model.
The model identifier for Chirp is: chirp.
You can specify this model while creating a recognizer or inline in synchronous or batch recognition requests.
Available API methods
Chirp processes speech in much larger chunks than other models do. This means it might not be suitable for true, real-time use. Chirp is available through the following API methods:
v2Speech.Recognize(good for short audio < 1 min)v2Speech.BatchRecognize(good for long audio 1 min to 8 hrs)
Chirp is not available on the following API methods:
v2Speech.StreamingRecognizev1Speech.StreamingRecognizev1Speech.Recognizev1Speech.LongRunningRecognizev1p1beta1Speech.StreamingRecognizev1p1beta1Speech.Recognizev1p1beta1Speech.LongRunningRecognize
Regions
Chirp is available in the following regions:
us-central1europe-west4asia-southeast1
See the languages page for more information.
Languages
You can see the supported languages in the full language list.
Feature support and limitations
Chirp does not currently support many of the STT API features. See below for specific restrictions.
- Confidence scores: The API returns a value, but it isn't truly a confidence score.
- Speech adaptation: No adaptation features supported.
- Diarization: Automatic diarization isn't supported.
- Forced normalization: Not supported.
- Word level confidence: Not supported.
- Language detection: Not supported.
Chirp does support the following features:
- Automatic punctuation: The punctuation is predicted by the model. It can be disabled.
- Word timings: Optionally returned.
- Language-agnostic audio transcription: The model automatically infers the spoken language in your audio file and adds it to the results.
Before you begin
- Sign in to your Google Cloud account. If you're new to Google Cloud, create an account to evaluate how our products perform in real-world scenarios. New customers also get $300 in free credits to run, test, and deploy workloads.
-
In the Google Cloud console, on the project selector page, select or create a Google Cloud project.
-
Make sure that billing is enabled for your Google Cloud project.
-
Enable the Speech-to-Text APIs.
-
Make sure that you have the following role or roles on the project: Cloud Speech Administrator
Check for the roles
-
In the Google Cloud console, go to the IAM page.
Go to IAM - Select the project.
-
In the Principal column, find the row that has your email address.
If your email address isn't in that column, then you do not have any roles.
- In the Role column for the row with your email address, check whether the list of roles includes the required roles.
Grant the roles
-
In the Google Cloud console, go to the IAM page.
Go to IAM - Select the project.
- Click Grant access.
- In the New principals field, enter your email address.
- In the Select a role list, select a role.
- To grant additional roles, click Add another role and add each additional role.
- Click Save.
-
- Install the Google Cloud CLI.
-
To initialize the gcloud CLI, run the following command:
gcloud init
-
Create local authentication credentials for your Google Account:
gcloud auth application-default login
Client libraries can use Application Default Credentials to easily authenticate with Google APIs and send requests to those APIs. With Application Default Credentials, you can test your application locally and deploy it without changing the underlying code. For more information, see Authenticate for using client libraries.
Also ensure you have installed the client library.
Perform synchronous speech recognition with Chirp
Here is an example of performing synchronous speech recognition on a local audio file using Chirp:
Python
Make a request with language-agnostic transcription enabled
The following code samples demonstrate how to make a request with language-agnostic transcription enabled.
Python
Getting started with Chirp in the Google Cloud console
- Ensure you have signed up for a Google Cloud account and created a project.
- Go to Speech in Google Cloud console.
- Enable the API if it's not already enabled.
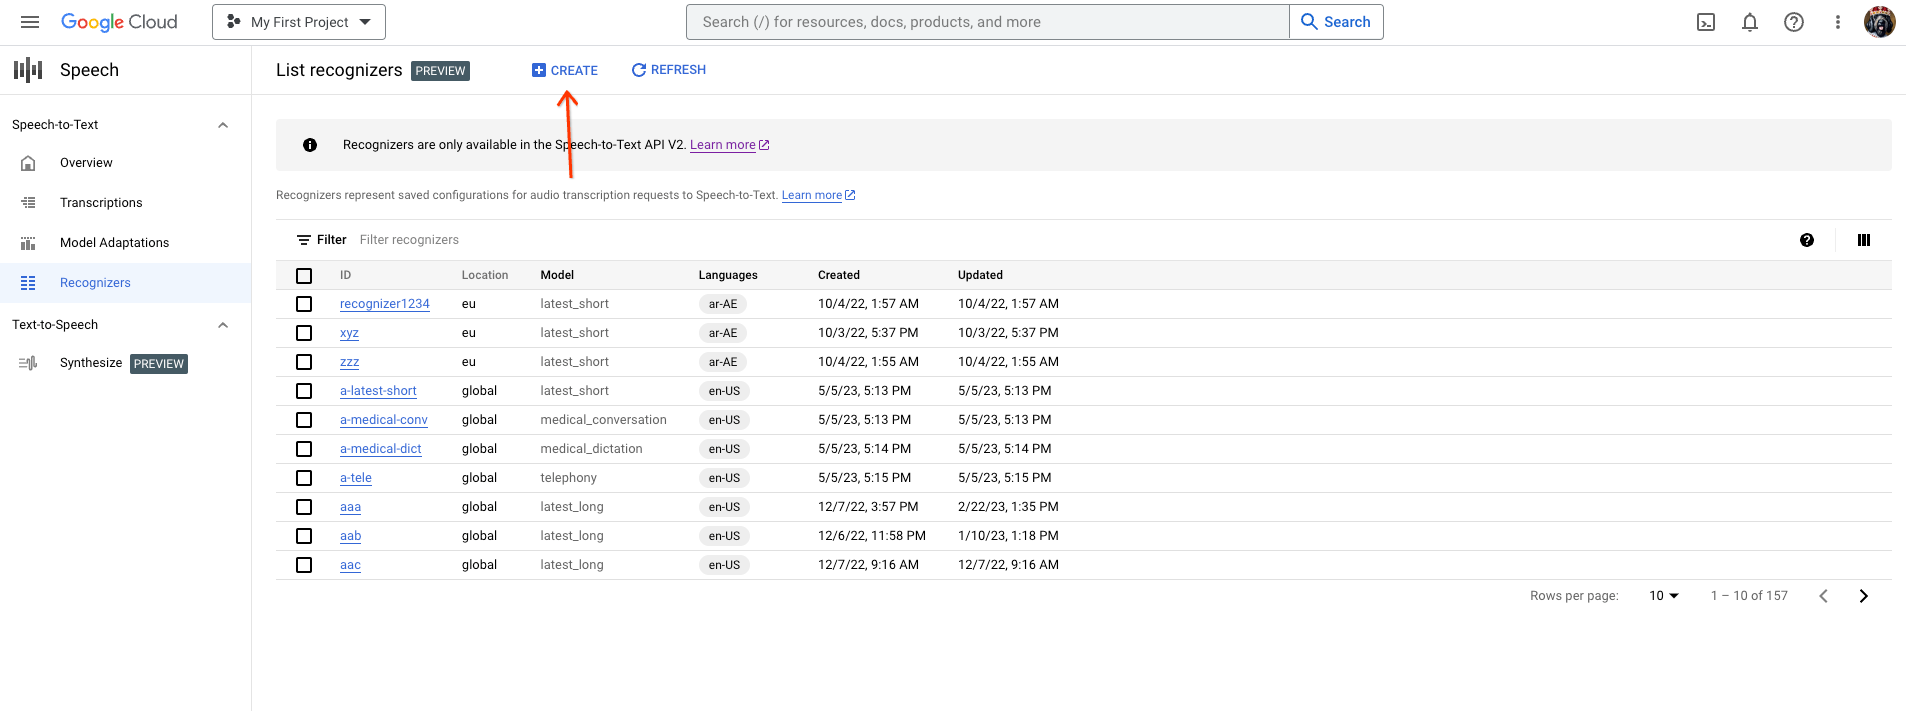
Create an STT Recognizer that uses Chirp. a. Go to the Recognizers tab and click Create.
b. From the Create Recognizer page, enter the necessary fields for Chirp.
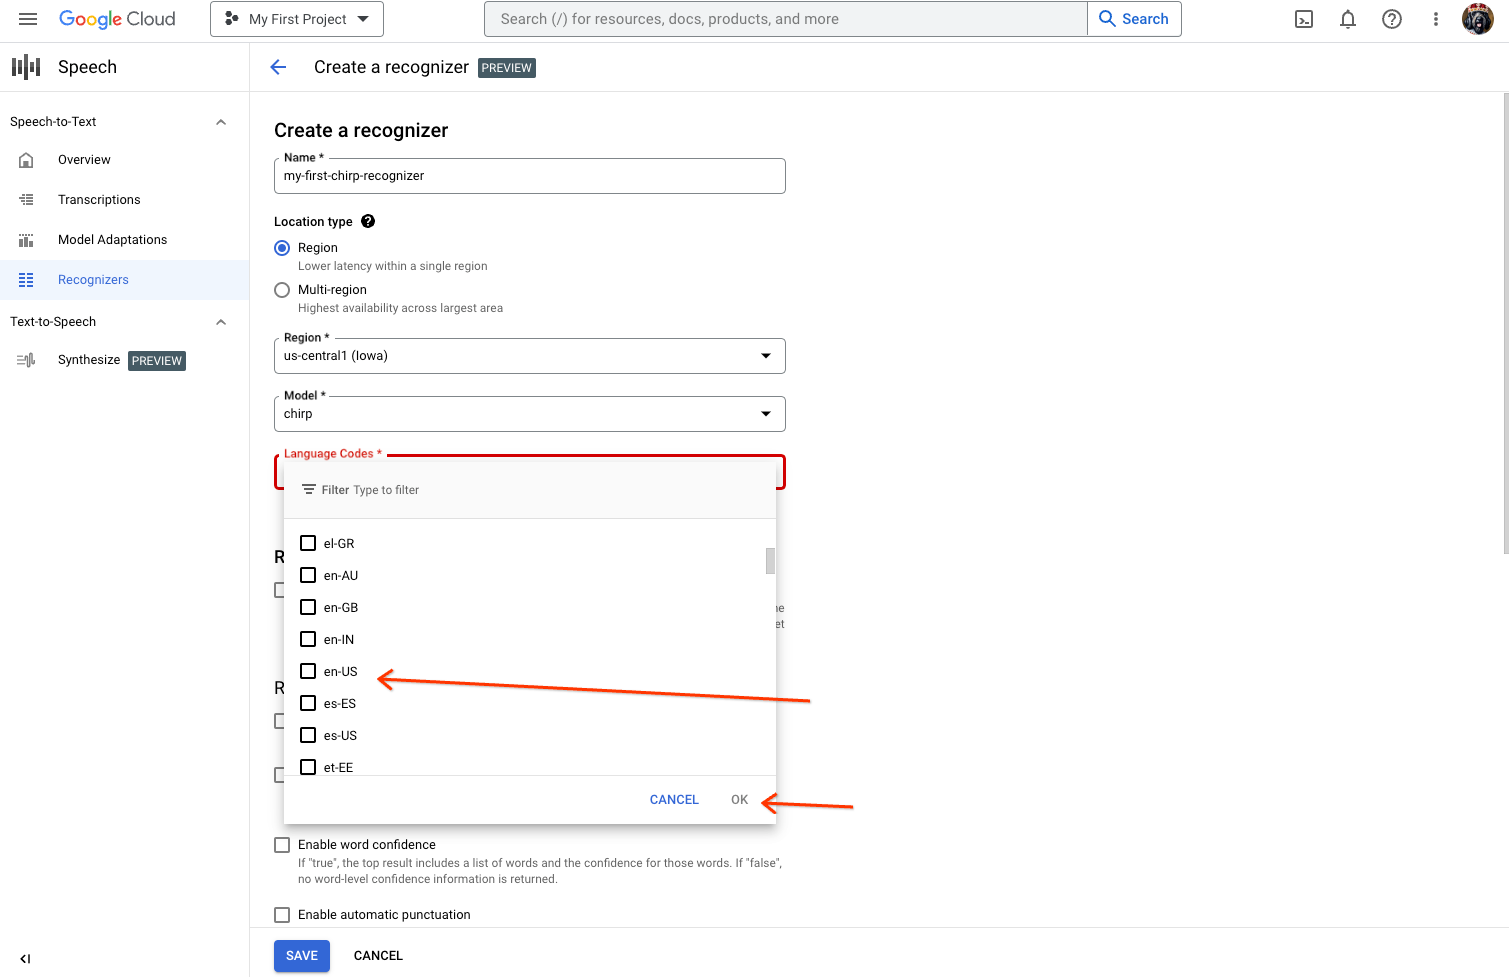
i. Name your recognizer.
ii. Select chirp as the Model.
iii. Select the language you want to use. You must use one recognizer per language that you plan to test.
iv. Do not select any other features.
Make sure that you have an STT UI Workspace. If you do not have one already, you need to create a workspace. a. Visit the transcriptions page, and click New Transcription.
b. Open the Workspace dropdown and click New Workspace to create a workspace for transcription.
c. From the Create a new workspace navigation sidebar, click Browse.
d. Click to create a new bucket.
e. Enter a name for your bucket and click Continue.
f. Click Create to create your Cloud Storage bucket.
g. Once the bucket is created, click Select to select your bucket for use.
h. Click Create to finish creating your workspace for the speech-to-text UI.
Perform a transcription on your actual audio.

a. From the New Transcription page, select your audio file through either upload (Local upload) or specifying an existing Cloud Storage file (Cloud storage). Note: The UI tries to assess your audio file parameters automatically.
b. Click Continue to move to the Transcription options.

c. Select the Spoken language that you plan to use for recognition with Chirp from your previously created recognizer.
d. In the model dropdown, select Chirp - Universal Speech Model.
e. In the Recognizer dropdown, select your newly created recognizer.
f. Click Submit to run your first recognition request using Chirp.
View your Chirp transcription result. a. From the Transcriptions page, click the name of the transcription to view its result.
b. In the Transcription details page, view your transcription result, and optionally playback the audio in the browser.
Clean up
To avoid incurring charges to your Google Cloud account for the resources used on this page, follow these steps.
-
Optional: Revoke the authentication credentials that you created, and delete the local credential file.
gcloud auth application-default revoke
-
Optional: Revoke credentials from the gcloud CLI.
gcloud auth revoke
Console
gcloud
Delete a Google Cloud project:
gcloud projects delete PROJECT_ID
What's next
- Practice transcribing short audio files.
- Learn how to transcribe streaming audio.
- Learn how to transcribe long audio files.
- For best performance, accuracy, and other tips, see the best practices documentation.