| title | description | author | tags | date_published |
|---|---|---|---|---|
Creating translated subtitles with AI |
Use the Speech-to-Text API and Translation API to transcribe dialog to SRT subtitles, and localize subtitles for different languages. |
lepistom |
AI, ML, artificial intelligence, machine learning |
2020-06-09 |
Markku Lepisto | Solutions Architect | Google
Contributed by Google employees.
This tutorial shows you how to use the Google Cloud AI services Speech-to-Text API and Translation API to add subtitles to videos and to provide localized subtitles in other languages.
This tutorial shows how to do the following:
- Transcribe audio files with spoken dialog into text and SRT subtitle files.
- Get accurate timings of spoken sentences for subtitles.
- Translate subtitles to other languages.

This tutorial uses billable components of Google Cloud, including the following:
- Cloud Storage
- Cloud Speech-to-Text
- Cloud Translation
This tutorial should not generate any usage that would not be covered by the free tier, but you can use the Pricing Calculator to generate a cost estimate based on your projected production usage.
To see this tutorial in action, you can watch the Google Cloud Level Up episode first, and then follow the steps in this tutorial yourself.
This tutorial assumes that you already have a Google Cloud account set up.
- Go to the Cloud Console.
- Click the project selector in the upper-left corner and select New Project.
- Give the project a name and click Create.
- Click the project selector again and select your new project.
-
On your local development machine, install the following tools:
- Google Cloud SDK (gcloud command-line tool)
- git
- python3
- pip
-
Configure
gcloudto use your new Google Cloud project:gcloud init -
Export an environment variable with your current Google Cloud project ID:
PROJECT_ID=$(gcloud info --format='value(config.project)') -
Enable the services used in this tutorial:
gcloud services enable speech.googleapis.com texttospeech.googleapis.com translate.googleapis.com storage-component.googleapis.com -
Clone the GitHub repository associated with the community tutorials:
git clone https://github.com/GoogleCloudPlatform/community.git -
Change to the tutorial directory:
cd community/tutorials/speech2srt -
Create a new Python 3 virtual environment:
python3 -m venv venv -
Activate the virtual environment:
source venv/bin/activate -
Install the required Python modules:
pip3 install -r requirements.txt -
Create two Cloud Storage buckets: one for input, one for output. Because bucket names are a global namespace, you must use unique bucket names.
-
Export the two bucket names into environment variables. Replace
[YOUR_FIRST_BUCKET]and[YOUR_SECOND_BUCKET]with your custom bucket names:BUCKET_IN=[YOUR_FIRST_BUCKET] BUCKET_OUT=[YOUR_SECOND_BUCKET] -
Create the buckets:
gsutil mb gs://$BUCKET_IN
gsutil mb gs://$BUCKET_OUT
-
In this section, you create a Service Account in your Google Cloud project and grant sufficient permissions to it so that it can use the AI services. You also download a JSON key for the Service Account. The JSON key is used by the Python utilities to authenticate with the Cloud services.
-
Create a new Service Account:
gcloud iam service-accounts create ml-dev --description="ML APIs developer access" --display-name="ML Developer Service Account" -
Grant the ML Developer role to the Service Account:
gcloud projects add-iam-policy-binding $PROJECT_ID --member serviceAccount:ml-dev@$PROJECT_ID.iam.gserviceaccount.com --role roles/ml.developer -
Grant the Project Viewer role to the Service Account:
gcloud projects add-iam-policy-binding $PROJECT_ID --member serviceAccount:ml-dev@$PROJECT_ID.iam.gserviceaccount.com --role roles/viewer -
Grant the Storage Object Admin role to the Service Account, so that it can upload and download objects to and from Cloud Storage:
gcloud projects add-iam-policy-binding $PROJECT_ID --member serviceAccount:ml-dev@$PROJECT_ID.iam.gserviceaccount.com --role roles/storage.objectAdmin -
Create a JSON key for the Service Account:
gcloud iam service-accounts keys create ./ml-dev.json --iam-account ml-dev@$PROJECT_ID.iam.gserviceaccount.comThe key file will be downloaded to the current working directory.
-
Export your service account JSON key to the shell environment variables, so that the utilities can authenticate with the Cloud AI services:
export GOOGLE_APPLICATION_CREDENTIALS=ml-dev.json
The goal of this tutorial is to generate SRT subtitle files that you can use in your video player, or upload to platforms such as YouTube.
Example SRT subtitle file with two subtitle entries:
1
00:00:00,000 --> 00:00:01,800
This is an example text file.

2
00:00:01,800 --> 00:00:04,300
It can be used to test the artificial intelligence.
Each entry contains the following items:
- incrementing index number, starting from 1
- start and stop times for the subtitle, in the format hh:mm:ss,ms
- subtitle body in one or more lines of text
The input data for the solution is an audio file that contains spoken dialog. The first step is to transcribe the audio file's speech to text.
Your starting point may be any of these or more:
- a new video in post-production, being edited before publishing
- an existing video encoded as a playback-optimized video file
- an existing multichannel audio file in which one track contains the dialog
- an audio recording of just the spoken dialog
Regardless of the source data type, you need to prepare an audio file for transcribing that contains only the spoken dialog. If possible, the file should not contain any other audio (such as music), or video tracks. The audio file should be in a format that can be used by the Cloud Speech-to-Text API. To prepare an optimized audio file, follow the steps in Optimizing audio files for Speech-to-Text. The quality of the audio input can greatly affect the quality of the transcribed output.
This tutorial includes a pre-created audio file example.wav, which the next steps use for demonstration.
To transcribe audio files, this tutorial uses the example utility speech2srt.py.
The utility performs the following steps:
-
Configures the API request and sets the following parameters:
-
"enable_word_time_offsets": TrueThis gives millisecond-accurate start and stop times of each spoken word.
-
"enable_automatic_punctuation": TrueThis adds punctuation marks, such as commas or periods.
-
-
Calls the Cloud Speech-to-Text API and passes input parameters to the service:
- URI of the source audio file in Cloud Storage (example:
gs://$BUCKET_IN/example.wav) - Sample rate of the audio in Hertz (default:
16000) - Language code of the spoken dialog (default:
en-us) - Max characters per line, before breaking to the next line (default:
40)
- URI of the source audio file in Cloud Storage (example:
-
Receives the transcribed text from the service, including metadata (including the timing of each spoken word).
-
Writes two output files:
- a plain text file, with each sentence on a separate line (breaking to the next sentence with either a punctuation mark, or if the sentence exceeds the configured maximum characters per line limit)
- an SRT subtitle file, with each sentence as a separate subtitle entry
To transcribe the audio file, do the following:
-
Upload your dialog audio file to the Cloud Storage bucket:
gsutil cp example.wav gs://$BUCKET_IN/ -
View the command-line options for the transcribing utility:
python3 speech2srt.py -h -
Transcribe the file
example.wav:python3 speech2srt.py --storage_uri gs://$BUCKET_IN/example.wav --sample_rate_hertz 24000If successful, the command should output the following:
Transcribing gs://[YOUR_FIRST_BUCKET]/example.wav ...
Transcribing finished
Writing en-US subtitles to: en.srt
Writing text to: en.txt
Example plain text output
en.txt:This is an example text file. It can be used to test the artificial intelligence solution the solution can transcribe spoken dialogue in to text. It can convert text into subtitles and it can translate subtitles to multiple Target languages.Example SRT subtitles output
en.srt:1 00:00:00,000 --> 00:00:01,800 This is an example text file. 2 00:00:01,800 --> 00:00:04,300 It can be used to test the artificial intelligence 3 00:00:04,300 --> 00:00:08,300 solution the solution can transcribe spoken dialogue 4 00:00:08,300 --> 00:00:08,900 in to text. 5 00:00:08,900 --> 00:00:12,100 It can convert text into subtitles and it can translate 6 00:00:12,100 --> 00:00:14,500 subtitles to multiple Target languages.The file
en.txtis used as the translation input file for translating into other languages in later steps. Theen.srtfile subtitles file for your video. -
Open both output files
en.txtanden.srtin a text editor and fix any transcribing mistakes where necessary. -
Load the SRT subtitles file in your video player, enable subtitles, and verify that the subtitles are displayed correctly. Refer to the Level Up YouTube episode for an example on how to load the subtitles to YouTube Studio.
Now that you have created subtitles in the original language, you can use the
Cloud Translation API to generate subtitles in other languages. To achieve this,
you can use the included utilities translate_txt.py and txt2srt.py.
The utilities perform the following steps:
- Queries and prints the list of languages that the Translation API can translate to and from.
- Calls the API with the
batch_translatemethod. - Uses the source text file in Cloud Storage as the input.
- Specifies the source text file's original language.
- Specifies the target languages for the translation operation.
- Specifies the output bucket for the translation text files and descriptive
index.csvfile.
- Reads the translation output file
index.csvto identify the translated output text files. - Opens the original language SRT subtitle file to read the timings for each subtitle entry.
- For each translated text file, does the following:
- Replaces the original language subtitle's body text with the translated text.
- Writes the translated subtitles as SRT output files.
The tools match the sentences in the plain text files, and SRT subtitle files, by their line and index number. For example, line 1 in the plain text file has the same content as the SRT subtitle at index 1. For this reason, the current versions of the utilities only support 1 line of text per subtitle entry.
To generate subtitles for multiple target languages, do the following:
-
Upload the transcribed original language text to Cloud Storage:
gsutil cp en.txt gs://$BUCKET_IN/ -
View the command-line options for the utility
translate_txt.py:python3 translate_txt.py -h -
The output bucket must be empty before executing the translation step. To empty the bucket, use the following command:
(venv) $ gsutil rm gs://$BUCKET_OUT/* -
Call the Translation API service and specify the list of target languages:
python3 translate_txt.py --project_id $PROJECT_ID --source_lang en --target_lang ko,hi --input_uri gs://$BUCKET_IN/en.txt --output_uri gs://$BUCKET_OUT/This example command specifies that you want to translate the plain text file
gs://$BUCKET_IN/en.txtto Korean and Finnish, and store the output files in the Cloud Storage bucketgs://$BUCKET_OUT.If everything went well, the output should look like the following:
Supported Languages: af am ar az be bg bn bs ca ceb co cs cy da de el en eo es et eu fa fi fr fy ga gd gl gu ha haw hi hmn hr ht hu hy id ig is it iw ja jw ka kk km kn ko ku ky la lb lo lt lv mg mi mk ml mn mr ms mt my ne nl no ny or pa pl ps pt ro ru rw sd si sk sl sm sn so sq sr st su sv sw ta te tg th tk tl tr tt ug uk ur uz vi xh yi yo zh-CN zh-TW zu Waiting for operation to complete... Total Characters: 484 Translated Characters: 484 -
Copy the output files to your local machine:
gsutil cp gs://$BUCKET_OUT/* . -
View the
index.csvfile, which contains information about the translation operation output files:cat index.csvThe output should be the following:
gs://[YOUR_FIRST_BUCKET]/en.txt,fi,gs://[YOUR_SECOND_BUCKET]/en_fi_translations.txt,,,
gs://{YOUR_FIRST_BUCKET]/en.txt,ko,gs://[YOUR_SECOND_BUCKET]/en_ko_translations.txt,,,
Here you can see that the service translated the source file
en.txtand wrote two output files, in Finnish and Korean, respectively. -
Create SRT subtitles from the Finnish and Korean plain text files:
python3 txt2srt.py --srt en.srt --index index.csvYou should see the following command output:
Loading en.srt
Updating subtitles for each translated language
Wrote SRT file fi.srt
Wrote SRT file ko.srt
The utility
txt2srt.pygenerated the translated subtitles by loading the originalen.srtEnglish subtitles for the timing information, and replaced each subtitle entry's body text with the corresponding line of text, from the Finnish and Korean translated files. -
Check the translated subtitles:
head -8 fi.srtThe output should look like the following:
1 00:00:00,000 --> 00:00:01,800 Tämä on esimerkki tekstitiedostosta. 2 00:00:01,800 --> 00:00:04,300 Sitä voidaan käyttää tekoälyn testaamiseen -
As with the original language speech-to-text transcribing result, check the output files and fix any mistakes using a text editor.
Now you have subtitles for your video in multiple languages.
To avoid incurring charges to your Google Cloud account for the resources used in this tutorial, you can delete the project.
Caution: Deleting a project has the following consequences:
- If you used an existing project, you'll also delete any other work you've done in the project.
- You can't reuse the project ID of a deleted project. If you created a custom project ID that you plan to use in the
future, delete the resources inside the project instead. This ensures that URLs that use the project ID, such as
an
appspot.comURL, remain available.
To delete a project, do the following:
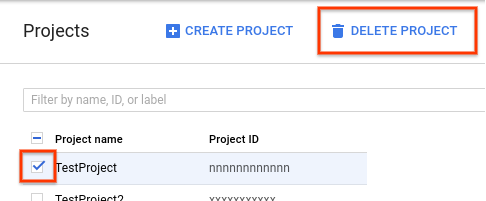
- In the Cloud Console, go to the Projects page.
- In the project list, select the project you want to delete and click Delete project.
- In the dialog, type the project ID, and then click Shut down to delete the project.
- Watch this tutorial's Google Cloud Level Up episode on YouTube
- Learn more about AI on Google Cloud
- Learn more about Cloud developer tools
- Try out other Google Cloud features for yourself. Have a look at our tutorials.