This page describes how to enable optional features on an in-cluster control plane. For information on the Google-managed control plane, see Configuring the Google-managed control plane.
When you install Anthos Service Mesh, the features that are
enabled by default differ by platform. You
enable optional features by including an overlay file when you install
(or upgrade) Anthos Service Mesh. An overlay file is a YAML file containing an
IstioOperator custom resource (CR)
that you use to configure the control plane. You can override the default
configuration and enable an optional feature or disable a default
feature in an overlay file. Specify one feature per overlay file. You can
layer on more overlays, and each overlay file overrides the configuration on the
previous layers.
About the overlay files
The overlay files on this page are in the
anthos-service-mesh
package in GitHub. These files contain common customizations to the default
configuration. You can use these files as they are, or you can make additional
changes to them as needed.
When you install Anthos Service Mesh using the
istioctl installcommand, you can specify one or more overlay files with the-fcommand-line option. Although you can modify the configuration by specifying configuration parameters on the command-line by using the--setoption toistioctl install, we recommend that you use an overlay file so you can store the file in your version-control system along with your other custom resource files. You need to keep these files for when you upgrade Anthos Service Mesh so that your control plane has the same configuration after the upgrade.When you install Anthos Service Mesh using the Google-provided
install_asmscript, you can specify one or more overlay files with the--optionor the--custom_overlayoptions. If you don't need to make any changes to the files in theanthos-service-meshrepository, you can use--option, and the script fetches the file from GitHub for you. Otherwise, you can make changes to the overlay file, and then use the--custom_overlayoption to pass it to theinstall_asmscript.
| Don't include multiple CRs in one overlay file | Create separate overlay files for each CR |
|---|---|
 |
 |
Downloading the anthos-service-mesh package
To download the anthos-service-mesh package:
The following steps use kpt to download the asm package from the
GitHub repository. If you prefer, you can use git clone instead.
Install
kptif you haven't already:gcloud components install kptDownload the package that contains the files:
kpt pkg get \
https://github.com/GoogleCloudPlatform/anthos-service-mesh-packages.git/asm@release-1.10-asm asm
The following examples assume that the
asmpackage is in your current working directory.
How to enable optional features
To enable a feature when you are installing Anthos Service Mesh, the exact command
differs slightly depending on your platform and whether you are using the
install_asm script or the istioctl install command.
The following examples are simplified to show only using the custom overlays to
enable optional features. Replace OTHER_FLAGS with the
command line options from the installation guide that you're following.
Using the install_asm script
The install_asm script provides two ways to enable an optional feature. The
method that you use depends on whether you need to make changes to the overlay
file.
Use
--optionwhen you don't need to make any changes to the overlay file. With--option,install_asmfetches the file from the GitHub repository for you, so you must have an internet connection../install_asm \ OTHER_FLAGS \ --option OPTION_NAMEReplace
OPTION_NAMEwith the option you want to enable. For a list of options refer to theanthos-service-meshpackage.Use
--custom_overlaywhen you need to customize the overlay file../install_asm \ OTHER_FLAGS \ --custom_overlay PATH_TO_FILEReplace
PATH_TO_FILEwith the path to the overlay file you want to use.
Using the istioctl install command
You use the istioctl install command for multi-project installations on
GKE and for platforms that aren't on Google Cloud, such as
GKE on VMware.
Use
-fto include the overlay file. This can be an overlay file from theanthos-service-meshpackage without customizations or a custom overlay file.istioctl install \ OTHER_FLAGS \ -f PATH_TO_FILEReplace
PATH_TO_FILEwith the path to the overlay file you want to use.
YAML for optional features
The following sections provide the YAML to enable optional and supported features.
mTLS STRICT mode
The global.mtls.enabled configuration was removed from the IstioOperator
CR to avoid issues with upgrades and to provide a more flexible installation.
To enable STRICT mTLS,
configure a
peer authentication policy instead.
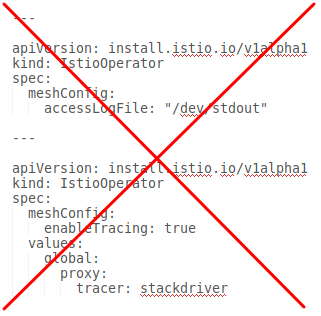
Direct Envoy to stdout
For more information, see Enable Envoy's access logging.
Cloud Trace
Cloud Trace is available with Anthos Service Mesh installations on the following platforms:
- GKE on Google Cloud
- GKE Enterprise clusters on-premises if you install with Anthos Service Mesh certificate authority (Mesh CA)
For detailed pricing information, refer to the Cloud Trace pricing page.
The default sampling rate is 1%, but you can override the default by specifying
a tracing.sampling value. The value must be in the range of 0.0 to 100.0 with a
precision of 0.01. For example, to trace 5 requests out of every 10,000, use
0.05.
The following example shows a sampling rate of 100% (which you would only do for demo or troubleshooting purposes).
apiVersion: install.istio.io/v1alpha1
kind: IstioOperator
spec:
  meshConfig:
    enableTracing: true
    defaultConfig:
      tracing:
        sampling: 100
  values:
    global:
      proxy:
        tracer: stackdriver
Note that currently tracer configuration is part of proxy bootstrap configuration, so pod needs to restart and get re-injected to pick up the tracer update. For example, you can use the following command the restart pods belong to a deployment:
kubectl rollout restart deployment -n NAMESPACE DEPLOYMENT_NAME
Trace context propagation
Although the sidecar proxies can automatically send trace spans, they need some hints to tie together the entire trace. Applications need to propagate the appropriate HTTP headers so that when the proxies send span information, the spans can be correlated correctly into a single trace.
To do this, an application needs to collect and propagate the following headers from the incoming request to any outgoing requests:
- x-request-id
- x-b3-traceid
- x-b3-spanid
- x-b3-parentspanid
- x-b3-sampled
- x-b3-flags
- x-ot-span-context
- x-cloud-trace-context
- traceparent
- grpc-trace-bin
For examples propagating the headers, see Trace context propagation.
Create a trace from client with custom ID
To create a trace from a client with a custom ID, use the curl command to
create a request with an external client and force it to show a trace. For example:
curl $URL --header "x-client-trace-id: 105445aa7843bc8bf206b12000100000"
For more information about x-client-trace-id, refer to the
Envoy documentation.
Egress via egress gateways
For more information, see Egress Gateways.
Istio Container Network Interface
How you enable the Istio Container Network Interface (CNI) depends on the environment that Anthos Service Mesh is installed on.
Choose the overlay file that matches your platform.
Enable CNI on GKE
Enable CNI on-premises
Enable an internal load balancer
For installations on GKE, you can enable an internal load balancer for the Istio ingress gateway.
External certificate management on the ingress gateway
For information on enabling external certificate management on the ingress gateway using Envoy SDS, see Secure Gateways.