Schedule and run custom scans on a deployed application using Web Security Scanner in the Google Cloud console. Web Security Scanner supports scans for public URLs and IPs that aren't behind a firewall.
Before you begin
To set up custom scans using Web Security Scanner:
- You must have a deployed application on a public URL or IP.
- You must have Security Command Center enabled.
Before you scan, carefully audit your application for any feature that may affect data, users, or systems beyond the desired scope of your scan.
Because Web Security Scanner populates fields, pushes buttons, clicks links, and other interaction, you should use it with caution. Web Security Scanner might activate features that change the state of your data or system, with undesirable results. For example:
- In a blog application that allows public comments, Web Security Scanner might post test strings as comments on all your blog articles.
- In an email sign-up page, Web Security Scanner might generate large numbers of test emails.
For tips about how to minimize risk, see best practices to prevent unintended consequences.
Enable Web Security Scanner
Enable Web Security Scanner in Security Command Center to create and run custom scans.
If Security Command Center is active, you can enable Web Security Scanner in the Google Cloud console on the Security Command Center Settings page.
Step 1: Deploying a test application
To complete Web Security Scanner setup for custom scans, you need the URL of a Compute Engine, Google Kubernetes Engine (GKE), or App Engine application that is already deployed. If you don't have a deployed application, or if you want to try out Web Security Scanner with a test application, deploy the test App Engine application. Use the language of your choice:
Step 2: Assign IAM roles
To run a Web Security Scanner scan, you must have one of the following Identity and Access Management (IAM) roles for the project you want to scan:
- Editor
- Owner
To add one of these roles:
- Go to the IAM & Admin page in the
Google Cloud console.
Go to the IAM & Admin page - Click the Project selector drop-down list.
- On the Select from dialog that appears, select the project that you want to scan using Web Security Scanner.
- On the IAM page, next to your username, click Edit.
- On the Edit permissions panel that appears, click Add another role,
and then select one of the following roles:
- Project > Owner
- Project > Editor
- When you're finished adding roles, click Save.
Learn more about Web Security Scanner roles.
Step 3: Run a scan
When you set up a scan, it's queued to run later. Depending on current load, it might be several hours before a scan executes. To create, save, and run a scan:
- Go to the Web Security Scanner page in the Google Cloud console.
Go to the Web Security Scanner page - Select the project that contains the deployed application you want to scan.
- To set up a new scan, click New scan:
On the Create a new scan page that loads, set the following values:
- Under Starting URLs, enter the URL of the application you want to scan.
- Under Schedule, select Weekly.
- Under Next run on, select a date.
The box to Export to Security Command Center is automatically checked. If you've enabled Web Security Scanner as a Security Command Center security source, scan results can be displayed in the Google Cloud console.
For this first scan, use the default scan without changing any other values on the Create a new scan page. For more information about scan settings, see Scanning an app.
To create the scan, click Save.
On the Web Security Scanner page, click the scan name to load its overview page, and then click Run scan.
The scan will be queued, and then it will run at a future time. It might take several hours before the scan runs.
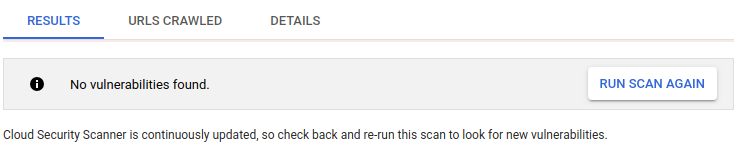
The scan overview page displays a results section when the scan completes. The following image shows example scan results when no vulnerabilities are detected:
If you've enabled Web Security Scanner as a Web Security Scanner security source, scan results are also displayed on the Google Cloud console.
To display details about a specific finding, click the finding name in the scan results.
You have now completed a basic Web Security Scanner scan. If you scanned your own application, learn how to customize the scan in the scanning an app section on this page.
If you deployed a test application to run the scan, complete the following clean up step on this page to avoid incurring App Engine charges for the application.
Step 4: Cleaning up
- In the Google Cloud console, go to the Manage resources page.
- In the project list, select the project that you want to delete, and then click Delete.
- In the dialog, type the project ID, and then click Shut down to delete the project.
Scanning an app
Set up a custom scan for your app using a test account.
Step 1: Creating a test account
When you scan your app, it's best to use a test account that doesn't have access to sensitive data or harmful operations. Create a test account that can sign in to your app. Note the login credentials to provide for authentication when creating a scan. The credentials enable you to use the test account to scan data.
Step 2: Creating a scan
- Go to the Web Security Scanner page
in the Google Cloud console.
Go to the Web Security Scanner page - Click Select, and then select a project that already has an App Engine, Compute Engine, or GKE application deployed.
- To display the new scan form, click Create scan or New scan.
- To add values to the new scan form, use the following table as a guide:
Field Description Starting URLs A simple site usually requires only one starting URL, like the home, main, or landing page for the site, from which Web Security Scanner can find all other site pages. However, Web Security Scanner might not find all pages if a site has:
- Many pages
- Islands of unconnected pages
- Navigation that requires complex JavaScript like a mouseover-driven multilevel menu
In such cases, specify more starting URLs to increase scan coverage.
Excluded URLs To reduce complexity, exclusions are defined using a simplified proto-language using one or more * wildcards, instead of requiring a valid regular expression. For details and sample valid patterns, see Excluding URLs later on this page. Authentication > Google account You can create a test account in Gmail and then use the account to scan your product. If you are a Google Workspace customer, you can create test accounts within your domain, for example,
test-account@yourdomain.com. In Web Security Scanner, these accounts work like Gmail accounts. Two factor authentication is not supported.Google enforces a real name policy on Google accounts. If the name on your test account doesn't look real, the account might be blocked.
Authentication > Identity-Aware Proxy alpha To protect resources with Identity-Aware Proxy, see the IAP guide.
To use Web Security Scanner with an IAP-protected resource, first grant access to the Web Security Scanner service account:
- Go to the IAP page in the Google Cloud console.
- Select the project that you want to use with Web Security Scanner.
- Select the application resource you want to scan, and then click Add Principal on the Info Panel.
-
In the New principals box on the Add principals panel,
enter the Web Security Scanner service account in the form of
service-project-number@gcp-sa-websecurityscanner.iam.gserviceaccount.com. - On the Select a role drop-down list, select Cloud IAP > IAP Secured Web App User.
- When you're finished adding roles, click Save.
Next, add the OAuth client ID to the scan. Web Security Scanner can only scan applications that are protected by a single OAuth Client ID. To add the OAuth client ID:
- Go to the IAP page in the Google Cloud console.
- Select the project that you want to use with Web Security Scanner.
- On the Overflow menu, select Edit OAuth Client.
- On the Client ID for web application window that appears, copy the Client ID.
- Go to the Web Security Scanner page in the Google Cloud console.
- Under Authentication, select Identity-Aware Proxy alpha.
- In the OAuth2 Client ID box, paste the OAuth client ID that you copied, and then click Save.
Authentication > Non-Google account Select this option if you have created your own authentication system and you aren't using Google Account services. Specify the login form's URL, the username, and the password. These credentials are used to sign in to your application and scan it.
Web Security Scanner attempts heuristics to sign in to your application, and scan it. Specifically, this method looks for a two field login-form that includes a
usernamefield andpasswordfield. The login action must result in an authentication cookie for the scanner to continue its scan.Common issues can cause custom login to fail include:
-
Using non-standard HTML form fields, for example, not using a
passwordtype. -
Using a complicated login form, for example, a form that has more
than a single
usernameandpasswordfield. - Not saving an authentication cookie on successful login.
- In some situations, the scanner is denied by counter-measures that are meant to protect against bots, DDOS, and other attacks.
We recommend using Identity-Aware Proxy integration for the most consistent experience with authenticated scanning of applications.
Schedule You can set the scan to run daily, weekly, every two weeks, or every four weeks. It's best to create a scheduled scan to ensure that future versions of your application are tested. Also, because we occasionally release new scanners that find new bug types, running a scheduled scan offers more coverage without manual effort. Run scans from a predefined set of source IPs
PreviewSelect this option to restrict scan traffic to a predefined set of IP addresses. This lets you enable the scanner to access applications behind a firewall, but may limit the scope of the scan. To modify your firewall rules to allow Web Security Scanner traffic, see Configuring the firewall later on this page. Export options Select this option to automatically export scan configurations and scan results to Security Command Center. Ignore HTTP status errors This option controls whether a high number of HTTP status errors—for example, 400 Bad Request—during a scan will cause the scan to be reported as a failure. If the option is selected, status errors are ignored. If the option is not selected, and the percentage of status errors exceeds a predetermined threshold, the scan is reported as a failure. - When you're finished adding values, click Save. You can now run the new scan.
By default, Web Security Scanner uses randomly assigned IP addresses during each run. To make Web Security Scanner IP addresses predictable, complete the steps to enable scans from static IPs later on this page.
Step 3: Running a scan
To run a scan:
- Sign in to the test account that you used to create the scan.
- Go to the Web Security Scanner page
in the Google Cloud console.
Go to the Web Security Scanner page - Click Select, and then select the project that you created the scan in.
- Under Scan configs, click the name of the scan that you want to run.
- On the scan details page, click Run.
The scan is placed in a queue, and there might be a delay before it runs. It can take several minutes or many hours to run, depending on the system load and features like:
- Site complexity
- Number of actionable elements per page
- Number of links
- The amount of JavaScript on the site, including navigation
You can set up and run up to 10 different scans before you need to delete or clean up previously saved results.
Viewing custom scan results
The status and results of a custom scan are displayed on the scan details page in the Google Cloud console. To view scan results:
- Sign in to the test account that you used to create the scan.
- Go to the Web Security Scanner page
in the Google Cloud console.
Go to the Web Security Scanner page - Click Select, and then select the project that contains the scan that you want to review.
- Under Scan configs, click the name of the scan that you want to review.
The scan details page loads and displays results from the most recent scan. If a scan is in progress, the Results tab displays the current completion percent. To display results from previous scans, select the scan date and time from the drop-down list.
Details for completed custom scans include:
- The Results tab displays a list of vulnerabilities the scan found, if any.
- The URLs crawled tab displays a list of URLs that the scan checked.
- The Details tab includes:
- Starting URLs
- Authentication
- User agent
- Maximum scan speed as queries per second (QPS)
You can find more information about the scan in the project logs page.
Editing a custom scan
To edit a custom scan:
- Sign in to the test account that you used to create the scan.
- Go to the Web Security Scanner page
in the Google Cloud console.
Go to the Web Security Scanner page - Click Select, and then select the project that contains the scan that you want to edit.
- Under Scan configs, click the name of the scan that you want to edit.
- On the scan details page that appears, click Edit.
- On the Editing [scan name] page that appears, make changes that you want, and then click Save.
The edited custom scan runs when it's next scheduled, or you can manually run it to get updated results.
Deleting a custom scan
To delete one or more custom scans:
- Sign in to the test account that you used to create the scan.
- Go to the Web Security Scanner page
in the Google Cloud console.
Go to the Web Security Scanner page - Click Select, and then select the project that contains the scan that you want to edit.
- Under Scan configs, select the checkbox next to one or more scans that you want to delete.
- Click Delete, and then click Ok.
All scans that you selected are deleted.
Setting up a scan from static IPs
This section describes how to enable Web Security Scanner custom scans from static IP addresses. When you enable this feature, Web Security Scanner uses predictable IP addresses to scan your public Compute Engine and Google Kubernetes Engine applications. This feature is in Preview, and the Web Security Scanner IP addresses might change in a future release.
Before you begin
To use the Web Security Scanner custom scans from static IPs feature, you need:
- A public Compute Engine or GKE application. This feature currently doesn't support App Engine applications.
- A scan created with no authentication, or with Google account authentication. This feature currently doesn't support scans that use non-Google account authentication.
Step 1: Configuring the firewall
- Go to the Firewall rules page
in the Google Cloud console.
Go to the Firewall rules page - Click Select, and then select your project.
- On the Firewall rules page that appears, click Create Firewall Rule.
- On the Create a firewall rule page, set the following values:
- Name: enter
web-security-scanneror a similar name. - Priority: select a higher priority (lower number value) than all of the rules that deny egress traffic to your application.
- Source IP ranges: enter
34.66.18.0/26and34.66.114.64/26. - Protocols and ports: select Allow all or specify the protocols and
ports for your application. Usually, you can select the tcp checkbox
and then enter
80and443for the ports.
- Name: enter
- When you're finished setting values, click Create.
Step 2: Configuring the scan
After you configure your firewall to allow the Web Security Scanner predictable IP addresses, configure the scan to use pre-defined IPs:
- Go to the Web Security Scanner page
in the Google Cloud console.
Go to the Web Security Scanner page - Click Select, and then select your project.
- Create a new scan or edit an existing scan.
- Select the Run scans from a pre-defined set of source IPs checkbox.
- Save the scan.
The next time the scan runs, it will scan the public Compute Engine and GKE applications that are behind the firewall.
Excluding URLs
You can specify up to 100 excluded URL patterns to avoid testing sections of a site during a custom scan. Web Security Scanner doesn't request resources that match any of the exclusions. The following sections describe the pattern matching that Web Security Scanner uses.
URL pattern matching
Excluded URL matching is based on a set of URLs defined by match patterns. A match pattern is a URL with five segments:
scheme: for example,httpor*host: for example,www.google.comor*.google.comor*path: for example,/*,/foo*, or/foo/bar. *query: for example,?*,?*foo=bar*fragment: for example,#*,#access
Following is the basic syntax:
<exclude-pattern> := <scheme>://<host><path><query><fragment>
<scheme> := '*' | 'http' | 'https'
<host> := '*' | '*.' <any char except '/' and '*'>+
<path> := '/' <any chars except '?' or '#'>
<query> := '?' <any chars except '#'>
<fragment> := '#' <any chars>
The * in each part has the following function:
scheme:*matches either HTTP or HTTPS.host:*matches any host*.hostnamematches the specified host and any of its subdomains.
path:*matches 0 or more characters.
All segments are not required in an excluded pattern.
- If the
schemesegment is not specified, it defaults to*://. - The
hostsegment must always be specified. - If the
pathsegment is not specified, it defaults to:/*, ifqueryandfragmentsegments are not specified. This value matches anypathor nopath./, or an emptypath, if either thequeryorfragmentsegment is specified.
- If the
querysegment is not specified, it defaults to:?*, if thefragmentsegment is not specified. This value matches anyqueryor noquery.?, or an emptyquery, if thefragmentis specified.
- If the
fragmentsegment is not specified, it defaults to#*, which matches anyfragmentor nofragment.
Valid Pattern Matches
The following table provides examples of valid patterns:
| Pattern | Behavior | Sample matching URLs |
|---|---|---|
http://*/* |
Matches any URL that uses the HTTP scheme. |
|
http://*/foo* |
Matches any URL that uses the HTTP scheme, on any host, if the path starts
with /foo.
|
|
https://*.google.com/foo*bar |
Matches any URL that uses the HTTPS scheme and is on a
google.com host — like www.google.com,
docs.google.com, or google.com — if the path
starts with /foo and ends with bar.
|
|
http://example.org/foo/bar.html |
Matches the specified URL. |
http://example.org/foo/bar.html
|
http://127.0.0.1/* |
Matches any URL that uses the HTTP scheme and is on the host
127.0.0.1.
|
|
*://mail.google.com/* |
Matches any URL that starts with http://mail.google.com or
https://mail.google.com. |
|
*://*/foo*?*bar=baz* |
Matches any URL where the path starts with /foo and has the
query parameter bar=baz. |
https://www.google.com/foo/example?bar=baz |
google.com/app#*open* |
Matches any URL with a google.com host where the path
starts with /app and has the fragment
open. |
https://www.google.com/app/example#open |
Invalid pattern matches
The following table provides examples of invalid patterns:
| Pattern | Reason |
|---|---|
http://www.google.com |
The URL doesn't include a path. |
http://*foo/bar |
* in the host must be followed by a . or
/.
|
http://foo.*.bar/baz |
If * is in the host, it must be the first character.
|
http:/bar |
The URL is scheme separator isn't properly formed. The "/"
should be "//".
|
foo://* |
The URL scheme is invalid. |
What's next
- Learn how to remediate Web Security Scanner findings.