本教學課程適用於初次在雲端環境中建構應用程式的新手,以及想學習 Google Cloud 重要應用程式開發概念的人員,例如工程師和網頁開發人員。
目標
- 學習基本的 Google Cloud 工具,例如 Google Cloud Console 和
gcloud。 - 將您的應用程式部署至 App Engine 標準環境。
- 使用 Firestore 保留您的資料。
- 將上傳的檔案儲存在 Cloud Storage 中。
- 使用 Google Cloud 作業套件監控應用程式。
如要瞭解如何以其他語言建構應用程式,請參閱下列指南中的相關教學:
費用
In this document, you use the following billable components of Google Cloud:
The instructions in this document are designed to keep your resource usage within
the limits of Google Cloud's Always Free
tier.
To generate a cost estimate based on your projected usage,
use the pricing calculator.
When you finish the tasks that are described in this document, you can avoid continued billing by deleting the resources that you created. For more information, see Clean up.
事前準備
- Sign in to your Google Cloud account. If you're new to Google Cloud, create an account to evaluate how our products perform in real-world scenarios. New customers also get $300 in free credits to run, test, and deploy workloads.
-
In the Google Cloud console, on the project selector page, select or create a Google Cloud project.
-
Make sure that billing is enabled for your Google Cloud project.
-
In the Google Cloud console, on the project selector page, select or create a Google Cloud project.
-
Make sure that billing is enabled for your Google Cloud project.
- 如要以原生模式建立 Firestore 資料庫,請完成下列步驟:
-
前往 Cloud Console 的「Firestore 檢視器」頁面。
前往「Firestore 檢視器」 - 按一下「選取 Cloud Firestore 模式」畫面中的 [選取原生模式]。
- 選取 Firestore 資料庫的位置。您所設定的位置會是 Cloud 專案的預設 Google Cloud 資源位置。此位置會用於 Cloud 專案中需要位置設定的 Google Cloud 服務;具體來說,也就是您的預設 Cloud Storage 值區與 App Engine 應用程式。
- 按一下 [建立資料庫]。
-
前往 Cloud Console 的「Firestore 檢視器」頁面。
-
Enable the App Engine Admin, Cloud Storage, Cloud Logging, and Error Reporting APIs.
-
在 Cloud Shell 中開啟應用程式的原始碼。
前往 Cloud ShellCloud Shell 可讓您直接在瀏覽器中使用指令列工具存取 Google Cloud 資源。
- 如要將程式碼範例和變更下載到應用程式目錄中,請按一下 [繼續]。
-
在 Cloud Shell 中,將
gcloud工具設定為使用您新建的 Google Cloud 專案:# Configure gcloud for your project gcloud config set project PROJECT_ID
將 PROJECT_ID 替換為您透過 Cloud Console 建立的 Google Cloud 專案 ID。
gcloud指令列工具是您透過指令列與 Google Cloud 資源互動的主要方式。在本教學課程中,您將使用gcloud工具部署及監控應用程式。
執行您的應用程式
- 使用
bundler安裝應用程式依附元件:bundle install - 執行 rails server:
GOOGLE_CLOUD_PROJECT=PROJECT_ID bundle exec rails server -p 8080
將 PROJECT_ID 替換成您先前建立的 Google Cloud 專案 ID。 - 在 Cloud Shell 中,按一下 [網頁預覽] ,然後選取 [透過以下通訊埠預覽:8080]。這會開啟新視窗,顯示執行中的應用程式。
將您的應用程式部署至 App Engine
Google Cloud 提供數個執行程式碼的選項。在此範例中,您會使用 App Engine 將可擴充的應用程式部署至 Google Cloud。使用 App Engine 便無須設定部署作業或是管理伺服器,讓您能專注於程式設計工作。此外,App Engine 可以自動調度資源以應付突然爆增的流量。
app.yaml 檔案是您部署至 App Engine 的主要設定檔:
- 在終端機視窗中,使用
gcloud工具將應用程式部署至 App Engine:# on the command-line gcloud app deploy
- 在網路瀏覽器中輸入下列網址:
https://PROJECT_ID.REGION_ID.r.appspot.com更改下列內容:
PROJECT_ID:您的 Google Cloud 專案 IDREGION_ID:App Engine 指派給應用程式的代碼
關於如何部署至 App Engine 的詳情,請參閱 Ruby 2.5 執行階段環境。
使用 Firestore 保留您的資料
您無法將資訊儲存在 App Engine 執行個體上,因為這些資訊在執行個體重新啟動後將會遺失,而且也不會存在於新建立的執行個體當中。不過,您可以使用資料庫儲存所有執行個體讀取及寫入的資訊。
Google Cloud 提供多個儲存資料的選項。在此範例中,您會使用 Firestore 儲存每本書的資料。Firestore 是全代管、無伺服器的 NoSQL 文件資料庫,可讓您儲存及查詢資料。Firestore 可根據您應用程式的需求自動調整資源配置,您不使用應用程式時,Firestore 也會將資源調度率降至零。讓我們馬上開始新增您的第一本書。
- 在網路瀏覽器中輸入下列網址:
https://PROJECT_ID.REGION_ID.r.appspot.com更改下列內容:
PROJECT_ID:您的 Google Cloud 專案 IDREGION_ID:App Engine 指派給應用程式的代碼
-
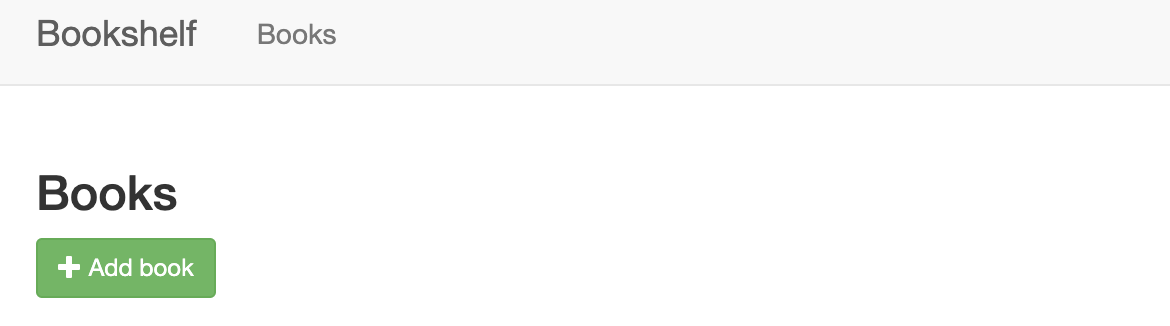
如要為已部署的應用程式建立書籍,請按一下 [新增書籍]。
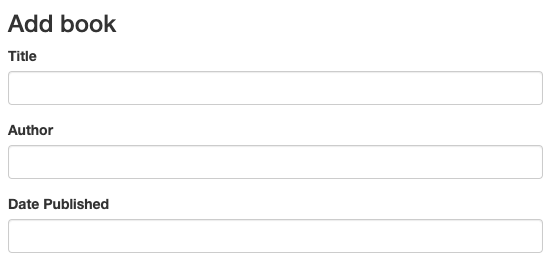
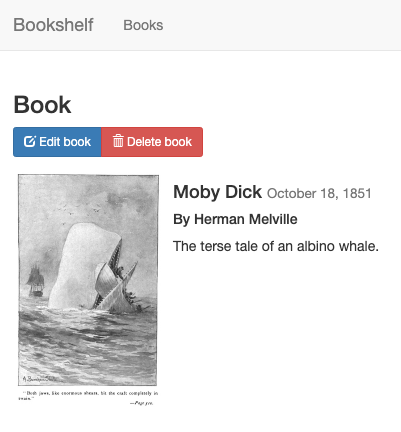
- 在「Title」欄位中,輸入
Moby Dick。 - 在「Author」欄位中,輸入
Herman Melville。 -
按一下 [儲存]。現在您已在 Bookshelf 應用程式中加入項目。
-
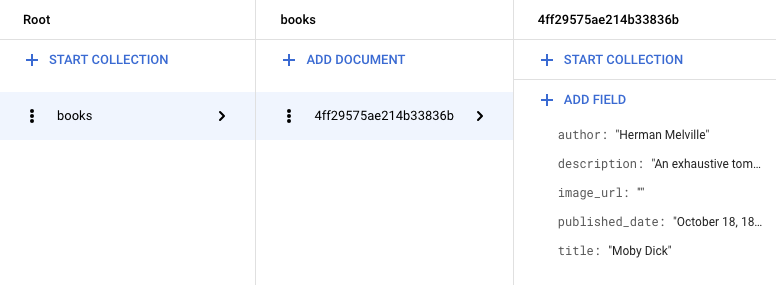
在 Cloud Console 中,如要重新整理 Firestore 頁面,請按一下 [重新整理] 圖示 refresh,資料即會出現在 Firestore 中。Bookshelf 應用程式會將每本書儲存為具有唯一識別碼的 Firestore 文件,並將這些文件全都儲存在 Firestore 集合。基於本教學課程的目標,我們將這個集合稱為「books」。
Firestore 會使用 Firestore 用戶端程式庫儲存書籍資料。以下提供擷取 Firestore 文件的範例:
如要進一步瞭解如何使用 Firestore,請參閱將資料新增至 Firestore 的相關說明。
將上傳的檔案儲存在 Cloud Storage 中
現在您已新增了一本書,接下來請新增書籍的封面圖片。您無法將檔案儲存在執行個體中,資料庫也不適合用來儲存圖片檔。建議您使用 Cloud Storage。
Cloud Storage 是 Google Cloud 主要的 blob 儲存庫。您可以使用 Cloud Storage 託管要在 Google Cloud 中共用的應用程式資產。如要使用 Cloud Storage,您必須建立一個 Cloud Storage 值區,然後使用這個基本容器保存資料。
- 前往 Cloud Console 的「Cloud Storage 瀏覽器」頁面。
- 按一下 [建立值區]。
- 在「建立值區」對話方塊中輸入值區的名稱。請將您的 Google Cloud 專案 ID 加入
_bucket字串,讓名稱近似於YOUR_PROJECT_ID_bucket。這個名稱必須遵守值區命名規定,所有其他欄位則可以保留其預設值。 - 按一下 [建立]。
- 建立值區之後,您必須開放物件的公開存取權,以便使用者查看。如需開放物件公開存取權的相關操作說明,請參閱將資料設為公開。
-
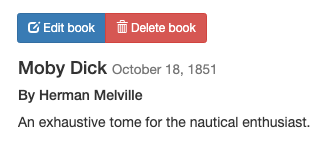
請按一下 [編輯書籍],然後選取上傳後要當做書籍封面的圖片。舉例來說,您可以使用這個公有領域的圖片:
-
按一下 [Save]。系統會將您重新導向至首頁,當中會顯示 Bookshelf 應用程式項目。
Bookshelf 應用程式會使用 Cloud Storage 用戶端程式庫將上傳的檔案傳送至 Cloud Storage。
如要進一步瞭解如何使用 Cloud Storage,請參閱使用指南清單。
使用 Google Cloud 作業套件監控應用程式
您已部署應用程式,並建立及修改了書籍資訊。如要為您的使用者監控這些事件,請使用應用程式效能管理。
使用 Cloud Logging 監控記錄檔
Cloud Console
-
透過瀏覽器前往應用程式的
/logs網址:https://PROJECT_ID.REGION_ID.r.appspot.com/logs
進行這項操作之後,系統會將自訂項目傳送給 Cloud Logging。該項目的記錄嚴重性為
NOTICE,並且包含以下訊息:「Hey, you triggered a custom log entry. Good job!」 -
前往記錄檢視器,即可即時監控您的應用程式。發生問題時,這是要優先查看的地方之一。
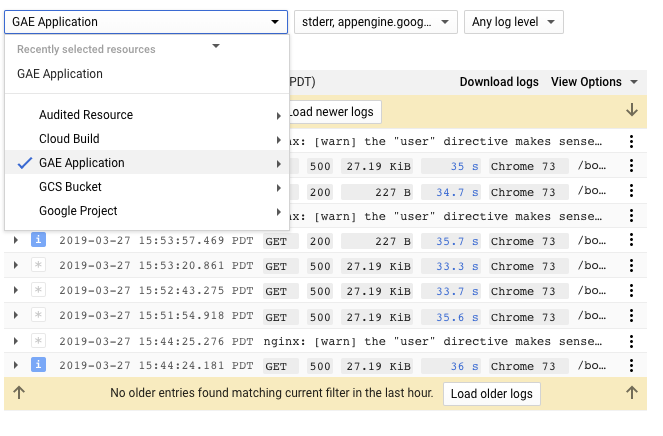
- 在「資源」下拉式清單中選取 [
GAE Application]。 - 在「記錄檔」下拉式清單中,選取 [所有記錄]。
您會看見一個顯示自訂記錄項目的資料列。

gcloud
-
在終端機視窗中,使用
gcloud指令列工具監聽新的記錄項目,以監控您的應用程式記錄檔:gcloud app logs tail
-
透過瀏覽器前往應用程式的
/logs網址:https://PROJECT_ID.REGION_ID.r.appspot.com/logs
進行這項操作之後,系統會將自訂項目傳送給 Cloud Logging。該項目的記錄嚴重性為
NOTICE,並且包含以下訊息:「Hey, you triggered a custom log entry. Good job!」gcloud指令的輸出結果會顯示新的記錄項目:Waiting for new log entries... 2019-03-27 22:17:01 default[20190327t151430] "Hey, you triggered a custom log entry. Good job!"
透過 Error Reporting 監控錯誤
-
前往 Cloud Console 的「Error Reporting」頁面。
前往「Error Reporting」頁面
Error Reporting 會醒目顯示應用程式中的錯誤和例外狀況,並讓您設定與其相關的快訊。 - 透過瀏覽器前往應用程式的
/errors網址。https://PROJECT_ID.REGION_ID.r.appspot.com/errors
這項操作會產生一個新的測試例外狀況,並傳送給 Google Cloud 作業套件。
-
返回 Cloud Console 的「Error Reporting」頁面,稍後就會顯示新的錯誤。按一下 [自動重新載入],這樣您就不需要手動重新整理頁面。

清除
如要避免系統向您的 Google Cloud 帳戶收取本教學課程中所用資源的相關費用,請刪除含有該項資源的專案,或者保留專案但刪除個別資源。
刪除專案
- In the Google Cloud console, go to the Manage resources page.
- In the project list, select the project that you want to delete, and then click Delete.
- In the dialog, type the project ID, and then click Shut down to delete the project.