Many Google Cloud services, such as Cloud Billing, send out notifications to share important information with Google Cloud users. By default, these notifications are sent to members with certain Identity and Access Management (IAM) roles. With Essential Contacts, you can customize who receives notifications by providing your own list of contacts.
Before you begin
Enable the Essential Contacts API.
Required roles
To get the permissions that you need to manage contacts, ask your administrator to grant you the following IAM roles on the project, folder, or organization where the contact is assigned :
-
To view contacts:
Essential Contacts Viewer (
roles/essentialcontacts.viewer) -
To view, edit, delete, and create contacts:
Essential Contacts Admin (
roles/essentialcontacts.admin)
For more information about granting roles, see Manage access.
These predefined roles contain the permissions required to manage contacts. To see the exact permissions that are required, expand the Required permissions section:
Required permissions
The following permissions are required to manage contacts:
-
To view contacts:
-
essentialcontacts.contacts.get -
essentialcontacts.contacts.list
-
-
To edit, delete, and create contacts:
-
essentialcontacts.contacts.create -
essentialcontacts.contacts.delete -
essentialcontcts.contacts.update
-
You might also be able to get these permissions with custom roles or other predefined roles.
Notification categories
You can assign contacts to several notifications categories. If you do not add a contact to a category, notifications in that category go to the fallback contact, which is selected based on your members' IAM roles. We recommend adding custom contacts, and not relying on fallback contacts, to help ensure that the correct people receive notifications for your project, folder, or organization.
You can add both individuals and groups as contacts. To reduce the impact of personnel changes, we recommend adding groups as contacts, then managing the membership of those groups to determine who receives notifications. This practice helps ensure that notifications always go to active employees.
Review the following table to learn about notifications categories, fallback contacts, and recommended contacts. If you do not assign a contact to a given category, notifications are sent to the fallback contact.
| Category | Description | Examples | Fallback contact | Recommended contact |
|---|---|---|---|---|
| All | All notifications from every other category | N/A | N/A | People or automated systems that are responsible for routing or logging a potentially large number of notifications |
| Billing | Billing and payment notifications | Price updates, errors, and credits | Billing Account Administrator (roles/billing.admin) |
Finance department staff and people who manage your financial relationship with Google, including people who manage budgets, planning, and accounts related to Google Cloud usage |
| Legal | Legal compliance notifications | Enforcement actions, regulatory compliance, government notices | Billing Account Administrator (roles/billing.admin) |
Legal counsel, compliance managers, government relations specialists, and other related professionals |
| Product updates | Changes to Google products | New versions, product terms updates, deprecations | Project Owner (roles/owner) |
Product managers, architects, and engineers who can benefit from timely information about changes to Google products and services |
| Security | Security/privacy issue notifications | Vulnerabilities, data incidents, and attacks | Organization Administrator (roles/resourcemanager.organizationAdmin) |
IT security, operations security, and other people whose job it is to safeguard your company and customer data and ensure business continuity |
| Suspension | Notifications related to immediate account and project suspension | Apigee evaluation compliance, copyright infringements, and coin mining | Project Owner (roles/owner) |
People immediately responsible for keeping your IT infrastructure and business applications up and running |
| Technical | Technical events and other operational issues | Logging configuration errors, data loss prevention updates, and Actions on Google status | Project Owner (roles/owner) |
IT professionals, reliability engineers, admins, on-call lists, and other people who need to know of current and upcoming technical events and issues to better manage your IT assets and avoid disruptions |
| Technical Incidents | For Premium Support customers, a subcategory of the Technical category for outage notifications | Unplanned outages, service issues | N/A | IT professionals, reliability engineers, admins, on-call lists, and other people who need to react to outages |
Supported languages
In Essential Contacts, each contact has a preferred language setting. Notification creators can reference this setting when sending notifications.
When you add a contact in the Google Cloud console, the Google Cloud console automatically configures the contact's preferred language based on the contact creator's preferred language settings. When you add a contact using the API, you manually configure the contact's preferred language using a language code. This language code can refer to any of the languages that Essential Contacts supports.
Best practices for assigning contacts
You can assign contacts at the project, folder, or organization level.
Contacts are inherited through the Google Cloud resource hierarchy. As a result, if you add a contact at the organization level, they receive notifications for the organization and for all folders and projects in the organization. Similarly, if you add a contact at the folder level, they receive notifications for the folder and for all folders and projects in the folder.
Where you decide to assign contacts depends on the structure of your organization. However, we generally recommend assigning contacts at the following levels, based on their notification category:
| Recommended level | Notification category |
|---|---|
| Organization level |
|
| Folder/project level |
|
1 The level at which you assign security contacts depends on your organization's specific security practices. For example, if individual project owners are in charge of security for their own projects, you would assign your security contacts at the project level. However, if an organization-wide group manages security for all projects, you would assign your security contacts at the organization level.
2 Technical category contacts receive a large number of email notifications. Assign these contacts at the folder or project level to enable them to process the incoming notification flow.
Assigning contacts for outage and disruption notifications
If you are a Premium Support customer, you can assign contacts to receive outage and disruption notifications through the Technical Incidents subcategory. This enables you to steer high-impact outage notifications to contacts who need to focus on outages, without the distraction of other technical notifications.
To ensure that notifications are sent to appropriate contacts, keep the following inheritance behavior in mind as you assign contacts to the Technical Incidents subcategory:
If you assign a Technical Incidents contact on a project or folder, outage notifications are only sent to:
- The project or folder Technical Incidents contact
- Inherited Technical Incidents contacts from the parent organization or folder
If you do not assign a Technical Incidents contact on a project or folder, outage notifications are only sent to:
- The project or folder Technical contact
- Inherited Technical Incidents contacts from the parent organization or folder
If a Technical Incident contact is not assigned or inherited, and no Technical contact is assigned, outage notifications are not sent
Limiting allowed domains for contacts
To restrict the email address domains that new contacts can have, set the
organization policy constraint
constraints/essentialcontacts.allowedContactDomains. Existing
contacts are not impacted by this constraint.
To learn how to set organization policy constraints, see Organization policy constraints.
Listing contacts
To list all contacts in your project, folder, or organization, do the following:
Console
In the Google Cloud console, go to the Essential contacts page.
Make sure the name of your project, folder, or organization appears in the resource selector at the top of the page. The resource selector tells you what project, folder, or organization you are currently managing contacts for.
To list the contacts by category, select Category. To list the contacts alphabetically, select Contacts.
gcloud
-
In the Google Cloud console, activate Cloud Shell.
At the bottom of the Google Cloud console, a Cloud Shell session starts and displays a command-line prompt. Cloud Shell is a shell environment with the Google Cloud CLI already installed and with values already set for your current project. It can take a few seconds for the session to initialize.
-
With the Google Cloud CLI, you can either list the contacts that are defined on
a resource, or list all contacts and inherited contacts for a resource.
Listing contacts defined on a resource
To view the contacts that have been defined on a specific project, folder, or organization, use the
gcloud essential-contacts listcommand:gcloud essential-contacts list --RESOURCE_TYPE="RESOURCE_ID"
Replace the following values:
RESOURCE_TYPE: The resource type that you want to list contacts for. Use the valueproject,folder, ororganization.RESOURCE_ID: Your Google Cloud project, organization, or folder ID. Project IDs are alphanumeric strings, likemy-project. Folder and organization IDs are numeric, like123456789012.
Alternatively, if you do not specify a resource type or ID, the gcloud CLI lists contacts for the current project.
The response is similar to the following:
---
email: my-contact-1@example.com
languageTag: en-US
name: projects/my-projects/contacts/1
notificationCategorySubscriptions:
- ALL
---
email: my-contact-2@example.com
languageTag: en-US
name: projects/my-projects/contacts/2
notificationCategorySubscriptions:
- BILLING
---
Listing contacts and inherited contacts
Child resources (folders and projects) inherit contacts from their ancestors (organizations and other folders). If you want to list all contacts and inherited contacts for a resource, use the
gcloud essential-contacts computecommand:gcloud essential-contacts compute --notification-categories="NOTIFICATION_CATEGORY" \ --RESOURCE_TYPE="RESOURCE_ID"
Replace the following values:
Before using any of the request data below, make the following replacements:
NOTIFICATION_CATEGORIES: A comma-separated list of the categories of notifications that you want to compute contacts for. The list can contain any of the following values:all,billing,legal,product-updates,security,suspension,technical,technical-incidents, andnotification-category-unspecified. Choosing a value ofalllists contacts for all categories.RESOURCE_TYPE: The resource type that you want to compute contacts for. Use the valueproject,folder, ororganization.RESOURCE_ID: Your Google Cloud project, organization, or folder ID. Project IDs are alphanumeric strings, likemy-project. Folder and organization IDs are numeric, like123456789012.
If you do not specify a resource type and ID, the gcloud CLI lists contacts for the current project.
The response lists all contacts and inherited contacts for the resource:
---
email: my-contact-1@example.com
languageTag: en-US
name: projects/my-projects/contacts/1
notificationCategorySubscriptions:
- ALL
---
email: my-contact-2@example.com
languageTag: en-US
name: projects/my-projects/contacts/2
notificationCategorySubscriptions:
- BILLING
---
email: my-organization-contact@example.com
languageTag: en-US
name: organizations/my-organization/contacts/1
notificationCategorySubscriptions:
- ALL
---
REST
With the Essential Contacts REST API, you can either list the contacts that are defined on a resource, or list all contacts and inherited contacts for a resource.
Listing contacts defined on a resource
To view the contacts that have been defined on a specific project, folder, or
organization, use the Essential Contacts API's contacts.list
method.
Before using any of the request data below, make the following replacements:
RESOURCE_TYPE: The resource type that you want to list contacts for. Use the valueprojects,folders, ororganizations.RESOURCE_ID: Your Google Cloud project, organization, or folder ID. Project IDs are alphanumeric strings, likemy-project. Folder and organization IDs are numeric, like123456789012.PAGE_SIZE: Optional. The number of contacts to include in the response. The default value is 50, and the maximum value is 100. If the number of contacts is greater than the page size, the response contains a pagination token that you can use to retrieve the next page of results.NEXT_PAGE_TOKEN: Optional. The pagination token returned in an earlier response from this method. If specified, the list of contacts starts where the previous response ended.
Request:
GET essentialcontacts.googleapis.com/v1/RESOURCE_TYPE/RESOURCE_ID/contacts?pageSize=PAGE_SIZE&pageToken=NEXT_PAGE_TOKEN
To send your request, expand one of these options:
curl (Linux, macOS, or Cloud Shell)
Execute the following command:
curl -X GET \
-H "Authorization: Bearer "$(gcloud auth application-default print-access-token) \
https://essentialcontacts.googleapis.com/v1/RESOURCE_TYPE/RESOURCE_ID/contacts?pageSize=PAGE_SIZE&pageToken=NEXT_PAGE_TOKEN
PowerShell (Windows)
Execute the following command:
$cred = gcloud auth application-default print-access-token
$headers = @{ "Authorization" = "Bearer $cred" }

Invoke-WebRequest `
  -Method GET `
  -Headers $headers `
  -Uri "https://essentialcontacts.googleapis.com/v1/RESOURCE_TYPE/RESOURCE_ID/contacts?pageSize=PAGE_SIZE&pageToken=NEXT_PAGE_TOKEN" | Select-Object -Expand Content
After sending the request, you receive a JSON response similar to the following:
{
  "contacts": [
    {
      "name": "projects/my-projects/contacts/1",
      "email": "my-contact-1@example.com",
      "notificationCategorySubscriptions": [
        "ALL"
      ],
      "languageTag": "en-US"
    },
    {
      "name": "projects/my-projects/contacts/2",
      "email": "my-contact-2@example.com",
      "notificationCategorySubscriptions": [
        "BILLING"
      ],
      "languageTag": "en-US"
    }
  ]
}
Listing contacts and inherited contacts
Child resources (folders and projects) inherit contacts from their ancestors
(organizations and other folders). If you want to list all contacts and
inherited contacts for a resource, use the Essential Contacts API's
contacts.compute method.
Before using any of the request data below, make the following replacements:
RESOURCE_TYPE: The resource type that you want to compute contacts for. Use the valueprojects,folders, ororganizations.RESOURCE_ID: Your Google Cloud project, organization, or folder ID. Project IDs are alphanumeric strings, likemy-project. Folder and organization IDs are numeric, like123456789012.NOTIFICATION_CATEGORY: The categories of notifications that you want to compute contacts for. You can repeat this field to list contacts for multiple notification categories. TheNOTIFICATION_CATEGORYcan be any of the following values:ALL,BILLING,LEGAL,PRODUCT_UPDATES,SECURITY,SUSPENSION,TECHNICAL,TECHNICAL_INCIDENTS, andNOTIFICATION_CATEGORY_UNSPECIFIED. Choosing a value ofALLlists contacts for all categories.PAGE_SIZE: Optional. The number of contacts to include in the response. The default value is 50, and the maximum value is 100. If the number of contacts is greater than the page size, the response contains a pagination token that you can use to retrieve the next page of results.NEXT_PAGE_TOKEN: Optional. The pagination token returned in an earlier response from this method. If specified, the list of contacts starts where the previous response ended.
Request:
GET essentialcontacts.googleapis.com/v1/RESOURCE_TYPE/RESOURCE_ID/contacts:compute?notificationCategories=NOTIFICATION_CATEGORY&pageSize=PAGE_SIZE&pageToken=NEXT_PAGE_TOKEN
To send your request, expand one of these options:
curl (Linux, macOS, or Cloud Shell)
Execute the following command:
curl -X GET \
-H "Authorization: Bearer "$(gcloud auth application-default print-access-token) \
https://essentialcontacts.googleapis.com/v1/RESOURCE_TYPE/RESOURCE_ID/contacts:compute?notificationCategories=NOTIFICATION_CATEGORY&pageSize=PAGE_SIZE&pageToken=NEXT_PAGE_TOKEN
PowerShell (Windows)
Execute the following command:
$cred = gcloud auth application-default print-access-token
$headers = @{ "Authorization" = "Bearer $cred" }

Invoke-WebRequest `
  -Method GET `
  -Headers $headers `
  -Uri "https://essentialcontacts.googleapis.com/v1/RESOURCE_TYPE/RESOURCE_ID/contacts:compute?notificationCategories=NOTIFICATION_CATEGORIES&pageSize=PAGE_SIZE&pageToken=NEXT_PAGE_TOKEN" | Select-Object -Expand Content
The response lists all contacts and inherited contacts for the resource:
{
  "contacts": [
    {
      "name": "projects/my-projects/contacts/1",
      "email": "my-project-contact-1@example.com",
      "notificationCategorySubscriptions": [
        "ALL"
      ],
      "languageTag": "en-US"
    },
    {
      "name": "projects/my-projects/contacts/2",
      "email": "my-project-contact-2@example.com",
      "notificationCategorySubscriptions": [
        "BILLING"
      ],
      "languageTag": "en-US"
    },
    {
      "name": "organizations/my-organization/contacts/1",
      "email": "my-organization-contact@example.com",
      "notificationCategorySubscriptions": [
        "ALL"
      ],
      "languageTag": "en-US"
    }
  ]
}
Managing individual essential contacts
You can add contacts, remove them, or assign notification categories for them on the Essential contacts page in the Google Cloud console, or by using the REST API.
Adding a contact
To add a contact, do the following:
Console
In the Google Cloud console, go to the Essential contacts page.
Make sure the name of your project, folder, or organization appears in the resource selector at the top of the page. The resource selector tells you what project, folder, or organization you are currently managing contacts for.
Click Add contact.
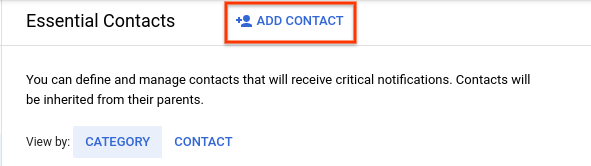
In the Email and Confirm email fields, enter the email address of the contact.
From the Notification categories drop-down menu, select the notification categories that you want the contact to receive communications for. For a list of notification categories and recommended contacts, see Identifying contacts on this page.
Click Save.
gcloud
-
In the Google Cloud console, activate Cloud Shell.
At the bottom of the Google Cloud console, a Cloud Shell session starts and displays a command-line prompt. Cloud Shell is a shell environment with the Google Cloud CLI already installed and with values already set for your current project. It can take a few seconds for the session to initialize.
To add a new contact, use the gcloud essential-contacts create command:
gcloud essential-contacts create --email="EMAIL" \
    --notification-categories="NOTIFICATION_CATEGORIES" \
    --language="LANGUAGE" \
    --RESOURCE_TYPE="RESOURCE_ID"
Replace the following values:
EMAIL: The email address of your contact. You cannot change this field after you create your contact.NOTIFICATION_CATEGORIES: A comma-separated list of the the notification categories that you want the contact to receive communications for. The list can contain any of the following values:all,billing,legal,product-updates,security,suspension,technical, technical-incidents , andnotification-category-unspecified. Choosing a value ofalllists contacts for all categories.For a list of recommended contacts for each category, see Identifying contacts on this page.
LANGUAGE: The language code for your contact's preferred notification language. You can include the language code of any of the supported languages.RESOURCE_TYPE: The resource type that you want to create a contact for. Use the valueproject,folder, ororganization.RESOURCE_ID: Your Google Cloud project, organization, or folder ID. Project IDs are alphanumeric strings, likemy-project. Folder and organization IDs are numeric, like123456789012.
If you do not specify a resource type and ID, the gcloud CLI creates a contact in the current project.
If the command is successful, no response is returned.
REST
To add a new contact, use the Essential Contacts API's
contacts.create method.
Before using any of the request data below, make the following replacements:
RESOURCE_TYPE: The resource type that you want to create a contact for. Use the valueprojects,folders, ororganizations.RESOURCE_ID: Your Google Cloud project, organization, or folder ID. Project IDs are alphanumeric strings, likemy-project. Folder and organization IDs are numeric, like123456789012.EMAIL: The email address of your contact. You cannot change this field after you create your contact.NOTIFICATION_CATEGORY_1andNOTIFICATION_CATEGORY_2: The notification categories that you want the contact to receive communications for. This value can be any of the following:ALL,BILLING,LEGAL,PRODUCT_UPDATES,SECURITY,SUSPENSION,TECHNICAL,TECHNICAL_INCIDENTS.For a list of recommended contacts for each category, see Identifying contacts on this page.
LANGUAGE: The language code for your contact's preferred notification language. You can include the language code of any of the supported languages.
Request:
POST essentialcontacts.googleapis.com/v1/RESOURCE_TYPE/RESOURCE_ID/contacts
Request body:
{
  "email": "EMAIL",
  "notificationCategorySubscriptions": [
    "NOTIFICATION_CATEGORY_1",
    "NOTIFICATION_CATEGORY_2"
  ],
  "languageTag": "LANGUAGE"
}
To send your request, expand one of these options:
After sending the request, you receive a JSON response similar to the following:
{
  "name": "projects/my-project/contacts/3",
  "email": "my-new-contact@example.com",
  "notificationCategorySubscriptions": [
    "SUSPENSION",
    "TECHNICAL"
  ],
  "languageTag": "en"
}
Changing a contact
To change which categories a contact is assigned to, do the following:
Console
In the Google Cloud console, go to the Essential contacts page.
Make sure the name of your project, folder, or organization appears in the resource selector at the top of the page. The resource selector tells you what project, folder, or organization you are currently managing contacts for.
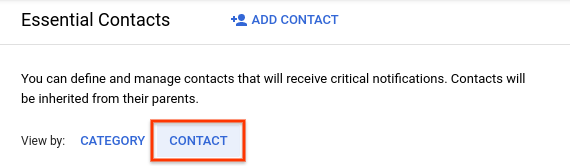
Next to View by, select Contact.
Click next to the contact whose category you want to change.

Select the notification categories you want from the Notification categories drop-down menu and click Save.
gcloud
-
In the Google Cloud console, activate Cloud Shell.
At the bottom of the Google Cloud console, a Cloud Shell session starts and displays a command-line prompt. Cloud Shell is a shell environment with the Google Cloud CLI already installed and with values already set for your current project. It can take a few seconds for the session to initialize.
To update an existing contact, use the gcloud essential-contacts update command:
gcloud essential-contacts update CONTACT_ID \
    --notification-categories="NOTIFICATION_CATEGORIES" \
    --language="LANGUAGE"
    --RESOURCE_TYPE="RESOURCE_ID"
Replace the following values:
CONTACT_ID: The numeric ID of the contact you want to update. To see the IDs of all contacts in your project, folder, or organization, list your contacts. The numeric ID is everything aftercontactsin the contact's name.NOTIFICATION_CATEGORIES: A comma-separated list of the the new notification categories that you want the contact to receive communications for. This list will replace the existing list of notification categories.The list can contain any of the following values:
all,billing,legal,product-updates,security,suspension,technical, technical-incidents , andnotification-category-unspecified. Choosing a value ofalllists contacts for all categories.For a list of recommended contacts for each category, see Identifying contacts on this page.
LANGUAGE: The language code for your contact's preferred notification language. You can include the language code of any of the supported languages.RESOURCE_TYPE: The resource type that the contact is defined on. Use the valueproject,folder, ororganization.RESOURCE_ID: The ID of the Google Cloud project, organization, or folder where the contact is defined. Project IDs are alphanumeric strings, likemy-project. Folder and organization IDs are numeric, like123456789012.
If you do not specify a resource type and ID, the gcloud CLI updates the contact with the specified ID in the current project. If no contact with the specified ID exists, the gcloud CLI returns an error.
If the command is successful, no response is returned.
REST
To change the notification subscriptions or preferred language of an existing
contact, use the Essential Contacts API's contacts.patch
method.
Before using any of the request data below, make the following replacements:
RESOURCE_TYPE: The resource type that you want to list contacts for. Use the valueprojects,folders, ororganizations.RESOURCE_ID: Your Google Cloud project, organization, or folder ID. Project IDs are alphanumeric strings, likemy-project. Folder and organization IDs are numeric, like123456789012.CONTACT_ID: The numeric ID of the contact you want to update. To see the IDs of all contacts in your project, folder, or organization, list your contacts. The numeric ID is everything aftercontactsin the contact's name.UPDATE_MASK: Optional. A mask describing which fields of the contact you've changed. The format for the mask is a comma-separated list of fully qualified names of fields, for example:notificationCategorySubscriptions,languageTag.EMAIL: The email address of your contact. This field must match the email address associated with the CONTACT_ID that you include in the request.NOTIFICATION_CATEGORY_1andNOTIFICATION_CATEGORY_2: Optional. The updated notification categories that you want the contact to receive communications for. This value can be any of the following:ALL,BILLING,LEGAL,PRODUCT_UPDATES,SECURITY,SUSPENSION,TECHNICAL,TECHNICAL_INCIDENTS.For a list of recommended contacts for each category, see Identifying contacts on this page.
LANGUAGE: The language code for the contact's preferred notification language. You can include the language code of any of the supported languages.
Request:
PATCH essentialcontacts.googleapis.com/v1/RESOURCE_TYPE/RESOURCE_ID/contacts/CONTACT_ID?updateMask="UPDATE_MASK"
Request body:
{
  "name": "RESOURCE_TYPE/RESOURCE_ID/contact/CONTACT_ID",
  "email": "EMAIL",
  "notificationCategorySubscriptions": [
    "NOTIFICATION_CATEGORY_1",
    "NOTIFICATION_CATEGORY_2"
  ],
  "languageTag": "LANGUAGE"
}
To send your request, expand one of these options:
After sending the request, you receive a JSON response similar to the following:
{
  "name": "projects/my-project/contacts/2",
  "email": "my-new-contact@example.com",
  "notificationCategorySubscriptions": [
    "ALL"
  ],
  "languageTag": "en"
}
Deleting a contact
To delete a contact, do the following:
Console
In the Google Cloud console, go to the Essential contacts page.
Make sure the name of your project, folder, or organization appears in the resource selector at the top of the page. The resource selector tells you what project, folder, or organization you are currently managing contacts for.
Next to View by, select Contact.
Click next to the email address of the contact you want to delete. Then, in the dialog, confirm that you want to delete the contact.

gcloud
-
In the Google Cloud console, activate Cloud Shell.
At the bottom of the Google Cloud console, a Cloud Shell session starts and displays a command-line prompt. Cloud Shell is a shell environment with the Google Cloud CLI already installed and with values already set for your current project. It can take a few seconds for the session to initialize.
To delete an existing contact, use the gcloud essential-contacts delete command:
gcloud essential-contacts delete CONTACT_ID \
    --RESOURCE_TYPE="RESOURCE_ID"
Replace the following values:
CONTACT_ID: The numeric ID of the contact you want to delete. To see the IDs of all contacts in your project, folder, or organization, list your contacts. The numeric ID is everything aftercontactsin the contact's name.RESOURCE_TYPE: The resource type that the contact is defined on. Use the valueproject,folder, ororganization.RESOURCE_ID: The ID of the Google Cloud project, organization, or folder where the contact is defined. Project IDs are alphanumeric strings, likemy-project. Folder and organization IDs are numeric, like123456789012.
If you do not specify a resource type and ID, the gcloud CLI deletes the contact with the specified ID in the current project. If no contact with the specified ID exists, the gcloud CLI returns an error.
If the command is successful, no response is returned.
REST
To delete a contact, use the Essential Contacts API's
contacts.delete method.
Before using any of the request data below, make the following replacements:
RESOURCE_TYPE: The resource type that you want to list contacts for. Use the valueprojects,folders, ororganizations.RESOURCE_ID: Your Google Cloud project, organization, or folder ID. Project IDs are alphanumeric strings, likemy-project. Folder and organization IDs are numeric, like123456789012.CONTACT_ID: The numeric ID of your contact. To see the IDs of all contacts in your project, folder, or organization, list your contacts.
Request:
DELETE essentialcontacts.googleapis.com/v1/RESOURCE_TYPE/RESOURCE_ID/contacts/CONTACT_ID
To send your request, expand one of these options:
If the request is successful, the response body will be empty.
Managing contacts by category
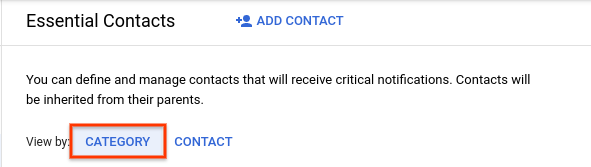
In the Google Cloud console, you can also manage contacts by category by going to the Category tab on the Essential contacts page.
To add, change, or delete the contacts assigned to a single category, do the following:
In the Google Cloud console, go to the Essential contacts page.
Make sure the name of your project, folder, or organization appears in the resource selector at the top of the page. The resource selector tells you what project, folder, or organization you are currently managing contacts for.
Next to View by, select Category.
Click in the same row as the category whose contacts you want to manage.

Manage the contacts assigned to the category:
- To add a new contact, click Add contact, then follow the steps to add a contact described on this page.
To change which category a contact is assigned to, click next to the contact whose category you want to change. Then, select the notification categories you want from the Notification categories drop-down menu and click Save.
To delete a contact, click next to that contact's email address.
Verifying email transmissions
You can send a test email to contacts in each category to verify whether the email accounts are able to receive emails from Google Cloud.
To send a test email to contacts in a specific category, do the following:
In the Google Cloud console, go to the Essential contacts page.
Make sure the name of your project, folder, or organization appears in the resource selector at the top of the page. The resource selector displays the project, folder, or organization you are currently managing contacts for.
Next to View by, select Category.
Click in the same row as the category whose contacts you want to deliver test emails to.
Select the checkboxes next to the contacts to whom you want to send emails.
Click Send. A test email is sent to the selected contacts.
Communicate with each contact to make sure they received a test email from gcp-essential-contacts-noreply@google.com.
Managing contacts with Terraform
You can use Terraform to manage your notification contacts. Contacts have the following format in Terraform language:
resource "google_essential_contacts_contact" "contact" {
  parent = "RESOURCE_TYPE/RESOURCE_ID"
  email = "EMAIL"
  language_tag = "LANGUAGE"
  notification_category_subscriptions = NOTIFICATION_CATEGORIES
}
When creating a contact, replace the following values:
RESOURCE_TYPE: The resource type that you want to list contacts for. Use the valueprojects,folders, ororganizations.RESOURCE_ID: Your Google Cloud project, organization, or folder ID. Project IDs are alphanumeric strings, likemy-project. Folder and organization IDs are numeric, like123456789012.EMAIL: The email address of your contact. You cannot change this field after you create your contact.LANGUAGE: Optional. The language code for the contact's preferred notification language. You can include the language code of any of the supported languages.NOTIFICATION_CATEGORIES: An array of the notification categories that you want the contact to receive communications for. For example,["BILLING", "LEGAL"].This array can contain any of the following values:
ALL,BILLING,LEGAL,PRODUCT_UPDATES,SECURITY,SUSPENSION,TECHNICAL,TECHNICAL_INCIDENTS.For a list of recommended contacts for each category, see Identifying contacts on this page.
To add, modify or remove a contact, add, modify or remove a contact resource in your Terraform configuration file.
For more details, see the Terraform Essential Contacts documentation.
What's next
- Learn how to associate a domain with a project for verification purposes.
- Understand how to manage your notification preferences.