This document shows you how to integrate reCAPTCHA Enterprise for WAF with Google Cloud Armor on websites.
To complete the integration, you must implement one or more features of reCAPTCHA Enterprise for WAF and configure Google Cloud Armor security policies.
Before you begin
Enable the reCAPTCHA Enterprise API.
Plan how you want to implement the features of reCAPTCHA Enterprise for WAF to protect your website.
- Choose one or more WAF features that best match your use case.
- Identify the pages that you want to protect and the type of WAF feature that you want to implement on those pages.
Implement features of reCAPTCHA Enterprise for WAF
Depending on your requirements, you can use one or more features of reCAPTCHA Enterprise for WAF in a single application.
If you want to use more than one feature, then you must create a reCAPTCHA key for each of those features and use them in your application. For example, if you want to use reCAPTCHA action-tokens and reCAPTCHA challenge page, then you must create an action-token key and a challenge-page key, and use them in your application.
Implement reCAPTCHA action-tokens
You must have reCAPTCHA Enterprise running on your web pages to generate action-tokens.
After reCAPTCHA Enterprise generates an action-token, you attach the action-token to a predefined
request header wherever you need to protect any user action, such as checkout. By default, action-tokens are valid for 30 minutes, but can vary depending on the traffic.
You must attach the action-token to a predefined request header before the token expires, so that
the Google Cloud Armor can evaluate the token attributes.
To implement a reCAPTCHA action-token, do the following:
Create an action-token key for your website.
Console
In the Google Cloud console, go to the reCAPTCHA Enterprise page.
Verify that the name of your project appears in the resource selector at the top of the page.
If you don't see the name of your project, click the resource selector, then select your project.
Click Create key.

- In the Display name field, enter a display name for the key.
- Depending on the platform for which you want to create reCAPTCHA keys for WAF, perform the appropriate action:
From the Choose platform type menu, select Website.

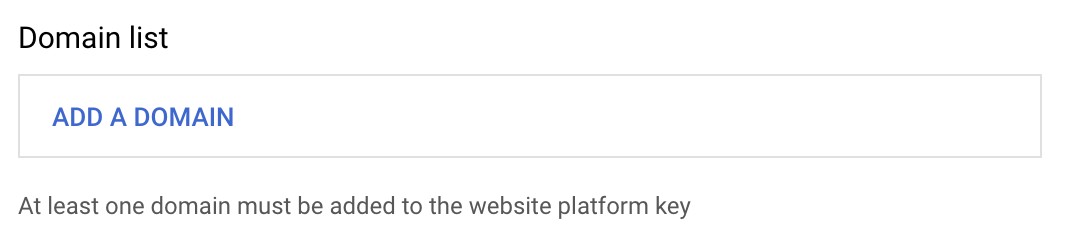
The Domain list section appears.
-
Enter the domain name for your website:
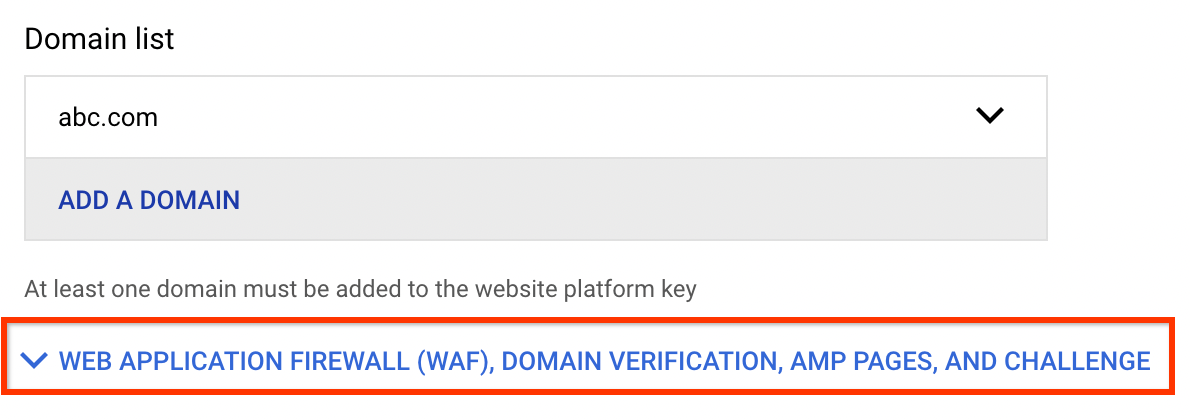
In the Domain list section, click Add a domain.
- In the Domain field, enter the name of your domain.
Optional: To add an additional domain, click Add a domain and enter the name of another domain in the Domain field. You can add up to a maximum of 250 domains.
For websites, the reCAPTCHA key is unique to the domains and subdomains that you specify. You can specify more than one domain if you serve your website from multiple domains. If you specify a domain (for example,
examplepetstore.com), you do not need to specify its subdomains (for example,subdomain.examplepetstore.com).To use a key on more than 250 domains, click the Disable domain verification toggle. reCAPTCHA Enterprise will then ignore the Domain list. You need to perform domain verification yourself by examining the
tokenProperties.hostnamefield in the assessments you create.
- Expand the Web application firewall (WAF), Domain verification, AMP pages, and challenge
section.
- Turn on the Web application firewall (WAF) toggle.

From the Feature menu, select Action token.

-
Optional: Turn on Use checkbox challenge.
- Click Create key.
The newly created key is listed on the reCAPTCHA keys page.
gcloud
To create reCAPTCHA keys, use the gcloud recaptcha keys create command.
Before using any of the command data below, make the following replacements:
- DISPLAY_NAME: Name for the key. Typically a site name.
- INTEGRATION_TYPE: Type of integration.
Specify
scoreorcheckbox. - DOMAIN_NAME: Domains or subdomains of websites allowed to use
the key.
Specify multiple domains as a comma-separated list. Optional: Specify
--allow-all-domainsto disable domain verification.Disabling domain verification is a security risk because there are no restrictions on the site, so your reCAPTCHA key can be accessed and used by anyone.
- WAF_FEATURE: Name of the WAF feature.
Specify
action-token. - WAF_SERVICE: Name of the
WAF service provider.
Specify
CAfor Google Cloud Armor.
Execute the gcloud recaptcha keys create command:
Linux, macOS, or Cloud Shell
gcloud recaptcha keys create \
--web \
--display-name=DISPLAY_NAME  \
--integration-type=INTEGRATION_TYPE \
--domains=DOMAIN_NAME \
--waf-feature=WAF_FEATURE \
--waf-service=WAF_SERVICE
Windows (PowerShell)
gcloud recaptcha keys create `
--web `
--display-name=DISPLAY_NAME  `
--integration-type=INTEGRATION_TYPE `
--domains=DOMAIN_NAME `
--waf-feature=WAF_FEATURE `
--waf-service=WAF_SERVICE
Windows (cmd.exe)
gcloud recaptcha keys create ^
--web ^
--display-name=DISPLAY_NAME  ^
--integration-type=INTEGRATION_TYPE ^
--domains=DOMAIN_NAME ^
--waf-feature=WAF_FEATURE ^
--waf-service=WAF_SERVICE
The response contains the newly created reCAPTCHA key.
REST
For API reference information about key types and integration types, see Key and Integration type.Before using any of the request data, make the following replacements:
- DISPLAY_NAME: Name for the key. Typically a site name.
- INTEGRATION_TYPE: Type of integration.
Specify
scoreorcheckbox. - DOMAIN_NAME: Domains or subdomains of websites allowed to use
the key.
Specify multiple domains as a comma-separated list. Optional: Specify
--allow-all-domainsto disable domain verification.Disabling domain verification is a security risk because there are no restrictions on the site, so your reCAPTCHA key can be accessed and used by anyone.
- WAF_FEATURE: Name of the WAF feature.
Specify
action-token. - WAF_SERVICE: Name of the
WAF service provider.
Specify
CAfor Google Cloud Armor.
HTTP method and URL:
POST https://recaptchaenterprise.googleapis.com/v1/projects/PROJECT_ID/keys
Request JSON body:
{
  "displayName": "DISPLAY_NAME",
   'wafSettings': "  {
       "wafService": "WAF_SERVICE",
"wafFeature": "WAF_FEATURE"
  }
  "webSettings": {
    "allowedDomains": "DOMAINS",
    "integrationType": "TYPE_OF_INTEGRATION"
   }
}
To send your request, choose one of these options:
curl
Save the request body in a file named
request.json, and execute the following command:curl -X POST \
-H "Authorization: Bearer $(gcloud auth print-access-token)" \
-H "Content-Type: application/json; charset=utf-8" \
-d @request.json \
"https://recaptchaenterprise.googleapis.com/v1/projects/PROJECT_ID/keys"PowerShell
Save the request body in a file named
request.json, and execute the following command:$cred = gcloud auth print-access-token
$headers = @{ "Authorization" = "Bearer $cred" }
Invoke-WebRequest `
-Method POST `
-Headers $headers `
-ContentType: "application/json; charset=utf-8" `
-InFile request.json `
-Uri "https://recaptchaenterprise.googleapis.com/v1/projects/PROJECT_ID/keys" | Select-Object -Expand ContentYou should receive a JSON response similar to the following:
{ "name": "projects/project-id/keys/7Ldqgs0UBBBBBIn4k7YxEB-LwEh5S9-Gv6QQIWB8m", "displayName": "DISPLAY_NAME, "webSettings": { "allowAllDomains": true, "allowedDomains": [ "localhost" ], "integrationType": "SCORE", }, "wafSettings": { "wafService": "CA", "wafFeature": "ACTION_TOKEN" } }Integrate reCAPTCHA JavaScript on your web pages with the action-token key that you created. For instructions, refer to the document that corresponds with the integration type of your action-token key.
- For the
SCOREintegration type, see Integrate score-based keys with the frontend. - For the
CHECKBOXintegration type, see Render the reCAPTCHA widget on the frontend.
- For the
After you receive the token from reCAPTCHA Enterprise, attach the token to a predefined request header in the following format:
X-Recaptcha-Token: value-of-your-action-token
You can use languages such as XHR, Ajax, or Fetch API to attach the token to a predefined request header.
The following sample script shows how to protect the
executeaction and attach the token to a predefined request header using JavaScript + XHR:<script> src="https://www.google.com/recaptcha/enterprise.js?render=ACTION_TOKEN_KEY"></script> <script> function onSuccess(action_token) { const xhr = new XMLHttpRequest(); xhr.open('GET','YOUR_URL', false); // Attach the action-token to the predefined request header xhr.setRequestHeader("X-Recaptcha-Token", action_token); xhr.send(null); } function onError(reason) { alert('Response promise rejected: ' + reason); grecaptcha.enterprise.ready(function () { document.getElementById("execute-button").onclick = () => { grecaptcha.enterprise.execute('ACTION_TOKEN_KEY', { }).then(onSuccess, onError); }; }); } </script>
Implement reCAPTCHA session-tokens
The reCAPTCHA JavaScript sets a reCAPTCHA session-token as a cookie on the end user's browser after the assessment. The end user's browser attaches the cookie and refreshes the cookie as long as the reCAPTCHA JavaScript remains active.
To provide a session-token as a cookie, install a session-token key on at least one of your web pages that satisfy the following requirements:
- The web page must be the page that the end user browses before the page that needs to be protected. For example, if you want to protect the checkout page, install a session-token key on the home page or product page.
- The web page is protected by a Google Cloud Armor security policy.
You can use this cookie to protect the end user's subsequent requests and page loads on a specific domain. Session-tokens are valid for 30 minutes by default. However, if the end user stays on the page where you implemented the session-token, reCAPTCHA Enterprise refreshes the session-token periodically to prevent it from expiring.
Install session-tokens on each page that needs to be protected by reCAPTCHA Enterprise. We recommend that you protect every page with reCAPTCHA Enterprise and use Google Cloud Armor rules to enforce access on all the pages, except the first page that end users browse.
The following is a sample reCAPTCHA session-token:recaptcha-ca-t=value-of-your-session-token;domain=domain;expires=expiration_time
To implement a reCAPTCHA session-token, do the following:
Create a session-token key for your website.
Console
In the Google Cloud console, go to the reCAPTCHA Enterprise page.
Verify that the name of your project appears in the resource selector at the top of the page.
If you don't see the name of your project, click the resource selector, then select your project.
Click Create key.
- In the Display name field, enter a display name for the key.
- Depending on the platform for which you want to create reCAPTCHA keys for WAF, perform the appropriate action:
From the Choose platform type menu, select Website.
The Domain list section appears.
-
Enter the domain name for your website:
In the Domain list section, click Add a domain.
- In the Domain field, enter the name of your domain.
Optional: To add an additional domain, click Add a domain and enter the name of another domain in the Domain field. You can add up to a maximum of 250 domains.
For websites, the reCAPTCHA key is unique to the domains and subdomains that you specify. You can specify more than one domain if you serve your website from multiple domains. If you specify a domain (for example,
examplepetstore.com), you do not need to specify its subdomains (for example,subdomain.examplepetstore.com).To use a key on more than 250 domains, click the Disable domain verification toggle. reCAPTCHA Enterprise will then ignore the Domain list. You need to perform domain verification yourself by examining the
tokenProperties.hostnamefield in the assessments you create.
- Expand the Web application firewall (WAF), Domain verification, AMP pages, and challenge
section.
- Turn on the Web application firewall (WAF) toggle.
From the Feature menu, select Session token.
- Optional:Turn on Disable domain verification.
Disabling domain verification is a security risk because there are no restrictions on the site, so your reCAPTCHA key can be accessed and used by anyone.
- Click Create key.
The newly created key is listed on the reCAPTCHA keys page.
gcloud
To create reCAPTCHA keys, use the gcloud recaptcha keys create command.
Before using any of the command data below, make the following replacements:
- DISPLAY_NAME: Name for the key. Typically a site name.
- INTEGRATION_TYPE: Type of integration.
Specify
score. - DOMAIN_NAME: Domains or subdomains of websites allowed to use
the key.
Specify multiple domains as a comma-separated list. Optional: Specify
--allow-all-domainsto disable domain verification.Disabling domain verification is a security risk because there are no restrictions on the site, so your reCAPTCHA key can be accessed and used by anyone.
- WAF_FEATURE: Name of the WAF feature.
Specify
session-token. - WAF_SERVICE: Name of the
WAF service provider.
Specify
CAfor Google Cloud Armor.
Execute the gcloud recaptcha keys create command:
Linux, macOS, or Cloud Shell
gcloud recaptcha keys create \ --web \ --display-name=DISPLAY_NAME \ --integration-type=INTEGRATION_TYPE \ --domains=DOMAIN_NAME \ --waf-feature=WAF_FEATURE \ --waf-service=WAF_SERVICE
Windows (PowerShell)
gcloud recaptcha keys create ` --web ` --display-name=DISPLAY_NAME ` --integration-type=INTEGRATION_TYPE ` --domains=DOMAIN_NAME ` --waf-feature=WAF_FEATURE ` --waf-service=WAF_SERVICE
Windows (cmd.exe)
gcloud recaptcha keys create ^ --web ^ --display-name=DISPLAY_NAME ^ --integration-type=INTEGRATION_TYPE ^ --domains=DOMAIN_NAME ^ --waf-feature=WAF_FEATURE ^ --waf-service=WAF_SERVICE
The response contains the newly created reCAPTCHA key.
REST
For API reference information about key types and integration types, see Key and Integration type.Before using any of the request data, make the following replacements:
- DISPLAY_NAME: Name for the key. Typically a site name.
- INTEGRATION_TYPE: Type of integration.
Specify
score. - DOMAIN_NAME: Domains or subdomains of websites allowed to use
the key.
Specify multiple domains as a comma-separated list. Optional: Specify
--allow-all-domainsto disable domain verification.Disabling domain verification is a security risk because there are no restrictions on the site, so your reCAPTCHA key can be accessed and used by anyone.
- WAF_FEATURE: Name of the WAF feature.
Specify
session-token. - WAF_SERVICE: Name of the
WAF service provider.
Specify
CAfor Google Cloud Armor.
HTTP method and URL:
POST https://recaptchaenterprise.googleapis.com/v1/projects/PROJECT_ID/keys
Request JSON body:
{ "displayName": "DISPLAY_NAME", 'wafSettings': " { "wafService": "WAF_SERVICE", "wafFeature": "WAF_FEATURE" } "webSettings": { "allowedDomains": "DOMAINS", "integrationType": "TYPE_OF_INTEGRATION" } }To send your request, choose one of these options:
curl
Save the request body in a file named
request.json, and execute the following command:curl -X POST \
-H "Authorization: Bearer $(gcloud auth print-access-token)" \
-H "Content-Type: application/json; charset=utf-8" \
-d @request.json \
"https://recaptchaenterprise.googleapis.com/v1/projects/PROJECT_ID/keys"PowerShell
Save the request body in a file named
request.json, and execute the following command:$cred = gcloud auth print-access-token
$headers = @{ "Authorization" = "Bearer $cred" }
Invoke-WebRequest `
-Method POST `
-Headers $headers `
-ContentType: "application/json; charset=utf-8" `
-InFile request.json `
-Uri "https://recaptchaenterprise.googleapis.com/v1/projects/PROJECT_ID/keys" | Select-Object -Expand ContentYou should receive a JSON response similar to the following:
{ "name": "projects/project-id/keys/7Ldqgs0UBBBBBIn4k7YxEB-LwEh5S9-Gv6QQIWB8m", "displayName": "DISPLAY_NAME, "webSettings": { "allowAllDomains": true, "allowedDomains": [ "localhost" ], "integrationType": "SCORE", }, "wafSettings": { "wafService": "CA", "wafFeature": "SESSION_TOKEN" } }Add the session-token key and
waf=sessionto the reCAPTCHA JavaScript.The following sample script shows how to implement a session-token on a web page:
<!DOCTYPE html> <html lang="en"> <head> <meta charset="UTF-8"> <title>reCAPTCHA WAF Session Token</title> <script src="https://www.google.com/recaptcha/enterprise.js?render=SESSION_TOKEN_KEY&waf=session" async defer></script> <body></body> </head> </html>
Implement a reCAPTCHA challenge page
When you implement a reCAPTCHA challenge page, reCAPTCHA Enterprise redirects to an interstitial page where it determines if it's necessary to show a CAPTCHA challenge to a user. Therefore, CAPTCHA challenges might not be visible to all users.
To implement a reCAPTCHA challenge page, create a challenge-page key for your website.
Console
In the Google Cloud console, go to the reCAPTCHA Enterprise page.
Verify that the name of your project appears in the resource selector at the top of the page.
If you don't see the name of your project, click the resource selector, then select your project.
Click Create key.
- In the Display name field, enter a display name for the key.
- Depending on the platform for which you want to create reCAPTCHA keys for WAF, perform the appropriate action:
From the Choose platform type menu, select Website.
- Expand the Web application firewall (WAF), Domain verification, AMP pages, and challenge
section.
- Turn on the Web application firewall (WAF) toggle.
From the Feature menu, select Challenge page.
- Turn on Disable domain verification.
When you disable domain verification for challenge-page keys, Google Cloud Armor verifies the domain.
- Click Create key.
The newly created key is listed on the reCAPTCHA keys page.
gcloud
To create reCAPTCHA keys, use the gcloud recaptcha keys create command.
Before using any of the command data below, make the following replacements:
- DISPLAY_NAME: Name for the key. Typically a site name.
- INTEGRATION_TYPE: Type of integration.
Specify
invisible. - DOMAIN_NAME: Domains or subdomains of websites allowed to use
the key.
Specify
--allow-all-domains. - WAF_FEATURE: Name of the WAF feature.
Specify
challenge-page. - WAF_SERVICE: Name of the
WAF service provider.
Specify
CAfor Google Cloud Armor.
Execute the gcloud recaptcha keys create command:
Linux, macOS, or Cloud Shell
gcloud recaptcha keys create \ --web \ --display-name=DISPLAY_NAME \ --integration-type=INTEGRATION_TYPE \ --domains=DOMAIN_NAME \ --waf-feature=WAF_FEATURE \ --waf-service=WAF_SERVICE
Windows (PowerShell)
gcloud recaptcha keys create ` --web ` --display-name=DISPLAY_NAME ` --integration-type=INTEGRATION_TYPE ` --domains=DOMAIN_NAME ` --waf-feature=WAF_FEATURE ` --waf-service=WAF_SERVICE
Windows (cmd.exe)
gcloud recaptcha keys create ^ --web ^ --display-name=DISPLAY_NAME ^ --integration-type=INTEGRATION_TYPE ^ --domains=DOMAIN_NAME ^ --waf-feature=WAF_FEATURE ^ --waf-service=WAF_SERVICE
The response contains the newly created reCAPTCHA key.
REST
For API reference information about key types and integration types, see Key and Integration type.Before using any of the request data, make the following replacements:
- DISPLAY_NAME: Name for the key. Typically a site name.
- INTEGRATION_TYPE: Type of integration.
Specify
invisible. - DOMAIN_NAME: Domains or subdomains of websites allowed to use
the key.
Specify
--allow-all-domains. - WAF_FEATURE: Name of the WAF feature.
Specify
challenge-page. - WAF_SERVICE: Name of the
WAF service provider.
Specify
CAfor Google Cloud Armor.
HTTP method and URL:
POST https://recaptchaenterprise.googleapis.com/v1/projects/PROJECT_ID/keys
Request JSON body:
{
"displayName": "DISPLAY_NAME",
'wafSettings': " {
"wafService": "WAF_SERVICE",
"wafFeature": "WAF_FEATURE"
}
"webSettings": {
"allowedDomains": "DOMAINS",
"integrationType": "TYPE_OF_INTEGRATION"
}
}
To send your request, choose one of these options:
curl
Save the request body in a file named request.json,
and execute the following command:
curl -X POST \
     -H "Authorization: Bearer $(gcloud auth print-access-token)" \
     -H "Content-Type: application/json; charset=utf-8" \
     -d @request.json \
     "https://recaptchaenterprise.googleapis.com/v1/projects/PROJECT_ID/keys"
PowerShell
Save the request body in a file named request.json,
and execute the following command:
$cred = gcloud auth print-access-token
$headers = @{ "Authorization" = "Bearer $cred" }

Invoke-WebRequest `
    -Method POST `
    -Headers $headers `
    -ContentType: "application/json; charset=utf-8" `
    -InFile request.json `
    -Uri "https://recaptchaenterprise.googleapis.com/v1/projects/PROJECT_ID/keys" | Select-Object -Expand Content
You should receive a JSON response similar to the following:
{
  "name": "projects/project-id/keys/7Ldqgs0UBBBBBIn4k7YxEB-LwEh5S9-Gv6QQIWB8m",
"displayName": "DISPLAY_NAME,
"webSettings": {
  "allowAllDomains": true,
  "allowedDomains": [
    "localhost"
  ],

  "integrationType": "INVISIBLE",

},
"wafSettings": {
  "wafService": "CA",
  "wafFeature": "CHALLENGE_PAGE"

}
}
Configure Google Cloud Armor security policies
After implementing the features of reCAPTCHA Enterprise for WAF, you must configure Google Cloud Armor security policies for bot management.
If you implemented a reCAPTCHA challenge page, then you must do the following:
- Associate the challenge-page key with your security policy.
- Configure a security policy rule to redirect a request for reCAPTCHA Enterprise assessment.
If you implemented reCAPTCHA action tokens or session tokens, then you must configure a security policy rule that evaluates reCAPTCHA Enterprise tokens.
Before configuring the Google Cloud Armor security policies, understand the reCAPTCHA token attributes for Google Cloud Armor.
To learn how to configure Google Cloud Armor security policies and use the reCAPTCHA keys for WAF with your security policies, see Configure rules for bot management.
What's next
- Examples of integration with Google Cloud Armor.
- Learn how to implement reCAPTCHA WAF features with Google Cloud Armor.