モデルのトレーニング

信頼できるラベル付きトレーニング ドキュメント項目のセットを含むデータセットを用意したら、カスタムモデルの作成とトレーニングを行うことができます。

モデルのトレーニングが完了するまで数時間かかることがあります。トレーニングに必要な時間は、データセットのサイズ、トレーニング項目の性質、モデルの複雑さなどの要素によって異なります。AutoML Natural Language は早期停止を使用して、過学習のない、可能な限り最適なモデルを生成します。

分類モデルの場合、平均トレーニング時間は約 6 時間、最長で 24 時間です。エンティティ抽出および感情分析モードの場合、平均トレーニング時間は 5 時間、最大で 6 時間です。

モデルのトレーニングが完了すると、プロジェクトに関連付けられたメールアドレスにメッセージが送信されます。

カスタムモデルの最大寿命は 18 か月です。この時間が経過した後も予測を続けるには、新しいモデルを作成してトレーニングする必要があります。

ウェブ UI

モデルをトレーニングする手順は次のとおりです。

  1. AutoML Natural Language UI を開き、トレーニングするモデルのタイプに対応するボックスの [開始] を選択します。

    [データセット] ページに移り、現在のプロジェクトでこれまでに作成されたデータセットのステータスが表示されます。別のプロジェクトのデータセットを使用してトレーニングするには、タイトルバーの右上にあるプルダウン リストからプロジェクトを選択します。

  2. カスタムモデルのトレーニングに使用するデータセットを選択します。

    選択したデータセットの表示名がタイトルバーに表示され、データセット内の個々のドキュメントがラベルと一緒にページに一覧表示されます。

    テキスト項目ページ

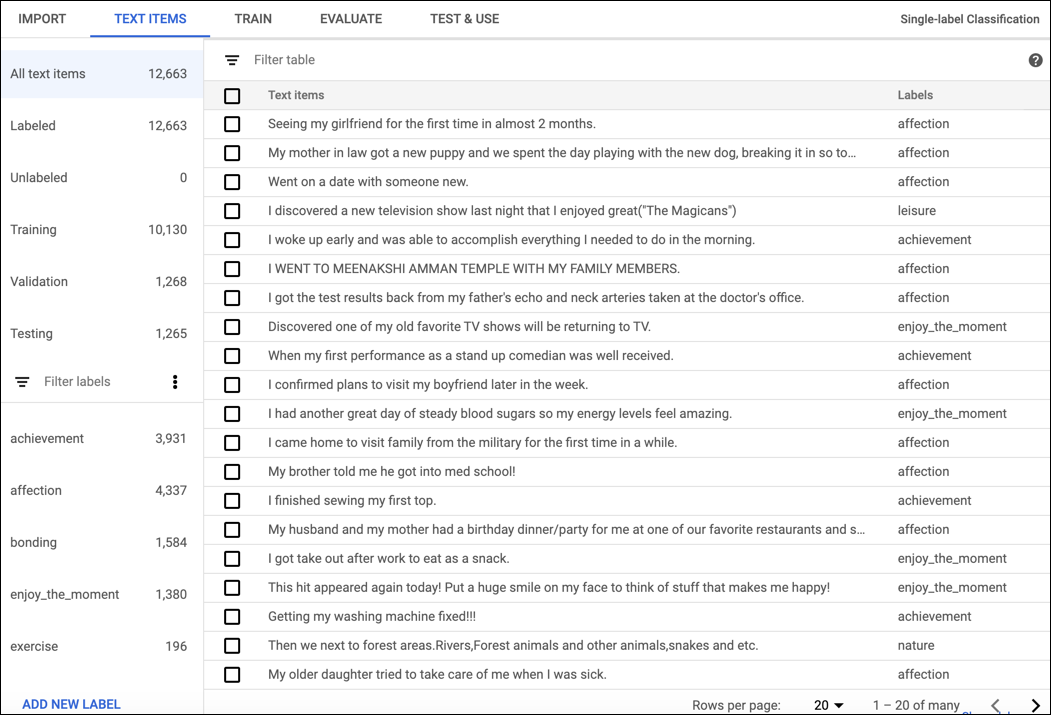
  3. データセットの確認を終えたら、タイトルバーのすぐ下にある [トレーニング] タブをクリックします。

    このデータセットから最初のモデルをトレーニングする場合、トレーニング ページにデータセットの基本的な分析とデータセットがトレーニングに適しているかどうかのアドバイスが表示されます。AutoML Natural Language によって変更が提案される場合は、[テキスト アイテム] ページに戻ってドキュメントやラベルを追加することを検討してください。

    このデータセットから他のモデルをトレーニングしたことがある場合、トレーニング ページにモデルの基本的な評価指標が表示されます。

  4. [トレーニングを開始] をクリックします。

  5. モデルの名前を入力します。

    モデル名は最大 32 文字で、英字、数字、アンダースコアのみ使用できます。最初の文字は英字でなければなりません。

  6. (省略可): 医療用語のエンティティ抽出モデルをトレーニングするには、[医療エンティティの抽出を有効にする] を選択します(ベータ版)。このオプションでは、医療データの処理に最適化され、ヘルスケア用に医療調整されたモデルを使用できます。詳しくは、AutoML Entity Extraction for Healthcare をご覧ください。

  7. モデルを自動的にデプロイする場合は、[トレーニング完了後にモデルをデプロイする] のチェックボックスをオンにします。

  8. [トレーニングを開始] をクリックします。

コードサンプル

分類

REST

リクエストのデータを使用する前に、次のように置き換えます。

  • project-id: プロジェクト ID
  • location-id: リソースのロケーション。グローバル ロケーションの場合は us-central1、EU の場合は eu
  • dataset-id: データセット ID

HTTP メソッドと URL:

POST https://automl.googleapis.com/v1/projects/project-id/locations/location-id/models

リクエストの本文(JSON):

{
  "displayName": "test_model",
  "dataset_id": "dataset-id",
  "textClassificationModelMetadata": {
   }
}

リクエストを送信するには、次のいずれかのオプションを展開します。

出力は次のようになります。オペレーション ID を使用して、タスクのステータスを取得できます。例については、オペレーションのステータスの取得をご覧ください。

{
  "name": "projects/434039606874/locations/us-central1/operations/1979469554520652445",
  "metadata": {
    "@type": "type.googleapis.com/google.cloud.automl.v1beta1.OperationMetadata",
    "createTime": "2018-04-27T01:28:41.338120Z",
    "updateTime": "2018-04-27T01:28:41.338120Z",
    "cancellable": true
  }
}

Python

AutoML Natural Language のクライアント ライブラリをインストールして使用する方法については、AutoML Natural Language のクライアント ライブラリをご覧ください。詳細については、AutoML Natural Language Python API のリファレンス ドキュメントをご覧ください。

AutoML Natural Language で認証を行うには、アプリケーションのデフォルト認証情報を設定します。詳細については、ローカル開発環境の認証の設定をご覧ください。

from google.cloud import automl

# TODO(developer): Uncomment and set the following variables
# project_id = "YOUR_PROJECT_ID"
# dataset_id = "YOUR_DATASET_ID"
# display_name = "YOUR_MODEL_NAME"

client = automl.AutoMlClient()

# A resource that represents Google Cloud Platform location.
project_location = f"projects/{project_id}/locations/us-central1"
# Leave model unset to use the default base model provided by Google
metadata = automl.TextClassificationModelMetadata()
model = automl.Model(
    display_name=display_name,
    dataset_id=dataset_id,
    text_classification_model_metadata=metadata,
)

# Create a model with the model metadata in the region.
response = client.create_model(parent=project_location, model=model)

print(f"Training operation name: {response.operation.name}")
print("Training started...")

Java

AutoML Natural Language のクライアント ライブラリをインストールして使用する方法については、AutoML Natural Language のクライアント ライブラリをご覧ください。詳細については、AutoML Natural Language Java API のリファレンス ドキュメントをご覧ください。

AutoML Natural Language で認証を行うには、アプリケーションのデフォルト認証情報を設定します。詳細については、ローカル開発環境の認証の設定をご覧ください。

import com.google.api.gax.longrunning.OperationFuture;
import com.google.cloud.automl.v1.AutoMlClient;
import com.google.cloud.automl.v1.LocationName;
import com.google.cloud.automl.v1.Model;
import com.google.cloud.automl.v1.OperationMetadata;
import com.google.cloud.automl.v1.TextClassificationModelMetadata;
import java.io.IOException;
import java.util.concurrent.ExecutionException;

class LanguageTextClassificationCreateModel {

  public static void main(String[] args)
      throws IOException, ExecutionException, InterruptedException {
    // TODO(developer): Replace these variables before running the sample.
    String projectId = "YOUR_PROJECT_ID";
    String datasetId = "YOUR_DATASET_ID";
    String displayName = "YOUR_DATASET_NAME";
    createModel(projectId, datasetId, displayName);
  }

  // Create a model
  static void createModel(String projectId, String datasetId, String displayName)
      throws IOException, ExecutionException, InterruptedException {
    // Initialize client that will be used to send requests. This client only needs to be created
    // once, and can be reused for multiple requests. After completing all of your requests, call
    // the "close" method on the client to safely clean up any remaining background resources.
    try (AutoMlClient client = AutoMlClient.create()) {
      // A resource that represents Google Cloud Platform location.
      LocationName projectLocation = LocationName.of(projectId, "us-central1");
      // Set model metadata.
      TextClassificationModelMetadata metadata =
          TextClassificationModelMetadata.newBuilder().build();
      Model model =
          Model.newBuilder()
              .setDisplayName(displayName)
              .setDatasetId(datasetId)
              .setTextClassificationModelMetadata(metadata)
              .build();

      // Create a model with the model metadata in the region.
      OperationFuture<Model, OperationMetadata> future =
          client.createModelAsync(projectLocation, model);
      // OperationFuture.get() will block until the model is created, which may take several hours.
      // You can use OperationFuture.getInitialFuture to get a future representing the initial
      // response to the request, which contains information while the operation is in progress.
      System.out.format("Training operation name: %s\n", future.getInitialFuture().get().getName());
      System.out.println("Training started...");
    }
  }
}

Node.js

AutoML Natural Language のクライアント ライブラリをインストールして使用する方法については、AutoML Natural Language のクライアント ライブラリをご覧ください。詳細については、AutoML Natural Language Node.js API のリファレンス ドキュメントをご覧ください。

AutoML Natural Language で認証を行うには、アプリケーションのデフォルト認証情報を設定します。詳細については、ローカル開発環境の認証の設定をご覧ください。

/**
 * TODO(developer): Uncomment these variables before running the sample.
 */
// const projectId = 'YOUR_PROJECT_ID';
// const location = 'us-central1';
// const dataset_id = 'YOUR_DATASET_ID';
// const displayName = 'YOUR_DISPLAY_NAME';

// Imports the Google Cloud AutoML library
const {AutoMlClient} = require('@google-cloud/automl').v1;

// Instantiates a client
const client = new AutoMlClient();

async function createModel() {
  // Construct request
  const request = {
    parent: client.locationPath(projectId, location),
    model: {
      displayName: displayName,
      datasetId: datasetId,
      textClassificationModelMetadata: {}, // Leave unset, to use the default base model
    },
  };

  // Don't wait for the LRO
  const [operation] = await client.createModel(request);
  console.log(`Training started... ${operation}`);
  console.log(`Training operation name: ${operation.name}`);
}

createModel();

Go

AutoML Natural Language のクライアント ライブラリをインストールして使用する方法については、AutoML Natural Language のクライアント ライブラリをご覧ください。詳細については、AutoML Natural Language Go API のリファレンス ドキュメントをご覧ください。

AutoML Natural Language で認証を行うには、アプリケーションのデフォルト認証情報を設定します。詳細については、ローカル開発環境の認証の設定をご覧ください。

import (
	"context"
	"fmt"
	"io"

	automl "cloud.google.com/go/automl/apiv1"
	"cloud.google.com/go/automl/apiv1/automlpb"
)

// languageTextClassificationCreateModel creates a model for text classification.
func languageTextClassificationCreateModel(w io.Writer, projectID string, location string, datasetID string, modelName string) error {
	// projectID := "my-project-id"
	// location := "us-central1"
	// datasetID := "TCN123456789..."
	// modelName := "model_display_name"

	ctx := context.Background()
	client, err := automl.NewClient(ctx)
	if err != nil {
		return fmt.Errorf("NewClient: %w", err)
	}
	defer client.Close()

	req := &automlpb.CreateModelRequest{
		Parent: fmt.Sprintf("projects/%s/locations/%s", projectID, location),
		Model: &automlpb.Model{
			DisplayName: modelName,
			DatasetId:   datasetID,
			ModelMetadata: &automlpb.Model_TextClassificationModelMetadata{
				TextClassificationModelMetadata: &automlpb.TextClassificationModelMetadata{},
			},
		},
	}

	op, err := client.CreateModel(ctx, req)
	if err != nil {
		return fmt.Errorf("CreateModel: %w", err)
	}
	fmt.Fprintf(w, "Processing operation name: %q\n", op.Name())
	fmt.Fprintf(w, "Training started...\n")

	return nil
}

その他の言語

C#: クライアント ライブラリ ページの C# の設定手順を行ってから、.NET 用の AutoML Natural Language リファレンス ドキュメントをご覧ください。

PHP: クライアント ライブラリ ページの PHP の設定手順を行ってから、PHP 用の AutoML Natural Language リファレンス ドキュメントをご覧ください。

Ruby: クライアント ライブラリ ページの Ruby の設定手順を行ってから、Ruby 用の AutoML Natural Language のリファレンス ドキュメントをご覧ください。

エンティティの抽出

REST

リクエストのデータを使用する前に、次のように置き換えます。

  • project-id: プロジェクト ID
  • location-id: リソースのロケーション。グローバル ロケーションの場合は us-central1、EU の場合は eu
  • dataset-id: データセット ID
  • model-hint: 使用するベースライン モデル。defaulthealthcareベータ版)など。

HTTP メソッドと URL:

POST https://automl.googleapis.com/v1/projects/project-id/locations/location-id/models

リクエストの本文(JSON):

{
  "displayName": "test_model",
  "dataset_id": "dataset-id",
  "textExtractionModelMetadata": {
    "model_hint": "model-hint"
  }
}

リクエストを送信するには、次のいずれかのオプションを展開します。

出力は次のようになります。オペレーション ID を使用して、タスクのステータスを取得できます。例については、オペレーションのステータスの取得をご覧ください。

{
  "name": "projects/434039606874/locations/us-central1/operations/1979469554520652445",
  "metadata": {
    "@type": "type.googleapis.com/google.cloud.automl.v1beta1.OperationMetadata",
    "createTime": "2018-04-27T01:28:41.338120Z",
    "updateTime": "2018-04-27T01:28:41.338120Z",
    "cancellable": true
  }
}

Python

AutoML Natural Language のクライアント ライブラリをインストールして使用する方法については、AutoML Natural Language のクライアント ライブラリをご覧ください。詳細については、AutoML Natural Language Python API のリファレンス ドキュメントをご覧ください。

AutoML Natural Language で認証を行うには、アプリケーションのデフォルト認証情報を設定します。詳細については、ローカル開発環境の認証の設定をご覧ください。

from google.cloud import automl

# TODO(developer): Uncomment and set the following variables
# project_id = "YOUR_PROJECT_ID"
# dataset_id = "YOUR_DATASET_ID"
# display_name = "YOUR_MODEL_NAME"

client = automl.AutoMlClient()

# A resource that represents Google Cloud Platform location.
project_location = f"projects/{project_id}/locations/us-central1"
# Leave model unset to use the default base model provided by Google
metadata = automl.TextExtractionModelMetadata()
model = automl.Model(
    display_name=display_name,
    dataset_id=dataset_id,
    text_extraction_model_metadata=metadata,
)

# Create a model with the model metadata in the region.
response = client.create_model(parent=project_location, model=model)

print(f"Training operation name: {response.operation.name}")
print("Training started...")

Java

AutoML Natural Language のクライアント ライブラリをインストールして使用する方法については、AutoML Natural Language のクライアント ライブラリをご覧ください。詳細については、AutoML Natural Language Java API のリファレンス ドキュメントをご覧ください。

AutoML Natural Language で認証を行うには、アプリケーションのデフォルト認証情報を設定します。詳細については、ローカル開発環境の認証の設定をご覧ください。

import com.google.api.gax.longrunning.OperationFuture;
import com.google.cloud.automl.v1.AutoMlClient;
import com.google.cloud.automl.v1.LocationName;
import com.google.cloud.automl.v1.Model;
import com.google.cloud.automl.v1.OperationMetadata;
import com.google.cloud.automl.v1.TextExtractionModelMetadata;
import java.io.IOException;
import java.util.concurrent.ExecutionException;

class LanguageEntityExtractionCreateModel {

  static void createModel() throws IOException, ExecutionException, InterruptedException {
    // TODO(developer): Replace these variables before running the sample.
    String projectId = "YOUR_PROJECT_ID";
    String datasetId = "YOUR_DATASET_ID";
    String displayName = "YOUR_DATASET_NAME";
    createModel(projectId, datasetId, displayName);
  }

  // Create a model
  static void createModel(String projectId, String datasetId, String displayName)
      throws IOException, ExecutionException, InterruptedException {
    // Initialize client that will be used to send requests. This client only needs to be created
    // once, and can be reused for multiple requests. After completing all of your requests, call
    // the "close" method on the client to safely clean up any remaining background resources.
    try (AutoMlClient client = AutoMlClient.create()) {
      // A resource that represents Google Cloud Platform location.
      LocationName projectLocation = LocationName.of(projectId, "us-central1");
      // Set model metadata.
      TextExtractionModelMetadata metadata = TextExtractionModelMetadata.newBuilder().build();
      Model model =
          Model.newBuilder()
              .setDisplayName(displayName)
              .setDatasetId(datasetId)
              .setTextExtractionModelMetadata(metadata)
              .build();

      // Create a model with the model metadata in the region.
      OperationFuture<Model, OperationMetadata> future =
          client.createModelAsync(projectLocation, model);
      // OperationFuture.get() will block until the model is created, which may take several hours.
      // You can use OperationFuture.getInitialFuture to get a future representing the initial
      // response to the request, which contains information while the operation is in progress.
      System.out.format("Training operation name: %s\n", future.getInitialFuture().get().getName());
      System.out.println("Training started...");
    }
  }
}

Node.js

AutoML Natural Language のクライアント ライブラリをインストールして使用する方法については、AutoML Natural Language のクライアント ライブラリをご覧ください。詳細については、AutoML Natural Language Node.js API のリファレンス ドキュメントをご覧ください。

AutoML Natural Language で認証を行うには、アプリケーションのデフォルト認証情報を設定します。詳細については、ローカル開発環境の認証の設定をご覧ください。

/**
 * TODO(developer): Uncomment these variables before running the sample.
 */
// const projectId = 'YOUR_PROJECT_ID';
// const location = 'us-central1';
// const dataset_id = 'YOUR_DATASET_ID';
// const displayName = 'YOUR_DISPLAY_NAME';

// Imports the Google Cloud AutoML library
const {AutoMlClient} = require('@google-cloud/automl').v1;

// Instantiates a client
const client = new AutoMlClient();

async function createModel() {
  // Construct request
  const request = {
    parent: client.locationPath(projectId, location),
    model: {
      displayName: displayName,
      datasetId: datasetId,
      textExtractionModelMetadata: {}, // Leave unset, to use the default base model
    },
  };

  // Don't wait for the LRO
  const [operation] = await client.createModel(request);
  console.log(`Training started... ${operation}`);
  console.log(`Training operation name: ${operation.name}`);
}

createModel();

Go

AutoML Natural Language のクライアント ライブラリをインストールして使用する方法については、AutoML Natural Language のクライアント ライブラリをご覧ください。詳細については、AutoML Natural Language Go API のリファレンス ドキュメントをご覧ください。

AutoML Natural Language で認証を行うには、アプリケーションのデフォルト認証情報を設定します。詳細については、ローカル開発環境の認証の設定をご覧ください。

import (
	"context"
	"fmt"
	"io"

	automl "cloud.google.com/go/automl/apiv1"
	"cloud.google.com/go/automl/apiv1/automlpb"
)

// languageEntityExtractionCreateModel creates a model for text entity extraction.
func languageEntityExtractionCreateModel(w io.Writer, projectID string, location string, datasetID string, modelName string) error {
	// projectID := "my-project-id"
	// location := "us-central1"
	// datasetID := "TEN123456789..."
	// modelName := "model_display_name"

	ctx := context.Background()
	client, err := automl.NewClient(ctx)
	if err != nil {
		return fmt.Errorf("NewClient: %w", err)
	}
	defer client.Close()

	req := &automlpb.CreateModelRequest{
		Parent: fmt.Sprintf("projects/%s/locations/%s", projectID, location),
		Model: &automlpb.Model{
			DisplayName: modelName,
			DatasetId:   datasetID,
			ModelMetadata: &automlpb.Model_TextExtractionModelMetadata{
				TextExtractionModelMetadata: &automlpb.TextExtractionModelMetadata{},
			},
		},
	}

	op, err := client.CreateModel(ctx, req)
	if err != nil {
		return fmt.Errorf("CreateModel: %w", err)
	}
	fmt.Fprintf(w, "Processing operation name: %q\n", op.Name())
	fmt.Fprintf(w, "Training started...\n")

	return nil
}

その他の言語

C#: クライアント ライブラリ ページの C# の設定手順を行ってから、.NET 用の AutoML Natural Language リファレンス ドキュメントをご覧ください。

PHP: クライアント ライブラリ ページの PHP の設定手順を行ってから、PHP 用の AutoML Natural Language リファレンス ドキュメントをご覧ください。

Ruby: クライアント ライブラリ ページの Ruby の設定手順を行ってから、Ruby 用の AutoML Natural Language のリファレンス ドキュメントをご覧ください。

感情分析

REST

リクエストのデータを使用する前に、次のように置き換えます。

  • project-id: プロジェクト ID
  • location-id: リソースのロケーション。グローバル ロケーションの場合は us-central1、EU の場合は eu
  • dataset-id: データセット ID

HTTP メソッドと URL:

POST https://automl.googleapis.com/v1/projects/project-id/locations/location-id/models

リクエストの本文(JSON):

{
  "displayName": "test_model",
  "dataset_id": "dataset-id",
  "textSentimentModelMetadata": {
  }
}

リクエストを送信するには、次のいずれかのオプションを展開します。

出力は次のようになります。オペレーション ID を使用して、タスクのステータスを取得できます。例については、オペレーションのステータスの取得をご覧ください。

{
  "name": "projects/434039606874/locations/us-central1/operations/1979469554520652445",
  "metadata": {
    "@type": "type.googleapis.com/google.cloud.automl.v1beta1.OperationMetadata",
    "createTime": "2018-04-27T01:28:41.338120Z",
    "updateTime": "2018-04-27T01:28:41.338120Z",
    "cancellable": true
  }
}

Python

AutoML Natural Language のクライアント ライブラリをインストールして使用する方法については、AutoML Natural Language のクライアント ライブラリをご覧ください。詳細については、AutoML Natural Language Python API のリファレンス ドキュメントをご覧ください。

AutoML Natural Language で認証を行うには、アプリケーションのデフォルト認証情報を設定します。詳細については、ローカル開発環境の認証の設定をご覧ください。

from google.cloud import automl

# TODO(developer): Uncomment and set the following variables
# project_id = "YOUR_PROJECT_ID"
# dataset_id = "YOUR_DATASET_ID"
# display_name = "YOUR_MODEL_NAME"

client = automl.AutoMlClient()

# A resource that represents Google Cloud Platform location.
project_location = f"projects/{project_id}/locations/us-central1"
# Leave model unset to use the default base model provided by Google
metadata = automl.TextSentimentModelMetadata()
model = automl.Model(
    display_name=display_name,
    dataset_id=dataset_id,
    text_sentiment_model_metadata=metadata,
)

# Create a model with the model metadata in the region.
response = client.create_model(parent=project_location, model=model)

print(f"Training operation name: {response.operation.name}")
print("Training started...")

Java

AutoML Natural Language のクライアント ライブラリをインストールして使用する方法については、AutoML Natural Language のクライアント ライブラリをご覧ください。詳細については、AutoML Natural Language Java API のリファレンス ドキュメントをご覧ください。

AutoML Natural Language で認証を行うには、アプリケーションのデフォルト認証情報を設定します。詳細については、ローカル開発環境の認証の設定をご覧ください。

import com.google.api.gax.longrunning.OperationFuture;
import com.google.cloud.automl.v1.AutoMlClient;
import com.google.cloud.automl.v1.LocationName;
import com.google.cloud.automl.v1.Model;
import com.google.cloud.automl.v1.OperationMetadata;
import com.google.cloud.automl.v1.TextSentimentModelMetadata;
import java.io.IOException;
import java.util.concurrent.ExecutionException;

class LanguageSentimentAnalysisCreateModel {

  static void createModel() throws IOException, ExecutionException, InterruptedException {
    // TODO(developer): Replace these variables before running the sample.
    String projectId = "YOUR_PROJECT_ID";
    String datasetId = "YOUR_DATASET_ID";
    String displayName = "YOUR_DATASET_NAME";
    createModel(projectId, datasetId, displayName);
  }

  // Create a model
  static void createModel(String projectId, String datasetId, String displayName)
      throws IOException, ExecutionException, InterruptedException {
    // Initialize client that will be used to send requests. This client only needs to be created
    // once, and can be reused for multiple requests. After completing all of your requests, call
    // the "close" method on the client to safely clean up any remaining background resources.
    try (AutoMlClient client = AutoMlClient.create()) {
      // A resource that represents Google Cloud Platform location.
      LocationName projectLocation = LocationName.of(projectId, "us-central1");
      // Set model metadata.
      System.out.println(datasetId);
      TextSentimentModelMetadata metadata = TextSentimentModelMetadata.newBuilder().build();
      Model model =
          Model.newBuilder()
              .setDisplayName(displayName)
              .setDatasetId(datasetId)
              .setTextSentimentModelMetadata(metadata)
              .build();

      // Create a model with the model metadata in the region.
      OperationFuture<Model, OperationMetadata> future =
          client.createModelAsync(projectLocation, model);
      // OperationFuture.get() will block until the model is created, which may take several hours.
      // You can use OperationFuture.getInitialFuture to get a future representing the initial
      // response to the request, which contains information while the operation is in progress.
      System.out.format("Training operation name: %s\n", future.getInitialFuture().get().getName());
      System.out.println("Training started...");
    }
  }
}

Node.js

AutoML Natural Language のクライアント ライブラリをインストールして使用する方法については、AutoML Natural Language のクライアント ライブラリをご覧ください。詳細については、AutoML Natural Language Node.js API のリファレンス ドキュメントをご覧ください。

AutoML Natural Language で認証を行うには、アプリケーションのデフォルト認証情報を設定します。詳細については、ローカル開発環境の認証の設定をご覧ください。

/**
 * TODO(developer): Uncomment these variables before running the sample.
 */
// const projectId = 'YOUR_PROJECT_ID';
// const location = 'us-central1';
// const dataset_id = 'YOUR_DATASET_ID';
// const displayName = 'YOUR_DISPLAY_NAME';

// Imports the Google Cloud AutoML library
const {AutoMlClient} = require('@google-cloud/automl').v1;

// Instantiates a client
const client = new AutoMlClient();

async function createModel() {
  // Construct request
  const request = {
    parent: client.locationPath(projectId, location),
    model: {
      displayName: displayName,
      datasetId: datasetId,
      textSentimentModelMetadata: {}, // Leave unset, to use the default base model
    },
  };

  // Don't wait for the LRO
  const [operation] = await client.createModel(request);
  console.log(`Training started... ${operation}`);
  console.log(`Training operation name: ${operation.name}`);
}

createModel();

Go

AutoML Natural Language のクライアント ライブラリをインストールして使用する方法については、AutoML Natural Language のクライアント ライブラリをご覧ください。詳細については、AutoML Natural Language Go API のリファレンス ドキュメントをご覧ください。

AutoML Natural Language で認証を行うには、アプリケーションのデフォルト認証情報を設定します。詳細については、ローカル開発環境の認証の設定をご覧ください。

import (
	"context"
	"fmt"
	"io"

	automl "cloud.google.com/go/automl/apiv1"
	"cloud.google.com/go/automl/apiv1/automlpb"
)

// languageSentimentAnalysisCreateModel creates a model for text sentiment analysis.
func languageSentimentAnalysisCreateModel(w io.Writer, projectID string, location string, datasetID string, modelName string) error {
	// projectID := "my-project-id"
	// location := "us-central1"
	// datasetID := "TST123456789..."
	// modelName := "model_display_name"

	ctx := context.Background()
	client, err := automl.NewClient(ctx)
	if err != nil {
		return fmt.Errorf("NewClient: %w", err)
	}
	defer client.Close()

	req := &automlpb.CreateModelRequest{
		Parent: fmt.Sprintf("projects/%s/locations/%s", projectID, location),
		Model: &automlpb.Model{
			DisplayName: modelName,
			DatasetId:   datasetID,
			ModelMetadata: &automlpb.Model_TextSentimentModelMetadata{
				TextSentimentModelMetadata: &automlpb.TextSentimentModelMetadata{},
			},
		},
	}

	op, err := client.CreateModel(ctx, req)
	if err != nil {
		return fmt.Errorf("CreateModel: %w", err)
	}
	fmt.Fprintf(w, "Processing operation name: %q\n", op.Name())
	fmt.Fprintf(w, "Training started...\n")

	return nil
}

その他の言語

C#: クライアント ライブラリ ページの C# の設定手順を行ってから、.NET 用の AutoML Natural Language リファレンス ドキュメントをご覧ください。

PHP: クライアント ライブラリ ページの PHP の設定手順を行ってから、PHP 用の AutoML Natural Language リファレンス ドキュメントをご覧ください。

Ruby: クライアント ライブラリ ページの Ruby の設定手順を行ってから、Ruby 用の AutoML Natural Language のリファレンス ドキュメントをご覧ください。