Prerequisites
Before running or migrating any on-premises VMs on Compute Engine, make sure you've set up the prequisites described in the overview.
Running a VM in Compute Engine or starting a migration
- From the vSphere Web Client, select the desired Virtual Machine.
Right-click that VM, then select one of the following:
- To run the VM on Compute Engine, select Migrate for Google Compute Engine Operations > Run-in-Cloud
- To migrate the VM, select Migrate for Google Compute Engine > Migrate
Select your Cloud Extension.
(Optional) Name the Cloud VM.
Click Next. The Cloud Instance screen appears.
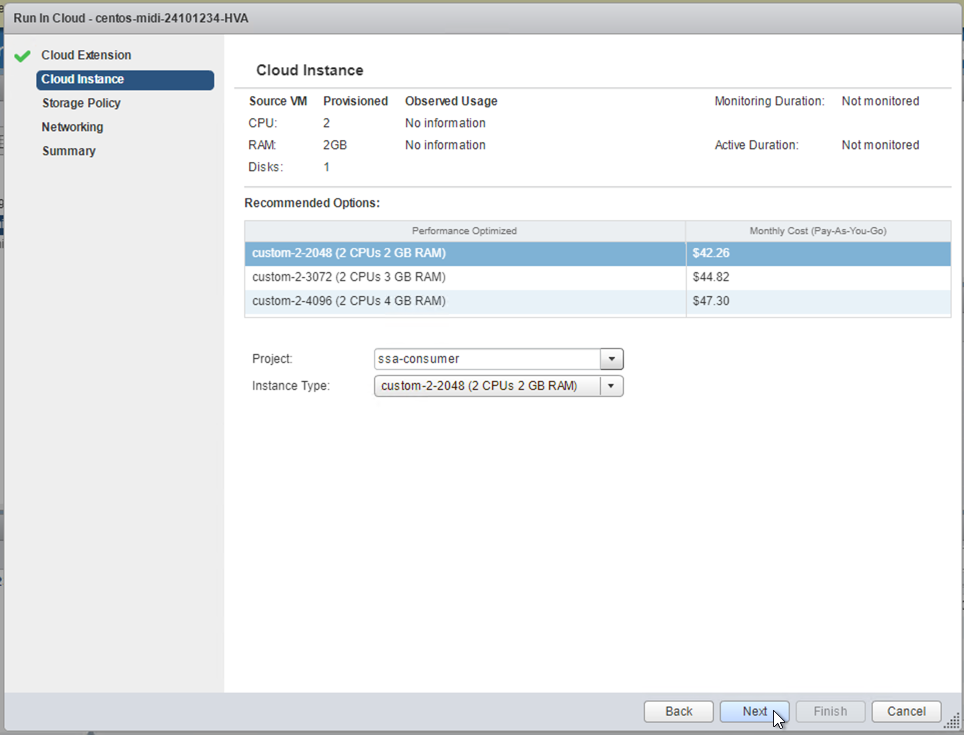
Select the Project and Instance Type.
Migrate for Compute Engine suggests instance sizes that approximate the capacity and performance of the existing VM. For information on how recommendations are processed, see Cloud Instance Rightsizing.
Click Next. The Storage Policy screen appears.
For the Storage Policy, select one of the following:
- Write Back to write storage data changes made on Compute Engine back on-premises.
- Write Isolation to not write storage data changes back on-premises while the VM is running on Compute Engine.
For more on storage policies, see Understanding and changing storage policies.
Click Next. The Networking screen appears.
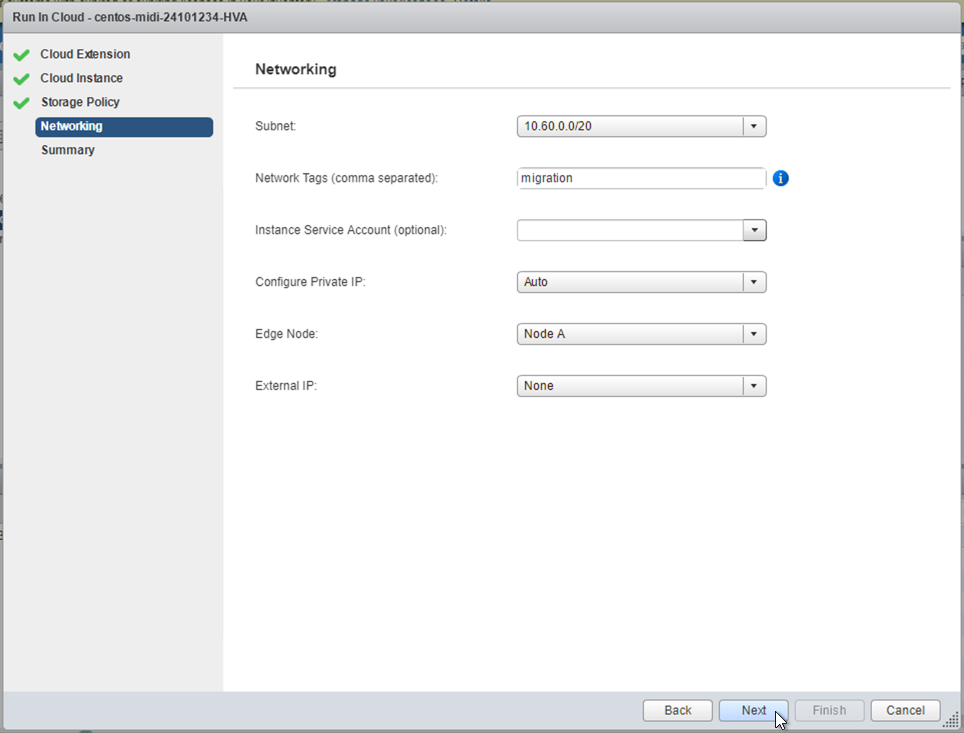
Select the Subnet on Google Cloud for the VM.
Enter any Network Tags (comma separated) which will be applied to the migrated VM.
(Optional) Select the Instance Service Account .
From the Configure Private IP drop-down list, select one of the following:
- Auto to automatically assign an available address from the subnet, or
- Static and enter a Static IP within the VPC subnet.
From the Edge Node drop-down list, select the primary node in your Cloud Extension that will handle the migration.
For External IP, select:
- None, to not assign an external IP address.
- Ephemeral, for an automatically assigned external IP.
- Static, to assign an external IP previously created on the Google Cloud console.
Click Next.
If you are performing a migrate operation:
- Select the Disk Type for your instance and Service Account that hosts the worker instance handling the migration.
- Click Next. The Summary screen appears.
Review the summary, and then click Finish.
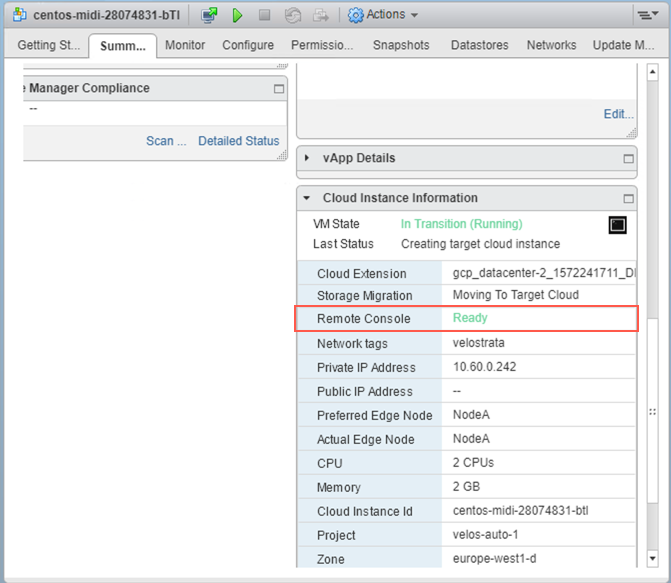
You can view the progress of running the VM and then migrating the VM on the Cloud Instance Information portlet on the VM Summary page, and by monitoring the created vSphere task.
After running a VM in Compute Engine
You can connect to the VM when the Remote Console field in the Cloud Instance Information portlet turns green and reads Ready.
For more information about monitoring your VMs, see Monitoring overview.
After migrating a VM to Compute Engine
Storage migrations take several hours. When the Migration Wizard is completed, the VM is ready to detach. To continue, see Detaching a VM.