This document explains how to create and manage sinks to route log entries to supported destinations.
Cloud Logging automatically creates and manages a service account for log sinks that route logs to a destination that is not a log bucket in the current Google Cloud project. You can create and manage a service account that is used by sinks in multiple projects. For more information, see Configure log sinks with user-managed service accounts.
Overview
Sinks control how Cloud Logging routes logs. Using sinks, you can route some or all of your logs to the following destinations:
- Cloud Logging bucket: Provides storage in Cloud Logging. A log bucket can store log entries that are received by multiple Google Cloud projects. You can combine your Cloud Logging data with other data by upgrading a log bucket to use Log Analytics, and then creating a linked BigQuery dataset. For information about viewing log entries stored in log buckets, see Query and view logs overview and View logs routed to Cloud Logging buckets.
- BigQuery dataset: Provides storage of log entries in BigQuery datasets. You can use big data analysis capabilities on the stored log entries. To combine your Cloud Logging data with other data sources, we recommend that you upgrade your log buckets to use Log Analytics and then create a linked BigQuery dataset. For information about viewing log entries routed to BigQuery, see View logs routed to BigQuery.
- Cloud Storage bucket: Provides storage of log entries in Cloud Storage. Log entries are stored as JSON files. For information about viewing log entries routed to Cloud Storage, see View logs routed to Cloud Storage.
- Pub/Sub topic: Provides support for third-party integrations. Log entries are formatted into JSON and then routed to a Pub/Sub topic. For information about viewing log entries routed to Pub/Sub, see View logs routed to Pub/Sub.
- Splunk: Provides support for Splunk. You must route your log entries to a Pub/Sub topic and then subscribe to that topic by using Splunk.
- Google Cloud project: Route log entries to a different Google Cloud project. When you route log entries to a different Google Cloud project, the destination project's Log Router receives the log entries and processes them. The sinks in the destination project determine how the received log entries are routed. Error Reporting can analyze log entries when the destination project routes those log entries to a log bucket owned by the destination project.
- Other resources: Route your log entries to a supported destination that is in a different project. For information about the paths to use, see Destination path formats.
Sinks belong to a given Google Cloud resource: Google Cloud projects, billing accounts, folders, and organizations. When the resource receives a log entry, it routes the log entry according to the sinks contained by that resource. The log entry is sent to the destination associated with each matching sink.
An aggregated sink is a type of sink that combines and routes log entries from the Google Cloud resources contained by an organization or folder. For instructions, see Collate and route organization-level logs to supported destinations.
To create and manage sinks, you can use the Google Cloud console, the Cloud Logging API, and the Google Cloud CLI. Using the Google Cloud console has the following advantages over the other methods:
- View and manage all of your sinks in one place.
- Preview which log entries are matched by your sink's filter before you create the sink.
- Create and authorize sink destinations for your sinks.
Before you begin
The instructions in this document describe creating and managing sinks at the Google Cloud project level. You can also create non-aggregated sinks for billing accounts, folders, and organizations.
To get started, do the following:
Ensure that you have a Google Cloud project with logs that you can see in the Logs Explorer.
-
Enable the Cloud Logging API.
-
To get the permissions that you need to create, modify, or delete a sink, ask your administrator to grant you the Logs Configuration Writer (
roles/logging.configWriter) IAM role on your project. For more information about granting roles, see Manage access.You might also be able to get the required permissions through custom roles or other predefined roles.
For information about granting IAM roles, see the Logging Access control guide.
You have a resource in a supported destination or have the ability to create one.
To route logs to a destination, the destination must exist before you create the sink. You can create the destination in any Google Cloud project in any organization.
Some limitations might apply when you route your logs to other destinations. For more information, see Destination limitations.
Create a sink
Following are the instructions for creating a sink in a Google Cloud project. Instead of a Google Cloud project, you can specify a billing account, folder, or organization.
You can create up to 200 sinks per Google Cloud project.
After you create the sink, ensure that Logging has the appropriate permissions to write logs to your sink's destination; see Set destination permissions.
To create a sink, do the following:
Console
-
In the navigation panel of the Google Cloud console, select Logging, and then select Log Router:
Select an existing Google Cloud project.
Select Create sink.
In the Sink details panel, enter the following details:
Sink name: Provide an identifier for the sink; note that after you create the sink, you can't rename the sink but you can delete it and create a new sink.
Sink description (optional): Describe the purpose or use case for the sink.
In the Sink destination panel, select the sink service and destination by using the Select sink service menu.
To route logs to a service that is in the same Google Cloud project, select one of the following options:
- Cloud Logging bucket: Select or create a Logging bucket.
- BigQuery table: Select or create the particular dataset to receive the routed logs. You also have the option to use partitioned tables.
- Cloud Storage bucket: Select or create the particular Cloud Storage bucket to receive the routed logs.
- Pub/Sub topic: Select or create the particular topic to receive the routed logs.
- Splunk: Select the Pub/Sub topic for your Splunk service.
- Google Cloud project: Select or create the Google Cloud project to receive the routed logs.
- Other resource: Select this option to route your log entries to a supported destination that is in a different project. For information about the path to use, see Destination path formats.
In the Choose logs to include in sink panel, do the following:
In the Build inclusion filter field, enter a filter expression that matches the log entries you want to include. To learn more about the syntax for writing filters, see Logging query language.
If you don't set a filter, all logs from your selected resource are routed to the destination.
For example, you might want to build a filter to route all Data Access logs to a single Logging bucket. This filter looks like the following:
log_id("cloudaudit.googleapis.com/data_access") OR log_id("externalaudit.googleapis.com/data_access")Note that the length of a filter can't exceed 20,000 characters.
To verify you entered the correct filter, select Preview logs. This opens the Logs Explorer in a new tab with the filter prepopulated.
(Optional) In the Choose logs to filter out of sink panel, do the following:
In the Exclusion filter name field, enter a name.
In the Build an exclusion filter field, enter a filter expression that matches the log entries you want to exclude. You can also use the
samplefunction to select a portion of the log entries to exclude.
You can create up to 50 exclusion filters per sink. Note that the length of a filter can't exceed 20,000 characters.
Select Create sink.
API
To create a logging sink in your Google Cloud project, use projects.sinks.create in the Logging API. In the LogSink object, provide the appropriate required values in the method request body:
name: An identifier for the sink. Note that after you create the sink, you can't rename the sink, but you can delete it and create a new sink.destination: The service and destination to where you want your logs routed. To route logs to a different project, or to a destination that is in another project, set thedestinationfield with the appropriate path, as described in Destination path formats.For example, if your sink destination is a BigQuery dataset, then
destinationlooks like the following:bigquery.googleapis.com/projects/PROJECT_ID/datasets/DATASET_ID
In the LogSink object, provide the appropriate optional information:
filter: Set thefilterproperty to match the log entries you want to include in your sink. If you don't set a filter, all logs from your Google Cloud project are routed to the destination. Note that the length of a filter can't exceed 20,000 characters.exclusions: Set this property to match the log entries that you want to exclude from your sink. You can also use thesamplefunction to select a portion of the log entries to exclude. You can create up to 50 exclusion filters per sink.description: Set this property to describe the purpose or use case for the sink.
Call projects.sinks.create to create the sink.
If the API response contains a JSON key labeled
"writerIdentity", then grant the service account of the sink the permission to write to the sink destination. For more information, see Set destination permissions.You don't need to set destination permissions when the API response doesn't contain a JSON key labeled
"writerIdentity".
For more information on creating sinks using the Logging API, see the LogSink reference.
gcloud
To create a sink, run the following gcloud logging sinks create
command.
Provide the appropriate values for the variables in the command as follows:
- SINK_NAME: An identifier for the sink. Note that after you create the sink, you can't rename the sink but you can delete it and create a new sink.
SINK_DESTINATION: The service and destination to where you want your logs routed. To route logs to a different project, or to a destination that is in another project, set SINK_DESTINATION with the appropriate path, as described in Destination path formats.
For example, if your sink destination is a BigQuery dataset, then SINK_DESTINATION looks like the following:
bigquery.googleapis.com/projects/PROJECT_ID/datasets/DATASET_ID
OPTIONAL_FLAGS includes the following flags:
--log-filter: Use this flag to set a filter that matches the log entries you want to include in your sink. If you don't set a filter, all logs from your Google Cloud project are routed to the destination.--exclusion: Use this flag to set an exclusion filter for log entries that you want to exclude from your sink. You can also use thesamplefunction to select a portion of the log entries to exclude. This flag can be repeated; you can create up to 50 exclusion filters per sink.--description: Use this flag to describe the purpose or use case for the sink.
gcloud logging sinks create SINK_NAME SINK_DESTINATION OPTIONAL_FLAGS
For example, to create a sink to a Logging bucket, your command might look like this:
gcloud logging sinks create my-sink logging.googleapis.com/projects/myproject123/locations/global/buckets/my-bucket \
  --log-filter='logName="projects/myproject123/logs/matched"' --description="My first sink"
For more information on creating sinks using the
Google Cloud CLI, including more flags and examples, see the
gcloud logging sinks reference.
New log sinks to Cloud Storage buckets might take several hours to start routing logs. Sinks to Cloud Storage are processed hourly while other destination types are processed in real time.
Sinks don't define the schema for BigQuery datasets. Instead, the first log entry received by BigQuery determines the schema for the destination table. For more information, see BigQuery schema for routed logs.
For information about how to view logs in the sink destinations, see View logs routed to Cloud Logging buckets.
After creating the sink, you can view the number and volume of log entries
received using the logging.googleapis.com/exports/
metrics.
If you receive error notifications, see Troubleshoot routing and sinks.
Don't put sensitive information in sink filters. Sink filters are treated as service data.
Destination path formats
If you are routing to a destination that is in another project, then you must provide the Logging, BigQuery, Cloud Storage, or Pub/Sub service and destination information:
To route log entries to a Cloud Logging log bucket that is in a different Google Cloud project, the sink destination is the following:
logging.googleapis.com/projects/DESTINATION_PROJECT_ID/locations/LOCATION/buckets/BUCKET_NAME
To route log entries to another Google Cloud project, the sink destination path is the following:
logging.googleapis.com/projects/DESTINATION_PROJECT_ID
To route log entries to a BigQuery dataset, the sink destination is the following:
bigquery.googleapis.com/projects/PROJECT_ID/datasets/DATASET_ID
To route log entries to a Cloud Storage bucket, the sink destination is the following:
storage.googleapis.com/BUCKET_NAME
To route log entries to a Pub/Sub topic, the sink destination is the following:
pubsub.googleapis.com/projects/PROJECT_ID/topics/TOPIC_ID
Manage sinks
After your sinks are created, you can perform these actions on them:
- View sink details
- Update sink
- Disable sink
- Delete sink
- Troubleshoot sink
- View sink log volume and error rates
Before you delete a sink, consider the following:
- You can't delete the
_Defaultand the_Requiredsinks, but you can disable_Defaultsinks to stop routing logs to_DefaultLogging buckets. - After a sink is deleted, it stops routing log entries.
- If the sink has a dedicated service account, then deleting that sink also deletes the service account. Sinks created before May 22, 2023 have dedicated service accounts. Sinks created on or after May 22, 2023 have a shared service account. Deleting the sink doesn't delete the shared service account.
Any changes made to a sink might take a few minutes to apply.
Following are the instructions for managing a sink in a Google Cloud project. Instead of a Google Cloud project, you can specify a billing account, folder, or organization:
Console
-
In the navigation panel of the Google Cloud console, select Logging, and then select Log Router:
Select the Google Cloud project that contains your sink by using the resource selector from anywhere in the Google Cloud console:

To view your aggregated sinks, select the organization, folder, or billing account that contains the sink.
The Log Router page contains a table summary of sinks. Each table row contains information about a sink's properties:
- Enabled: Indicates if the sink's state is enabled or disabled.
- Type: The sink's destination service; for example,
Cloud Logging bucket. - Name: The sink's identifier, as provided when the sink was created;
for example
_Default. - Description: The sink's description, as provided when the sink was created.
- Destination: Full name of the destination for where the routed log entries will be sent.
- Created: The date and time that the sink was created.
- Last updated: The date and time that the sink was last edited.
For each table row, the more_vert More actions menu provides the following options:
- View sink details: Displays the sink's name, description, destination service, destination, and inclusion and exclusion filters. Selecting Edit opens the Edit Sink panel.
- Edit sink: Opens the Edit Sink panel where you can update the sink's parameters.
- Disable sink: Lets you disable the sink and stop routing logs to the sink's destination. For more information on disabling sinks, see Stop storing logs in log buckets.
- Enable sink: Lets you enable a disabled sink and restart routing logs to the sink's destination.
- Delete sink: Lets you delete the sink and stop routing logs to the sink's destination.
- Troubleshoot sink: Opens the Logs Explorer where you can troubleshoot errors with the sink.
- View sink log volume and error rates: Opens the Metrics Explorer where you can view and analyze data from the sink.
Clicking on any of the column names lets you sort data in ascending or descending order.
API
To view the sinks for your Google Cloud project, call
projects.sinks.list.To view a sink's details, call
projects.sinks.get.To update a sink, call
projects.sink.update.You can update a sink's destination, filters, and description. You can also disable or reenable the sink.
To disable a sink, call
projects.sink.updateand set thedisabledproperty totrue.To reenable the sink, call
projects.sink.updateand set thedisabledproperty tofalse.To delete a sink, call
projects.sinks.delete.For more information on any of these methods for managing sinks using the Logging API, see the LogSink reference.
gcloud
To view your list of sinks for your Google Cloud project, use the
gcloud logging sinks listcommand, which corresponds to the Logging API methodprojects.sinks.list:gcloud logging sinks list
To view your list of aggregated sinks, use the appropriate flag to specify the resource that contains the sink. For example, if you created the sink at the organization level, use the
--organization=ORGANIZATION_IDflag to list the sinks for the organization.To describe a sink, use the
gcloud logging sinks describecommand, which corresponds to the Logging API methodprojects.sinks.get:gcloud logging sinks describe SINK_NAME
To update a sink, use the
gcloud logging sinks updatecommand, which corresponds to the API methodprojects.sink.update.You can update a sink to change the destination, filters, and description, or to disable or reenable the sink:
gcloud logging sinks update SINK_NAME NEW_DESTINATION --log-filter=NEW_FILTER
Omit the NEW_DESTINATION or
--log-filterif those parts don't change.For example, to update the destination of your sink named
my-project-sinkto a new Cloud Storage bucket destination namedmy-second-gcs-bucket, your command looks like this:gcloud logging sinks update my-project-sink storage.googleapis.com/my-second-gcs-bucket
To disable a sink, use the
gcloud logging sinks updatecommand, which corresponds to the API methodprojects.sink.update, and include the--disabledflag:gcloud logging sinks update _Default --disabled
To reenable the sink, use the
gcloud logging sinks updatecommand, remove the--disabledflag, and include the--no-disabledflag:gcloud logging sinks update _Default --no-disabled
To delete a sink, use the
gcloud logging sinks deletecommand, which corresponds to the API methodprojects.sinks.delete:gcloud logging sinks delete SINK_NAME
For more information on managing sinks using the Google Cloud CLI, see the
gcloud logging sinksreference.
Stop storing logs in log buckets
For each Google Cloud project, Logging automatically creates
two log buckets: _Required and _Default.
Logging automatically creates two log sinks, _Required
and _Default, that route logs to the correspondingly named buckets.
You can't disable the _Required sink. You can
disable the _Default sink to stop logs from being stored in the
_Default bucket. You can also disable any user-defined sinks.
When you disable all the sinks in your Google Cloud project that send logs
to the _Default bucket,
no new logs are stored in that log bucket.
The _Default bucket is empty when all of the previously stored logs in the
_Default bucket have fulfilled the bucket's
retention period.
To disable your Google Cloud project sinks that route logs to the _Default
bucket, complete the following steps:
Console
-
In the navigation panel of the Google Cloud console, select Logging, and then select Log Router:
To find all the sinks that route logs to the
_Defaultbucket, filter the sinks by destination, and then enter_Default.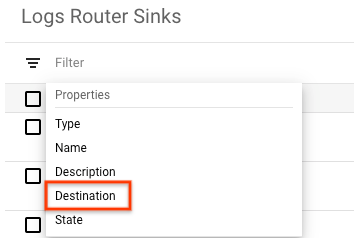
For each sink, select more_vert Menu and then select Disable sink.
The sinks are now disabled and your Google Cloud project sinks no
longer route logs to the _Default bucket.
To reenable a disabled sink and restart routing logs to the sink's destination, do the following:
-
In the navigation panel of the Google Cloud console, select Logging, and then select Log Router:
To find all the disabled sinks previously configured to route logs to the
_Defaultbucket, filter the sinks by destination, and then enter_Default.For each sink, select more_vert Menu and then select Enable sink.
API
To view the sinks for your Google Cloud project, call the Logging API method
projects.sinks.list.Identify any sinks that are routing to the
_Defaultbucket.For example, to disable the
_Defaultsink, callprojects.sink.updateand set thedisabledproperty totrue.
The _Default sink is now disabled; it no longer routes logs to the
_Default bucket.
To disable the other sinks in your Google Cloud project that are routing
to the _Default bucket, repeat the steps above.
To reenable a sink, call
projects.sink.update
and set the disabled property to false.
gcloud
To view your list of sinks for your Google Cloud project, use the
gcloud logging sinks listcommand, which corresponds to the Logging API methodprojects.sinks.list:gcloud logging sinks list
Identify any sinks that are routing to the
_Defaultbucket. To describe a sink, including seeing the destination name, use thegcloud logging sinks describecommand, which corresponds to the Logging API methodprojects.sinks.get:gcloud logging sinks describe SINK_NAME
For example, to disable the
_Defaultsink, use thegcloud logging sinks updatecommand and include the--disabledflag:gcloud logging sinks update _Default --disabled
The _Default sink is now disabled; it no longer routes logs to the
_Default bucket.
To disable the other sinks in your Google Cloud project that are routing
to the _Default bucket, repeat the steps above.
To reenable a sink, use the
gcloud logging sinks update
command, remove the --disabled flag, and include the --no-disabled
flag:
gcloud logging sinks update _Default --no-disabled
Set destination permissions
This section describes how to grant Logging the Identity and Access Management permissions to write logs to your sink's destination. For the full list of Logging roles and permissions, see Access control.
Cloud Logging creates a shared service account for a resource when a log sink is created, unless the required service account already exists. The service account might exist because the same service account is used for all sinks in the underlying resource. Resources can be a Google Cloud project, an organization, a folder, or a billing account.
The writer identity of a sink is the identifier of the service
account associated with that sink. All sinks have a writer identity except
for sinks that write to a log bucket in the current Google Cloud project.
When the destination of a sink is a log bucket in the current
Google Cloud project, the sink doesn't require any additional
destination permissions. Therefore, the value of the writer identity field
is listed as None in the console,
and it isn't reported by the API and the Google Cloud CLI commands.
Following are the instructions for setting Google Cloud project-level permissions for your sink to route to its destination. Instead of a Google Cloud project, you can specify a billing account, folder, or organization:
Console
To get the sink's writer identity—an email address—from the new sink, do the following:
-
In the navigation panel of the Google Cloud console, select Logging, and then select Log Router:
Select more_vert Menu and then select View sink details. The writer identity appears in the Sink details panel.
-
If the value of the
writerIdentityfield contains an email address, then proceed to the next step. When the value isNone, you don't need to configure destination permissions for the sink.To copy the sink's writer identity into your clipboard, click content_copy Copy.
If you have Owner access to the destination, then add the service account as an IAM principal in the destination project:
- For Cloud Storage destinations, add the sink's writer identity
as a principal by using IAM, and then grant it the
Storage Object Creator role
(
roles/storage.objectCreator). - For BigQuery destinations, add the sink's writer identity
as a principal by using IAM, and then grant it the
BigQuery Data Editor role
(
roles/bigquery.dataEditor). - For Pub/Sub destinations, including Splunk, add the sink's writer identity
as a principal by using IAM, and then grant it the
Pub/Sub Publisher role
(
roles/pubsub.publisher). - For Logging bucket destinations in different
Google Cloud projects, add the sink's writer identity as a principal by
using IAM, and then grant it the
Logs Bucket Writer role
(
roles/logging.bucketWriter). - For Google Cloud projects destinations, add the sink's
writer identity as a principal by using IAM, and then grant it the
Logs Writer role
(
roles/logging.logWriter). Specifically, a principal needs thelogging.logEntries.routepermission.
- For Cloud Storage destinations, add the sink's writer identity
as a principal by using IAM, and then grant it the
Storage Object Creator role
(
API
Call the API method projects.sinks.list to list the sinks in your Google Cloud project.
Locate the sink whose permissions you want to modify, and if the sink details contain a JSON key labeled
"writerIdentity", then proceed to the next step. When the details don't include a"writerIdentity"field, you don't need to configure destination permissions for the sink.If you have IAM Owner access to the destination, add the service account to the destination by doing the following:
- For Cloud Storage destinations, add the sink's writer identity
as a principal by using IAM, and then grant it the
Storage Object Creator role
(
roles/storage.objectCreator). - For BigQuery destinations, add the sink's writer identity
as a principal by using IAM, and then grant it the
BigQuery Data Editor role
(
roles/bigquery.dataEditor). - For Pub/Sub destinations, including Splunk, add the sink's writer identity
as a principal by using IAM, and then grant it the
Pub/Sub Publisher role
(
roles/pubsub.publisher). - For Logging bucket destinations in different
Google Cloud projects, add the sink's writer identity as a principal by
using IAM, and then grant it the
Logs Bucket Writer role
(
roles/logging.bucketWriter). - For Google Cloud projects destinations, add the sink's
writer identity as a principal by using IAM, and then grant it the
Logs Writer role
(
roles/logging.logWriter). Specifically, a principal needs thelogging.logEntries.routepermission.
- For Cloud Storage destinations, add the sink's writer identity
as a principal by using IAM, and then grant it the
Storage Object Creator role
(
gcloud
Get the service account from the
writerIdentityfield in your sink:gcloud logging sinks describe SINK_NAME
Locate the sink whose permissions you want to modify, and if the sink details contain a line with
writerIdentity, then proceed to the next step. When the details don't include awriterIdentityfield, you don't need to configure destination permissions for the sink.The value of the SERVICE_ACCT_NAME field in the following steps is the writer identity, which looks similar to the following:
serviceAccount:service-123456789012@gcp-sa-logging.iam.gserviceaccount.com
If you have IAM Owner access to the destination, add the service account to the destination by doing the following:
- For Cloud Storage destinations, add the sink's writer identity
as a principal by using IAM, and then grant it the
Storage Object Creator role
(
roles/storage.objectCreator). - For BigQuery destinations, add the sink's writer identity
as a principal by using IAM, and then grant it the
BigQuery Data Editor role
(
roles/bigquery.dataEditor). - For Pub/Sub destinations, including Splunk, add the sink's writer identity
as a principal by using IAM, and then grant it the
Pub/Sub Publisher role
(
roles/pubsub.publisher). - For Logging bucket destinations in different
Google Cloud projects, add the sink's writer identity as a principal by
using IAM, and then grant it the
Logs Bucket Writer role
(
roles/logging.bucketWriter). - For Google Cloud projects destinations, add the sink's
writer identity as a principal by using IAM, and then grant it the
Logs Writer role
(
roles/logging.logWriter). Specifically, a principal needs thelogging.logEntries.routepermission.
For example, to grant the Logs Writer role (
roles/logging.logWriter) role to the service accountservice-123456789012@gcp-sa-logging.iam.gserviceaccount.comin the projectmy-test-project, run the following command:gcloud projects add-iam-policy-binding my-test-project --member='serviceAccount:service-123456789012@gcp-sa-logging.iam.gserviceaccount.com' --role='roles/logging.logWriter'
- For Cloud Storage destinations, add the sink's writer identity
as a principal by using IAM, and then grant it the
Storage Object Creator role
(
Destination limitations
Depending on the destination you route your logs to, there might be some limitations.
Route to log buckets in different Google Cloud projects
The following limitations apply when you route your logs to log buckets in different Google Cloud projects:
- Error Reporting is disabled on logs stored in log buckets that use customer-managed encryption keys.
Route to different Google Cloud projects
The following limitations apply when you route your logs to different Google Cloud projects:
There is a one-hop limit. For example, if you route log entries from project A to project B, then you can't route the log entries from project B to a different project.
Audit logs aren't routed to the
_Requiredbucket in the destination project. You must create another sink or bucket to store them.If the organization or folder that contains the Google Cloud project that you are routing to has existing aggregated sinks, then the logs aren't routed by those aggregated sinks.
Code samples
To use client library code to configure sinks in your chosen languages, see Logging client libraries: Log sinks.
Filter examples
Following are some filter examples that are particularly useful when creating sinks.
For additional examples that might be useful as you build your inclusion filters and exclusion filters, see Sample queries.
Restore the _Default sink filter
If you edited the filter for the _Default sink, you might want to restore
its default filter. To do so, enter the following inclusion filter:
  NOT log_id("cloudaudit.googleapis.com/activity") AND NOT \
  log_id("externalaudit.googleapis.com/activity") AND NOT \
  log_id("cloudaudit.googleapis.com/system_event") AND NOT \
  log_id("externalaudit.googleapis.com/system_event") AND NOT \
  log_id("cloudaudit.googleapis.com/access_transparency") AND NOT \
  log_id("externalaudit.googleapis.com/access_transparency")
Exclude Google Kubernetes Engine container and pod logs
To exclude Google Kubernetes Engine container and pod logs for
GKE system namespaces, use the following filter:
resource.type = ("k8s_container" OR "k8s_pod")
resource.labels.namespace_name = (
"cnrm-system" OR
"config-management-system" OR
"gatekeeper-system" OR
"gke-connect" OR
"gke-system" OR
"istio-system" OR
"knative-serving" OR
"monitoring-system" OR
"kube-system")
To exclude Google Kubernetes Engine node logs for GKE system
logNames, use the following filter:
resource.type = "k8s_node"
logName:( "logs/container-runtime" OR
"logs/docker" OR
"logs/kube-container-runtime-monitor" OR
"logs/kube-logrotate" OR
"logs/kube-node-configuration" OR
"logs/kube-node-installation" OR
"logs/kubelet" OR
"logs/kubelet-monitor" OR
"logs/node-journal" OR
"logs/node-problem-detector")
To view the volume of Google Kubernetes Engine node, pod and container logs stored in log buckets, use Metrics Explorer in Cloud Monitoring.
Exclude Dataflow logs not required for supportability
To exclude Dataflow logs that aren't required for supportability, use the following filter:
resource.type="dataflow_step"
labels."dataflow.googleapis.com/log_type"!="system" AND labels."dataflow.googleapis.com/log_type"!="supportability"
To view the volume of Dataflow logs stored in log buckets, use Metrics Explorer in Cloud Monitoring.
Supportability
While Cloud Logging provides you with the ability to exclude logs from being stored in a log bucket, you might want to consider keeping logs that help with supportability. Using these logs can help you quickly troubleshoot and identify issues with your applications.
For example, GKE system logs are useful to troubleshoot your GKE applications and clusters because they are generated for events that happen in your cluster. These logs can help you determine if your application code or the underlying GKE cluster is causing your application error. GKE system logs also include Kubernetes Audit Logging generated by the Kubernetes API Server component, which includes changes made using the kubectl command and Kubernetes events.
For Dataflow, we recommended that you, at a minimum, write your system
logs (labels."dataflow.googleapis.com/log_type"="system") and supportability
logs (labels."dataflow.googleapis.com/log_type"="supportability") to
log buckets. These logs
are essential for developers to observe and troubleshoot their Dataflow
pipelines, and users might not be able to use the Dataflow
Job details page to view job logs.
What's next
If you encounter issues as you use sinks to route logs, see Troubleshoot routing logs.
To learn how to view your routed logs in their destinations, as well as how the logs are formatted and organized, see View logs in sink destinations.
To learn more about querying and filtering with the Logging query language, see Logging query language.