This tutorial shows how to handle sessions on App Engine.
Many apps need session handling for authentication and user preferences.
The Gorilla Web Toolkit
sessions package comes with a file system based implementation to perform this
function. However, this implementation is unsuitable for an app that can be served
from multiple instances, because the session that is recorded in one instance
might differ from other instances. The
gorilla/sessions
package also comes with a cookie-based implementation. But, this implementation
requires encrypting cookies and storing the entire session on the client, rather
than just a session ID, which may be too large for some apps.
Objectives
- Write the app.
- Run the app locally.
- Deploy the app on App Engine.
Costs
In this document, you use the following billable components of Google Cloud:
To generate a cost estimate based on your projected usage,
use the pricing calculator.
When you finish the tasks that are described in this document, you can avoid continued billing by deleting the resources that you created. For more information, see Clean up.
Before you begin
- Sign in to your Google Cloud account. If you're new to Google Cloud, create an account to evaluate how our products perform in real-world scenarios. New customers also get $300 in free credits to run, test, and deploy workloads.
-
In the Google Cloud console, on the project selector page, select or create a Google Cloud project.
-
Make sure that billing is enabled for your Google Cloud project.
-
Enable the Firestore API.
- Install the Google Cloud CLI.
-
To initialize the gcloud CLI, run the following command:
gcloud init
-
In the Google Cloud console, on the project selector page, select or create a Google Cloud project.
-
Make sure that billing is enabled for your Google Cloud project.
-
Enable the Firestore API.
- Install the Google Cloud CLI.
-
To initialize the gcloud CLI, run the following command:
gcloud init
-
Update
gcloudcomponents:gcloud components update
- Prepare your development environment.
Setting up the project
In your terminal window, clone the sample app repository to your local machine:
git clone https://github.com/GoogleCloudPlatform/golang-samples.git
Change to the directory that contains the sample code:
cd golang-samples/getting-started/sessions
Understanding the web app
This app displays greetings in different languages for every user. Returning users are always greeted in the same language.
Before the app can store preferences for a user, you need a way to store information about the current user in a session. This sample app uses Firestore to store session data.
You can use firestoregorilla,
a session store that's compatible with
gorilla/sessions.
The app starts by importing dependencies, defining an
apptype to hold asessions.Storeand an HTML template, and defining the list of greetings.Next, the app defines a
mainfunction, which creates a newappinstance, registers the index handler, and starts the HTTP server. ThenewAppfunction creates theappinstance by initializing asessions.Storewith thefirestoregorilla.Newfunction.The index handler gets the user's session, creating one if needed. New sessions are assigned a random language and a view count of 0. Then, the view count is increased by one, the session is saved, and the HTML template writes the response.
The following diagram illustrates how Firestore handles sessions for the App Engine app.

Deleting sessions
firestoregorilla
doesn't delete old or expired sessions. You can
delete session data
in the Google Cloud console
or implement an automated deletion strategy. If you use storage solutions for
sessions such as Memcache or Redis, expired sessions are automatically deleted.
Running locally
In your terminal window, build the
sessionsbinary:go buildStart the HTTP server:
./sessionsView the app in your web browser:
Cloud Shell
In the Cloud Shell toolbar, click Web preview
 and select Preview on port 8080.
Local machine
In your browser, go to
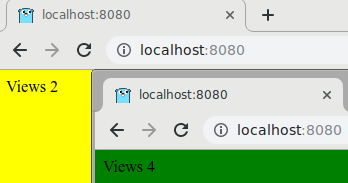
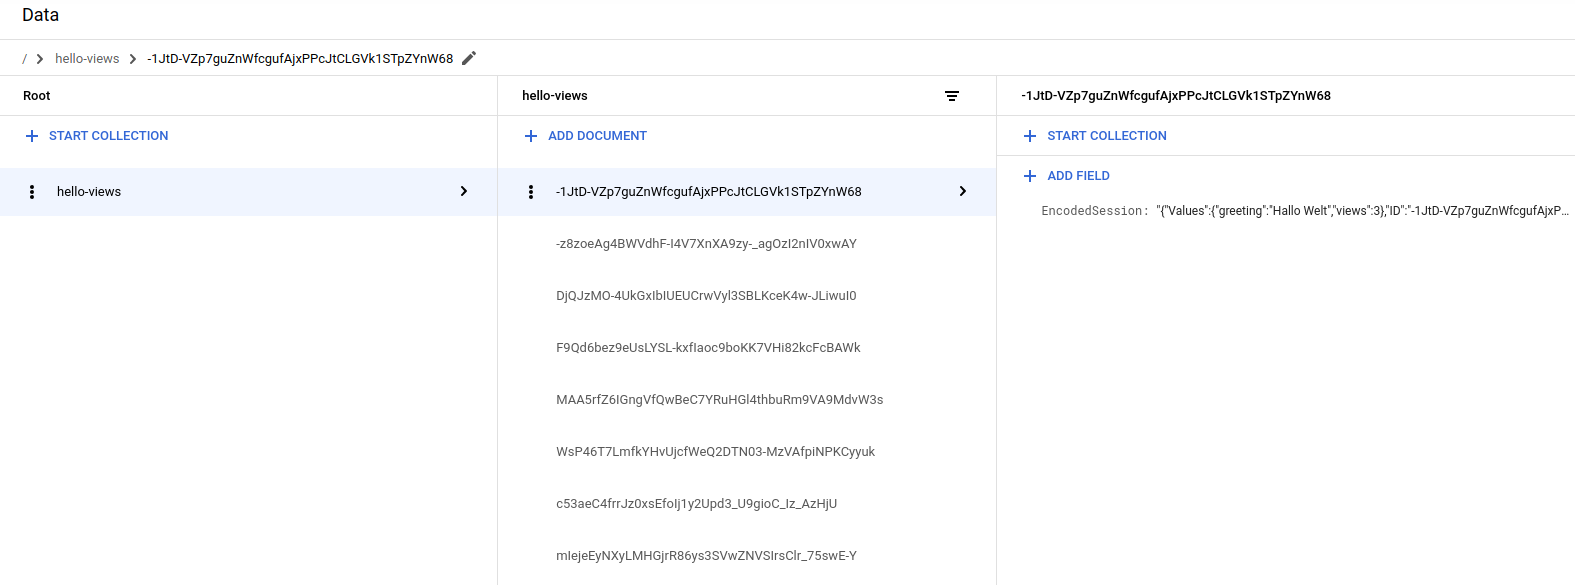
http://localhost:8080You see one of five greetings: “Hello World”, “Hallo Welt”, "Hola mundo”, “Salut le Monde”, or “Ciao Mondo.” The language changes if you open the page in a different browser or in incognito mode. You can see and edit the session data in the Google Cloud console.
To stop the HTTP server, in your terminal window, press
Control+C.
Deploying and running on App Engine
You can use the App Engine standard environment to build and deploy an app that runs reliably under heavy load and with large amounts of data.
This tutorial uses the App Engine standard environment to deploy the server.
The app.yaml file contains the App Engine standard environment
configuration:
Deploy the app on App Engine:
gcloud app deployIn your browser, enter the following URL:
https://PROJECT_ID.REGION_ID.r.appspot.comReplace the following:
PROJECT_ID: Your Google Cloud project IDREGION_ID: A code that App Engine assigns to your app
The greeting is now delivered by a web server running on an App Engine instance.
Debugging the app
If you cannot connect to your App Engine app, check the following:
- Check that the
gclouddeploy commands successfully completed and didn't output any errors. If there were errors (for example,message=Build failed), fix them, and try deploying the App Engine app again. In the Google Cloud console, go to the Logs Explorer page.
In the Recently selected resources drop-down list, click App Engine Application, and then click All module_id. You see a list of requests from when you visited your app. If you don't see a list of requests, confirm you selected All module_id from the drop-down list. If you see error messages printed to the Google Cloud console, check that your app's code matches the code in the section about writing the web app.
Make sure that the Firestore API is enabled.
Clean up
Delete the project
- In the Google Cloud console, go to the Manage resources page.
- In the project list, select the project that you want to delete, and then click Delete.
- In the dialog, type the project ID, and then click Shut down to delete the project.
Delete the App Engine instance
- In the Google Cloud console, go to the Versions page for App Engine.
- Select the checkbox for the non-default app version that you want to delete.
- To delete the app version, click Delete.
What's next
- Try Cloud Functions tutorials.
- Learn more about App Engine.
- Try Cloud Run, which lets you run stateless containers on a fully managed environment or in your own Google Kubernetes Engine cluster.