This page describes how to manage the Google Cloud CLI in Cloud Tools for Eclipse. You can either allow Cloud Tools for Eclipse to download and install the gcloud CLI for you, or you can point it to a specific gcloud CLI installation.
Auto-managed gcloud CLI
When you install Cloud Tools for Eclipse, it searches your computer for the gcloud CLI. If it can't find the gcloud CLI, then it automatically downloads the latest version of the gcloud CLI. It also periodically checks for and installs updates as needed.
The plugin also checks for the gcloud CLI:
when you start Eclipse
when you deploy an App Engine standard application
when you start the App Engine standard local server
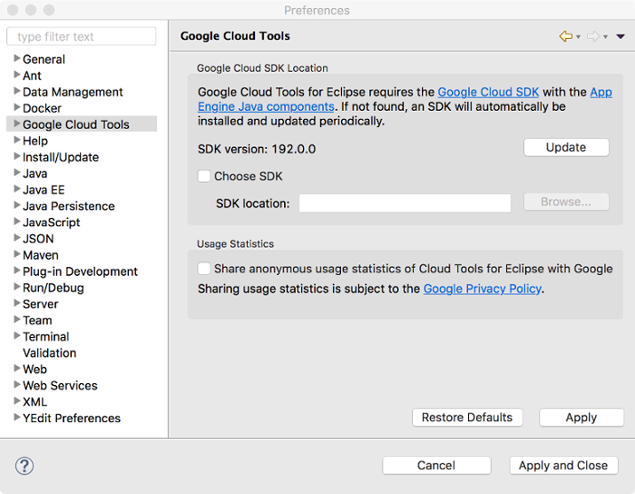
In the Eclipse Preferences dialog, the Google Cloud Tools setting shows the gcloud CLI configuration. When the Choose SDK checkbox is clear, then Cloud Tools for Eclipse is managing the gcloud CLI.
Self-managed gcloud CLI
To pick a gcloud CLI from your local file system:
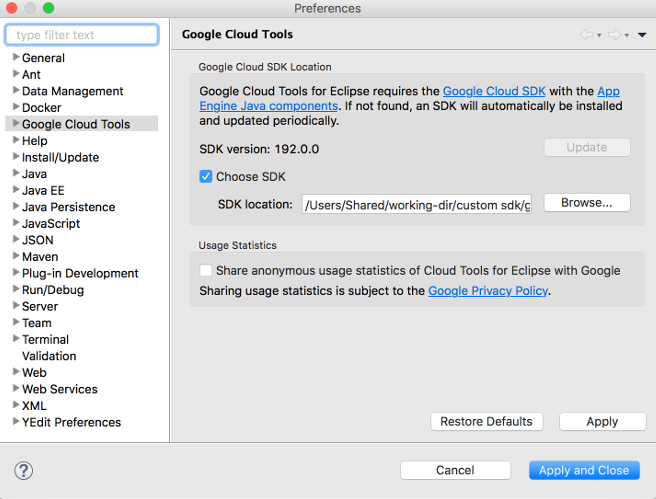
In the Eclipse Preferences dialog, select Google Cloud Tools.
Select the Choose SDK checkbox.
Click Browse and navigate to the location of the gcloud CLI you want to use.
Eclipse uses the specified gcloud CLI.