Dialogflow에서 fulfillment는 사용자 요청을 해결할 수 있는 서비스, 앱, 피드, 대화 또는 기타 로직입니다. 여기서는 Make Appointment 인텐트에서 제공하는 시간 및 날짜 정보를 바탕으로 자전거 판매점에 일정을 예약할 수 있는 fulfillment가 필요합니다.
이 설정을 위해 인텐트에서 시간 및 날짜 매개변수를 받을 수 있고 API를 사용하여 Google 캘린더에 이벤트를 만들 수 있는 백엔드 서비스인 웹훅을 제공합니다. 이를 완료하려면 다음 두 가지 작업을 수행해야 합니다.
- Google Calendar API의 사용자 인증 정보를 가져옵니다.
- 새 캘린더를 만들고 웹훅에서 코드를 구성합니다.
인라인 편집기로 웹훅 만들기
Dialogflow 콘솔에는 Firebase에서 웹훅으로 실행되도록 배포할 수 있는 NodeJS 코드를 직접 작성할 수 있는 인라인 편집기가 있습니다.
Dialogflow의 인라인 편집기를 사용하여 웹훅을 만들려면 다음 단계를 따르세요.
- Make Appointment 인텐트를 클릭합니다.
- Fulfillment 섹션에서 Enable Webhook call for this intent(이 인텐트의 웹훅 호출 사용 설정) 버튼을 전환합니다.

- SAVE(저장)를 클릭합니다.
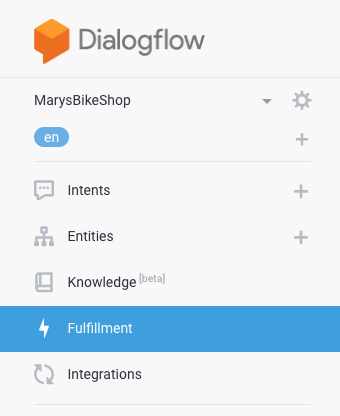
- 탐색 메뉴에서 Fulfillment 탭을 클릭하여 fulfillment 페이지로 이동합니다.
- 인라인 편집기의 버튼을 ENABLED(사용 설정됨)으로 전환합니다.

- 인라인 편집기의
package.json탭에서 기존 콘텐츠를 삭제합니다.
아래 JSON 콘텐츠를 복사하여 인라인 편집기의
package.json탭에 붙여넣습니다.{ "name": "DialogflowFirebaseWebhook", "description": "Firebase Webhook dependencies for a Dialogflow agent.", "version": "0.0.1", "private": true, "license": "Apache Version 2.0", "author": "Google Inc.", "engines": { "node": "6" }, "scripts": { "lint": "semistandard --fix \"**/*.js\"", "start": "firebase deploy --only functions", "deploy": "firebase deploy --only functions" }, "dependencies": { "firebase-functions": "^2.0.2", "firebase-admin": "^5.13.1", "googleapis": "^27.0.0", "actions-on-google": "2.2.0", "dialogflow-fulfillment": "0.5.0" } }인라인 편집기의
index.js탭에서 기존 코드를 삭제합니다.
아래의 코드를 복사하여 인라인 편집기의
index.js탭에 붙여넣습니다./** * Copyright 2017 Google Inc. All Rights Reserved. * * Licensed under the Apache License, Version 2.0 (the "License"); * you may not use this file except in compliance with the License. * You may obtain a copy of the License at * * http://www.apache.org/licenses/LICENSE-2.0 * * Unless required by applicable law or agreed to in writing, software * distributed under the License is distributed on an "AS IS" BASIS, * WITHOUT WARRANTIES OR CONDITIONS OF ANY KIND, either express or implied. * See the License for the specific language governing permissions and * limitations under the License. */ 'use strict'; const functions = require('firebase-functions'); const {google} = require('googleapis'); const {WebhookClient} = require('dialogflow-fulfillment'); // Enter your calendar ID and service account JSON below. const calendarId = '<INSERT CALENDAR ID HERE>'; // Example: 6ujc6j6rgfk02cp02vg6h38cs0@group.calendar.google.com const serviceAccount = {}; // The JSON object looks like: { "type": "service_account", ... } // Set up Google Calendar service account credentials const serviceAccountAuth = new google.auth.JWT({ email: serviceAccount.client_email, key: serviceAccount.private_key, scopes: 'https://www.googleapis.com/auth/calendar' }); const calendar = google.calendar('v3'); process.env.DEBUG = 'dialogflow:*'; // It enables lib debugging statements const timeZone = 'America/Los_Angeles'; // Change it to your time zone const timeZoneOffset = '-07:00'; // Change it to your time zone offset exports.dialogflowFirebaseFulfillment = functions.https.onRequest((request, response) => { const agent = new WebhookClient({ request, response }); function makeAppointment (agent) { // Use the Dialogflow's date and time parameters to create Javascript Date instances, 'dateTimeStart' and 'dateTimeEnd', // which are used to specify the appointment's time. const appointmentDuration = 1;// Define the length of the appointment to be one hour. const dateTimeStart = convertParametersDate(agent.parameters.date, agent.parameters.time); const dateTimeEnd = addHours(dateTimeStart, appointmentDuration); const appointmentTimeString = getLocaleTimeString(dateTimeStart); const appointmentDateString = getLocaleDateString(dateTimeStart); // Check the availability of the time slot and set up an appointment if the time slot is available on the calendar return createCalendarEvent(dateTimeStart, dateTimeEnd).then(() => { agent.add(`Got it. I have your appointment scheduled on ${appointmentDateString} at ${appointmentTimeString}. See you soon. Good-bye.`); }).catch(() => { agent.add(`Sorry, we're booked on ${appointmentDateString} at ${appointmentTimeString}. Is there anything else I can do for you?`); }); } let intentMap = new Map(); intentMap.set('Make Appointment', makeAppointment); // It maps the intent 'Make Appointment' to the function 'makeAppointment()' agent.handleRequest(intentMap); }); function createCalendarEvent (dateTimeStart, dateTimeEnd) { return new Promise((resolve, reject) => { calendar.events.list({ // List all events in the specified time period auth: serviceAccountAuth, calendarId: calendarId, timeMin: dateTimeStart.toISOString(), timeMax: dateTimeEnd.toISOString() }, (err, calendarResponse) => { // Check if there exists any event on the calendar given the specified the time period if (err || calendarResponse.data.items.length > 0) { reject(err || new Error('Requested time conflicts with another appointment')); } else { // Create an event for the requested time period calendar.events.insert({ auth: serviceAccountAuth, calendarId: calendarId, resource: {summary: 'Bike Appointment', start: {dateTime: dateTimeStart}, end: {dateTime: dateTimeEnd}} }, (err, event) => { err ? reject(err) : resolve(event); } ); } }); }); } // A helper function that receives Dialogflow's 'date' and 'time' parameters and creates a Date instance. function convertParametersDate(date, time){ return new Date(Date.parse(date.split('T')[0] + 'T' + time.split('T')[1].split('-')[0] + timeZoneOffset)); } // A helper function that adds the integer value of 'hoursToAdd' to the Date instance 'dateObj' and returns a new Data instance. function addHours(dateObj, hoursToAdd){ return new Date(new Date(dateObj).setHours(dateObj.getHours() + hoursToAdd)); } // A helper function that converts the Date instance 'dateObj' into a string that represents this time in English. function getLocaleTimeString(dateObj){ return dateObj.toLocaleTimeString('en-US', { hour: 'numeric', hour12: true, timeZone: timeZone }); } // A helper function that converts the Date instance 'dateObj' into a string that represents this date in English. function getLocaleDateString(dateObj){ return dateObj.toLocaleDateString('en-US', { weekday: 'long', month: 'long', day: 'numeric', timeZone: timeZone }); }DEPLOY(배포)를 클릭합니다.

그림 7. 웹훅 함수
makeAppointment()에 대한 연결을 보여주는 플로차트
이제 Make Appointment 인텐트가 웹훅의 makeAppointment() 함수에 연결되었습니다. 웹훅에서 다음 코드를 살펴보겠습니다.
exports.dialogflowFirebaseFulfillment = functions.https.onRequest((request, response) => {
  const agent = new WebhookClient({ request, response });

  function makeAppointment (agent) {
    // Calculate appointment start and end datetimes (end = +1hr from start)
    const dateTimeStart = convertParametersDate(agent.parameters.date, agent.parameters.time);
    const dateTimeEnd = addHours(dateTimeStart, 1);
    const appointmentTimeString = getLocaleTimeString(dateTimeStart);
    const appointmentDateString = getLocaleDateString(dateTimeStart);
    // Check the availability of the time, and make an appointment if there is time on the calendar
    return createCalendarEvent(dateTimeStart, dateTimeEnd).then(() => {
      agent.add(`Got it. I have your appointment scheduled on ${appointmentDateString} at ${appointmentTimeString}. See you soon. Good-bye.`);
    }).catch(() => {
      agent.add(`Sorry, we're booked on ${appointmentDateString} at ${appointmentTimeString}. Is there anything else I can do for you?`);
    });
  }
  let intentMap = new Map();
  intentMap.set('Make Appointment', makeAppointment);
  agent.handleRequest(intentMap);
});
위의 코드에서 다음 줄을 확인합니다.
intentMap.set('Make Appointment', makeAppointment);
set() 함수는 Map 객체 intentMap에서 호출됩니다. 이 함수는 인텐트를 코드의 특정 함수에 연결합니다. 이 경우 호출은 Make Appointment 인텐트와 makeAppointment() 함수 간의 매핑을 설정합니다.
makeAppointment(agent){} 함수는 agent.parameters.date 및 agent.parameters.time을 통해 agent 입력 객체에서 날짜 및 시간 매개변수 값을 읽습니다. 날짜 및 시간 값을 파싱하고 형식을 지정한 후에 함수는 커스텀 함수 createCalendarEvent()를 호출하여 Google 캘린더에 API 호출을 보내 캘린더에 이벤트를 만듭니다.
마지막으로 agent.add() 함수는 사용자에 대한 응답으로 맞춤설정된 문자열을 제공하는 데 사용됩니다. Dialogflow 콘솔을 사용하여 웹훅으로 응답을 제공하는 것과 달리 코드 로직을 사용하여 매우 동적인 응답을 구성할 수 있습니다. 예를 들어 에이전트가 일정을 예약하면 다음 응답으로 답장합니다.
알겠습니다. ${appointmentDateString} ${appointmentTimeString}에 약속을 잡아 드렸습니다. 곧 뵙겠습니다. 감사합니다.
그러나 에이전트가 제공된 특정 날짜와 시간에 일정을 예약하지 못하면 다음 응답을 반환합니다.
죄송합니다. ${appointmentDateString} ${appointmentTimeString}에 예약이 있습니다. 그 밖에 도와드릴 일이 있을까요?
현재 Google Calendar API에 액세스할 수 없으므로 코드를 제대로 테스트할 수 없습니다. Google Calendar API 설정을 맞춤설정하기 위한 코드에는 다음과 같은 변수가 있습니다.
const calendarId = '<INSERT CALENDAR ID HERE>'; // Example: 6ujc6j6rgfk02cp02vg6h38cs0@group.calendar.google.com
const serviceAccount = {}; // The JSON object looks like: { "type": "service_account", ... }
이제 Google Calendar API에 액세스하도록 코드를 구성해야 합니다.
Google Calendar API의 사용자 인증 정보를 가져오기
Google Calendar API의 사용자 인증 정보를 가져오려면 다음 단계를 따르세요.
- Dialogflow 탐색 메뉴에서 에이전트 이름 옆의 설정 ⚙ 버튼을 클릭합니다.

- Google PROJECT(Google 프로젝트) 표에서 프로젝트 ID 링크를 클릭하여 Google Cloud Platform Console을 엽니다.

- Google Cloud Platform Console에서 메뉴 버튼 ☰을 클릭하고 API 및 서비스 > 라이브러리 를 선택합니다.
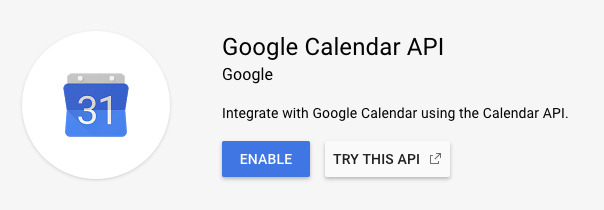
Google Calendar API 카드를 클릭합니다.

Google Calendar API 페이지에서 사용 설정을 클릭합니다.
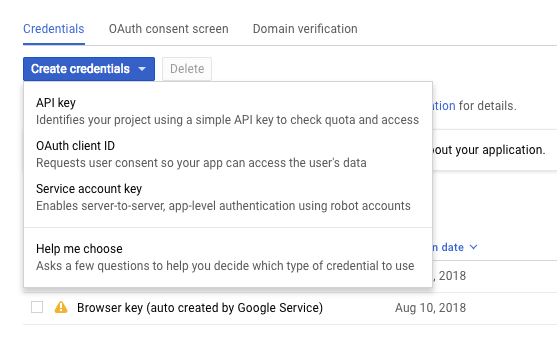
탐색 메뉴에서 사용자 인증 정보를 클릭합니다.
사용자 인증 정보 만들기를 클릭하고 드롭다운 메뉴에서 서비스 계정 키 항목을 선택합니다.
서비스 계정 드롭다운 메뉴를 클릭하고 새 서비스 계정 항목을 선택합니다.
서비스 계정 이름 입력 필드에
bike-shop-calendar를 입력합니다.
역할 필드의 경우 드롭다운 메뉴에서 프로젝트 > 소유자를 선택합니다.
만들기를 클릭합니다. (서비스 계정 키가 포함된 JSON 파일이 다운로드됩니다.)
웹훅에서 새 캘린더 생성 및 코드 구성
이제 일정을 추적하기 위해 자전거 판매점의 새 캘린더를 만들어야 합니다. 다운로드한 JSON 파일의 정보를 사용하여 에이전트의 웹훅 코드를 새 Google 캘린더에 통합합니다. 다음 안내를 계속하기 전에 JSON 파일의 내용을 보고 복사할 수 있는지 확인합니다.
새 캘린더를 만들고 통합을 완료하려면 다음 단계를 따르세요.
- Google 캘린더를 엽니다.
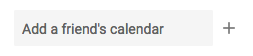
- Google 캘린더의 탐색 메뉴에서 친구의 캘린더 추가 입력 필드 옆에 있는 + 버튼을 클릭합니다.
- 드롭다운 메뉴에서 새 캘린더 항목을 선택합니다.
- 이름 필드에
Mary's Bike Shop을 입력합니다. - 캘린더 만들기 링크를 클릭합니다. (탐색 메뉴의 내 캘린더의 설정 창 아래 새 캘린더
Mary's Bike Shop이 만들어집니다.) - Mary's Bike Shop을 클릭하고 특정 사용자와 공유를 선택합니다.
- 특정 사용자와 공유 섹션에서 사용자 추가를 클릭합니다. (특정 사용자와 공유 팝업 창이 화면에 나타납니다.)

이전에 다운로드한 JSON 파일을 열고
client_email필드에 따옴표 없이 이메일 주소를 복사합니다.{ "type": "service_account", "project_id": "marysbikeshop-...", "private_key_id": "...", "private_key": "...", "client_email": "bike-shop-calendar@<project-id>.iam.gserviceaccount.com", "client_id": "...", "auth_uri": "https://accounts.google.com/o/oauth2/auth", "token_uri": "https://accounts.google.com/o/oauth2/token", "auth_provider_x509_cert_url": "https://www.googleapis.com...", "client_x509_cert_url": "https://www.googleapis.com/robot/v..." }특정 사용자와 공유 팝업 창에 이메일 또는 이름 추가 입력 필드의
client_email에 있는 이메일 주소를 붙여넣습니다.
권한 드롭다운 메뉴에서 일정 변경 항목을 선택합니다.
보내기를 클릭합니다.
캘린더 통합 섹션까지 아래로 스크롤하여 캘린더 ID의 내용을 복사합니다.

Dialogflow 콘솔에서 에이전트의 Fulfillment 페이지로 이동합니다.
인라인 편집기의
index.js탭에서calendarId변수를 찾습니다.const calendarId = '<INSERT CALENDAR ID HERE>';다음 코드와 같이
<INSERT CALENDAR ID HERE>를 대체할 캘린더 ID의 내용을 붙여넣습니다.const calendarId = 'fh5kgikn3t4vvmc73423875rjc@group.calendar.google.com';인라인 편집기의
index.js탭에서serviceAccount변수를 찾습니다.const serviceAccount = {};이전에 다운로드한 JSON 파일을 다시 열고 가장 바깥쪽 중괄호(
{})를 포함한 전체 내용을 복사합니다.다음 코드 스니펫과 같이
serviceAccount값을 대체할 내용을 붙여넣습니다.const serviceAccount = { "type": "service_account", "project_id": "marysbikeshop-...", "private_key_id": "...", "private_key": "...", "client_email": "bike-shop-calendar@<project-id>.iam.gserviceaccount.com", "client_id": "...", "auth_uri": "https://accounts.google.com/o/oauth2/auth", "token_uri": "https://accounts.google.com/o/oauth2/token", "auth_provider_x509_cert_url": "https://www.googleapis.com...", "client_x509_cert_url": "https://www.googleapis.com/robot/v..." };DEPLOY(배포)를 클릭합니다.
에이전트를 테스트하여 캘린더에 새 일정이 올바르게 만들어졌는지 확인합니다.


추가 개선사항
현재 에이전트는 사용자가 원활하게 협조할 때만 서비스를 제공할 수 있습니다. 사용자가 스크립트로 작성된 대화상자 외부에 있는 내용을 말하면 대화를 제대로 처리하지 못합니다. 대화형 인터페이스의 중요한 역할은 에이전트가 예기치 않은 사용자 발화에서 복구할 수 있도록 만드는 것입니다. 에이전트가 대화의 흐름을 효과적으로 관리할 수 있도록 Dialogflow의 강력한 기능인 컨텍스트를 살펴보는 것이 좋습니다.